Table of Contents
Advertisement
Quick Links
NOTE: This heater has an
Electronic Ignition and will
require the installation of 1
- AAA battery. The battery
should be installed by
unscrewing the RED
IGNITER BUTTON.
The LED control box also
requires the use of 8 - AA
batteries. BATTERIES ARE
NOT INCLUDED.
PLEASE READ INSTRUCTIONS CAREFULLY BEFORE ASSEMBLY
PATIO HEATER
INSTRUCTION MANUAL
FOR OUTDOOR USE ONLY
RETAIN THIS MANUAL FOR REFERENCE
e-mail: customercare@jrhome.com
WARNING: For o utdoo r use o nly.
FOR YOUR SAFETY
If you smell ga s:
1. Shut o ga s to t he applia nce .
2. Extinguish a ny op en am e.
3. If odo ur continues , imm ediately
call ga s supplier.
FOR YOUR SAFETY
Do not store o r use ga soline o r ot her
ammabl e vapo urs o r liq uidsin the
vicinity of t his o r a ny ot her
applia nce .
For cus tom er serv ice, pa rts or wa rranty
issues :
Call 1- 800 - 56 1-555 0
or e-mail cus tom erc are@j rhom e.com
Establishing a burner ignition for
the FIRST time or after changing
the cylinder tank may take up to
2-3 minutes in order for the gas
to purge through the feeder lines.
1
Item#: PH-SQ201
Model#: LIP-10A-TGG
Advertisement
Table of Contents

Related Manuals for Paramount Fitness LIP-10A-TGG


Summary of Contents for Paramount Fitness LIP-10A-TGG
- Page 1 Item#: PH-SQ201 Model#: LIP-10A-TGG PATIO HEATER INSTRUCTION MANUAL WARNING: For o utdoo r use o nly. FOR YOUR SAFETY If you smell ga s: NOTE: This heater has an 1. Shut o ga s to t he applia nce .
-
Page 2: Table Of Contents
TABLE OF CONTENTS Safety Information ** WARNING ** Security and caution Improper operation, installation, adjustment, alteration, servicing or maintenance cause severe Tools and accessories property damage and /or serious damage and /or serious injury or death. Please read the installation, 6~10 Assembly and instructions operating and maintenance instructions thoroughly... -
Page 3: Warning
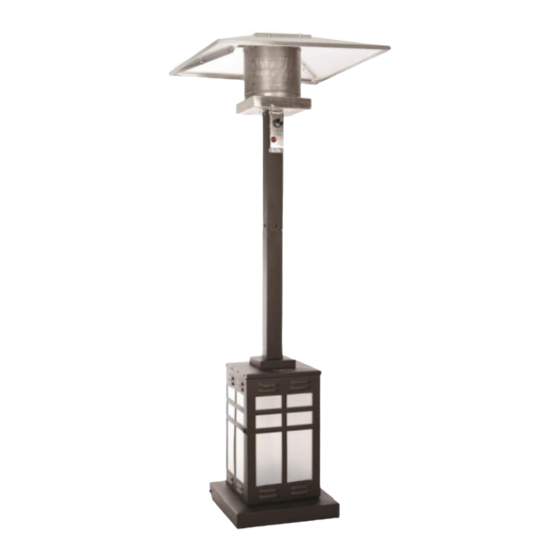
GENERAL DESCRIPTION This appliance is a propane portable heater. The burner is controlled and adjusted by the gas control knob. Gas supply is controlled by the valve on the gas cylinder. The burner is made of stainless steel. Heat diffusion is assisted by the reflector. -
Page 4: For Your Safety
SECURITY AND CAUTION FOR YOUR SAFETY If you smell gas : Close gas supply at cylinder valve b. Extinguish all open flames c. Proceed to p e r f o r m a leak test with a soapy water solution (50% soap/ 50% water) If bubbles are detected, retighten connections. -
Page 5: Tools And Accessories
TOOLS AND ACCESSORIES CAUTION • DO NOT operate the heater in an explosive environment Keep this appliance away from areas where you have stored gas or other vapors and flammable liquids. • Before use, verify that no parts are damaged, inspect gas hose. •... -
Page 6: Assembly And Instructions 6~10
ASSEMBLY AND INSTRUCTIONS HARDWARE CONTENTS 1. Locate Tank Housing Assembly (G) and Tank Housing Support Bar (H). Attach Tank Housing Support Bar (H) to the top front edge of the Tank Housing Assembly (G) with 2 M4x10 (GG) Countersunk Head Screws (screws come pre-assembled in the Tank Housing Support Bar.) Hardware Used: 2 x GG, Countersunk Head Screw M4x10 2. - Page 7 ASSEMBLY AND INSTRUCTIONS 3. Attach the Post Support Plate (F)/Lower Post (E) to the Tank Housing Assembly (G/H). (NOTE: Make sure Paramount logo is facing forward directly over the Tank Housing Support Bar.)Align the holes in the Post Support Plate (F) With the holes in the top of the Tank Housing Assembly (G/H) and insert a total of 12 M4x10 (CC)bolts into the holes and loosely tighten.
- Page 8 ASSEMBLY AND INSTRUCTIONS 5. Carefully route the Gas Hose (C) that comes attached to Head and Upper Post Assembly (B) completely through the Lower Post/Post Support Plate Assembly (E/F). (Hint: Control knob on Head Assembly should be located over the Tank Housing Door.) 6.
- Page 9 ASSEMBLY AND INSTRUCTIONS 8. While supporting heater, tilt the Head and Upper Post Assembly (B) and screw in the 3 M8x66 Stud Bolts (BB) into the holes on top of the Head Assembly. Slide the assembled Reflector over the 3 bolts that now extend from the Head Assembly. Use the 3 M8 Wing Nuts (DD) and 3 M8 Washers (FF) to secure the assembled Reflector to the Head Assembly of the heater.
- Page 10 Connect the hose and regulator to the LP cylinder. The LP cylinder is ASSEMBLY AND INSTRUCTIONS 10 . sold separately. Use a standard 20 lb. propane cylinder only. Screw Regulator (D) onto Gas Hose (C). Do not cross thread. Hand tighten securely. 10.
-
Page 11: Operation 11~13
OPERATION TO LIGHT NOTE: For initial start or after any cylinder change, hold the control knob in for 2 minutes to purge air from all : gas lines before proceeding. NOTE: This heater has an Electronic Ignition and will require installation of 1 - AAA battery. - Page 12 OPERATIONS HAVE HEATER INSPECTED IF …….. ● You smell gas combined with yellow tipped flames on burner. ● Heater does not provide expected heat capacity. ● Burner makes little explosion sounds while operating. This sound is normal when turning off the heater. PRECAUTIONS ●...
- Page 13 OPERATIONS Operation Checklist: For a safe and pleasurable heating experience, perform this check before each use: Before Operating: 1. I am familiar with entire owner’s manual and understand all precautions noted. 2. All components are properly assembled, intact and operable. 3.
-
Page 14: Trouble Shooting
TROUBLE SHOOTING TROUBLE SHOOTING GUIDE If you are having this If this condition exists: You will need to do the following: problem Open valve at cylinder. Turn cylinder 1. Cylinder valve may be OFF. valve in counter-clockwise direction. Refill LPG tank 2. -
Page 15: Storage And Maintenance
STORAGE AND MAINTENANCE CUSTOMER SERVICE ATTENTION : Consumer ... Please use the customer information listed below for any questions concerning assembly, care information, warranty issues and/or replacement parts. To ensure your satisfaction and maintain high standards for quality and workmanship, we want to hear from you should you have any questions or comments. - Page 16 IMPORTANT For questions, concerns or problems with our product please Si vous éprouvez si vous avez des questions ou des email our customer service department: préoccupations, prière de faire parvenir un courriel à notre service à la clientèle customercare@jrhome.com customercare@jrhome.com DATED PROOF OF PURCHASE REQUIRED FOR WARRANTY SERVICE UNE PREUVE D’ACHAT DATÉE EST REQUISE POUR SE PRÉVALOIR DE LA GARANTIE.
Need help?
Do you have a question about the LIP-10A-TGG and is the answer not in the manual?
Questions and answers