Table of Contents
Advertisement
Quick Links
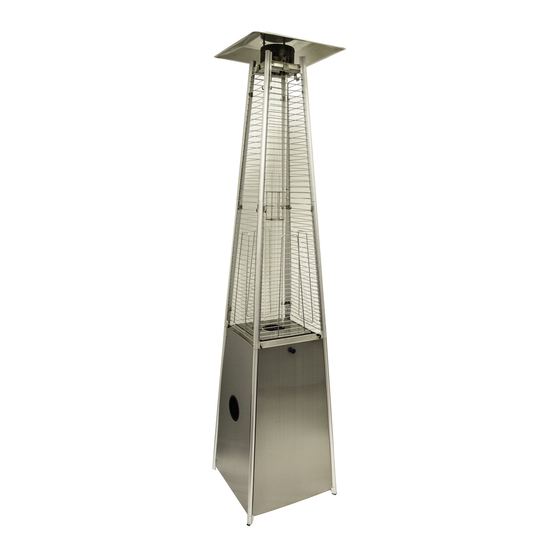
PATIO HEATER INSTRUCTION MANUAL
Conforms to ANSI
STD Z83.26a-2008
Certified to CSA
STD 2.37a-2008
3177588
PLEASE READ INSTRUCTIONS CAREFULLY BEFORE ASSEMBLY
FLAME HEATER
For cus tomer service, parts
or warranty issues:
Call 1-800-561-5550
or e-mail customercare@jrhome.com
FOR OUTDFOOR USE ONLY | USES PROPANE LPG ONLY
RETAIN THIS MANUAL FOR REFERENCE
!
WARNING
HAZARDOUS FIRE OR EXPLOSION MAY RESULT IF
INSTRUCTIONS ARE IGNORED.
It is the consumer's responsibility to see that the
patio heater is properly assembled, installed, and
taken care of. Failure to follow instructions in this
manual could result in bodily injury and/or
property damage.
!
PRECAUTIONS
vapours and liquids in the vicinity of this or any
other appliance.
•Any LP cylinder not connected for use shall not be
stored in the vicinity of this or any other appliance
FOR YOUR SAFETY IF YOU SMELL GAS:
1.T
3.Do not operate any electrical appliances
4.Ventilate the area.
5.Check for leaks as detailed in this manual.
6.If odour persists, contact your dealer or gas
supplier immediately.
Model no.PH08-SSB, PH08-SB
Item no.PH08-SS 40C, PH08-S BK
Advertisement
Table of Contents

Related Manuals for Paramount Fitness PH08-SSB


Summary of Contents for Paramount Fitness PH08-SSB
- Page 1 Model no.PH08-SSB, PH08-SB FLAME HEATER Item no.PH08-SS 40C, PH08-S BK PATIO HEATER INSTRUCTION MANUAL WARNING HAZARDOUS FIRE OR EXPLOSION MAY RESULT IF INSTRUCTIONS ARE IGNORED. It is the consumer’s responsibility to see that the patio heater is properly assembled, installed, and taken care of.
-
Page 2: Tools Required
DaNGer CarBON mONOXIDe HaZarD this appliance can produce carbon monoxide which has no odor. Using it in an enclosed space can kill you. Never use this appliance in a enclosed space such as a camper, tent, car or home. WarNING tOOlS reQUIreD : improper installation, adjustment alteration, services or maintenance can cause... - Page 3 PreCaUtIONS please reaD the FolloWinG saFetY rules WarNING WarninG this appliance must only be used outdoors using this product in an enclosed area may cause injury, death or property damage. read instructions before use. this appliance must be installed in accordance with your local area’s regulations and bylaws •...
- Page 4 • Do not obstruct the ventilation holes of the cylinder housing. • Shut off the valve of the gas cylinder or the regulator before moving the appliance. • The tubing or the flexible hose must be changed within the prescribed intervals. •...
-
Page 5: Installation
Warning leaK teStING do not smoke WarninG while leak testing Gas connections on the appliance are leak tested at the factory prior to shipment. possible mishandling of the appliance during the shipment might contribute to product integrity as a whole. a complete gas leakage test must be performed again at the installation site. -
Page 6: Parts List
PARTS LIST PART NAME PART NUMBER PICTURE QUANTITY DESCRIPTION/LOCATION Tank Housing Assembly 1 ring Stability Ring and 3 bolts/nuts 2 wheels, 4 bolts/nuts Wheel Kit with preassembled Hardware on wheels 8 pieces/4 Aluminum Tubes sets Damper Reflector Glass Tube 2 pcs/1 set Stainless Steel Ring Rubber Ring Mesh Guards... -
Page 7: Heater Assembly
PREPARATION FOR ASSEMBLY Before beginning assembly of this appliance, make sure all parts are present. Compare all parts with Parts List as shown on page 6 of this manual. If any part is missing or damaged, do not attempt to assemble this product. Contact customer service for replacement parts. - Page 8 STEP 4: Locate the Aluminum Tubes (4). Remove 8 pieces/4 sets of tubes. There will be 4 pieces of tubes that have a rod protruding from one end and 4 pieces of tubes WITHOUT the protrusion. To fit tubes together, locate the piece WITHOUT the protrusion and make sure there is a small hole at the bottom of the tube.
- Page 10 STEP 10: Locate the Mesh Guards (10)--8 pieces/4 sets. There will be 4 pieces that are narrow and 4 pieces that are wider (Fig A). Begin with the wider pieces and hang them with the hook attached to the mesh guards onto the assembled Aluminum Tubes (there are oblong 4 holes in each tube—2 at the top and 2 at the bottom –...
-
Page 11: Operation
OPERATION PREPARATION: You will need to purchase a propane gas cylinder designed to be used with the regulator purchased or supplied. For correct operation Hose of the gas system follow the instructions supplied with the regulator Connector supplied or purchased. Connect the hose to the hose connector in the control box. -
Page 12: Maintenance & Storage
MAINTENANCE / STORAGE CLEANING & MAINTENANCE: To enjoy years of outstanding performance from your heater make sure you perform the following maintenance routines on a regular basis: • Keep exterior surfaces clean: - While washing your unit, be sure to keep the area around the burner and pilot assembly dry at all times. -
Page 13: Troubleshooting
TROUBLESHOOTING PROBLEM PROBABLE CAUSE SOLUTION Gas valve may be OFF Turn the gas valve ON Pilot will not light Fuel tank is empty Air in supply system Purge air from lines Loose connection Pilot will not stay on Clean dirty area Debris around pilot Tighten connections Loose connection... -
Page 14: Warranty
WARRANTY For questions, concerns or problems with our product please email our customer service department: customercare@jrhome.com or call 1-800-561-5550. DATED PROOF OF PURCHASE REQUIRED FOR WARRANTY SERVICE. WARRANTY This product is inspected, tested and carefully packaged to minimize the chance of damage during shipment.
Need help?
Do you have a question about the PH08-SSB and is the answer not in the manual?
Questions and answers