Advertisement
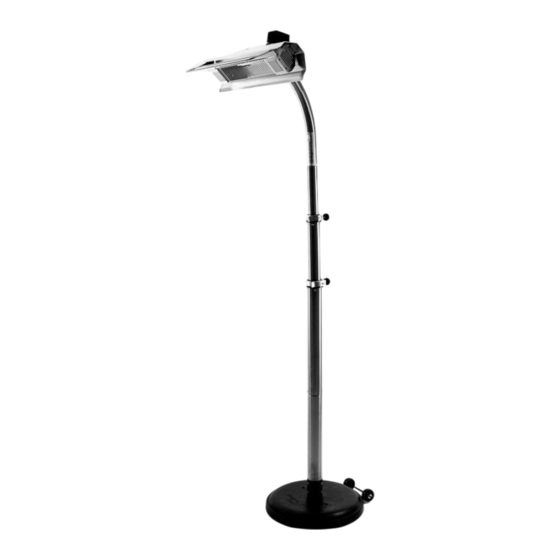
Pole Mounted Infrared Electric Patio Heater
Questions, problems, missing parts?
Before returning to your retailer, contact our exceptional customer service.
Contact us by email at customercare@jrhome.com or call us toll-free at
(800) 561-5550, 7:30 a.m. – 4:00 p.m., PT, Monday – Friday .
Item # : MS-1500WOIRPH
PH-E-129-BK
Model # : LIP-15-TGG-SP
Please read this manual carefully for guidance on
the safe assembly and use of this product.
FAILURE TO FOLLOW WARNINGS AND
OPERATIONAL INSTRUCTIONS
CONTAINED IN THIS MANUAL CAN
RESULT IN SEVERE PROPERTY DAMAGE
AND OR PERSONAL INJURY.
DO NOT plug the heater into the wall socket until all
assembly steps have been completed and make sure
that both switches are in the OFF position.
UNIT MUST BE ON A DEDICATED
ELECTRICAL CIRCUIT.
WARNING
This product can expose you to chemicals including carbon monoxide
which is known to the State of California to cause birth defects or other
reproductive harm. For more information go to www.P65Warnings.ca.gov.
ATTACH YOUR
RECEIPT HERE
Keep a copy of your proofo f
whichw ill be needed if you
need to contact us about
warranty coverage.
Purchase Date:
V02112020
Advertisement
Table of Contents

Related Manuals for Paramount Fitness LIP-15-TGG-SP


Summary of Contents for Paramount Fitness LIP-15-TGG-SP
- Page 1 Pole Mounted Infrared Electric Patio Heater Item # : MS-1500WOIRPH PH-E-129-BK Model # : LIP-15-TGG-SP Please read this manual carefully for guidance on the safe assembly and use of this product. FAILURE TO FOLLOW WARNINGS AND OPERATIONAL INSTRUCTIONS CONTAINED IN THIS MANUAL CAN RESULT IN SEVERE PROPERTY DAMAGE AND OR PERSONAL INJURY.
-
Page 2: Safety Guidelines
Safety Guidelines Failure to follow warnings and operational instructions contained in this manual can result in severe property damage and / or personal injury. DANGER WARNING Indicates a potentially hazardous situation Indicates a potentially hazardous situation which, if not avoided, WILL result in serious which, if not avoided, COULD result in injury or death. -
Page 3: Specification
NOTICE Thank you for purchasing the Paramount Pole Mounted Infrared Electric Patio Heater. Please read these instructions carefully. They have been written to help you make the most of your Pole Mounted Infrared Electric Patio Heater. FEATURES Environmentally friendly: Silent, clean, and odourless infrared heating with no harmful emissions or toxic residuals. - Page 4 IMPORTANT OPERATING INSTRUCTIONS Read all the instructions before using this heater. The head of this heater will get very hot during use. To avoid burning, do not let bare skin touch the hot surfaces. If provided, use handles when moving this heater. Keep flammable materials such as furniture, pillows, bedding, papers, cloths and curtains at least 3 feet (0.9M) from the heater.
- Page 5 COMPONENTS Please open the packing carefully and confirm you have all the following components. Should any components be missing or damaged, please report promptly to your supplier. Safety bar Heater head assembly. 3. Top bracket 5. Tube assembly 4. Curved top tube Lower straight tube Base bracket Base assembly...
-
Page 6: Assembly Tools
IDENTIFY THE LOCATION OF COMPONENTS ON THE FINISHED ASSEMBLY ASSEMBLY TOOLS The following hand tools, not supplied, are required for assembly. • A large cross head screwdriver. • A medium cross head screwdriver • An M12 wrench or adjustable wrench. ASSEMBLY PROCEDURE Check inside the box to ensure all parts are included before starting assembly. - Page 7 Step 2: Align the safety bar, item 2, to the heater head assembly, item 1. Insert and ttighten the screws. Reattach these Reattach these screws screws Step 3: Properly orient the top bracket, item 3 and insert it into the curved top tube, item 4 (diagram A). Insert and tighten four screws, item 10 (Diagram B).
- Page 8 Step 6: Note the orientation of the top bracket to the heater head. Insert and loosly tighten four large screws, items 10. IMPORTANT: Make sure the Assembly Tip : DO NOT fully installed correctly. It must be screws have been parallel to the added.
- Page 9 Step 10 : Insert the base bracket threaded bolt, item 7 into the base assembly, item 8. Invert the base assembly and fit the large flat washer, the spring washer and the M12 nut, items 11 onto the bolt, in that sequence and tighten the nut. Step 11 : Place the base assembly item 8 on the floor and align the lower straight tube, item 6 with the screw holes in the base bracket, item 7.
- Page 10 Step 14: With the heater in the required operating location check that the heater head assembly is level. This is necessary to avoid uneven heating of the infrared lamp, which will shorten its life span. If not level, release the screws holding the top bracket to the heater head assembly and to the upper curved tube, adjust the heater head assembly to a level position, then re-tighten the screws.
-
Page 11: Troubleshooting
TROUBLESHOOTING In the unlikely event that the heater fails to operate, check the following: Problem Probable Cause Solution Check the power plug connection with the power No power. outlet. Tilt switch knob set to “OFF”. Set tilt switch knob to “ON” Non-self-resetting thermal fuse blown. -
Page 12: Warranty
IMPORTANT For questions, concerns or problems with our product please Si vous éprouvez si vous avez des questions ou des email our customer service department: préoccupations, prière de faire parvenir un courriel à notre service à la clientèle customercare@jrhome.com customercare@jrhome.com DATED PROOF OF PURCHASE REQUIRED FOR WARRANTY SERVICE UNE PREUVE D’ACHAT DATÉE EST REQUISE POUR SE PRÉVALOIR DE LA GARANTIE.
Need help?
Do you have a question about the LIP-15-TGG-SP and is the answer not in the manual?
Questions and answers
Où puis-je acheter le tube chauffant pour le modèle: LIP-15-TGG-SP-SB-SS