
Related Manuals for Max EH-70F


Summary of Contents for Max EH-70F
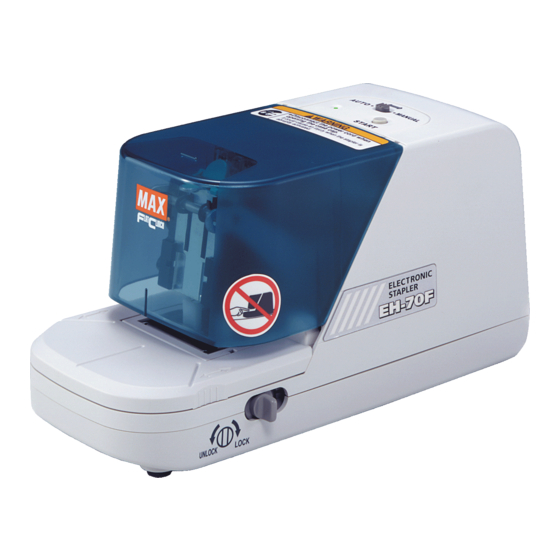
- Page 1 ELECTRONIC STAPLER EH-70F SERVICE MANUAL −1−...
-
Page 2: Assembly Procedure
1. CLINCHER ASSY. Tightening Torque: 0.78N·m ±10% (8kgf·cm) CLINCHER HOLDER BASE CF (EH17398) CLINCHER HOLDER CF (EH16437) CLINCHER (EH12731) CLINCHER SUB-HOLDER CF (EH16438) PAN-HEAD SCREW 3x6 CF (AA21563) ASSEMBLY PROCEDURE 1. Matching the hole on the upper part of the Clincher with the projection on the upper part of the Clincher Holder CF, place the two pieces together. -
Page 3: Frame Assy
3. FRAME ASSY. LINK ASSY. (EH80610) CLINCHER LINK ASSY. Confirm that there is a E-RING 5 CF cutout here. (JJ10512) TABLE (70F) (EH17388) SCREW 3x6 (CF) (AA04502) SPRING 3585 (KK23585) Apply silicone grease MOLYCOTE EM-30L here. LINK CENTER SHAFT-CF (EH16440) FRAME UNIT (70F) (EH70469) Apply silicone grease MOLYCOTE... - Page 4 4. MAGAZINE ASSY. (1) ROLLER SHAFT HOLDER (EH12288) RUBBER ROLLER UNIT CF (EH70486) E-RING 2.3 (JJ10003) * Do not apply oil (particularly not silicone SPRING 3552 grease) to the Rubber Roller Unit. If oil is (KK23552) attached, replace the Rubber Roller Unit CF and the Rubber Roller Shaft CF as a set.
- Page 5 5. MAGAZINE ASSY. (2) Confirm that there FACE PLATE SEAL is a cutout here. (EH12406) Apply silicone grease MOLYCOTE EM-30L here. * Take care of the mounting direction. STAPLE GUIDE GUIDE PLATE (70F) (EH12863) (EH17387) * Take care of the mounting direction.
- Page 6 6. MAGAZINE ASSY. (3) ACTUATOR (EH12290) STAPLE SWITCH PLATE (EH12689) STAPLE SWITCH ASSY. (EH70497) CARTRIDGE HOLDING SHAFT TAP TIGHT (P) 2x4 CF SPRING 3248 (EH12687) (AA05553) (KK13248) FEED LEVER (EH12292) Tightening torque: 0.20N·m Take care of the mounting direction (2kgf·cm) Long Hook Short Hook FEED PLATE (EH12693)
- Page 7 7. MAIN UNIT ASSY. (1) CAM SENSOR PLATE ROLLER (EH12297) E-RING 4 CF (EH12299) * Take care of the mounting direction. (JJ10509) The larger sized hole of the Roller should be mounted on the Cam Cover side. Apply silicone grease MOLYCOTE EM-30L here. CAM COVER (EH12296) * Take care of the mounting direction.
- Page 8 8. MAIN UNIT ASSY. (2) MOTOR UNIT (EH70482) BIND SCREW 2.6x4 CF (AA25514) Black MAIN PWB UNIT MAIN UNIT (EH70496) ASSY. (1) ASSEMBLY PROCEDURE 1. Fix the Motor Unit in the Main Unit Assy.(1) by inserting and tightening the two Bind Screws 2.6x4 Tightening Torque: 0.59N·m ±10% (6kgf·cm) 2.
- Page 9 9. MAIN UNIT ASSY. (3) Thin wall areas (Do not press strongly here.) PWB HOLDER (EH12306) PWB Holder Hook PWB Holder Hole for PWB Projections Holder Hook Frame Lower Surface Cutouts MAIN UNIT ASSY. (2) PWB Holder Connector Diagram 1 ASSEMBLY PROCEDURE 1.
- Page 10 10. MAIN UNIT ASSY. (4) Be sure not to apply silicone grease MOLYCOTE EM-30L to the flag part of the H.P. Lever. (Confirm visually.) FRAME ASSY. H.P. Lever Apply silicone grease MOLYCOTE EM-30L here. H.P. LEVER MAIN UNIT ASSY. (3) (EH12308) SPRING 3241 Diagram showing view from...
- Page 11 11. MAIN UNIT ASSY. (5) Apply silicone grease MOLYCOTE EM-30L here. MIDDLE GEAR 1 (EH14334) E-RING 4 CF (JJ10509) MIDDLE GEAR 2 (EH12304) DRIVER SHAFT MAIN PWB COVER (EH12300) (EH12309) RATCHET LEVER L (EH12311) RATCHET LINK (EH12302) E-RING 3.2 CF MAIN UNIT ASSY.
- Page 12 12. PAPER SENSOR ASSY. (1) SENSOR ARM (EH17357) Tightening Torque: 0.19N·m ±10% TAP TIGHT (P) 2x10 (AA05105) (2kgf·cm) SPRING 4158 (KK24158) Take care of the direction. LIMIT SWITCH HARNESS UNIT (EH70479) Diagram 1 SENSOR BASE (EH17356) A part Diagram 2 ASSEMBLY PROCEDURE 1.
- Page 13 13. PAPER SENSOR ASSY. (2) E-RING 3.2 CF (JJ10511) SENSOR ANGLE (EH17389) BOLT 4x8 (BB71111) PAPER SENSOR ASSY. (1) ASSEMBLY PROCEDURE 1. Mount the Bolt 4x8 on the Sensor Angle and fix the E-ring 3.2 CF in the groove in the screw part of the Bolt as shown in the diagram.
- Page 14 14. BASE UNIT ASSY. Diagram 1 SAFETY PLATE (EH17417) BASE UNIT (EH17354) PAN-HEAD SCREW COVER OPEN LEVER 3x5 CF (AA21566) (EH17359) ASSEMBLY PROCEDURE 1. Fix the Safety Plate to the Base Unit using the Pan-head Screws 3x5 CF. Tightening Torque: 0.49N·m ±10% (5kgf·cm) 2.
- Page 15 15. MAIN UNIT ASSY. (6) BASE UNIT ASSY. PAPER SENSOR ASSY. PAN-HEAD SCREW 4x5 CF (AA21562) * Bend up the Harness to ensure that it does MAIN UNIT ASSY. (5) not become caught between the Paper Sensor Assy. and the Base Unit Assy. CAUTION Take care not to trap the Harness that comes out of the Sensor Base.
- Page 16 16. MAIN UNIT ASSY. (7) Round connector at the end of the wire coming from the motor. PAN-HEAD SCREW 3x5 CF (AA21566) SWITCH PLATE (EH17390) MAIN UNIT ASSY. (6) Terminal Mounting Direction Base Unit Assy. Mounting Direction of the Switch Plate Mount the terminal so that it is pointing slightly downwards from the...
- Page 17 ASSEMBLY PROCEDURE 1. Fix the Main PWB Unit (EH-70F) to the Base Unit Assy. using the four Pan-head Screws 3x5 CF. At this time, the Main PWB Unit should be mounted in the position shown in the diagram where it is pressing against the edge of the Base Unit.
-
Page 18: Upper Case Assy
18. UPPER CASE ASSY. (1) COVER CAUTION LABEL (EUR) (EH17492) NAME PLATE B (EH17369) NAME PLATE A (EH17368) UPPER CASE (EUR) (EH17494) ASSEMBLY PROCEDURE 1. Affix the Cover Caution Label (EUR), Name Plate A and Name Plate B to the Upper Case (EUR). −18−... - Page 19 19. UPPER CASE ASSY. (2) TAP TIGHT (P) 3x8 (AA05102) CAP FRAME (EH17349) ANGLE PLATE (EH17416) SUB-PWB UNIT (EH70474) SWITCH COVER (CD14984) UPPER CASE ASSY. (1) WARNING LABEL (EUR) (EH17483) STAGE (EH17347) Take care of the Angle CASE CAP Plate direction (EH17348) CAP CAUTION LABEL (EUR) (EH17500)
- Page 20 20. MAIN UNIT ASSY. (9) TAP TIGHT (P) 3x8 (AA05102) MAIN UNIT ASSY. (8) SENSOR KNOB (EH12216) Band SG-100 Fixing UPPER CASE ASSY. (2) Method Take care of the position of the locking Match the red marking attached to the part of the Band SG-100.(Ensure that it does not stick out below the bottom of wires with the projection position.
-
Page 21: Lower Case Assy
21. LOWER CASE ASSY. SPEC. PLATE (EUR) (EH17493) SJ-5012 PADS (YZ30001) LOWER CASE (EUR) (EH17497) ASSEMBLY PROCEDURE 1. Affix the Spec. Plate and SJ-5012 Pads to the Lower Case. (Take care of the direction of the Spec. Plate.) −21−... - Page 22 Wear CAUTION antista 22. MAIN UNIT ASSY. (10) wrist band. TAP TIGHT (P) 3x8 (AA05102) LOWER CASE ASSY. BIND SCREW 3x6 CF NUT 1-3 (CC41104) (AA25112) MAIN UNIT ASSY. (9) Nut is firmly inserted as far as it Nut is not firmly inserted as far as will go.
Need help?
Do you have a question about the EH-70F and is the answer not in the manual?
Questions and answers