Advertisement
Advertisement
Table of Contents

Related Manuals for Max RE-BAR-TIER RB517CE


Summary of Contents for Max RE-BAR-TIER RB517CE
- Page 1 RB517 RB397 RB217 (CE) (CE) (CE) RE-BAR TYING TOOL RB517 RB397 RB217 OPERATING AND MAINTENANCE MANUAL Original Language English BEFORE USING THIS TOOL, STUDY THIS MANUAL TO ENSURE SAFETY WARNING AND INSTRUCTIONS. KEEP THESE INSTRUCTIONS WITH THE TOOL FOR FUTURE REFERENCE. WARNING...
- Page 2 См. на диске DVD или на веб-сайте. EESTI Vaata DVD-ROM-i või veebisaiti. EC DECLARATION OF CONFORMITY Page 47 www.max-europe.com DEFINITIONS OF SIGNAL WORDS WARNING: Indicates a potentially hazardous situation which, if not avoided, could result in death or serious injury.
-
Page 3: Table Of Contents
ENGLISH OPERATING AND MAINTENANCE MANUAL INDEX 1. GENERAL POWER TOOL SAFETY WARNINGS..... 3 2. RB517/397/217 SAFETY FEATURES ....... 6 3. SPECIFICATIONS AND TECHNICAL DATA ....11 4. BATTERY INSTRUCTIONS ..........14 5. OPERATING INSTRUCTIONS......... 18 6. MAINTENANCE..............27 7. CLEANING MANUAL............27 8. - Page 4 • Do not expose power tools to rain or • Use personal protective equipment. wet conditions. Water entering a power Always wear eye protection. Protective tool will increase the risk of electric shock. equipment such as dust mask, non-skid • Do not abuse the cord. Never use the safety shoes, hard hat, or hearing protec- cord for carrying, pulling or unplug- tion, hand protector used for appropriate...
- Page 5 Power tools are dangerous in the hands of untrained users. • Maintain power tools. Check for mis- alignment or binding of moving parts, breakage of parts and any other condi- tion that may affect the power tool's operation. If damaged, have the power tool repaired before use.
-
Page 6: Rb517/397/217 Safety Features
If a part must be re- TOOL IS IN OPERATION placed or repaired, purchase the replace- Failure to do so may result in serious injury. ment part at an authorized MAX Co., Ltd. distributor. Use only genuine authorized replacement parts. - Page 7 Before operating the tool, make sure to charge the Battery pack with the designated MAX Battery charg- 8. AFTER BATTERY INSTALLATION IF THE 13. BATTERY CHARGING PRECAUTION...
- Page 8 3 Never use a transformer 7 Do not put a cloth or any other cover on the Battery charger while the Bat- tery pack is being charged This will cause overheating and damage from burning, or the Charger may even catch fire.
- Page 9 The finish tie has sharp edges. To avoid seri- be repaired or replaced. ous injures, be careful not to touch the sharp edges. MAX recommends wearing safety 15 Do not charge non rechargeable bat- gloves while operating the tool. teries with this charger.
- Page 10 15. PRIOR TO USING THE TOOL. WARNING • Make sure that the safety features function properly. If they do not, avoid using the tool. Curl Guide Curl Guide When the Curl Guide is opened, it will emit a beeping sound and the tool does not operate. Trigger Trigger Lock Trigger Lock...
-
Page 11: Specifications And Technical Data
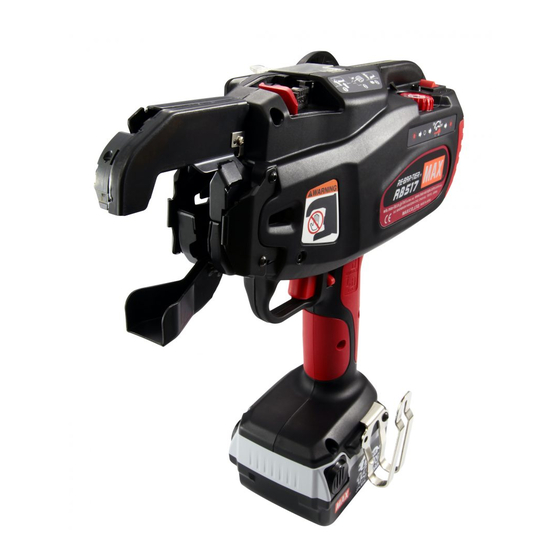
3. SPECIFICATIONS AND TECHNICAL DATA 1. NAME OF PARTS Torque and wrap dial(RB517) Reel stopper Window Torque dial (RB397) Release lever Feed dial (RB217) Release stopper Main switch Production number Reel holder Trigger lock Tie-Wire Curl guide Trigger Grip Battery pack (JPL914) LED lamp (Orange) Charging status indicator lamp... - Page 12 CHARGE (4 Wraps/tie)Approx. 1,700 ties MODEL RB217 TIE WIRE TW897A TW897A-EG DIAMETER 0.8mm 0.8mm LENGTH TIES PER COIL Approx. 170-210 ties Approx. 155-190 ties TIES PER CHARGE Approx. 2,000 ties BATTERY CHARGER: Use only an authorized Battery charger, MAX JC928.
- Page 13 4. TECHNICAL DATA 1 NOISE A-weighted single-event ------ LWA, 1s, d 84 dB sound power level A-weighted single event ------ LpA, 1s, d 73 dB emission sound pressure level at work station These values are determined and documented in accordance to EN60745-1 : 2006. 2 VIBRATION Vibration characteristic value - 1.8 m/s These values are determined and documented in accordance to ISO 5349-1 and ISO 5349-2.
-
Page 14: Battery Instructions
4. BATTERY INSTRUCTIONS Battery pack 1. Charging Latch When charging the Battery pack, remove it by pushing on its latches from both sides while firm- ly holding the grip of the tool. LOCK Red charging lamp WARNING • Before removing the Battery pack from the tool, set the Main switch at OFF and lock the Trigger. - Page 15 When the Battery pack is at low tem- perature When the Battery pack is at low temperature, its charging is automatically suspended until its tem- The green lamp blinks. perature increases (higher than 5°C (41°F)), in order to protect it, even if it is set in the Charger. Leave the Battery pack at normal temperature in the room for some time, and then, charge it again.
- Page 16 CAUTION • When the battery pack is fully discharged, do not leave it for a long time without recharging. If the fully discharged battery pack is removed from the system and left for a long period of time, the battery pack may become damaged. Recharge the battery immediately when it has been discharged.
- Page 17 Indication of Quick Charger Lamps Charger LED lamp Buzzer sound Recharging status The power cord is plugged Red lamp blinks. into the receptacle. The charger is The charger power cord is plugged It blinks every second. powered. into a wall socket. Two short beeps (Pi, pi) The battery pack is mounted.
-
Page 18: Operating Instructions
Recycling a Li-ion Battery The MAX battery pack uses a Li-ion battery, it may be illegal to dispose of this battery into the municipal waste system. Check with your local... - Page 19 The use of binding wire that has not been speci- fied may cause breakdown of this equipment. Feeding gears Therefore, be sure only to use the specified MAX TW897A. Do not use binding wire that has be- Pipe come rusted, since the use of rusted wire will cause equipment breakdown.
- Page 20 If the window is dirty and the pipe po- sition can not be confirmed Open the window and wipe off the dirt on the in- side of the window with a soft cloth, etc. Close the window again after cleaning to ensure that foreign objects will not be able to enter the ma- chine.
- Page 21 2. How to remove the Tie-Wire RB217 RB517 LOCK 0 Tool feeds the wire about 150 mm (6") and cuts the wire automatically.Remove the cut end of the wire with pliers. WARNING • Be sure to turn the Main switch OFF, lock the Trigger, and remove the Battery pack.
- Page 22 3. Auto Power-off feature Tie-Wire Reel stopper 3 Slide the Reel stopper to release the Reel holder and remove the Tie-Wire. This Re-bar Tier have "Auto Power-off" fea- 4 Mount the new Tie-Wire. (Refer to the Tie- ture, which saves the power consumption of Wire mounting method explanation.) the Li-ion battery when the tool is not operat- When the Tie-Wire runs out of binding wire...
- Page 23 Torque and wrap dial 2 This dial allows you to set 3 wraps / tie or 4 wraps / tie and also you can adjust the torque. To increase the tension, turn it in the coun- WARNING terclockwise. • When setting the main switch to ON, abso- To decrease the tension, turn it in the clock- lutely do not bring your hand close to the wise.
- Page 24 4. Tension adjustment RB397 1 Be sure to turn the Main switch OFF, to lock the Trigger and detach the Battery pack. WARNING • When setting the main switch to ON, abso- lutely do not bring your hand close to the binding part or rotating part of the tip of the tool.
- Page 25 4. Wire length adjustment RB217 3 Mount the battery pack on the tool's main body insert the charged battery pack on to the main unit until a click is heard. 1 Be sure to turn the main switch OFF, to lock the trigger and detach the battery pack.
- Page 26 5. For proper tightness 45° 4 Cross tie. Bent the tail of the first tie before making the second tie. 1 Tilt the tool 45° angle to the crossed re-bars. Re-bars 5 When you need extra tightness, place re- 2 Apply the tool perpendicularly to the surface bars at the top of the Arm part.
-
Page 27: Maintenance
6. MAINTENANCE 7. CLEANING MANUAL 1 Regularly inspect the tool When the machine operates for long hours, dust In order to maintain the performance of the and wire cuttings may adhere to the cutter sec- tool, periodically clean up and inspect the tion. - Page 28 Cutter Cutter plate unit Cutter Fixed cutter Reverse side Wire guide A of the cutter Integrat- ed unit of the cutter and pin Wire guide A 3. Remove the cutter and the fixed cutter, 5. Fit the cutter and assemble wire guide A. and clean them.
- Page 29 Disassembling RB517 RB217 Hexagon socket head bolt M3 × 6 (plated) Hexagon socket head bolt M3 × 5 (plated) Arm B WIRE GUIDE A Good The outer parts are No gap aligned with each other. 1. Loosen the 2 (plated) hexagon socket head bolts M3 ×...
- Page 30 Assembling Hexagon socket head bolt M3 × 5 (plated) Fixed cutter Cutter Washer 3 × 7 Large hole Small hole 5. Make sure that arm B is securely assem- bled and tighten the 2 (plated) hexagon socket head bolts M3 × 5. (Tightening torque: 172cN·m (15.2lbF·inch)) CAUTION •...
-
Page 31: Storage
8. STORAGE Do not store the tool in a cold weather environ- ment. Keep the tool in a warm area. When not in use, the tool should be stored in a warm and dry place. Keep out of reach of chil- dren. -
Page 32: Trouble Shooting/Repairs
9. TROUBLE SHOOTING/REPAIRS The troubleshooting and/or repairs shall be carried out only by the MAX CO., LTD. authorized distribu- tors or by other specialists. This tool alerts you to the following conditions by means of a warning sound and warning lamp. The warning lamp is illuminated or blinks, and is interlocked with the warning sound. - Page 33 Binding wire not of Confirm reel side face. Use MAX Tie-Wire (Pipipipi, designated types TW897A. pipipipi, ...) has been used. Three short Binding wire has Confirm reel winding Remove fray on reel.
- Page 34 :1848, Kawai, Tamamura-machi, Sawa-gun, Gunma, 370-1117 Japan Gunma, 370-1117 Japan Este producto ha sido evaluado en conformidad con las directivas antes mencionadas Autorisierter Entsorger :MAX.EUROPE BV/Präsident in der Gemeinschaft usando los estándares de Europa. Camerastraat 19, 1322 BB Almere, Holland Directiva sobre maquinaria: EN ISO 12100-1:2003, EN ISO 12100-2:2003, EN ISO 14121-1:2007, DÉCLARATION DE CONFORMITÉ...
- Page 35 • The content of this manual might be changed without notice for improvement. Camerastraat 19 1322 BB Almere The Netherlands Phone: +31-36-546-9669 FAX: +31-36-536-3985 wis.max-ltd.co.jp/int/ (GLOBAL Site) www.max-europe.com (EUROPE Site) 4010044 120322-00/02 PRINTED IN JAPAN...
Need help?
Do you have a question about the RE-BAR-TIER RB517CE and is the answer not in the manual?
Questions and answers