
Related Manuals for Waters Micromass ZQ 2000


Summary of Contents for Waters Micromass ZQ 2000
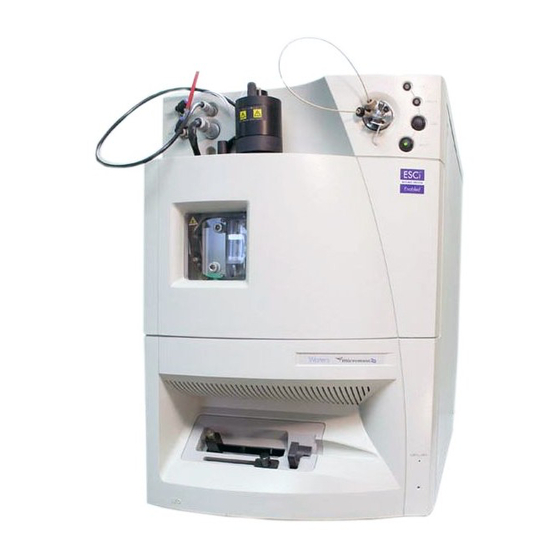
- Page 1 Waters Micromass ZQ Detector Operator’s Guide 34 Maple Street Milford, MA 01757 71500044702, Revision B...
- Page 2 This document is believed to be complete and accurate at the time of publication. In no event shall Waters Corporation be liable for incidental or consequential damages in connection with, or arising from, the use of this document.
- Page 3 Note: When you use the instrument, follow generally accepted procedures for quality control and methods development. If you observe a change in the retention of a particular compound, in the resolution between two compounds, or in peak shape, immediately determine the reason for the changes.
- Page 4 Caution: Use caution when working with any polymer tubing under pressure: • Always wear eye protection when near pressurized polymer tubing. • Extinguish all nearby flames. • Do not use Tefzel tubing that has been severely stressed or kinked. • Do not use Tefzel tubing with tetrahydrofuran (THF) or concentrated nitric or sulfuric acids.
- Page 5 Precauzione: prestare attenzione durante le operazioni con i tubi di polimero sotto pressione: • Indossare sempre occhiali da lavoro protettivi nei pressi di tubi di polimero pressurizzati. • Estinguere ogni fonte di ignizione circostante. • Non utilizzare tubi Tefzel soggetti a sollecitazioni eccessive o incurvati. •...
- Page 7 Caution: The user shall be made aware that if the equipment is used in a manner not specified by the manufacturer, the protection provided by the equipment may be impaired. Attention : L’utilisateur doit être informé que si le matériel est utilisé d’une façon non spécifiée par le fabricant, la protection assurée par le matériel risque d’être défectueuses.
- Page 8 Caution: To protect against fire hazard, replace fuses with those of the same type and rating. Attention : Remplacez toujours les fusibles par d’autres du même type et de la même puissance afin d’éviter tout risque d’incendie. Vorsicht: Zum Schutz gegen Feuergefahr die Sicherungen nur mit Sicherungen des gleichen Typs und Nennwertes ersetzen.
- Page 9 Caution: To avoid possible electrical shock, disconnect the power cord before servicing the instrument. Attention : Afin d’éviter toute possibilité de commotion électrique, débranchez le cordon d’alimentation de la prise avant d’effectuer la maintenance de l’instrument. Vorsicht: Zur Vermeidung von Stromschlägen sollte das Gerät vor der Wartung vom Netz getrennt werden.
- Page 10 Commonly Used Symbols Direct current Courant continu Gleichstrom Corrente continua Corriente continua Alternating current Courant alternatif Wechselstrom Corrente alternata Corriente alterna Protective conductor terminal Borne du conducteur de protection Schutzleiteranschluss Terminale di conduttore con protezione Borne del conductor de tierra...
- Page 11 Commonly Used Symbols (Continued) Frame or chassis terminal Borne du cadre ou du châssis Rahmen- oder Chassisanschluss Terminale di struttura o telaio Borne de la estructura o del chasis Caution or refer to manual Attention ou reportez-vous au guide Vorsicht, oder lesen Sie das Handbuch Prestare attenzione o fare riferimento alla guida Actúe con precaución o consulte la guía Caution, hot surface or high temperature...
- Page 12 Commonly Used Symbols (Continued) Caution, risk of electric shock (high voltage) Attention, risque de commotion électrique (haute tension) Vorsicht, Elektroschockgefahr (Hochspannung) Precauzione, rischio di scossa elettrica (alta tensione) Precaución, peligro de descarga eléctrica (alta tensión) Caution, risk of needle-stick puncture Attention, risques de perforation de la taille d’une aiguille Vorsicht, Gefahr einer Spritzenpunktierung Precauzione, rischio di puntura con ago...
- Page 13 Commonly Used Symbols (Continued) Fuse Fusible Sicherung Fusibile Fusible Electrical power on Sous tension Netzschalter ein Alimentazione elettrica attivata Alimentación eléctrica conectada Electrical power off Hors tension Netzschalter aus Alimentazione elettrica disattivata Alimentación eléctrica desconectada...
- Page 14 Waters Micromass ZQ Detector Information Intended Use ® ® Waters designed the Waters Micromass ZQ™ Detector to with an HPLC system to determine mass-to-charge ratio (m/z) for a wide range of analytes. Biological Hazard When you analyze physiological fluids, take all necessary precautions and treat all specimens as potentially infectious.
-
Page 15: Table Of Contents
Table of Contents Preface ..................23 Chapter 1 Overview ..................27 1.1 About the Micromass ZQ Detector........27 1.2 Theory and Principles of Operation ........28 1.3 MassLynx 4.0 Software............29 Chapter 2 Installing ..................30 2.1 Site Selection and Power Requirements....... 31 2.2 Unpacking and Inspecting............. - Page 16 Chapter 3 Tuning .................... 41 3.1 Opening MassLynx and Starting the Instrument....41 3.2 Tuning in ESI Mode ............... 43 3.2.1 Specifying Parameter Settings on the ES+ Source Page.............. 44 3.2.2 Specifying Parameter Settings on the Analyser Page ............46 3.3 Tuning in APCI Mode ............
- Page 17 Chapter 5 Maintaining ..................73 5.1 Considerations ..............73 5.2 Routine Maintenance ............75 5.2.1 Checking the Rotary Pump Oil ........75 5.2.2 Replacing the Pump Oil ..........75 5.2.3 Gas-Ballasting the Rotary Pump ....... 78 5.2.4 Replacing the Oil Mist Filter........79 5.2.5 Cleaning the Source Assembly........
- Page 18 Appendix A Using the ESCi Multi-Mode Ionization Source........ 108 A.1 Preparing for Operation ............. 108 A.1.1 Installing the Corona Discharge Needle....108 A.1.2 Setting Up MassLynx ..........110 A.2 Daidzein Test ..............117 A.2.1 Test Conditions ............118 A.2.2 Signal-to-Noise Ratio ..........118 Appendix B Specifications .................
- Page 19 List of Figures Installing the Detector ..............30 Pump Oil Level................33 Fitting the Gas Ballast and Hose adaptors to the Rotary Pump ..35 ZQ Detector Rear Panel ..............36 Nitrogen Stud................. 36 Drying Gas Exhaust Bottle ............37 Rheodyne Injector................
- Page 20 4-11 Display Calibration Graphs Dialog Box .......... 67 4-12 Calibrate Window Showing ZQ-4000 Calibration Graphs....69 Rotary Pump Assembly Fitted with Oil Mist Filter......76 Rotary Pump Oil Filler Plug, Drain Plug, and Sight Glass ..... 77 Isolation Valve................79 Oil Mist Filter Assembly ..............
- Page 21 List of Tables Installation Site Requirements ............31 ES+ Source Page Parameters ............43 Source and Desolvation Temperature Settings ......44 Analyser Page Parameters ............46 APCI+ Source Page Parameters ..........49 Recommended Calibration Acquisitions Setup Parameters ..65 Calibration Failure Troubleshooting ......... 69 Maintenance Schedule ..............
- Page 22 Source and Analyser Components ..........126 Washers, Screws, and Nuts ............127 Miscellaneous Components............128 List of Tables...
-
Page 23: Preface
Related Documentation Waters Licenses, Warranties, and Support: Provides software license and warranty information, describes training and extended support, and tells how Waters handles shipments, damages, claims, and returns. Online Documentation MassLynx Help: Describes all MassLynx windows, menus, menu selections, and dialog boxes for the base software and software options. - Page 24 Adobe Acrobat Reader lets you easily print pages, page ranges, or the entire document by selecting File > Print. For optimum print quantity, Waters recommends that you specify a ® PostScript printer driver for your printer. Ideally, use a printer that supports 600 dpi print resolution.
- Page 25 Convention Usage Underlined Blue Indicates hypertext cross-references to a specific chapter, section, subsection, or sidehead. Clicking this topic using the hand symbol brings you to this topic within the document. Right-clicking and selecting Go Back from the shortcut menu returns you to the origi- nating topic.
- Page 26 Cautions Cautions provide information essential to the safety of the operator. For example: Caution: To avoid burns, turn off the lamp at least 30 minutes before removing it for replacement or adjustment. Caution: To avoid electrical shock and injury, unplug the power cord before performing maintenance procedures.
-
Page 27: Chapter 1 Overview
Chapter 1 Overview ® ® This chapter describes the Waters Micromass ZQ™ Detector, its features and options. 1.1 About the Micromass ZQ Detector The ZQ Detector is a quadrupole mass analyser that can determine the mass-to-charge ratio (m/z) of diverse analytes. An HPLC system, or syringe pump, delivers liquid sample to the instrument’s analyser source. -
Page 28: Theory And Principles Of Operation
MassLynx acquires and stores data from conventional LC detectors simultaneously with data the mass detector acquires. It can also acquire data from selected systems, like Waters 996/2996 Photodiode Array Detectors. Consult the MassLynx 4.0 Guide to Inlet Control for details about MassLynx. -
Page 29: Masslynx 4.0 Software
Atmospheric Pressure Chemical Ionization (APCI) A heated nebulizer vaporizes the sample. The sample ions then merge with solvent ions in the atmospheric source, enabling proton transfers between the solvent and sample ions. APCI generally produces both protonated and deprotonated molecular ions from the sample. -
Page 30: Chapter 2 Installing
Chapter 2 Installing This chapter describes how to unpack and install your Waters Micromass ZQ Detector. Figure 2-1 summarizes these procedures. Connect N Installation Exhaust Begins Select and Prepare Connect Rheodyne Appropriate Site Injector Tubing Install Unpack and Inspect ESI Probe... -
Page 31: Site Selection And Power Requirements
2.1 Site Selection and Power Requirements Install the detector on a stable, level, and appropriately clean surface that meets the specifications in Table 2-1. Table 2-1 Installation Site Requirements Factor Requirement 15 to 28 °C (59 to 82.4 °F) Temperature range Relative humidity 20 to 80%, noncondensing range... -
Page 32: Unpacking And Inspecting
2.2 Unpacking and Inspecting The Waters Micromass ZQ system is shipped in several cartons. Among them, they contain these items: • Micromass ZQ Detector with Startup Kit • Rotary pump • MassLynx workstation • MassLynx 4.0 documentation set • Waters Micromass ZQ Detector Operator’s Guide... -
Page 33: Installing The Detector
Technical Service at 800 252-4752. All others should call their local Waters subsidiary or Waters corporate headquarters in Milford, Massachusetts (U.S.A.). 2.3 Installing the Detector This section describes how to install the Waters Micromass ZQ 2000 and ZQ 4000 Detectors. 2.3.1 Installing the Rotary Pump Attention: The rotary pump is shipped without oil. -
Page 34: Installing The Oil Return Connection Kit
Note: Use Ultragrade 19 or Inland Q45 oil only. Refer to the manufacturer’s manual for more information about filling the pump with oil. 3. Attach the NW25 tee, included in the Startup Kit, to the inlet of the rotary pump using the NW25 center ring and clamp (Figure 5-1). -
Page 35: Connecting The Nitrogen Supply And Exhaust
1. E1/E2M Pump 2. Filters 3. Wire Mesh 4. Circlip 5. O-Ring 6. Gas Ballast Adaptor 7. Bonded Seal 8. Hose Adaptor 9. Bonded Seal 10. Banjo Bolt Figure 2-3 Fitting the Gas Ballast and Hose adaptors to the Rotary Pump 2. -
Page 36: Zq Detector Rear Panel
In Port Exhaust Rotary Pump Power Connection Vacuum Ports Figure 2-4 ZQ Detector Rear Panel 2. Attach a nitrogen regulator to the nitrogen supply, and install the 6-mm stud (Figure 2-5) into the regulator outlet. Figure 2-5 Nitrogen Stud 3. Connect the free end of the 6-mm PTFE tubing to the 6-mm stud. 4. -
Page 37: Connecting The Rheodyne Injector (For Manual Injections)
Figure 2-6 Drying Gas Exhaust Bottle Attention: The instrument requires two separate exhaust systems, one for STOP nitrogen, the other for the rotary pump. Vent them to atmosphere through separate exhaust lines. Oil mist can seriously damage the instrument when the nitrogen exhaust line connects with the rotary pump exhaust line. -
Page 38: Installing The Esi Probe
(To Source) Figure 2-7 Rheodyne Injector 2.3.5 Installing the ESI Probe Refer to Figure 2-8 for this procedure. 1. Connect the PTFE tubing from the probe adjustment flange to the desolvation gas port on the front panel. 2. Remove the protective sleeve, if fitted, from the electrospray probe tip. 3. -
Page 39: Connecting The Workstation
Figure 2-8 ESI Probe in Situ 2.3.6 Connecting the Workstation Waters ships the workstation with preinstalled MassLynx software. Before connecting the workstation to the instrument, set it up according to its accompanying instructions. You should locate the workstation within 16 feet (5 meters) of the instrument. -
Page 40: Preparing The Syringe And Syringe Pump
To connect the instrument to the power source: 1. Select the correct power cord for your location. 2. Connect the female end of the power cord to the power port on the rear panel of the instrument. 2.3.7 Preparing the Syringe and Syringe Pump This section refers to the 250-µL Hamilton syringe, various syringe fittings, and the API Setup Solution (polypropylene glycol/reserpine/cyclodextrin) found in the Startup Kit. -
Page 41: Chapter 3 Tuning
Chapter 3 Tuning Tuning involves adjusting source settings, analyser settings, and gas flows to produce optimal peak intensities. After you tune, calibrate the instrument in electrospray (ESI) mode, even if you intend to operate it in APCI mode. See Section 3.3.3 for details about tuning in APCI mode. -
Page 42: Masslynx Main Window
3. Click OK. The MassLynx Main window appears (Figure 3-2). Menu Bar Toolbar Information Bar Shortcut Bar Status Bar Figure 3-2 MassLynx Main Window Note: After initiating, the Main window displays “Instrument Present” in the status bar. 4. The shortcut bar should appear in the MassLynx Main window, and “Instrument” should appear at its top. -
Page 43: Tuning In Esi Mode
Figure 3-3 Tune Window Displaying the ES+ Source Page 3.2 Tuning in ESI Mode Table 3-1 describes the Tune window’s ES+ Source page parameters. Note: The voltage parameters shown in this table optimize sensitivity and stability. The temperature and flow rate parameters control the extent of solvent evaporation and adduct formation. -
Page 44: Specifying Parameter Settings On The Es+ Source Page
Table 3-1 ES+ Source Page Parameters (Continued) Parameter Description Source temperature Table 3-2. Desolvation Table 3-2. temperature Desolvation gas flow Optimizes gas flow depends on mobile phase composition and flow rate (>100 L/hr). Cone gas flow Helps reduce adduct ions and keep the sample cone clean (50 to150 L/hr). -
Page 45: Syringe Selection Dialog Box
3. Click the ES+ Source tab, and specify these suggested starting parameters in the corresponding fields of the ES+ Source page. Parameter Suggested Value Capillary (kV) Cone (V) Extractor (V) RF Lens (V) Source Temp ( Desolvation Gas Flow (L/hr) Desolvation Temp ( Cone Gas Flow (L/hr) Attention:... -
Page 46: Specifying Parameter Settings On The Analyser Page
6. Ensure the drop-down list displays Hamilton 250uL, then click OK. 7. Set the syringe pump to deliver 10 µL/min by entering that rate in the Pump Flow field of the Analyser page (Figure 3-5). 8. Click (Syringe pump) to infuse the startup solution into the source. 9. -
Page 47: Tuning In Apci Mode
Figure 3-5 Tune Window Displaying the Analyser Page 2. Specify these suggested starting parameters in the Analyser page fields. Parameter Suggested Value LM Resolution HM Resolution Ion Energy Multiplier Note: If you change HM and/or LM Resolution after calibrating the instrument, you should recalibrate. -
Page 48: Preparing The Source For Apci Operation
3.3.1 Preparing the Source for APCI Operation To prepare the source for APCI tuning when the instrument is in ESI mode: 1. Prepare the syringe according to the procedure in Section 2.3.7, loading it with API Setup Solution from the Startup Kit. 2. -
Page 49: Installing The Tee Fitting
3.3.2 Installing the Tee Fitting To optimize APCI peaks, temporarily install a tee fitting to merge the sample flow from the syringe pump with the solvent flow from an HPLC pump. The combined sample/solvent stream flows into the probe (Figure 3-6). -
Page 50: Tune Window Displaying The Apci+ Source Page
1. Select Ion Mode > APCI+ from the Tune window (Figure 3-3). The APCI+ Source page appears (Figure 3-7). Figure 3-7 Tune Window Displaying the APCI+ Source Page 2. Click (API Gas) in the Tune window to toggle the nitrogen flow to On. Attention: You must toggle API gas to Off before reopening the nitrogen STOP... - Page 51 3. Specify these suggested parameters in the APCI+ Source page fields. Parameter Suggested Value Corona (µA) Cone (V) Extractor (V) RF Lens (V) Source Temp ( Desolvation Gas Flow (L/hr) APcI Probe Temp ( Cone Gas Flow (L/hr) Attention: Before proceeding, let the source temperature, desolvation gas STOP flow, desolvation temperature, and cone gas flow reach their setpoints.
-
Page 52: Readbacks
3.4 Readbacks Readbacks report current instrument performance in most of the parameters whose values you specify on the Tune window’s pages. They appear as red numerals in read-only fields. These fields are adjacent to those that contain the parameters’ set values. Monitor readbacks to determine whether the instrument performs to your parameter settings. -
Page 53: Diagnostics Page Readbacks
Figure 3-9 Diagnostics Page Readbacks 3. Let the ion beam stabilize for 3 to 5 minutes. 4. Monitor for mass peaks, which should appear at approximately the mass values you specified on the ES+ Source or APCI+ Source page. Readbacks... -
Page 54: Chapter 4 Calibrating
Chapter 4 Calibrating Calibrating the mass scale entails setting up a calibration file and specifying calibration parameters in MassLynx. 4.1 Setting Up the Calibration File Before calibrating, you must remove the current calibration file and select a reference file: 1. Select Calibration >... -
Page 55: Setting Calibration Parameters
3. Select File > Open. The Open dialog box appears (Figure 4-2). Figure 4-2 Open Dialog Box 4. Select Uncal.cal, and click Open. The Calibration window reappears. 5. Make sure the phrase “No calibration” follows the three calibration types: Static, Scanning, and Scan Speed Compensation. - Page 56 3. Enter these suggested initial reference solution values in Tune window’s Peak Editor. Mass (ZQ 2000) Mass (ZQ 4000) Span Gain 172.9 172.9 772.5 1521.9 1521.9 2271.4 1971.6 3470.5 Note: These settings are offered as reference points only and, once adopted, might require adjusting.
-
Page 57: Tune Window Displaying The Es+ Source Page
Figure 4-3 Tune Window Displaying the ES+ Source Page 6. Click the Analyser tab to open the Analyser page (Figure 4-4), and enter these suggested parameters in the corresponding fields. Parameter Suggested Value LM resolution HM resolution Ion energy (V) Multiplier (V) Cone Gas Flow Rate (L/hr) Syringe Pump Flow Rate (µL/min) -
Page 58: Instrument Threshold Settings Dialog Box
Figure 4-4 Tune Window Displaying Analyser Page Parameters 7. Maximize the signal intensity of the four mass peaks in the Tune window Peak Display: a. Turn the probe adjustor knob (Figure 2-8) to adjust the orientation of the probe relative to the sample cone orifice. b. -
Page 59: Automatic Calibration Check Dialog Box
For most low mass-range calibrations, the instrument acquires calibration data in continuum mode. The continuum-data parameter settings in the Instrument Threshold Settings dialog box ensure appropriate scanning speeds. 1. Select Options > Set Instrument Threshold from the Tune window. The Instrument Threshold Settings dialog box appears (Figure 4-5). -
Page 60: Calibration Parameters Dialog Box
You should not enable this option when the mass range of interest is less than 1000 da and includes the subrange 0 to 150 da. Check Acquisition Calibration Ranges – Waters recommends you enable this option, which displays messages alerting you when the instrument attempts to acquire data outside the calibrated ranges for mass and scan speed. - Page 61 • Polynomial order = 4 – a fourth-order curve • Polynomial order = 5 – a fifth-order curve Waters suggests a polynomial order of 2 for calibrations that use sodium cesium iodide as the reference solution and where the calibrated mass range starts below 100 da and extends through 650 da.
-
Page 62: Mass Measure Dialog Box
Calibrate display – Lets you calibrate the raw data peaks in the upper graph of the Calibration report. As you select each peak, the display recalibrates, bringing the other spectral masses into line. 4.2.5 Mass Measure Dialog Box Mass measure parameters control conversion of raw continuum data to centroid data, which the calibration process requires. -
Page 63: Automatic Calibration Dialog Box
Acquire & Calibrate Print Report. Considerations Though Waters suggests you perform all three types of calibration, you can nevertheless specify one, or any combination, of calibration types. Beware, however, that doing so invokes the following limitations: • Specify Static to calibrate only for acquisitions where the quadrupole “parks”... -
Page 64: Calibration Acquisition Dialog Box
These values represent the scan range and speed limits of the parameters and instrument. Note: For improved calibration performance, Waters suggests you adopt the parameter values in Table 4-1. -
Page 65: Calibration Acquisition Setup Dialog Box
Figure 4-10 Calibration Acquisition Setup Dialog Box Table 4-1 Recommended Calibration Acquisitions Setup Parameters Parameter ZQ 2000 ZQ 4000 Scan From (amu) Scan To (amu) 2040 4080 Run Duration (mins) Data Type Continuum Continuum Static Span ± (amu) Static Dwell (sec) Slow Scan Time (sec) Fast Scan Time (sec) 0.40... - Page 66 Specifies how much time the instrument takes to acquire each calibration data file. Data Type – Specifies data type as centroid, continuum, or MCA. Waters suggests using continuum or MCA acquisitions for electrospray calibrations. Note: Calibrating in MCA mode limits maximum acquisition speed to 400 da/sec.
-
Page 67: Display Calibration Graphs Dialog Box
Use Fast Scan Time to calculate the fastest scan speed the calibration can accommodate (the range’s upper limit). Thus, where Fast Scan Time = 0.4 seconds: Scan speed = 2040 – 50/0.4+0.1 = 3980 amu/sec The scan speed range for this calibration is 197 to 3980 amu/sec. Checking the Calibration Select Process... - Page 68 The Save As dialog box appears. 3. Enter a file name in the File name field. Note: Waters recommends you incorporate the current date in every file you name. 4. Click Save or Cancel. The Automatic Calibration dialog box appears (Figure 4-9).
-
Page 69: Calibration Failure Troubleshooting
Mean Residual Error Figure 4-12 Calibrate Window Showing ZQ-4000 Calibration Graphs Calibration Failure Calibration failures result from many causes. If too many mass peaks are missed, check data in the on-screen Calibration report. If the missed masses appear there, one or more of the first three causes listed in Table 4-2 likely apply. - Page 70 Table 4-2 Calibration Failure Troubleshooting (Continued) Symptom Possible Cause Corrective Action Too many consecutive Reference solution in low Increase reference solu- peaks missed. supply or concentration. tion or its concentration. Multiplier set too low to detect Reset the Multiplier the less intense peaks. parameter.
- Page 71 Contamination or background peaks can also invalidate a calibration. For example, a contamination or background peak that lies within a peak-matching window might be more intense than its neighboring reference peak. Thus the software can choose the contamination or background peak instead of the reference peak. In such a case, if the reference peak is closer to the peak window’s center, narrow the peak window to exclude the contamination or background peak.
- Page 72 • Scan Speed Compensation • Acquire & Calibrate 6. Click the Acquisition Parameters button to open the Calibration Acquisition Setup dialog box (Figure 4-10). 7. Set Scan From, Scan Duration, Data Type, Slow Scan Time, Fast Scan Time, and Inter Scan Delay to agree with the parameters you will use for data acquisition.
-
Page 73: Chapter 5 Maintaining
Chapter 5 Maintaining This chapter includes routine maintenance procedures. 5.1 Considerations Safety and Handling Caution: Observe good laboratory practice when you handle solvents, change tubing, or operate the instrument. Refer to Material Safety Data Sheets for the solvents you use, and know their chemical properties. -
Page 74: Maintenance Schedule
Contacting Waters Technical Service North American customers who experience maintenance problems they cannot resolve should contact Waters Technical Service at 800 252-4752. Others should phone their local Waters subsidiary or Waters corporate headquarters in Milford, Massachusetts (U.S.A.). Table 5-1 lists periodic maintenance schedules you should observe to ensure the instrument’s optimal performance. -
Page 75: Routine Maintenance
5.2 Routine Maintenance Routine maintenance comprises these tasks: • Checking the rotary pump oil (Section 5.2.1) • Changing the pump oil (Section 5.2.2) • Gas-ballasting the rotary pump (Section 5.2.3) • Replacing the oil mist filter (Section 5.2.4) • Cleaning the source assembly (Section 5.2.5) •... -
Page 76: Rotary Pump Assembly Fitted With Oil Mist Filter
Procedure Refer to Figure 5-1 Figure 5-2 when performing the following procedure. Note: Operate the pump to warm the oil before you drain it. Caution: Wear latex or vinyl gloves when changing the pump oil. NW25 Inlet Oil Mist Filter Drain Plug Gas Ballast Control T P 0 2 0 0 4... -
Page 77: Rotary Pump Oil Filler Plug, Drain Plug, And Sight Glass
Oil Filler Plug Drain Plug Figure 5-2 Rotary Pump Oil Filler Plug, Drain Plug, and Sight Glass 3. Remove the drain plug with the slotted screwdriver. 4. Remove the oil filler plug to facilitate drainage. 5. Drain the oil completely. 6. -
Page 78: Gas-Ballasting The Rotary Pump
5.2.3 Gas-Ballasting the Rotary Pump The rotary pump draws large quantities of solvent vapors. The vapors tend to condense in the pump oil, diminishing pumping efficiency. Gas-ballasting purges condensed contaminants from the oil. Gas-ballast the rotary pump when these conditions apply: •... -
Page 79: Replacing The Oil Mist Filter
Isolation Valve (Open) Figure 5-3 Isolation Valve 4. Open the gas ballast knob on the top of the pump. Run the pump for 30 to 60 minutes, then close the gas ballast knob. 5.2.4 Replacing the Oil Mist Filter Caution: Wear latex or vinyl gloves when replacing the oil mist filter. -
Page 80: Cleaning The Source Assembly
Oil Mist Filter Housing Oil Mist Filter Element Figure 5-4 Oil Mist Filter Assembly 4. Remove the top cover, and discard the odor filter. Note: The odor filter will likely stick to the cover. 5. Pull upward on the oil mist filter, removing and discarding it along with its O-ring. 6. - Page 81 • Source of oil-free, inert gas (nitrogen or helium) for drying (air-drying optional) • Lint-free paper towels Spare Parts You might need to replace these spare parts when cleaning source components. Item Waters Part Number Reference Number Ion block D-ring (AS035) 700001192 5711312...
-
Page 82: Pumping Block Assembly
Disassembling Source Components The source components comprise the pumping block and ion block assemblies, which you must disassemble before cleaning. Consult Figure 5-5 Figure 5-6 when disassembling and assembling these assemblies. 1. Stop the liquid flow, then disconnect the LC line from the probe. Attention: Never remove either probe before the source heater cools to STOP... -
Page 83: Ion Block Assembly
T P 0 2 0 0 0 1 – Ion Block Fastener 15 – Large Valve Stem Washer × 2 – BS 10 Black Viton O-Ring 16 – O-Ring, Kalrez, 0.240 0.063 × 17 – Seal Ring 3 – Screws, M3 20 Cross ×... -
Page 84: Probe Assembly In Position On The Source
Attention: If you are cleaning only the sample and cone gas nozzles, you STOP need not vent the system. Note: Venting interrupts electrical power to the turbomolecular pump. Nevertheless, the pump continues to operate briefly, until rotational speed decreases to less than 50%, at which point its vent valve opens. -
Page 85: Zq Detector Front View
8. Remove the center panel (Figure 5-8) from the front of the instrument by grasping its sides and pulling it toward you. Removable Center Panel Figure 5-8 ZQ Detector Front View 9. Unfasten the two clip fasteners (Figure 5-7) so that the source enclosure opens downward on its hinge, allowing access to the source contents. -
Page 86: Source Showing The Corona Discharge Needle
Pumping Block Corona Pin Mounting Contact Ion Block Corona Discharge Needle PTFE Tubing Figure 5-9 Source Showing the Corona Discharge Needle 11. Remove the PTFE tubing attached to the cone gas nozzle (Figure 5-10). 6-mm Hex Screw Isolation Valve Cone Gas Spring Clip 6-mm Hex Screw PTFE Tubing... -
Page 87: Sample Cone And Cone Gas Nozzle
12. Remove the two 2.5-mm hex screws securing the cone gas spring clip (Figure 5-10). 13. Remove the cone gas nozzle, O-ring, and sample cone from the ion block. Attention: Do not scratch the highly polished cone orifice surfaces. STOP 14. -
Page 88: Ion Block Rear View
Extraction Hold-Down Screw Retainer (PEEK) Extraction Cone Figure 5-12 Ion Block Rear View Note: Do not damage the ion block surface and insulator O-ring. 20. Grasp the extraction cone pin with the needle-nose pliers. Lift the extraction cone from the ion block. 21. -
Page 89: Hexapole Assembly
Caution: Be extremely careful when working with formic acid. Use a fume hood and appropriate protective equipment. 5. Expose all parts to ultrasound for about 30 minutes. If you used formic acid in the cleaning solution, rinse the parts well, immersing them in a beaker of water and setting the beaker in an ultrasonic bath for about 20 minutes to remove all traces of the acid. - Page 90 6. Remove the hexapole assembly from the graduated cylinder, and place it on a lint-free cloth. Allow it to air-dry, or use a nitrogen flow to dry it. 7. Insert the assembly, aligning the notches in the differential aperture at its rear with the two bottom support rails on the analyser assembly.
-
Page 91: Cleaning The Apci Probe Tip
5.2.6 Cleaning the APCI Probe Tip Clean the APCI probe tip when buffer residue accumulates on the probe tip or when signal intensity weakens. 1. Stop the liquid flow. 2. Open the source enclosure cover, and close the isolation valve (Figure 5-10). -
Page 92: Replacing Parts
6. Clean and sharpen the tip of the needle with the lapping film, then wipe the needle clean with a methanol-saturated tissue. Replace the needle if it is deformed or otherwise damaged. 7. Reinstall the needle. Point the tip toward the sample cone. 8. -
Page 93: Replacing The Stainless Steel Capillary
Procedure Note: Vent the instrument according to the procedure in Section 5.2.5, and proceed with these steps. 1. Remove the cover plate (shown as a cutaway in Figure 5-15) from the ion block. 2. Remove the two screws securing the heater cartridge ring tags from the PEEK terminal block (Figure 5-15). - Page 94 • 1.5-mm hex wrench • 6-mm hex wrench • 5/16-in. wrench • 7/16-in. wrench • Capillary tube (part number 700000341, reference number M955088AD) • Loupe Procedure 1. Remove the two end-cover retaining screws on the ESI probe with the slotted screwdriver.
-
Page 95: Replacing The Esi Probe Tip
0.5-mm Protrusion TP01749 Figure 5-16 ESI Probe Tip with Capillary Protruding 0.5 mm 19. Replace the probe end cover and secure it with the two slotted screws. Tighten the set screw to clamp the LC union in place. 20. Before reinstalling the probe, attach it to the nebulizer gas connection and turn on the nitrogen by selecting the API gas icon on the Tune page. -
Page 96: Replacing The Apci Fused Silica Capillary And Filter Pad
Procedure 1. Remove the ESI probe from the source. 2. Unscrew and remove the probe tip with the 6-mm hex wrench. 3. Install the new probe tip, and screw down until 0.5 mm of the capillary protrudes from the end. Use the Startup Kit loupe to ascertain the capillary position. 5.3.4 Replacing the APCI Fused Silica Capillary and Filter Pad Replace the fused silica capillary, and/or filter pad, when signal intensity decreases and backpressure increases. - Page 97 7. Use a 7/16-inch wrench to unscrew the coupling from the probe. Unscrew the adaptor nut from the probe with a 5/16-inch wrench. 8. Remove and discard the fused silica capillary, ferrule, and O-ring. 9. Examine the end of a length of new 300 × 100 µm fused silica capillary. Use the loupe to ascertain that you cut the end squarely.
-
Page 98: Replacing The Apci Probe Heater
5.3.5 Replacing the APCI Probe Heater Replace the APCI probe heater if it fails to heat. Required Material and Spare Part • 0.89-mm hex wrench or slotted screwdriver, depending on the type of screw that secures the probe tip • APCI probe heater, spare part (part number 700000337) Procedure 1. -
Page 99: Chapter 6 Troubleshooting
Chapter 6 Troubleshooting This chapter describes how to troubleshoot the instrument using recommended troubleshooting procedures. This chapter addresses the following topics: • Component hardware troubleshooting • Checking the APCI probe 6.1 Safety and Handling Caution: Observe good laboratory practice when you handle solvents, change tubing, or operate the instrument. - Page 100 Contacting Waters Technical Service You can easily correct many problems. Nevertheless, when North American customers cannot correct a condition, they should contact Waters Technical Service at 800 252-4752. All other customers should call their local Waters subsidiary or Waters corporate headquarters in Milford, Massachusetts U.S.A.
-
Page 101: Component Hardware Troubleshooting
6.2 Component Hardware Troubleshooting Table 6-1 contains suggestions for resolving hardware problems. Table 6-1 Hardware Troubleshooting Symptom Possible Cause Corrective Action No ion peaks on the Tune Operating parameters Optimize parameters. See window (No Ion Beam) (Capillary/Corona, Cone, Section 3.2.1, Section 3.3.2, Extractor, RF Lens, Ion... - Page 102 Table 6-1 Hardware Troubleshooting (Continued) Symptom Possible Cause Corrective Action No ion peaks on the Tune Insufficient nitrogen flow. Ascertain nitrogen pressure window (No Ion Beam) is 90 to 100 psi and the gas Continued flow rate on the Tune window is >100 L/hr.
- Page 103 Table 6-1 Hardware Troubleshooting (Continued) Symptom Possible Cause Corrective Action Unsteady or low intensity Poor nebulization due to Check temperature and gas peaks (Ion Beam) incorrect temperature and flow settings. Liquid inside gas flow settings. the source enclosure is an indication that the tempera- ture is too low.
- Page 104 Table 6-1 Hardware Troubleshooting (Continued) Symptom Possible Cause Corrective Action Unusually high LC back- APCI probe filter pad is Replace the filter pad. See pressure blocked. Section 5.3.4. Continued Tubing from LC system is Remove the finger-tightened blocked. nut and tubing from the back of the probe.
- Page 105 Table 6-1 Hardware Troubleshooting (Continued) Symptom Possible Cause Corrective Action Leaking nitrogen (hissing The seal around the source Examine the source enclo- sound or solvent smell) enclosure is imperfect. sure sealing surfaces for imperfections or nicks. Also, examine the condition of the encapsulated O-rings.
- Page 106 Table 6-1 Hardware Troubleshooting (Continued) Symptom Possible Cause Corrective Action Ion Mode drop-down One or both of the probe Remove probe cover, free menu options are disabled contact pins jammed inside the contact pin, and ensure or instrument spontane- the probe and do not that both pins and associ- ously switches probe type.
-
Page 107: Inspecting The Apci Probe
6.3 Inspecting the APCI Probe 1. Switch the instrument to Standby from the Tune window. 2. Make sure the probe heater is off. 3. Unplug the probe from the instrument front panel, and remove it from the source. 4. Connect the PTFE tube to the nebulizer outlet on the front panel. 5. -
Page 108: Using The Esci Multi-Mode Ionization Source
Using the ESCi Multi-Mode Ionization Source ® ® When fitted with the ESCi™ Multi-Mode Ionization Source, the Waters Micromass ZQ™ Mass Detector alternates between acquiring data in ESI and APCI ionization modes within the same run. This software-mediated capability depends on a high voltage power supply, which in ESCi mode switches continuously between supplying voltage to the ESI capillary and current to the APCI corona needle. -
Page 109: Zq Mass Detector, Front View
If the APCI probe is installed, remove it, and replace it with the ESI probe. See the Waters ZQ Detector Operator’s Guide for details about installing the ESI probe. Caution: If you recently operated the instrument, you will find the source enclosure’s inner surfaces hot. -
Page 110: Setting Up Masslynx
Mounting Contact Corona Discharge Needle Figure A-2 Installing the Corona Needle A.1.2 Setting Up MassLynx Follow steps 1 through 5 in Section 3.1 to open the MassLynx Tune window (Figure A-3). Figure A-3 Tune Window Using the ESCi Multi-Mode Ionization Source 110... -
Page 111: Tune Window Showing Options List With Esci Mode Selected
1. Select Options > ESCi mode (Figure A-4). A check mark appears on the drop-down list, beside ESCi, and the Ion Mode column appears in the Peak Editor. Ion Mode Column Figure A-4 Tune Window Showing Options List with ESCi Mode Selected Note: During instrument operation, the Diagnostics page displays voltage-equivalent output in current (APCI) mode and current-equivalent output in voltage (ESI) mode... -
Page 112: Selecting The Esci+ Or Esci- Ionization Mode
Figure A-5 Tune Window, Diagnostics Page 2. Select Ion Mode > ESCi+ ESCi– to enable the positive or negative ESCi ionization mode (Figure A-6). Figure A-6 Selecting the ESCi+ or ESCi- Ionization Mode Using the ESCi Multi-Mode Ionization Source 112... -
Page 113: Selecting The Ion Mode In The Masslynx Peak Editor
3. Optimize the fast-transitioning values, Voltages, APCI Voltages, and Source Voltages, for each mode and polarity (Figure A-7). 4. Optimize the slow-transitioning values, Temperatures Flow, for both ESI and APCI performance (Figure A-7). Note: The ESCi+ and ESCi– pages should display identical low-transitioning values. -
Page 114: Tune Window As It Appears During Esci Operation
ESI (Red) APCI (Blue) Figure A-8 Tune Window as it Appears During ESCi Operation 6. Select MS Method from the Main window shortcut bar (Figure 3-2). The MassLynx Function List Editor window appears, its list area blank (Figure A-9). See the MassLynx 4.0 Guide to ZQ Data Acquisition for details about this window. -
Page 115: Function List Editor Window (Blank)
MS Scan Button Figure A-9 Function List Editor Window (Blank) 7. Click . The Function:n MS Scan dialog box (where n = the function list number) appears (Figure A-10). Function Modes and Polarities Figure A-10 Function:n MS Scan Dialog Box Using the ESCi Multi-Mode Ionization Source... -
Page 116: Function List Editor Window Showing Specified Functions
8. Enter parameter values for your sample, then click OK. Note: Because you must complete this dialog box for each function you specify, runs with multiple functions require multiple iterations of this process. Each time you click OK, the MassLynx Function List Editor window reappears listing the scan function you just specified (Figure A-11). -
Page 117: Daidzein Test
Figure A-12 ESCi Mode Disabled A.2 Daidzein Test Use the Daidzein (Figure A-13) test to prepare the instrument for ESCi operation, evaluate its performance, and determine the ratio of peak heights to the level of noise in a mass chromatogram (signal-to-noise ratio). Figure A-13 Daidzein (m/z = 255.2 [M + H] and 253.2 [M –... -
Page 118: Test Conditions
3.0 min. A.2.2 Signal-to-Noise Ratio See the MassLynx User’s Guide for signal-to-noise theory and the Waters Micromass ZQ with MassLynx v4.0 Software and Instrument Verification Procedure for details about calculating the signal-to-noise ratio as it applies to the ZQ Detector. -
Page 119: Appendix B Specifications
Appendix B Specifications This appendix describes specifications for the Waters Micromass ZQ Detector and its ESCi option. B.1 ZQ Detector Specifications Table B-1 ZQ Detector Operational Specifications Condition Specification Mass Range: 2000 model 2 to 2000 amu 4000 model 2 to 4000 amu... -
Page 120: Zq Detector Environmental Specifications
Table B-2 ZQ Detector Environmental Specifications Condition Specification 15 to 28 °C (59 to 82.4 °F) Operating temperature range Operating humidity range 20 to 80%, noncondensing –20 to 60°C (–4 to 140 °F) Shipping and storage temperature Table B-3 ZQ Detector Dimensions Condition Specification Height... -
Page 121: Esci Multi-Mode Ionization Source Specifications
B.2 ESCi Multi-Mode Ionization Source Specifications Table B-5 ESCi Environmental Specifications Item Specification Operating temperature range 0 to 45 Altitude Up to 2000 m Maximum relative humidity 80% for temperatures up to 31 decreasing linearly to 50% at 40 Table B-6 ESCi Electrical Specifications Item Specification Input voltage... -
Page 122: Accessories And Spare Parts
Appendix C Accessories and Spare Parts The tables in this appendix list and indicate the part number for recommended spare parts and accessories. Table C-1 Fuses Item Part Number Fuse, 0.5A VFA, SMT little fuse 154.500 700001371 Fuse, 1A, SB, SMT little fuse 154 00IT 700001364 Fuse, 1.5A, SB, SMT little fuse 154 01.5T 700001365... -
Page 123: Vacuum Components
Table C-2 Probe Components (Continued) Item Part Number Ferrule, ESI-GVF16-16 700000343 Heater, APCI Probe 279000112 In-line Filter Anachem A314 600000106 Liner, Ferrule, ESI Probe 430000110 O-Ring, APCI-ESI, Coupling 700000968 Pad, Filter 600000103 Pin, Corona APCI 700000354 Probe adjustor Assy. 700001714 Silica, Fused, APCI Probe 430000109 Sleeve, ESI Conductive... -
Page 124: Valves And Flow Meters
Table C-3 Vacuum Components (Continued) Item Part Number Ms VAC Hose PVC ¾ in., 20 ft. WAT241397 NW25 Blanking Cap WAT240463 NW25 Center Ring, Viton WAT241160 NW25 Elbow 90 Deg. WAT240443 NW25 Swing Clamp WAT240696 NW25 Tee WAT240462 Oil Mist Filter Element WAT240447 Pump, Split Flow Turbo, Edwards 200/200H 700001128... -
Page 125: Power Supplies
Table C-5 Kits Item Part Number APCI Probe, Kit Consumable 700000464 APCI Probe, Spare Assy. Kit 700000338 API Calibration Kit 700001593 API Calibration Solution (NACsi) 700001594 API Test Kit 700000889 Basic Spares & Tool Kit 700001287 Edwards Oil Return Kit 700000573 Edwards Pump Kit (contains the oil return connection kit, 700001289... - Page 126 Table C-6 Power Supplies (Continued) Item Part Number Switch, Main 700001146 ZQ A/D Main Sys Board 700001804 ZQ Brandenburg PSU DN 1044 700001140 ZQ Brandenburg PSU DN1043 700001141 ZQ Brandenburg PSU DN1047 Mux Type 700001142 ZQ Single PS Main Wiring 700001360 ZQ Single PS Wiring 700001359...
- Page 127 Table C-7 Source and Analyser Components Item Part Number Seal Ring, ZQ 700001244 Seal, Plug 700000907 Spring Clip Cone Gas, ZQ 700001232 Stem, Valve 700001240 Support, ION Block ZQ 700001233 ZQ 4000, Lid, Quad Assy. 700001301 ZQ Source Assy. 700001222 ZQ Source Spares Kit 700001291 Table C-8 Washers, Screws, and Nuts...
- Page 128 Table C-9 Miscellaneous Components Item Part Number Basic Spares & Tool Kit 700001287 Cover, LHS, ZQ 700001120 Card, INTEL Pro100 210000169 Cover, RHS, ZQ 700001121 Cover, Top, ZQ 700001119 Guard, Fan 120MM, RS2584639 700001151 Kit, Rebuild, Rheo, RV700-100 700001303 LCZ/ZMD/ZQ Glass Eye Loupe 700000883 Molding, Front, ZQ 700001122...
-
Page 129: Index
Calibration gas cone checking retainer failure Cone gas nozzle, cleaning incorrect Connecting saving nitrogen supply and exhaust verifying rheodyne injector Calibration Acquisition dialog box Contacting Waters Technical Service Calibration acquisition ranges, check Calibration Acquisition Setup dialog box Index 129... - Page 130 Conventions, documentation Environmental specifications, ESCi Corona discharge needle Environmental specifications, ZQ Detector installing removing ES+ Source page parameters ESCi- mode ESCi Multi-Mode Ionization Source ESCi+ mode ESI probe Daidzein test installing conditions replacing tip signal-to-noise ratio ESI tuning Damage, reporting Exhaust systems, separation of Data type Default threshold parameters, adjusting...
- Page 131 Installing Matched peaks, manually editing corona discharge needle Maximum standard deviation drying gas exhaust bottle Miscellaneous components ESI probe Missed reference peaks Oil return connection kit Modes rotary pump ESCi- Instrument Threshold Settings dialog box ESCi+ Intensity threshold Intensity weighting ionization Inter scan delay Multi-Mode Ionization Source...
- Page 132 Parts Removing fuses corona discharge needle power supplies hexapole assembly spare ZQ Detector center panel Startup Kit Replacing Peak window APCI probe heater Peaks corona discharge needle matched ESI probe tip missed reference fused silica capillary Periodic maintenance schedules ion block cartridge heater Pirani gauge oil mister filter Plug, blanking...
- Page 133 Settings Tuning in ESI calibration Turbomolecular pump Tune page Shipping damage, reporting Signal-to-noise ratio Slow scan time Unpacking ZQ Detector Software, MassLynx 4.0 Updating Calibration report Source assembly, cleaning Source cleaning Source components Source parameters, APCI+ Source page Vacuum components Span correction, apply Vacuum pump oil level, checking Spare parts...
Need help?
Do you have a question about the Micromass ZQ 2000 and is the answer not in the manual?
Questions and answers