
Related Manuals for Waters 2996


Summary of Contents for Waters 2996
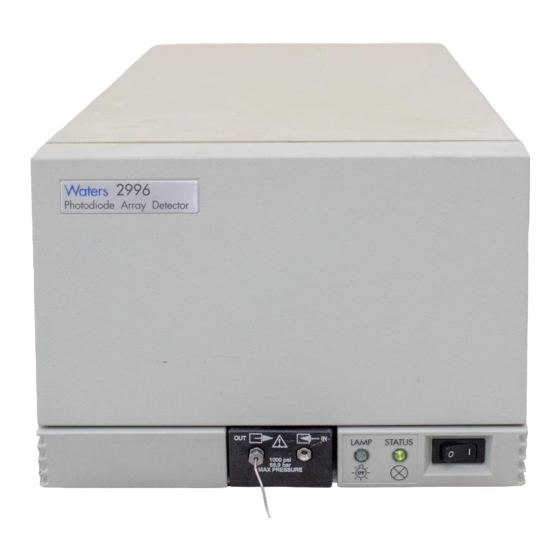
- Page 1 Waters 2996 PDA Detector Operator’s Guide 34 Maple Street Milford, MA 01757 71500023202, Revision C...
- Page 2 This document is believed to be complete and accurate at the time of publication. In no event shall Waters Corporation be liable for incidental or consequential damages in connection with, or arising from, the use of this document.
- Page 3 Note: When you use the instrument, follow generally accepted procedures for quality control and methods development. If you observe a change in the retention of a particular compound, in the resolution between two compounds, or in peak shape, immediately determine the reason for the changes.
- Page 4 Caution: Use caution when working with any polymer tubing under pressure: • Always wear eye protection when near pressurized polymer tubing. • Extinguish all nearby flames. • Do not use Tefzel tubing that has been severely stressed or kinked. • Do not use Tefzel tubing with tetrahydrofuran (THF) or concentrated nitric or sulfuric acids.
- Page 5 Precauzione: prestare attenzione durante le operazioni con i tubi di polimero sotto pressione: • Indossare sempre occhiali da lavoro protettivi nei pressi di tubi di polimero pressurizzati. • Estinguere ogni fonte di ignizione circostante. • Non utilizzare tubi Tefzel soggetti a sollecitazioni eccessive o incurvati. •...
- Page 6 Caution: The user shall be made aware that if the equipment is used in a manner not specified by the manufacturer, the protection provided by the equipment may be impaired. Attention : L’utilisateur doit être informé que si le matériel est utilisé d’une façon non spécifiée par le fabricant, la protection assurée par le matériel risque d’être défectueuses.
- Page 7 Caution: To avoid possible electrical shock, power off the instrument and disconnect the power cord before servicing the instrument. Attention : Afin d’éviter toute possibilité de commotion électrique, mettez hors tension l’instrument et débranchez le cordon d’alimentation de la prise avant d’effectuer la maintenance de l’instrument.
- Page 8 Commonly Used Symbols Direct current Courant continu Gleichstrom Corrente continua Corriente continua Alternating current Courant alternatif Wechselstrom Corrente alternata Corriente alterna Protective conductor terminal Borne du conducteur de protection Schutzleiteranschluss Terminale di conduttore con protezione Borne del conductor de tierra Frame or chassis terminal Borne du cadre ou du châssis Rahmen- oder Chassisanschluss...
- Page 9 Commonly Used Symbols (Continued) Caution, risk of electric shock (high voltage) Attention, risque de commotion électrique (haute tension) Vorsicht, Elektroschockgefahr (Hochspannung) Precauzione, rischio di scossa elettrica (alta tensione) Precaución, peligro de descarga eléctrica (alta tensión) Caution, risk of needle-stick puncture Attention, risques de perforation de la taille d’une aiguille Vorsicht, Gefahr einer Spritzenpunktierung Precauzione, rischio di puntura con ago...
- Page 10 Do not report this data until you ensure that chromatographic system performance is acceptable. General Maintenance To clean the outside of the Waters 2996 PDA Detector, use only a soft lint-free paper or cloth dampened with mild soap and water.
-
Page 11: Table Of Contents
Table of Contents Preface ........................ xix Chapter 1 Installation ......................1 Installation Site Requirements ................1 Power Connections.................... 2 Millennium Workstation Connections ............3 1.3.1 Connecting the IEEE-488 Cable............4 1.3.2 Setting the IEEE-488 Address ............5 Non-IEEE-488 Communication Connections ........... 6 1.4.1 Connecting Analog Output Cables ............ - Page 12 Replacing the Lamp ..................25 Replacing the Fuses..................27 Chapter 4 Principles of the 2996 PDA Detector Optics ..........29 2996 Detector Optics..................29 Resolving Spectral Data .................. 31 Measuring Light at the Photodiode ..............32 Computing Absorbance Data Points ............... 35 4.4.1 Calculating Absorbance ..............
- Page 13 Appendix A Detector Specifications ................... 51 Appendix B Spare Parts ......................53 Appendix C Mobile Phase Absorbance ................55 Index ........................59 Table of Contents xiii...
- Page 14 Table of Contents...
- Page 15 List of Figures Waters 2996 PDA Detector Dimensions............ 2 Detector Rear Panel ................... 3 Example of IEEE-488 Cable Connections..........4 Locating the IEEE-488 Switches ............... 5 Analog Out Terminal Strip................. 7 Event Input/Output Terminal Strip ............8 Compression Screw Assembly ..............11 2996 Detector Indicator Lights ..............
- Page 16 List of Figures...
- Page 17 Event In Terminal Specifications on TTL or Switch Closure....9 Event Out Terminal Specifications on Contact Closure ......9 LED Indicator Sequences During Startup..........12 2996 Detector Troubleshooting .............. 15 Optics Assembly Components..............30 2996 Detector Specifications ..............51 Spare Parts ....................53 Mobile Phase Absorbance Measured Against Air or Water ....
- Page 18 xviii List of Tables...
-
Page 19: Preface
This guide is intended for individuals who need to install, operate, maintain, and troubleshoot the 2996 PDA Detector. It is also intended for users who need to understand the Spectral Contrast principles underlying the processing of PDA Detector data by Millennium software. - Page 20 LAC/E module, the busLAC/E card, and interface cards used to communicate with serial instruments Waters 2996 PDA Detector Qualification Workbook: Describes qualification procedures for the 2996 PDA Detector. Documentation Conventions The following conventions may be used in this guide:...
- Page 21 Convention Usage Keys The word key refers to a computer key on the keypad or keyboard. Screen keys refer to the keys on the instrument located immediately below the screen. For example, “The A/B screen key on the 2414 Detector displays the selected channel.” …...
- Page 22 xxii...
-
Page 23: Chapter 1 Installation
Millennium or MassLynx software control. 1.1 Installation Site Requirements Install the 2996 PDA Detector at a site that meets the specifications in Table 1-1 and Figure 1-1. Table 1-1 Site Requirements Factor... -
Page 24: Power Connections
• Total power: 100 VA • Frequency range: 50 to 60 Hz Fuses The 2996 PDA Detector is shipped with fuses rated for North American operation. If you operate the 2996 PDA Detector in another location, install the IEC-rated fuses (supplied in Installation... -
Page 25: Millennium Workstation Connections
Waters 2996 Detector Startup Kit) in the fuse holder in the rear of the detector (refer to Section 3.3, Replacing the Fuses). Connecting the Power Cord Connect one end of the 2996 Detector power cord to the rear panel power receptacle (Figure 1-2) and the other end to a power outlet. -
Page 26: Connecting The Ieee-488 Cable
1. Connect one end of the IEEE-488 cable to the IEEE-488 receptacle on the rear panel of the 2996 Detector. Connect the other end of the cable (stackable connector for daisy-chaining additional instruments) to the IEEE-488 connector on any of the other instruments in your chromatographic system (Figure 1-3). -
Page 27: Setting The Ieee-488 Address
Use a small screwdriver (or similar device) to set the IEEE-488 switches on the detector rear panel (Figure 1-4) to the IEEE-488 address of the 2996 Detector. The address must be a number from 2 to 29 and must be different than that of any other component connected to your acquisition server. -
Page 28: Non-Ieee-488 Communication Connections
Procedure To connect the 2996 Detector to a device that receives analog output signals: 1. Pull off the analog out terminal strip from the 2996 Detector rear panel (Figure 1-5). This step simplifies the following steps. 2. Insert the appropriate bare wires at one end of an analog signal cable into the positive (+) and negative (–) terminals of Analog Out 1 (Figure 1-5). -
Page 29: Connecting Event Cables
If an inject start signal is not available over the IEEE-488 bus, you must provide a signal at Event In 1 terminal on the 2996 Detector rear panel. Manual injectors such as the Rheodyne 7725i provide a cable that connects the injector to an Event In terminal on the 2996 Detector rear panel. -
Page 30: Event Input/Output Terminal Strip
• Event signal cables (included in the Waters 2996 Detector Startup Kit) Procedure To connect the 2996 Detector to an external event input or output device: Pull off the event terminal strip from the rear panel (Figure 1-6). This simplifies the following steps: 1. -
Page 31: Fluidic Connections
Maximum current 0.5 A at 20 V Maximum voltage 24 V RMS Attention: To avoid damage to the 2996 Detector electronics, be sure you make the STOP proper electrical connections as outlined in this section. 1.5 Fluidic Connections Caution: To avoid chemical hazards, always observe safe laboratory practices when handling solvents. - Page 32 2. Cut the two lengths of tubing as follows: a. Use a Waters 1/16-inch stainless steel tubing cutter or a file with a cutting edge to scribe the circumference of the tubing at the desired break point.
-
Page 33: Starting Up And Shutting Down The Detector
The entire startup procedure takes less than 1 minute. Once completed, you should allow the 2996 Detector to warm up for at least 1 hour before running an analysis. Follow the procedures in this section to ensure reliable detector performance. -
Page 34: Led Indicator Sequences During Startup
• If both lights remain illuminated, the detector passed the internal diagnostics. • If either indicator light blinks or is off, refer to the troubleshooting tables in Chapter 2, Diagnostics and Calibration. 5. Wait 1 hour for the 2996 Detector to stabilize before acquiring data. WATERS 2996 Photodiode Array... - Page 35 Calibration was successful. Shutting Down the Detector To shut down the 2996 Detector: 1. If the mobile phase contains buffers, set the solvent delivery system or pump to deliver 1 mL/min of HPLC-grade water for 10 minutes. Otherwise, set the solvent delivery system or pump to deliver 1 mL/min of degassed methanol for 10 minutes.
- Page 36 Installation...
-
Page 37: Diagnostics And Calibration
Chapter 2 Diagnostics and Calibration The Waters 2996 Photodiode Array Detector automatically runs a series of internal diagnostics upon start up. The indicator LEDs on the front of the detector and messages at the Millennium Workstation show the results of the start up internal diagnostics (Figure 1-8). - Page 38 Table 2-1 2996 Detector Troubleshooting (Continued) Symptom Possible Cause Corrective Action Status light blinks and Failed startup Reseat and check alignment of flow lamp light on diagnostics cell. Flush the flow cell (Section 3.1.1, Flushing the Flow Cell). Insufficient energy Flush the flow cell (Section 3.1.1,...
-
Page 39: User-Initiated Diagnostics
2.2 User-Initiated Diagnostics Note: The system administrator can restrict access to the 2996 Detector diagnostics by disabling user access to Run Samples. For details, refer to the Millennium Help. There are two types of user-initiated PDA diagnostic tests: •... -
Page 40: Pda Calibration
2.3 PDA Calibration You can adjust, or calibrate, the 2996 Detector to ensure that wavelength readings are accurate. Recalibrate the 2996 Detector only if the Wavelength Accuracy diagnostic (in the Internal Diagnostics tests) fails. Calibration allows you to correct small errors in wavelength which may be caused by aging optics or excessive vibration. -
Page 41: Chapter 3 Maintenance
Chapter 3 Maintenance This chapter covers maintenance of the Waters 2996 Photodiode Array Detector flow cell, lamp, and fuse. Caution: To avoid possible electric shock, do not remove the 2996 Detector power supply covers. The power supply does not contain user-serviceable components. -
Page 42: Flushing The Flow Cell
Section 3.1.2, Removing the Flow Cell. 3.1.2 Removing the Flow Cell Note: You do not need to shut down the 2996 Detector to remove and replace the flow cell. Required Materials • 5/16-inch open-end wrench •... -
Page 43: Removing The Flow Cell Assembly
Always vent your system before disconnecting fluidic lines. 3. Use the 5/16-inch wrench to disconnect the fluidic lines at the front of the detector. 4. Lift up the 2996 detector front cover and pull the front cover from the detector chassis. -
Page 44: Disassembling And Cleaning The Flow Cell
Attention: The lens surface finish and the alignment of the lenses are critical to the STOP performance of the 2996 Detector. Be careful not to touch or damage the lenses and the lens holders. Attention: To prevent lens contamination, use powder-free gloves when disassembling,... -
Page 45: Disassembling The Flow Cell
• HPLC-grade methanol • Belleville spring washer • Flow cell gasket • Powder-free gloves Procedure To disassemble and clean the flow cell (and lenses): 1. Use the TORX T10 screwdriver to remove the three screws that secure one of the lens holder assemblies (Figure 3-3). -
Page 46: Installing The Flow Cell Assembly
4. Remove and discard the gasket. 5. Repeat steps 1 through 4 to remove, disassemble, and clean the other lens holder assembly. 6. Use methanol and a nonparticulating swab to clean the flow cell body. Reassembling the Flow Cell To reassemble the flow cell (Figure 3-3): 1. -
Page 47: Replacing The Lamp
6. Flush the flow cell (Section 3.1.1, Flushing the Flow Cell). 3.2 Replacing the Lamp Replace the lamp in the 2996 Detector when either of the following conditions exists: • The sampling rate requires an excessively long exposure time (more than 100 milliseconds). -
Page 48: Lamp Power Connector And Mounting Screws
2996 Detector and disconnect the power cord. Procedure To replace the lamp: 1. Power off the 2996 Detector, disconnect the power cord, and allow the lamp to cool for at least 15 minutes. Caution: To avoid the possibility of contacting hot surfaces, wait at least 15 minutes after powering off the detector before you handle the lamp. -
Page 49: Replacing The Fuses
Replace the fuses under the conditions indicated in the troubleshooting table (Section 2.1, Diagnostics). The 2996 Detector requires two 2 A, 250 V fuses (5 mm × 20 mm). Caution: To avoid electrical hazards, power off the 2996 Detector and disconnect the power cord before you perform the following procedure. - Page 50 4. Remove the fuses from the block, then install the new fuses. 5. Position the fuse block with the small tab pointing down, then push in the block until the side clips engage. 6. Connect the power cord, then power on the 2996 Detector. Maintenance...
-
Page 51: Principles Of The 2996 Pda Detector Optics
The 2996 Detector is an ultraviolet/visible light (UV/Vis) spectrophotometer with: • 512 photodiodes • Optical resolution of 1.2 nm per diode • Operating wavelength range from 190 to 800 nm The light path through the optics assembly of the 2996 Detector is shown in Figure 4-1. 2996 Detector Optics... -
Page 52: Optics Assembly Light Path
Flow Cell Lamp Optics Mirror and Mask Assembly Figure 4-1 Optics Assembly Light Path Table 4-1 describes the optics assembly components in the 2996 Detector. Table 4-1 Optics Assembly Components Component Function Lamp and lamp Focuses light from the deuterium source lamp via a mirror through a optics beamsplitter to the flow cell. -
Page 53: Resolving Spectral Data
The wavelength that strikes a particular diode depends on the angle of reflection from the grating. Figure 4-2 shows an absorbance spectrum of benzene obtained from the 2996 Detector using the 50-µm aperture. In this spectrum, the wavelength resolution is sufficient to resolve five principal benzene absorption peaks. -
Page 54: Measuring Light At The Photodiode
Figure 4-2 Benzene Spectrum at 1.2 nm Resolution 4.3 Measuring Light at the Photodiode The 2996 Photodiode Array Detector measures the amount of light striking the photodiode array to determine the absorbance of the sample in the flow cell. The array consists of 512 photodiodes arranged in a row. Each photodiode acts as a capacitor by holding a fixed amount of charge. -
Page 55: Photodiodes Discharged By Light
The interval between two readings of an individual diode is the exposure time. The 2996 Detector requires less than 10 msec to sequentially read all of the diodes in the array and process the data. The minimum exposure time is 10 msec. You can set exposure time from 10 to 500 msec. - Page 56 1 after all diodes have been recharged and read. You set the exposure time parameter in the General tab of the 2996 PDA Instrument Method Editor. You can specify either Auto Exposure or Exposure Time. For details, refer to the Millennium Help.
-
Page 57: Computing Absorbance Data Points
Be aware that increasing the Exposure Time parameter has the potential to saturate the photodiodes. A longer exposure time may cause the 2996 Detector to lose the signal at certain wavelengths because of diode saturation. When specifying the Exposure Time, select a value that provides settings for an optimum signal-to-noise ratio over the wavelength range of your analysis (see the next topic “Optimizing the Signal-to-Noise... -
Page 58: Absorbance As A Function Of Concentration
A = absorbance ε = molar absorptivity l = path length (1.0 cm in the 2996 Detector normal flow cell) c = molar concentration Beer’s Law applies only to well-equilibrated dilute solutions. It assumes that the refractive index of the sample remains constant, that the light is monochromatic, and that no stray light reaches the detector element. - Page 59 Photodiodes lose charge over time even when they are not exposed to light. The amount of charge lost is called dark current. At the start of a chromatographic run, the 2996 Detector closes the shutter to take a dark current reading for each diode. The shutter closes after the exposure time is calculated and stays closed for the same interval as the exposure time.
-
Page 60: Resolution
Note: The data storage rate is based on wavelength range, spectral resolution, and sample rate, which are set in the General tab of the 2996 PDA Instrument Method Editor. For details, refer to the Millennium Help. - Page 61 the data sent to the Millennium software database. A noise filter of 1 second is the default value, which provides a good signal-to-noise ratio for most chromatographic separations. Note the following with regard to filtering data: • The noise filter is a digital (low pass) filter. •...
- Page 62 Principles of the 2996 PDA Detector Optics...
-
Page 63: Spectral Contrast Theory
This chapter describes how Spectral Contrast represents absorbance spectra as vectors. When applied to the UV/Vis absorbance data collected by the 2996 Detector, the Spectral Contrast technique determines whether differences between spectra are due to the presence of multiple compounds in the same peaks (coelution) or due to nonideal conditions such as noise, photometric error, or solvent effects. -
Page 64: Representing Spectra As Vectors
A vector derived from the 2996 PDA Detector can include absorbances in any range from 190 to 800 nm. To enhance spectral sensitivity, set the bench resolution to 1.2 nm. -
Page 65: Vectors Derived From Two Wavelengths
5.2.1 Vectors Derived from Two Wavelengths The Spectral Contrast algorithm uses vectors to characterize spectra (Figure 5-2). To understand the vector principle, consider two vectors (Figure 5-2) based on the spectra depicted in Figure 5-1. AU at 245 nm Figure 5-2 Plotting Vectors for Two Spectra The axes in Figure 5-2 are in absorbance units at the two wavelengths used to calculate the absorbance ratio shown in Figure 5-1. -
Page 66: Spectral Contrast Angles
uses absorbances from multiple wavelengths to form a vector in an n-dimensional vector space, where n is the number of wavelengths from the spectrum. To compare two spectra, the Spectral Contrast technique forms a vector for each spectrum in an n-dimensional space. The two spectral vectors are compared mathematically to compute the angle between the two vectors. -
Page 67: Spectra With A Large Spectral Contrast Angle
Spectral Contrast Angle: 62.3° Compound A Compound B Wavelength (nm) Figure 5-3 Spectra with a Large Spectral Contrast Angle Spectra with Similar Shapes In Figure 5-4, the absorbance spectra of two compounds, A and B, are similar, and therefore, have a small Spectral Contrast angle (3.0°). Spectral Contrast Angles... -
Page 68: Spectra With A Small Spectral Contrast Angle
Spectral Contrast Angle: 3.0° Compound A Compound B Wavelength (nm) Figure 5-4 Spectra with a Small Spectral Contrast Angle Differences Between Spectra of the Same Compound Small but significant differences between absorbance spectra can occur because of factors other than those due to the absorbance properties of different compounds. For example, multiple spectra of the same compound may exhibit slight differences because of detector noise, photometric error, high sample concentration, or variations in solvent conditions. -
Page 69: Undesirable Effects
5.4.1 Detector Noise Statistical and thermal variations add electrical noise to the absorbance measurements made by the 2996 Detector. The noise manifests itself as fluctuations in the baseline, known as baseline noise. The magnitude of any absorbance differences caused by statistical and thermal variations can be predicted from the instrument noise in the baseline region of a chromatogram. -
Page 70: Photometric Error
5.4.2 Photometric Error At high absorbances (generally greater than 1 AU), a combination of effects can produce slight departures (about 1%) from Beer’s Law due to photometric error. Although photometric errors at this level may have a negligible effect on quantitation, they can be a significant source of spectral inhomogeneity. -
Page 71: Effects Of Ph And Solvent Concentration On The Absorbance Spectrum Of
Effect of pH pH 6.9 pH 5.1 pH 3.1 Wavelength (nm) Effect of Concentration Note position of Maxima can be shifted. Wavelength (nm) Figure 5-6 Effects of pH and Solvent Concentration on the Absorbance Spectrum of p-Aminobenzoic Acid Undesirable Effects... - Page 72 Spectral Contrast Theory...
-
Page 73: Detector Specifications
Appendix A Detector Specifications Table A-1 lists the 2996 PDA Detector specifications. Table A-1 2996 Detector Specifications Item Specification Dimensions Width: 11.5 in. (29 cm) Depth: 24 in. (61 cm) Height: 8.5 in. (22 cm) Weight 31.5 lbs (14.3 kg) - Page 74 Detector Specifications...
-
Page 75: Appendix B Spare Parts
Appendix B Spare Parts The spare parts listed in Table B-1 are recommended for customer installation. Damage incurred by performing unauthorized work on your 2996 Detector may invalidate certain warranties. Table B-1 Spare Parts Item Part Number Flow cell, standard... - Page 76 Spare Parts...
-
Page 77: Mobile Phase Absorbance
Appendix C Mobile Phase Absorbance This appendix lists the absorbances at several wavelengths for commonly used mobile phases. Choose your mobile phase carefully to reduce baseline noise. The best mobile phase for your application is one that is transparent at the chosen detection wavelengths. - Page 78 Table C-1 Mobile Phase Absorbance Measured Against Air or Water (Continued) Absorbance at Specified Wavelength (nm) Acids and Bases Acetic acid, 1% 2.61 2.63 2.61 2.43 2.17 0.87 0.14 0.01 <0.01 — Hydrochloric 0.11 0.02 <0.01 — — — — —...
- Page 79 Table C-1 Mobile Phase Absorbance Measured Against Air or Water (Continued) Absorbance at Specified Wavelength (nm) Potassium 0.03 <0.01 — — — — — — — — phosphate, monobasic 10 mM Potassium 0.53 0.16 0.05 0.01 <0.01 — — — —...
- Page 80 Table C-1 Mobile Phase Absorbance Measured Against Air or Water (Continued) Absorbance at Specified Wavelength (nm) ® Waters PIC Reagents PIC A, 1 vial/L 0.67 0.29 0.13 0.05 0.03 0.02 0.02 0.02 0.02 <0.01 PIC B6, 1 vial/L 2.46 2.50 2.42...
-
Page 81: Index
55 Auto Exposure parameter 34 photometric error 48 Exposure Time parameter 34 solvent change effects 49 Derived vectors 43, 44 Waters 2996 calculations 35, 37 Diagnostics 17 Acquisition Documentation conventions xx Auto Exposure parameter 34 Exposure Time parameter 34... - Page 82 6, 7 Match Angle, photometric error effects 48 event inputs 9 Maximum absorbance 48 event outputs 9 Millennium Chromatography Manager, Waters 2996 51 connections 3 Spectra Mobile phase derived vectors 43, 44 absorbances 55 spectral shape differences 47...
- Page 83 Spectrum match, spectral shape differences Waters Technical Service, contacting 15, 17 Wavelength Start up, procedure 11 accuracy 18 derived vectors 43, 44 mobile phase absorbances 55 Terminal strip connections 7, 8 diagram 8 Threshold angle 47 Troubleshooting 15–18 Tubing, cutting 10...
- Page 84 Index...
Need help?
Do you have a question about the 2996 and is the answer not in the manual?
Questions and answers