Table of Contents
Advertisement
Advertisement
Table of Contents

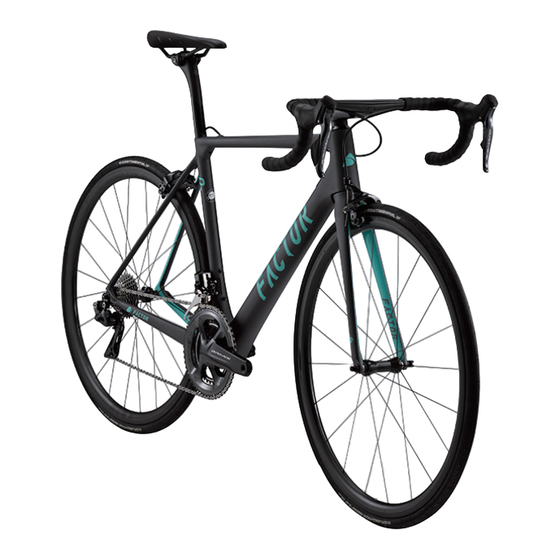
Summary of Contents for Factor O2
- Page 1 FACTORBIKES.COM Assembly Manual V2.20...
-
Page 2: Table Of Contents
Introduction Limited Lifetime Warranty On Bicycles And Framesets Necessary Tools Instructions 1 Seatpost 2 Di2 Cable Routing 3 Fork - Headset – Barstem Cutting the Fork 5 Barstem Di2 Routing 6 Rear Brake Cable Routing 7 Bottom Bracket 8 Computer Mount 9 Bottle Cage 10 Rear Dropout Assembly Manual... - Page 3 Factor bicycle. This lifetime limited warranty is not transferable. the lifetime of the original owner of each new Factor bicycle or frameset that the bicycle frame or If the bicycle is purchased as a gift, the original recipient of the gift is considered to be the original frameset is free of defective materials and workmanship.
- Page 4 Miscellaneous: the bicycle in, severe conditions or climates. In the event that Factor prevails in any court action, you agree to reimburse Factor for the expenses, Labour and/or transport charges for full or part replacement, repair, return or changeover. including attorney’s fees and expenses of litigation incurred by Factor in defending against your claim.
-
Page 5: Necessary Tools
Instructions Similar to a Formula 1 car, your Factor O2 requires a bit of patience and mechanical skill to achieve a truly impressive result. We recommend that you have your bicycle assembled and maintained by an authorized Factor dealer. Make sure to let your mechanic know how much you appreciate their help building the bike of your dreams! Check which rails standard are on your saddle. - Page 6 Note: Your Factor frame set requires a minimum of 90 mm of seat post insertion. The minimum insertion is clearly marked Slide 4 mm hex wrench through the hole under the top tube on the seat post.
-
Page 7: Di2 Cable Routing
Assembly Manual Di2 Cable Routing Note: Park Tool offers an excellent internal cable routing kit (Park Tool IR-1) to help you easily route your cables. If you do not have access to this Di2 cable routing overall view kit you can use a derailleur inner wire and a 5mm metal cable ferrule to route your wires. - Page 8 Assembly Manual Route the rear derailleur Di2 cable through the chain stay. Install Di2 cable grommet. Connect to the Di2 Junction B. Route the front derailleur Di2 cable through the seat tube hole to the bottom bracket exit window. Connect to the Di2 Junction B. Route the Di2 cable from the Junction A to the Junction B through the down tube (as pictured) to the bottom bracket shell exit window.
-
Page 9: Fork - Headset - Barstem
Assembly Manual Fork - Headset – Barstem Lightly grease the upper headset Lightly grease and install Lightly grease lower headset bearing and then install in upper compression ring. bearing and slide onto the headset cup. fork steerer tube. Install fork Install headset cone spacer Select the desired amount of headset spacers. -
Page 10: Cutting The Fork
Assembly Manual Install barstem Cutting the fork Carefully remove any bulges or rough edges from the top of Note: Carefully consider all possibilities before cutting your Cut fork steerer tube (there are many blades specifically for the steerer tube with a flat file fork. - Page 11 Assembly Manual With the Black Inc barstem, during reassembly, Tighten the headset top cap bolt until there is no check that the top of the headset compression plug is bearing play but the headset still spins freely. no more than 3mm below the top of the stem. (If using an aftermarket stem we recommend using a 5mm spacer above the stem) Install top cap using M5 bolt and align the barstem with the...
-
Page 12: Barstem Di2 Routing
Assembly Manual Barstem Di2 routing Route the rear shifter cable. to the left shifter Route the JC-130 through the handlebar. Note that the cables to both the front shifter and the JC-200 need to be pulled through at the same time. to the right shifter Shimano... -
Page 13: Rear Brake Cable Routing
Assembly Manual Rear brake cable routing Cut the cable housing to the correct length Route rear brake inner wire through top tube as pictured Di2 wire Brake Brake housing housing Di2 wire Bottom Bracket Install the cups into the frame with BRT-002 bearing press from Enduro Bearings. -
Page 14: Computer Mount
Assembly Manual For 24 or 22 mm cranks install the included Wheels MFG BBright reducers/adapters. Computer mount Release the bolt and remove the cover. Install the computer mount and tighten the 2 bolts to 2 Nm. -
Page 15: Bottle Cage
Assembly Manual Bottle cage Install cages and tighten M5 bolts with T20 Torx to 2 Nm. 10-1 Rear dropout In case of dropout replacement, apply Loctite 243 on bolts threads and tighten to 1 Nm. - Page 16 FACTORBIKES.COM...


Need help?
Do you have a question about the O2 and is the answer not in the manual?
Questions and answers