Advertisement
Quick Links
Advertisement

Subscribe to Our Youtube Channel
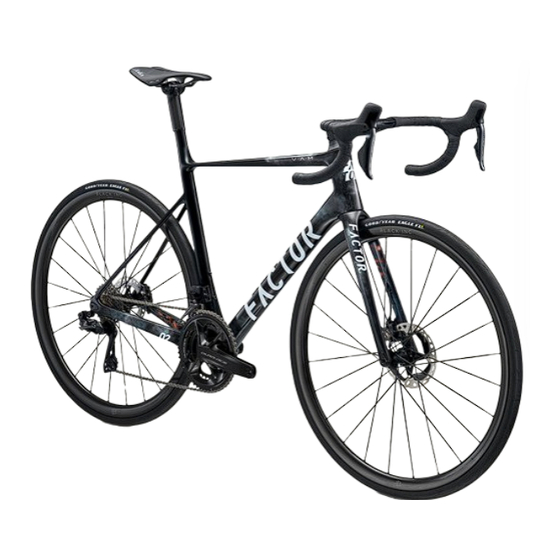
Summary of Contents for Factor O2 VAM 2023
- Page 2 2023 O2 VAM MANUAL...
- Page 3 Subject to the following limitations, terms and conditions, Factor warrants to the original owner for the lifetime of the original owner of each new Factor bicycle or frameset that the bicycle If the bicycle is purchased as a gift, the original recipient of the gift is considered to be the frame or frameset is free of defective materials and workmanship.
- Page 4 In the event that Factor prevails in any court action, you agree to reimburse Factor for the expenses, including attorney’s fees and expenses of litigation incurred by Factor in defending Labour and/or transport charges for full or part replacement, repair, return or changeover.
-
Page 5: Hose Routing
2023 O2 VAM Hose routing Di2 routing Install rear brake and fish hose through the frame and out the head tube ● Install the Front and rear derailleur Di2 wires as needed, extending from the ● ● install the anti rattle rear brake hose foam sleeve seat tube for attachment to the BT DN300 battery Insure that the clear plastic anti wear guard portion of the anti rattle hose ●... -
Page 6: Di2 Battery Installation
2023 O2 VAM Di2 Battery installation Push the battery into the external seat tube ● Affix the top and bottom rubber mounts to the Di2 battery ● ● Attach the routed Di2 wires to the battery... - Page 7 2023 O2 VAM External SeatPost clamp mount the external post on the frame. Tighten the M3 grub screws to not ● After determining the appropriate external seat post length and offset by ● more than 4 Nm. Be sure to gradually increase the torque on the top and working with your shop or customer service rep apply carbon paste to bottom grub screw, alternating between them to ensure an even inside surfaces of the external post as well as the seatpost clamp shown...
- Page 8 Determine the type of SP rails on your saddle and chose the appropriate ● clamp setup from the Pizza Box of parts Factor frame sets are shipped with 7X9 mm outer rail clamps for carbon rail saddles. 7x7 mm outer rail clamps for traditional saddle rails are available through your Factor dealer.
- Page 9 2023 O2 VAM Steerer Working with your mechanic determine the correct number of spacers, and cut the fork ● Pre-cut fork steerer making sure that it is cut 3mm below steerer tube as shown below the top of the stem. WARNING! Only use a maximum of 40mm of spacers (including tall headset cover) supplied with the frameset.
- Page 10 2023 O2 VAM Fork mounting Fish the front brake hose through the fork, from the bottom up. Pass the lower bearing over this hose and the cut steerer tube ● ● Lightly grease the lower bearing and install the fork in the frame, at the same time retract the rear brake hose in its anti-rattle housing...
- Page 11 2023 O2 VAM Top bearing Lightly grease the top bearing, and the split ring. ● ● Pull the hoses through the top bearing, the split ring and your chosen height dust cover. Assemble spacers as required ● ● Ensure the shape matching spacer is included if the Black Inc HB01 (non-aero) is used. ●...
-
Page 12: Fork Mounting
2023 O2 VAM Fork mounting Pull the brake hoses through the handlebar carefully, entering at the rear of the stem and exiting at the shifter ● Apply a generous amount of carbon post to the steerer tube, the stem, and the expansion plug ●... - Page 13 2023 O2 VAM Grommets ● Install the front and rear grommets Route the rear derailleur Di2 cable through Install Di2 cable grommet. Connect to the Di2 Junction B the chainstay. Route the front derailleur Di2 cable through Install Di2 cable grommet. Connect to the Di2 Junction B the seat tube hole to the bottom bracket exit port.
- Page 14 2023 O2 VAM Fork mounting Pull the brake hoses through the handlebar carefully, entering at the rear of the stem and exiting at the shifter ● Apply a generous amount of carbon post to the steerer tube, the stem, and the expansion plug ●...
- Page 15 2023 O2 VAM Apply a layer of good quality assembly paste Thread the cups into the frame and torque the cups Clean the inside of the frame bottom bracket to the threads of both bottom bracket cups. down to 30nm for the drive side and 40nm for the &...
- Page 16 2023 O2 VAM Apply Loctite 243 on bolt threads. Thread the Install a rear hub in the dropout with the free After ensuring the dropout insert is correctly bolt in but do not tighten, this will allow the hub on non-drive side. This will allow better aligned, tighten the dropout bolt to 1 Nm.
- Page 17 2023 O2 VAM Install a front hub in the dropout with the free hub on After ensuring the dropout insert is correctly non-drive side. This will allow better access for the aligned, tighten the dropout bolt to 1 Nm. next step. Install the thru-axle with the nylon washer and tighten to 12Nm Apply Loctite 243 on bolt threads.
- Page 18 2023 O2 VAM Install cages and tighten M5 bolts with T20 Torx to 2 Nm.
- Page 19 2023 O2 VAM If you are using a front derailleur, install the mount as shown, tightening to ● 3Nm. ● If you aren’t using a Front Derailleur mount, look for the supplied blanking plate and attach with a single screw.


Need help?
Do you have a question about the O2 VAM 2023 and is the answer not in the manual?
Questions and answers