Table of Contents
Advertisement
Available languages
Available languages
Quick Links
Advertisement
Chapters
Table of Contents

Related Manuals for ProLights ECLIPSEFRESNELJTW


Summary of Contents for ProLights ECLIPSEFRESNELJTW
- Page 1 ECLIPSEFRESNELJTW LED FRESNEL PROIECTOR USER MANUAL MANUALE UTENTE EN - IT...
- Page 2 All rights reserved by Music & Lights S.r.l. No part of this instruction manual may be reproduced in any form or by any means for any commercial use. In order to improve the quality of products, Music&Lights S.r.l. reserves the right to modify the characteristics stated in this instruction manual at any time and without prior notice.
-
Page 3: Table Of Contents
3. 14 Construction of the DMX termination 3. 15 Channels DMX 4 Maintenance 4. 1 Maintenance and cleaning the unit 4. 2 Fuse replacement 4. 3 Trouble shooting • ECLIPSEFRESNELJTW Packing content • Mounting bracket • Power cable • User manual... -
Page 4: Eclipsefresneljtw
ECLIPSEFRESNELJTW WARNING! Before carrying out any operations with the unit, carefully read this instruction manual and keep it with cure for future reference. It contains important information about the installation, usage and maintenance of the unit. SAFETY General instruction • The products referred to in this manual conform to the European Community Directives and are there- fore marked with . -
Page 5: Introduction
Featuring HD dimming and tuning from 2800K to 10000K version, and ready to run through external bat- tery, the ECLIPSEFRESNELJTW delivers the performance and quality of output demanded from this level of luminaire. - Page 6 ECLIPSEFRESNELJTW • DMX Channels:2/5ch1/5ch2/7/9/12/13/16/19ch • RDM: RDM ready for fixture remote monitor and settings • Display: Black OLED high resolution display • Firmware Upgrade: Yes, via USB-DMX interface (UPBOX1) not included • Other: 16bit Control of Dimmer and Color ELECTRONICS •...
-
Page 7: Operating Elements And Connections
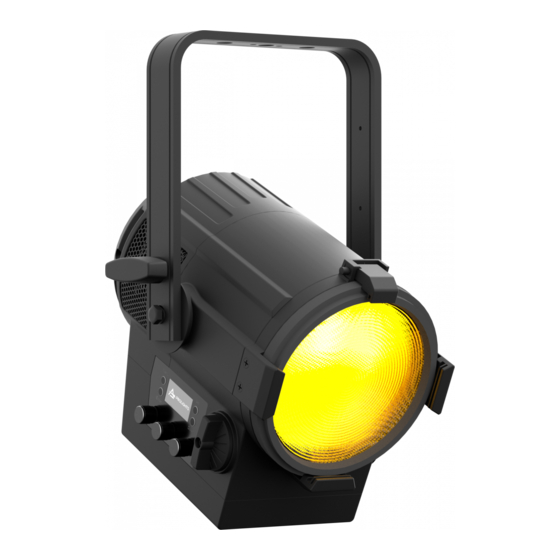
ECLIPSEFRESNELJTW 1.3 OPERATING ELEMENTS AND CONNECTIONS 12 13 Fig.2 1. AIR OPENING 2. LOCKING KNOB for mounting bracket 3. MOUNTING BRACKET 4. TRACK-ADAPTER(optional) 5. HANDLE 6. CONTROL PANEL with display and 4 button used to access the control panel functions and manage them 7. -
Page 8: Installation
NOTE - For the installation of the ECLIPSEFRESNELJTW make sure that the ridge of the adaptor is in with the groove of the track. Turn knobs 90° to connect the adaptor to the circuit. Please see the figure 4. -
Page 9: Functions And Settings
- 3 - FUNCTIONS AND SETTINGS 3.1 OPERATION To turn on the ECLIPSEFRESNELJTW connect the supplied main cable to a socket (100-240 VAC-50/60 Hz). Then the unit is ready for operation. You can also adjust the dimmer and zoom using the knobs. -
Page 10: Menu Structure
ECLIPSEFRESNELJTW 3.3 MENU STRUCTURE MENU ð DMX Address Value (001-512) CONNECT ð DMX Mode ð ð Color Temperature (2800 - 10000K) ð Customization (Red <000-255>, Orange <000-255>, Green <000-255>, Royal Blue <000-255>, Blue <000-255>, Lime <000-255>) 5CH1 5CH2 12CH 13CH... -
Page 11: Dmx Mode
• Press the MENU button to go back or to meet the waiting time to exit the setup menu. To able to operate the ECLIPSEFRESNELJTW with a light controller, adjust the DMX start address for the first a DMX channel. If e. g. address 33 on the controller is provided for controlling the function of the first DMX channel, adjust the start address 33 on the ECLIPSEFRESNELJTW. -
Page 12: White Calibration
ECLIPSEFRESNELJTW 3.7 DIMMER MODE • Enter in Dimmer mode to select specific dimming curve, press the button MENU so many times until shows DIM MODE, and press the button ENTER to confirm. • Press the button UP/DOWN to select OFF - DIM1 - DIM2 - DIM3. - Page 13 ECLIPSEFRESNELJTW • Press the UP/DOWN button to scroll through the menu, then select one of the following information and press the ENTER button to display it. - Fixture Time - Through the Fixture Time function you can display the operating time of the projector.
-
Page 14: Connection Of The Dmx Line
ECLIPSEFRESNELJTW 3.13 CONNECTION OF THE DMX LINE DMX connection employs standard XLR connectors. Use shielded pair-twisted cables with 120Ω imped- ance and low capacity. The following diagram shows the connection mode: DMX - INPUT DMX - OUTPUT XLR plug XLR socket... -
Page 15: Channels Dmx
ECLIPSEFRESNELJTW 3.15 CHANNELS DMX 2 CANALI 5 CANALI MODE MODE FUNCTION FUNCTION Value Value 5 Ch1 2 Ch DIMMER 000 - 000 0~100% 000 - 255 -25°~25° 001 - 255 DIMMER SPEED MODE COLOR MACRO Preset dimmer speed from display menu... - Page 16 ECLIPSEFRESNELJTW 5 CANALI 5 CANALI MODE MODE FUNCTION FUNCTION Value Value 5 Ch2 5 Ch2 DIMMER 8600K - 8800K 206 - 213 0~100% 000 - 255 8800K - 9000K 213 - 220 9000K - 9200K 220 - 227 DIMMER FINE...
- Page 17 ECLIPSEFRESNELJTW 9 CANALI 12 CANALI MODE MODE FUNCTION FUNCTION Value Value 12 Ch 9 Ch DIMMER DIMMER 000 - 255 0~100% 000 - 255 000 - 255 STROBE ORANGE 000 - 255 No Function 000 - 010 Strobe slow to fast...
- Page 18 ECLIPSEFRESNELJTW 16 CANALI 12 CANALI MODE MODE FUNCTION FUNCTION Value Value 12 Ch 16 Ch DIMMER 000 - 255 No Function DIMMER FINE 000 - 255 -25~25 001 - 255 000 - 255 COLOR MACRO No Function 000 - 005...
- Page 19 ECLIPSEFRESNELJTW 19 CANALI 19 CANALI MODE FUNCTION MODE FUNCTION Value 19 Ch Value 19 Ch DIMMER 000 - 255 2800K - 3000K 000 - 010 DIMMER FINE 000 - 255 3000K - 3200K 010 - 017 000 - 255 3200K - 3400K...
-
Page 20: Maintenance
ECLIPSEFRESNELJTW - 4 - MAINTENANCE 4.1 MAINTENANCE AND CLEANING THE UNIT • Make sure the area below the installation place is free from unwanted persons during setup. • Switch off the unit, unplug the main cable and wait until the unit has cooled down. -
Page 21: Troubleshooting
ECLIPSEFRESNELJTW 4.3 TROUBLESHOOTING Problems Possible causes Checks and remedies No mains supply Check the power supply voltage • • Dimmer fader set to 0 Increase the value of the dimmer channels Fixture does not light up • • Faulty LED Replace the LED board •... - Page 22 Music & Lights S.r.l. si riserva ogni diritto di elaborazione in qualsiasi forma delle presenti istruzioni per l’uso. La riproduzione - anche parziale - per propri scopi commerciali è vietata. Al fine di migliorare la qualità dei prodotti, la Music&Lights S.r.l. si riserva la facoltà di modificare, in qualunque momento e senza preavviso, le specifiche menzionate nel presente manuale di istruzioni.
- Page 23 3. 14 Costruzione del terminatore DMX 3. 15 Canali DMX 4 Manutenzione 4. 1 Manutenzione e pulizia del sistema ottico 4. 2 Sostituzione fusibile 4. 3 Risoluzione dei problemi • ECLIPSEFRESNELJTW Contenuto dell'imballo: • Staffa di montaggio • Cavo di alimentazione • Manuale utente...
-
Page 24: Avvertenze Generali
ECLIPSEFRESNELJTW ATTENZIONE! Prima di effettuare qualsiasi operazione con l’unità, leggere con attenzione questo manuale e conservarlo accuratamente per riferimenti futuri. Contiene informazioni importanti riguardo l’installazione, l’uso e la manutenzione dell’unità. SICUREZZA Avvertenze generali • I prodotti a cui questo manuale si riferisce sono conformi alle Direttive della Comunità Europea e per- tanto recano la sigla . -
Page 25: Introduzione
- 1 - INTRODUZIONE 1.1 DESCRIZIONE ECLIPSEFRESNELJTW è una sostituzione avanzata a LED per le tradizionali lampade Fresnel da 650 W, con miscelazione a 6 colori per offrire una riproduzione di alta precisione dello Spettro del bianco da 2800K a 10000K con un alto CRI e un’estesa riproduzione dei colori. - Page 26 ECLIPSEFRESNELJTW • RDM: RDM ready for fixture remote monitor and settings • Display: Black OLED high resolution display • Firmware Upgrade: Yes, via USB-DMX interface (UPBOX1) not included • Other: 16bit Control of Dimmer and Color ELETTRONICA • Dimmer: Linear 0~100% electronic dimmer •...
-
Page 27: Elementi Di Comando E Di Collegamento
ECLIPSEFRESNELJTW 1.3 ELEMENTI DI COMANDO E COLLEGAMENTI 12 13 Fig.2 1. PRESA DI VENTILAZIONE apertura per uscita flus- so d'aria da non ostruire. 2. VITE DI FISSAGGIO SAGOMATORE 3. BRACCIO GIREVOLE 4. STAFFA DI MONTAGGIO 5. MANIGLIE 6. PANNELLO DI CONTROLLO con display e 4 pul- sante per accesso e gestione delle funzioni. -
Page 28: Installazione
20 cm. Quindi orientare il proiettore. NOTA - Per l’installazione del proiettore ECLIPSEFRESNELJTW inserire il gancio (incluso) o un morsetto idoneo per fissarlo ad un sistema sospeso. -
Page 29: Funzioni E Impostazioni
ATTENZIONE - Assicuararsi di togliere la tensione di alimentazione prima di iniziare qualsiasi intervento di manutenzione, inserimento e sostituzione di track-adpter (optional) e dispositivi di illuminazione. 3.2 IMPOSTAZIONE BASE Il ECLIPSEFRESNELJTW dispone di un display e 4 pulsanti per accesso alle funzioni del pannello di control- lo (fig.5). Fig.4- Funzione dei tasti... -
Page 30: Struttura Menù
ECLIPSEFRESNELJTW 3.3 STRUTTURA MENU MENU ð DMX Address Value (001-512) CONNECT ð DMX Mode ð ð Color Temperature (2800 - 10000K) ð Customization (Red <000-255>, Orange <000-255>, Green <000-255>, Royal Blue <000-255>, Blue <000-255>, Lime <000-255>) 5CH1 5CH2 12CH 13CH... -
Page 31: Modalità Dmx
33 - 37 3.5 CONFIGURAZIONE CANALI DMX Il ECLIPSEFRESNELJTW dispone di diverse configurazioni dei canali DMX a cui si può accedere dal pannello di controllo. • Premere il tasto MENU fino a quando sul display non appare DMX CHANNEL, quindi premere il tasto ENTER. -
Page 32: Funzioni Del Dispositivo
ECLIPSEFRESNELJTW 3.7 FUNZIONI DISPOSITIVO Per il ECLIPSEFRESNELJTW è possibile accedere alle seguenti funzioni dispositivo: DIMMER • Per entrare nella modalità dimmer e scegliere e simulare diverse curve dimming, scorrere nel menu, selezionare l’icona Advanced, scorrere nel MENU fino a quando sul display non compare DIM MODE, quindi premere il tasto ENTER. - Page 33 ECLIPSEFRESNELJTW • Premere il tasto ENTER per accedere al menu principale. • Premere il tasto UP/DOWN per selezionare l’icona Information, quindi premere il tasto ENTER per acce- dere al menu successivo. • Premere il tasto UP/DOWN per scorrere nel menu, quindi selezionare una delle seguenti informazioni e premere il tasto ENTER per visualizzarla.
-
Page 34: Collegamenti Della Linea Dmx
ECLIPSEFRESNELJTW 3.13 COLLEGAMENTI DELLA LINEA DMX La connessione DMX è realizzata con connettori standard XLR. Utilizzare cavi schermati, 2 poli ritorti, con impedenza 120Ω e bassa capacità. Per il collegamento fare riferimento allo schema di connessione riportato di seguito: DMX - INPUT... -
Page 35: Canali Dmx
ECLIPSEFRESNELJTW 3.15 CANALI DMX 2 CANALI 5 CANALI MODE MODE FUNCTION FUNCTION Value Value 5 Ch2 2 Ch DIMMER 000 - 000 0~100% 000 - 255 -25°~25° 001 - 255 DIMMER SPEED MODE COLOR MACRO Preset dimmer speed from display menu... - Page 36 ECLIPSEFRESNELJTW 5 CANALI 5 CANALI MODE MODE FUNCTION FUNCTION Value Value 5 Ch2 5 Ch2 DIMMER 8600K - 8800K 206 - 213 0~100% 000 - 255 8800K - 9000K 213 - 220 9000K - 9200K 220 - 227 DIMMER FINE...
- Page 37 ECLIPSEFRESNELJTW 9 CANALI 12 CANALI MODE MODE FUNCTION FUNCTION Value Value 12 Ch 9 Ch DIMMER DIMMER 000 - 255 0~100% 000 - 255 000 - 255 STROBE ORANGE 000 - 255 No Function 000 - 010 Strobe slow to fast...
- Page 38 ECLIPSEFRESNELJTW 16 CANALI 12 CANALI MODE MODE FUNCTION FUNCTION Value Value 12 Ch 16 Ch DIMMER 000 - 255 No Function DIMMER FINE 000 - 255 -25~25 001 - 255 000 - 255 COLOR MACRO No Function 000 - 005...
- Page 39 ECLIPSEFRESNELJTW 19 CANALI 19 CANALI MODE FUNCTION MODE FUNCTION Value 19 Ch Value 19 Ch DIMMER 000 - 255 2800K - 3000K 000 - 010 DIMMER FINE 000 - 255 3000K - 3200K 010 - 017 000 - 255 3200K - 3400K...
-
Page 40: Manutenzione
ECLIPSEFRESNELJTW - 4 - MANUTENZIONE 4.1 MANUTENZIONE E PULIZIA DEL SISTEMA OTTICO • Durante gli interventi, assicurarsi che l’area sotto il luogo di installazione sia libera da personale non qualificato. • Spegnere l’unità, scollegare il cavo di alimentazione ed aspettare finché l’unità non si sia raffreddata. -
Page 41: Risoluzione Dei Problemi
4.3 RISOLUZIONE DEI PROBLEMI Anomalie Possibili cause Controlli e rimedi Mancanza di alimentazione di rete Verificare la presenza della tensione alimentazione • • Dimmer impostato a 0 Incrementare i valori del canale dimmer Il proiettore non illumina • • LED difettoso/i Sostituire scheda LED •... - Page 42 ECLIPSEFRESNELJTW...
- Page 43 ECLIPSEFRESNELJTW...
- Page 44 MUSIC & LIGHTS S.r.l. Via Appia, km 136,200 - 04020 Itri (LT) - ITALY Phone +39 0771 72190 - Fax +39 0771 721955 www.musiclights.it - email: info@musiclights.it ISO 9001:2008 Certified Company...
Need help?
Do you have a question about the ECLIPSEFRESNELJTW and is the answer not in the manual?
Questions and answers