Vacuum tube collector based on the heat pipe principle for the utilisation of solar energy (13 pages)
Summary of Contents for Viessmann Vitosol 100-FM SV1F
Page 1
Installation, Operating and Service Instructions
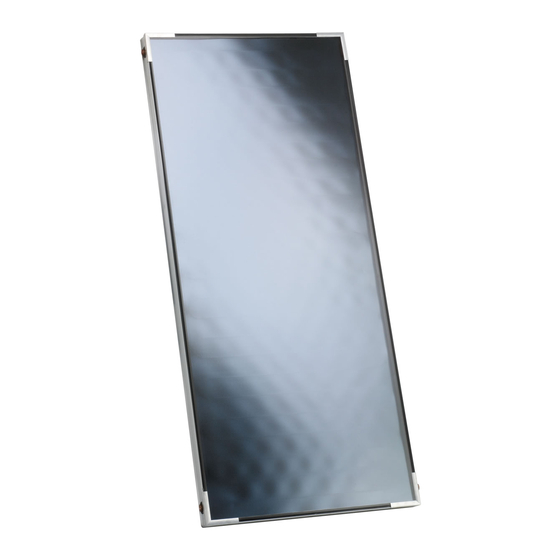
 Vitosol-FM Models SV, SH Flat plate solar collectors for sloped roofs, flat roofs, walls and freestanding installation 100-FM and 200-FM VITOSOL Vitosol 100-FM Model SV1F Vitosol 200-FM Vitosol 100-FM Model SV2F Model SH1F Vitosol 200-FM Model SH2F IMPORTANT Read and save these instructions...
Failure to do so renders warranty The use of Viessmann heat transfer medium “Tyfocor- null and void. HTL” or equivalent is strongly recommended. In areas with extremely cold climate conditions, where ...
Table of Contents Vitosol 100-FM/200-FM Installation, Operating and Service Page Safety Safety, Installation and Warranty Requirements ....2 Important Regulatory and Installation Requirements ..4 General Information About these Installation Instructions ......5 Product Information ..........5 Intended Use ............5 Notes on Installation..........
Replacement and wear parts which have not been tested together with the solar system can compromise its function. Installing non-authorized components and non-approved modifications/conversion can compromise safety and may infringe our warranty conditions. For replacement, use only original Viessmann replacement parts or those which are approved by Viessmann.
General Information Vitosol 100-FM/200-FM Installation, Operating and Service About these Installation Instructions Take note of all symbols and notations intended to draw attention to potential hazards or important product information. These include “WARNING”, “CAUTION”, and “IMPORTANT”. See below. Warnings draw your attention to the presence of WARNING potential hazards or important product information.
Filling the solar heating system with Viessmann heat transfer fluid “Tyfocor-HTL” is highly recommended. The collectors must be securely mounted so that the ...
Installation on Sloped Roofs Vitosol 100-FM/200-FM Installation, Operating and Service Overview of System Components (SV and SH Models) Sloped roof mounting hardware 1 Roof bracket 2 Joining element for mounting rail 3 Mounting rail, 43” (1093 mm) or 85½” (2170 mm) 4 Washer, Ø...
Installation on Sloped Roofs Vitosol 100-FM/200-FM Installation, Operating and Service Installing the Mounting Frames Install the panel array level or slightly inclined approximately ½” (10 mm) towards the connection side to ensure complete venting. Always locate an air vent at the highest point in the piping.
Page 9
Installation on Sloped Roofs Vitosol 100-FM/200-FM Installation, Operating and Service Installing the Mounting Frames (continued) Installation dimensions for Vitosol-FM, Model SV collector panels Dimensions for model SV collectors Number of collectors Dimension A inches (mm) (1019) (1019) (1019) (1019) (1019) (1019) (1019) (1019)
Page 10
Installation on Sloped Roofs Vitosol 100-FM/200-FM Installation, Operating and Service Installing the Mounting Frames (continued) Installation dimensions for Vitosol-FM, Model SH collector panels Dimensions for model SH collectors Number of collectors Dimension A inches 190c 381b 476c 953b (mm) (7266) (14532) (19376) (2422)
Page 11
Installation on Sloped Roofs Vitosol 100-FM/200-FM Installation, Operating and Service Installing the Mounting Frames (continued) Secure mounting brackets A on site with factory supplied screws to the roof joist. For dimensions see ‘Installing the mounting frames from pages 9 and10. Legend A Mounting brackets B Collector...
Page 12
A Clamping brackets with hole size Ø 5/16 in. (Ø 9 mm) It is recommended that a min. of 4 clamping brackets are required per support rail E (clamping brackets are ordered separately from Viessmann) B Collector C Mounting rail...
Page 13
Installation on Sloped Roofs Vitosol 100-FM/200-FM Installation, Operating and Service Installing the Mounting Frames (continued) Installing the mounting rails IMPORTANT IMPORTANT Make sure the mounting rail profile is as shown. The Ensure the upper and lower mounting rails are square single slot in the rail must face upwards.
Installation on Sloped Roofs Vitosol 100-FM/200-FM Installation, Operating and Service Installing the Solar Collectors CAUTION Never step, lean or place objects on the collectors. IMPORTANT Interconnecting pipes must be free from damage and contamination. Lubricate all plug-in joints (O-ring seals) on the collectors.
Installation on Flat Roofs or Freestanding Installation Vitosol 100-FM/200-FM Installation, Operating and Service Overview of System Components (Model SV) Legend 1 Collector support for angle of inclination 25° to 60° 2 Base rail 3 Adjustable support, lower part 4 Adjustable support, upper part (2-part) 5 Washer Ø...
Installation on Flat Roofs or Freestanding Installation Vitosol 100-FM/200-FM Installation, Operating and Service Overview of System Components (Model SH) Dimensions: Legend a 3” (80 mm) A Collector support for angle of inclination 25 to 45° b Ø 0.4” (11 mm) B Collector support for angle of inclination ...
2380 mm sin (180°- (45°+ 23.5°)) sin 23.5° z= 2380 mm sin 111.5° sin 23.5° z= 218.6 in. (5553 mm) Refer to Vitosol System Design Guide for more information on calculating “z”. Note: Contact Viessmann Solar Tech Support for assistance with calculating distance “z”.
Installation on Flat Roofs or Freestanding Installation Vitosol 100-FM/200-FM Installation, Operating and Service Installing the Collector Supports and Adjustment Angle of Inclination 1. Secure the adjustable support (lower) 3 to the bottom base rail 2 with bolt 7, nut 6 and washer 5.
Installation on Flat Roofs or Freestanding Installation Vitosol 100-FM/200-FM Installation, Operating and Service Installing Freestanding Installation on Substructures CAUTION Legend A Substructure rails (field supplied) Any welds or connections to the existing substructure must be supervised by a professional structural engineer. Note: See page 15 or 16 (depending on model) for numbered component description.
Page 20
Installation on Flat Roofs or Freestanding Installation Vitosol 100-FM/200-FM Installation, Operating and Service Installing Freestanding Installation on Substructures (continued) IMPORTANT Install the collector panel so that the rating plate C side of the first and last collector is on the outside (note sticker)! If only one collector is to be installed, connect the piping opposite the rating plate C side.
Installation on Flat Roofs or Freestanding Installation Vitosol 100-FM/200-FM Installation, Operating and Service Installing Freestanding Installation (with ballast - for Model SH only) Note: Use the base rails as a drilling template. 1. Observe the max. load and distance from the edge of the roof for on-site substructure.
Page 22
Installation on Flat Roofs or Freestanding Installation Vitosol 100-FM/200-FM Installation, Operating and Service Installing Freestanding Installation (with ballast - for Model SH only) (continued) Legend qW Mounting crossbars Note: See page 16 for numbered component description. Secure two mounting crossbars qW diagonally side by side to the adjustable supports, respectively for between one and six collectors.
Page 23
Installation on Flat Roofs or Freestanding Installation Vitosol 100-FM/200-FM Installation, Operating and Service Installing Freestanding Installation (with ballast - for Model SH only) (continued) Position the first collector into the retaining bracket 9 and push right up to the spacer lip of the connecting brace.
Page 24
Installation on Flat Roofs or Freestanding Installation Vitosol 100-FM/200-FM Installation, Operating and Service Installing Freestanding Installation (with ballast - for Model SH only) (continued) Model SH Secure against slipping and lifting*1 Secure against lifting only *2 Installation height above <26 26-66 66-328 <26...
Installation on a Wall Vitosol 100-FM/200-FM Installation, Operating and Service Overview of System Components (Model SH) Legend Collector support Base rail Adjustable support Gusset plate with circular hole Gusset plate with slot Washer, Ø 8.4 mm Hexagon nut M8 Hexagon bolt M8 x 20 Hex bolt M8 x 25 Retaining bracket Clamping bracket...
Installation on a Wall Vitosol 100-FM/200-FM Installation, Operating and Service Installing the Solar Collectors Dimensions 1. Use the base rails 2 as a drilling template. a 18 ” (481 mm) Secure the base rails with gusset plate with circular b 75f” (1920 mm) hole 4 at the top of the wall.
Page 28
Installation on a Wall Vitosol 100-FM/200-FM Installation, Operating and Service Installing the Solar Collectors (continued) Legend A Collector connection B Interconnection pipe qE C Spacer lip on support brace E D Rating plate E Support brace qW F Clamping brackets qQ a 9”...
Note: This piping configuration requires 1x short collectors) connecting pipe on page 7. B Collector temperature sensor location * must be ordered separately from Viessmann. C Air vent location D Supply pipe from collector Arrow directions are to ensure balanced flow throughout E Return pipe to collector the collectors.
Page 30
For the piping connecting the collectors to the Solar CAUTION Divicon pumping station, Viessmann recommends the use of commercial copper pipe and bronze fittings, or Do not use galvanized pipes, galvanized fittings or non-galvanized steel pipe. (PEX or other plastic pipes...
Hydronic Connections Vitosol 100-FM/200-FM Installation, Operating and Service Installing the General Connection Set and Collector Temperature Sensor CAUTION 1. Insert the plugs qZ until they bottom out, and secure with profile clips qE. The collectors may be damaged if the solar heating 2.
Additional Installation Information Vitosol 100-FM/200-FM Installation, Operating and Service Sample System Layout Legend WARNING Solar collector Solar-Divicon (pumping station) The domestic hot water temperature must be limited Overflow container to 140°F (60°C) by installing a mixing device, Expansion tank e.g. a thermostatic anti-scald mixing valve. Solar manual filling pump (optional) System fill manifold valve Solar brass elbow, comes with sensor well...
Do not carry out any soldering work at or near the Fill the solar heating system with Viessmann heat collector. transfer medium “Tyfocor-HTL” or suitable fluid as described on page 6.
Expansion factor β The required volume is determined by the following β = 0.13 for Viessmann heat transfer factors: medium from -4 to 248°F (-20 to 120°C) – Expansion of the heat transfer medium in its liquid state Liquid seal in the expansion tank [4% of the –...
Additional Installation Information Vitosol 100-FM/200-FM Installation, Operating and Service System Fluid Expansion Tank Pre-charge Pressure Calculator The collector circuit must be protected during system CAUTION stagnation (emergency shutdown) such that no heat transfer fluid can escape from the pressure relief valve or The pressure relief valve must be piped to the overflow the air vent located at the collector.
Additional Installation Information Vitosol 100-FM/200-FM Installation, Operating and Service Pre-commissioning Checklist Has the solar circuit been installed in accordance with the circuit diagram and all relevant standards? Have the collectors been installed with a slight upward gradient towards the piping side? Have the supply and return connections been carried out and pressure tested? Have the electrical connections been carried out...
Start-up Vitosol 100-FM/200-FM Installation, Operating and Service Quick Start-up Start-up steps 1. Check and adjust nitrogen cushion pressure in the diaphragm expansion tank D. Calculate cushion pressure based on formula (see page 37) and charge cushion pressure as required. 2. Thoroughly flush system through the system fill manifold F to remove debris and flux residue (see page 40).
Start-up Vitosol 100-FM/200-FM Installation, Operating and Service Set Expansion Tank Pre-charge Pressure 1. Cover the collectors with tarpaulin (if necessary). 2. If the system has already been filled, release fluid to ensure the system fluid pressure gauge indicates 0 psi (0 bar), or isolate the expansion tank from the system using the service valves and reduce the fluid pressure at the expansion tank connection.
The glycol PRV blow-off and drain pipe should terminate in an open container capable of holding the maximum possible collector fluid volume. The Viessmann compact mobile charging station is highly recommended for fast effective flushing, filling and air removal.
Start-up Vitosol 100-FM/200-FM Installation, Operating and Service Vent the Solar Heating System 1. The flow check valves on the Solar Divicon can be bypassed by turning the combination thermometer/ isolation valve 45°. Leave them in this position while starting up system. Open the air vent valve at the top of the system and bleed air from the air separator in the Solar Divicon.
Start-up Vitosol 100-FM/200-FM Installation, Operating and Service Check Switching Functions of the Solar Control Unit Refer to the Installation Instructions of the solar control unit. Check Electrical Connections Check the tightness of electrical connections and cable grommets. Check the cables for possible damage. Check Solar Fluid Flow Rate Flow Rate - Vitosol 100-FM / 200-FM Vitosol 100-FM / 200-FM recommended flow rates...
3 to 5 years. - supply temperatures - control functions Regular inspection and service by a qualified heating contractor is critical to the performance of the Viessmann Check freezing point and pH of the heat transfer Vitosol 100-FM and 200-FM. Neglected maintenance, medium annually e.g.
Maintenance Vitosol 100-FM/200-FM Installation, Operating and Service Check Safety Equipment Check for proper operation of all safety equipment take into account local jurisdiction. Shut Down Solar Heating System IMPORTANT Shut down of the solar system must always be avoided when the sun is shining on the collectors. If possible only shut down the system on cloudy days or in the morning or evening.
Check the freezing point of Tyfocor HTL heat transfer medium with a Viessmann glycol hydrometer tester or approved alternate refractometer. CAUTION Never mix Tyfocor HTL with water or alternate heat transfer fluid.
7571217 SH2F 7561684 Ordering Replacement Parts: Please provide Model and Serial Number from rating plate when ordering replacement parts. Order replacement components from your Viessmann distributor. Collector Assembly 0001 Interconnection pipe (each) 0002 Connection pipe (short), with no profile clamp...
Page 48
Ordering Replacement Parts: Please provide Model and Serial Number from rating plate when ordering replacement parts. Order replacement components from your Viessmann distributor. Parts 001 Copper pipe adaptor, ¾” x 4” 002 Copper pipe, Ø 22 l=60 mm Other Parts (not illustrated)
Page 49
Additional Information Vitosol 100-FM/200-FM Installation, Operating and Service Parts List (continued) Solar Expansion Tanks Installation Fittings, 7743295 for VITOSOL-FM solar collectors Parts 003 Adaptor ¾” G female - ¾” NPT male 004 Gasket, 17.2 x 23.9 x 1.5 Other Parts (not illustrated) 0401 Technical literature set 0402 Parts List 18L, 25L, 40L and 50L Tank...
Additional Information Vitosol 100-FM/200-FM Installation, Operating and Service Technical Data Vitosol 100-FM Model SV1F SH1F Gross area 27.0 (2.51) 27.0 (2.51) Absorber area 25.0 (2.32) 25.0 (2.32) Aperture area 25.1 (2.33) 25.1 (2.33) Max. stagnation temperature ºF (ºC) 293 (145) 293 (145) Permiss.
Page 51
Vitosol 100-FM/200-FM Installation, Operating and Service...
Page 52
Vitosol 100-FM/200-FM Installation, Operating and Service Scan for digital copy of this document...
Need help?
Do you have a question about the Vitosol 100-FM SV1F and is the answer not in the manual?
Questions and answers