
Related Manuals for Perle IOLAN SDS4 W


Summary of Contents for Perle IOLAN SDS4 W
- Page 1 IOLAN SDS4 W Port Hardware Installation Guide Updated: June 2017 Version A1-26.06.2017 www.perle.com Document Part#:5500414-10...
- Page 2 Modifications to this product not authorized by Perle could void the FCC approval and negate your authority to operate the product. Perle reserves the right to make changes without further notice, to any products to improve reliability, function, or design.
-
Page 3: Table Of Contents
IOLAN SDS4 W (Back View) ........ -
Page 4: Preface
SDS4 W. It covers hardware features as well as installation and operation of the switch. This document does not cover how to configure your Perle IOLAN SDS4 W. Information to configure your Perle IOLAN SDS4 W can be found in the IOLAN SDS/SCS/ STS User’s Guide Package Content •... -
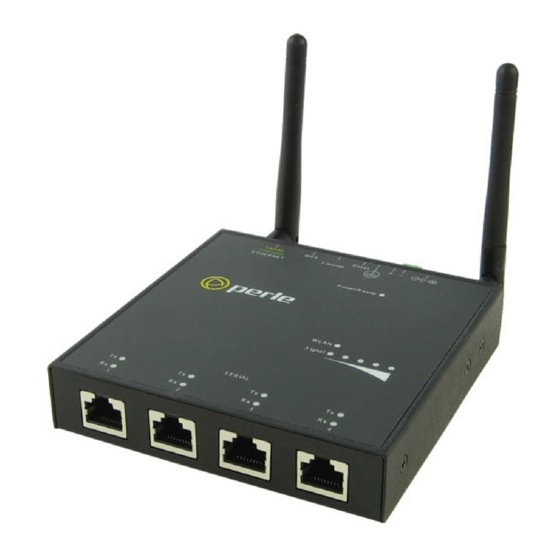
Page 5: Overview
Overview This chapter discusses the following topics: IOLAN SDS4 W IOLAN SDS4 W (Back View) Ethernet and Serial Port Button/Switch Functions LED Indicators Ethernet Port Status Indicators Installation IOLAN SDS4 W IOLAN SDS4 W Hardware Installation Guide... -
Page 6: Iolan Sds4 W (Back View)
Button/Switch Functions Reset Button To reboot the IOLAN SDS4 W insert a paper clip into the inset hole labeled as Reset and gently press inwards and release. The Power/Ready LEDs on the IOLAN SDS4 W will go On and then momentarily Off when released to show that the unit has been rebooted. -
Page 7: Led Indicators
WLAN State Description Green - solid A wireless connection has been established Green - flashing Data is being transmitted over the wireless network no wireless connection established IOLAN SDS4 W Hardware Installation Guide... -
Page 8: Ethernet Port Status Indicators
Ethernet Port Status Indicators Port Link / Speed (Green, Amber and Yellow LEDs) State Description Green 1000 Mbps (flashes with activity) Green/Amber 100 Mbps (flashes with activity) Amber 10 Mbps (flashes with activity) No LAN connection IOLAN SDS4 W Hardware Installation Guide... -
Page 9: Installation
Warning: In case of malfunction or damage, no attempts at repair should be made. Do not dismantle the product. All repairs need to be made by a qualified Perle representative. Warning: Transient protection shall be provided that is set at a level not exceeding 140% of the peak rated voltage value at the supply terminals to the equipment. - Page 10 Plug the power adapter into a power socket and connect the barrel connector end into the IOLAN SDS4 W. The IOLAN SDS4 W will perform a power up sequence. The Power/ Ready LED should show solid green. See LED Indicators for power up sequence.
-
Page 11: Connecting The Console Port
The console port is an 8‐pin male connector (with DTE pinouts). 1. Connect an DB9 cable directly from the IOLAN SDS4 W to the COM port on your PC. 2. Choose Start > Control Panel > Systems or equivalent on the Windows Operating System you are using. -
Page 12: Connecting Data Ports
10/100/1000 RJ45 port on the network hub/switch. 2. Once the IOLAN SDS4 W is connected and the link is established, the link LEDs will turn on. These LEDs will indicate whether you have a 10,100 or 1000 Mb/s link to your hub/switch. -
Page 13: Configuring The Iolan
SSH, SNMP or the Web interface. Web Device Manager The Perle Web Device Manager is an embedded Web based application that provides an easy to use browser interface for configuring ans managing the IOLAN. The IOLAN SDS4 W can be accessed through any standard desktop web browser. The IOLAN must have a valid IP address. -
Page 14: Appendix A - Technical Specifications
Contact information for the Perle Technical Assistance Center (PTAC) can be found at the link below. https://www.perle.com/support_services/support_request.shtm Warranty / Registration This product is covered by the Perle IOLAN SDS Warranty. Details can be found at: https://www.perle.com/support_services/warranty.shtml IOLAN SDS4 W Hardware Installation Guide... -
Page 15: Appendix B - Mechanical Drawing
Appendix B - Mechanical Drawing Din Rail IOLAN SDS4 W Hardware Installation Guide... -
Page 16: Appendix C - Sample Label
Appendix C - Sample Label IOLAN SDS4 W Hardware Installation Guide... -
Page 17: Appendix D - Cabling And Connectors
Note: For EIA‐232 these switches must be in the OFF position (default) Ethernet Cable The 10/100/1000BaseT(X) port is located on the back of the IOLAN SDS4 W. This Ether‐ net port will automatically adjust depending on the type of Ethernet cable used (straight‐... -
Page 18: Appendix E - Iolan Maintenance
Appendix E - IOLAN Maintenance • Ensure there is clearance of 50.8mm (2 inches) on all sides of the IOLAN SDS4 W to provide proper airflow through the unit • Do not use solvents or cleaning agents on this unit •... -
Page 19: Appendix E - Iolan Maintenance
Appendix E - IOLAN Maintenance • Ensure there is clearance of 50.8mm (2 inches) on all sides of the IOLAN SDS4 W to provide proper airflow through the unit • Do not use solvents or cleaning agents on this unit •... -
Page 20: Appendix F - Din Rail Mounting
Appendix B - Mechanical Drawing This appendix provides instructions on the following: • Mounting the IOLAN SDS4 W on a DIN Rail • Removing the IOLAN SDS4 W from the DIN Rail Mounting the IOLAN on a DIN Rail 1. Screw the DIN rail clip to the back of the SDS4 W.
Need help?
Do you have a question about the IOLAN SDS4 W and is the answer not in the manual?
Questions and answers