Table of Contents
Advertisement
A/C-D/C
Battery Backup
Sump Pump System
Instruction Manual & Safety Warnings
Table of Contents
Instructions
1
1
1
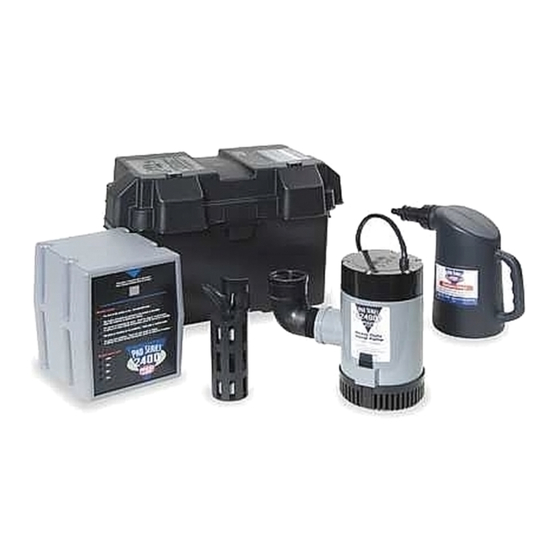
Items included in system
2
2
2
2
Installation options
3
4
5
Direct discharge for narrow sumps 6
Connection to existing discharge
7
8,9
Positioning the float switch
9
Connecting the pump
9
10
10
10
Lights and Alarms
Silencing the alarm
10
Battery fluid is low
11
Battery problem
11
Cleaning battery terminals
11
12
Power failure
13
Pump or fuse failure
13
Pump was activated
14
Replacing the pump
14
Battery power level
14
Testing the System
Testing the float switch
15
Using the Remote Notification
Remote Terminal
15
Remote Alarm
15
USB Data Port
15
Connect Modules
15
Maintenance Check List
15
Parts & Service Information
Technical support
15
16
17
Other Products
18
IMPORTANT: Even if you have the Pro Series backup sump pump
system installed by someone else, you must read and follow the
safety information contained in this manual. Failure to do so
could result in property damage, serious injury, or death.
Advertisement
Table of Contents

Related Manuals for Glentronics PHCC 2400 Pro Series


Summary of Contents for Glentronics PHCC 2400 Pro Series
-
Page 1: Table Of Contents
A/C-D/C Battery Backup Sump Pump System Instruction Manual & Safety Warnings Table of Contents Important Safety Warnings and Battery Instructions Replacing the pump Instructions Battery power level Control Unit Connections Electrical precautions Positioning the float switch Testing the System Battery preparation Connecting the pump Testing the float switch Battery precautions... -
Page 2: Important Safety Warnings And
• ALWAYS remove the power cord from the Risk of electrical and fire hazard. May result electrical outlet before connecting or When service is required, contact Glentronics To help reduce these risks, observe the in death, serious injury, shock or burns. To disconnecting the battery cables. -
Page 3: Introduction
The internal construction of some wet cell batteries may not be compatible with this system. be connected to the Pro Series 2400 system by Glentronics can not guarantee the compatibility of purchasing a second battery and acid pack, as The PHCC Pro Series 2400 A/C-D/C backup sump other brands of batteries. -
Page 4: Pump & Pipe
Pump & Pipe NORMAL SUMP PIT Installation Instructions INSTALLATIONS FLOOR FLOOR JOIST There are two basic methods that can be used to JOIST SLOPE install the pump, a direct discharge to the SLOPE PIPE PIPES DOWN outside of the building, or a connection to an DOWN RIGID 1-1/2"... -
Page 5: Direct Discharge To Outside
Pump & Pipe the pump to any existing pipes; it should be pipe in the installation (including vertical placed on the floor of the sump. A brick may and horizontal runs), install a check valve in Installation Instructions be placed under the pump if there are rocks place of the union. -
Page 6: Connection To Existing Discharge
Pump & Pipe Installation Instructions INSTALLATION B: CONNECTION TO AN EXISTING DISCHARGE PIPE (Diagram B) Depending on your installation requirements, PVC pipe lengths will vary. Cut the pipes and assemble them as shown in photo #7. Do not cement them together until you are sure they are cut to the correct lengths. - Page 7 Pump & Pipe attached, simply press the rest of the pump required. However, a check valve will prevent the arrow pointing up or it will not prevent onto the mounted strainer. water from flowing back into the pit when the the backflow of water.
-
Page 8: For Narrow Sumps
Pump & Pipe the main AC pump with two (2) stainless steel pipe attached to the Pro Series pump. Make down toward the backup pump. Now connect hose clamps. Position the bracket so the sure it is installed with the arrow pointing up the bottom of the assembly to the check valve Installation Instructions bottom of the “L”... -
Page 9: Battery Instructions
• The internal construction of some wet cell TO FILL THE BATTERY batteries may not be compatible with this system. Glentronics can not guarantee the 1. Remove the cover of the battery box by compatibility of other brands of batteries. -
Page 10: Control Unit Connections
top off each cell equally. It is important to Battery Maintenance the battery. Do not place anything on top of the have all the cells filled equally or the control unit. (Diagram F) battery will not operate properly. The acid Measuring the battery fluid level is one of the 1. -
Page 11: Installing The Battery Fluid Sensor
Check the connection of the float switch on the Understanding the WARNING back of the control unit. Make sure the float Warnings & Alarms 4. If you are not using the Pro Series 2200 switch is firmly connected. Standby battery, you cannot use the The Pro Series control unit features a series of 2. - Page 12 Remove • If the 5th light on the controller is also on, system to activate. Call the Glentronics service check your main pump for failure. The backup department for instructions or replace the battery.
-
Page 13: Replacing The Battery
Review the safety instructions on page 1. (+) post of the battery and slide the switch on gas that may have been emitted from the the front of the controller panel to battery. 1. Unplug the power cord from the wall outlet. “Maintenance Free Battery”. - Page 14 You can silence the “AC power failure” alarm for using a surge protector.) If the fuse blows 24 hours by pressing the RED button for five (5) again, call Glentronics technical support at seconds. The alarm will be silence, but the light 800-991-0466.
- Page 15 BLACK wire to the 1. Unplug the Pro Series control unit from the Then call Glentronics technical support for POSITIVE (+) post. Tighten the wing nuts. wall outlet. instructions at 800-991-0466. You may need to 11.
- Page 16 You can receive technical support, parts, or connection is needed to activate the alarm. stopped, the alarm will go off temporarily. Wait service information by calling Glentronics, Inc. The security system will provide two connection for the pump to stop pumping, and then push at 800-991-0466, or by visiting the Pro Series terminals.
-
Page 17: Troubleshooting Guide
Troubleshooting Guide DANGER Read safety warnings & instructions before attempting any repairs or maintenance. Potential Cause BATTERY FLUID LOW Solutions The battery fluid is low ......Add distilled water to each cell of the battery The fluid sensor is installed improperly . -
Page 18: Warranty
• 3 years from the date of installation, when used intermittently as a sump pump The defective product must be returned directly to the factory, postage prepaid with the original bill of sale or receipt to the address listed below. GLENTRONICS, INC., at its option, will either repair or replace the product and return it postage prepaid. - Page 19 CHECK OUT THESE OTHER PHCC PRO SERIES PRODUCTS AT www.stopflooding.com AC PUMPS FLOAT SWITCHES CHECK VALVES WATER ALARMS Industrial grade pumps for the residential What’s the most common reason your main What’s a Klunkless Check Valve™? Minimize the risk of water damage market AC pump fails? If you’ve spent any time in your basement,...
- Page 20 ©2013 Glentronics, Inc. 1806114 05/17...
Need help?
Do you have a question about the PHCC 2400 Pro Series and is the answer not in the manual?
Questions and answers
how long will a single battery last with constant use
A single battery lasts up to 16 hours of continuous pumping for the Glentronics PHCC 2400.
This answer is automatically generated