Table of Contents
Advertisement
Quick Links
1. IMPORTANT INFORMATION
WARNING:
TO PREVENT FIRE OR SHOCK HAZARD, DO NOT EXPOSE THIS MONITOR TO LIQUIDS OR MOISTURE.
HIGH VOLTAGE EXISTS ON THIS MONITOR. DO NOT REMOVE THE MONITOR'S COVER.
CAUTION:
1. Keep Monitor away from excessive dust, high temperature, moisture or direct sunlight.
2. Use well ventilated area and do not cover ventilation openings.
3. Unauthorized modification to this equipment, substitution or the use of an unshielded connecting
cable may cause excessive interference.
4. When the monitor is not in use disconnect it from the mains power supply.
5. If the picture display is abnormal in any way, disconnect from the main power by turning the power
switch OFF. Check and ensure the installation is correct. Then turn the POWER switch back ON.
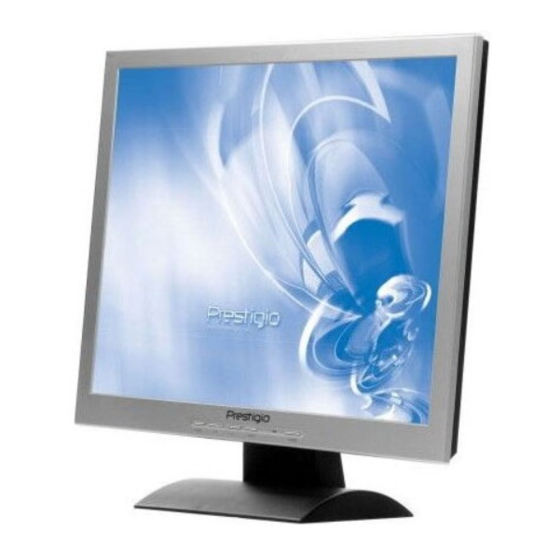
PRESTIGIO P371
Prestigio P371
Users manual
1
Advertisement
Table of Contents

Subscribe to Our Youtube Channel
Related Manuals for Prestigio P371


Summary of Contents for Prestigio P371
-
Page 1: Users Manual
Prestigio P371 Users manual 1. IMPORTANT INFORMATION WARNING: TO PREVENT FIRE OR SHOCK HAZARD, DO NOT EXPOSE THIS MONITOR TO LIQUIDS OR MOISTURE. HIGH VOLTAGE EXISTS ON THIS MONITOR. DO NOT REMOVE THE MONITOR’S COVER. CAUTION: 1. Keep Monitor away from excessive dust, high temperature, moisture or direct sunlight. -
Page 2: Safety Instructions
D If the product does not operate normally when the operating instructions are followed, adjust only those controls that are covered by the operating instructions since improper adjustment of other controls may result in damage and will often require extensive work by a qualified technician to restore the product to normal operation. PRESTIGIO P371... -
Page 3: Product Specifications
C to 40 Humidity Analog 30-80% (non-condensing) RGB analog Frequency Safety & EMI FH: 31-82 KHz FV:50-75 Hz Max. Resolution UL, CE, FCC 1280*1024 @75Hz *Specifications are subject to change Input Connector Analog RGB 15-pin mini D-sub Power AC Jack PRESTIGIO P371... -
Page 4: Application Video Timing
60.00(N) VESA 1024 X 768 56.48(N) 70.10(N) VESA 1024 X 768 60.02(P) 75.00(P) VESA 1024 X 768 60.24(N) 74.93(N) Macintosh 1152 X 864 67.50(P) 75.00(P) VESA 1152 X 870 68.68(N) 75.06(N) Macintosh 1280 X 1024 64.00(P) 60.00(P) VESA PRESTIGIO P371... - Page 5 4~5. /\ \/ (Adjust the value) Use both buttons to toggle between selections in the On Screen Display (OSD), or to adjust settings (i.e. volume, brightness, etc). 6. MENU “MENU” Use the MENU key to display the OSD (On-Screen Display) menu of monitor. PRESTIGIO P371...
-
Page 6: Back Panel And Connectors
5. BACK PANEL AND CONNECTORS 1. RGB input (PC in) The D-Sub 15-pin port is for RGB analog signal input. 3 .AC The AC port is for power cord. PRESTIGIO P371... -
Page 7: Installation Procedure
IV. Turn on the computer. V. Push the power switch button located at the lower right on the underside of the monitor. The power LED light indicates if the monitor is on. VI. Install the desktop stand. As below: PRESTIGIO P371... -
Page 8: On Screen Display Functions
Exit 5. OSD H. Position V. Position OSD Timer Exit 6. Language English, Deutsch, Francais, Espanol, Italiano, Simplified Chinese, Traditional Chinese, Japanese Exit 7. Recall Color Recall Recall All Exit 8. Miscellaneous Sharpness Display Information Exit 9. Exit PRESTIGIO P371... -
Page 9: Auto Adjust
MENU button to enter one of the sub-menus: H Position, V Position, Pixel Clock, or Phase settings. After adjusting the sub- item, press the MENU button and then press the AUTO button to exit. Please refer to the picture below: PRESTIGIO P371... - Page 10 Press the MENU button to enter the OSD function. Use the /\ or \/ buttons to choose Color, then press the MENU button to enter one of the sub-menus: 9300, 6500, 5800, or User Preset settings. After adjusting the sub-item, press the MENU button and then press the AUTO button to exit. Please refer to the picture below: PRESTIGIO P371...
- Page 11 Blue values and then press the AUTO button to exit. Please refer to the picture below: Press the /\ or \/ buttons to adjust the value of Red. Press the /\ or \/ buttons to adjust the value of Green. Press the /\ or \/ buttons to adjust the value of Blue. PRESTIGIO P371...
- Page 12 Press the MENU button to enter the OSD function menu. Use the /\ or \/ buttons to choose the language you need. When you have chosen your language, press the MENU button and then press the AUTO button to exit. Please refer to the picture below: PRESTIGIO P371...
- Page 13 Sharpness or Display Information settings. After adjusting the sub-item, press the MENU button and then press the AUTO button to exit. Please refer to the picture below: Choose the sharpness setting from 1~5. PRESTIGIO P371...
- Page 14 Enter the Display Information to see the resolution and frequency settings of the monitor. 9) Exit Choose Exit to exit the OSD menu at any time. PRESTIGIO P371...
-
Page 15: Troubleshooting
1. Are Brightness and Contrast set 1. Adjust brightness and contrast to your too dark too low? preference. Display image is 1. Does the Horizontal or Vertical 1. Re-adjust to your preference. too large or small control need adjusting? PRESTIGIO P371... - Page 16 9. ACCESSORIES VGA CABLE X 1 POWER CORD X 1 USER’S MANUAL X 1 PRESTIGIO P371...
Need help?
Do you have a question about the P371 and is the answer not in the manual?
Questions and answers