
Related Manuals for Digital Equipment DECserver 700-08


Summary of Contents for Digital Equipment DECserver 700-08
- Page 1 DECserver 700 Site Preparation and Maintenance (Hardware Owner’s Manual) Part Number: EK-DSRVW-MG. B01...
- Page 2 NOTICE — Class A Computing Device: This equipment generates, uses, and may emit radio frequency energy. The equipment has been type tested and found to comply with the limits for a Class A computing de- vice pursuant to Subpart J of Part 15 of FCC Rules, which are designed to provide reasonable protection against such radio frequency interference.
- Page 3 DECserver 700 Site Preparation and Maintenance (Hardware Owner’s Manual) February 1993 This manual, in conjunction with the DECserver 700 Hardware Installation Card , describes how to install the DECserver 700 network access server and how to verify its operation. This manual also describes the controls and indicators.
- Page 4 EK-DSRVW-MG. B01 The information in this document is subject to change without notice and should not be construed as a commitment by Digital Equipment Corporation. Digital Equipment Corporation assumes no re- sponsibility for any errors that may appear in this document.,...
-
Page 5: Table Of Contents
Contents Preface Hardware Overview Models ..........1–1 Controls, Indicators, and Connectors . - Page 6 3–5 Installing Serial Cables and Devices on the DECserver 700-16 3–9 Installing Serial Cables and Devices on the DECserver 700-08 3–11 Cabling Requirements ....... .
- Page 7 ....... . . 7–5 Figures 1–1 DECserver 700-08 Rear View ......1–2 1–2 DECserver 700-16 Rear View .
- Page 8 Cables and Adapters for the DECserver 700-16 ... . 3–10 3–2 Cables and Adapters for the DECserver 700-08 ... . 3–11 3–3 Maximum Communications Distances —...
- Page 9 Preface Intended Audience This manual, in conjunction with the DECserver 700 Hardware Installation Card, is intended for the hardware installer. The installer is responsible for ensuring that the hardware is installed and tested. The DECserver 700 Hardware Installation Card shows how to install the DECserver 700 when the site is verified and the cables and devices are in place.
- Page 10 Associated Documents DECserver 700 Hardware Installation Card Shows how to install the DECserver 700 when the site is verified and the cables and devices are in place. DECserver Network Access Software Installation (op-sys) Explains how to install the DECserver 700 distribution software, how to es- tablish downline load hosts, and how to verify the DECserver 700 system installation.
-
Page 11: Decserver 700 Controls
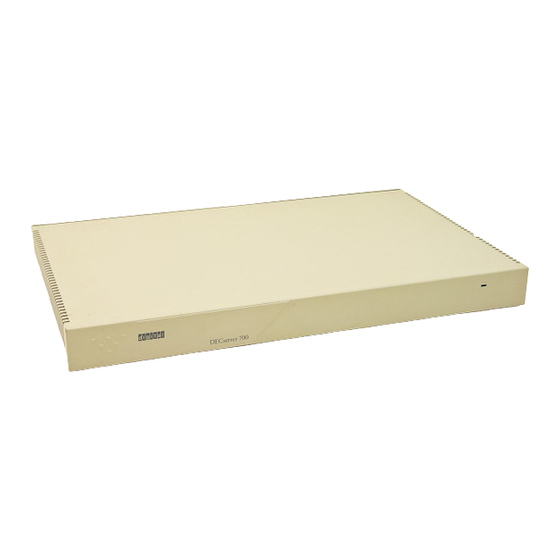
There are two DECserver 700 models: DECserver 700-08 DECserver 700-16 1.1 Models The DECserver 700-08 supports EIA-232-D/V.24/V.28 full modem control on eight 25-pin male D-connectors. Use this model to connect devices that require full du- plex, asynchronous control (for example: modems). 1–1... -
Page 12: Decserver 700-08 Rear View
Figure 1–1 shows a rear view of the DECserver 700-08. The DECserver 700-16 sup- ports EIA-423-A and DEC 423 data-leads on 16 MJ8 connectors. Use this model to connect devices requiring data-leads for operation (for example: terminals, printers, and personal computers in terminal emulation mode). You can connect the DEC- server to modems that do not require the full complement of signals provided by the DECserver 700-08, using special adapters (Section 3.3). -
Page 13: Decserver 700-16 Rear View
Figure 1–2 shows a rear view of the DECserver 700-16. Figure 1–2: DECserver 700-16 Rear View System reset Seven-segment Ethernet switch display select switch Power receptacle Serial ports 10BaseT Ethernet Standard System connector Ethernet OK LED Network connector activity LED LKG-5568-91I 1.2 Controls, Indicators, and Connectors All of the DECserver 700 controls, indicators, and connectors are located on the rear... - Page 14 Table 1–1 describes the DECserver 700 controls. Table 1–2 and Table 1–3 describe the indicators, and Table 1–4 describes the connectors. For more information on the connectors, refer to Chapter 4. Table 1–1: DECserver 700 Controls Control Description System reset switch On power up, press this switch until E appears on the seven-segment display.
-
Page 15: Decserver 700 Connectors
DECserver 700 Connectors Connector Description Serial port connectors These eight 25-pin male D-connectors connect EIA-232-D (DECserver 700-08) devices to the DECserver 700. Serial port connectors These 16 female MJ8 connectors connect data-lead de- (DECserver 700-16) vices to the DECserver 700. -
Page 16: Understand The Software Loading
1.3 Understand the Software Loading This section describes the two methods that the DECserver 700 access to load the software. 1.3.1 Loading from Flash RAM Once the DECserver 700 completes self-tests, the DECserver 700 checks for Flash RAM. If there is a valid Flash RAM, the DECserver 700 begins the boot sequence to load the software from Flash RAM. -
Page 17: Physical Requirements
Checking the Site The DECserver 700 can operate in an office environment and in a standard equip- ment rack located in a computer room or satellite equipment room. Regardless of where you install the DECserver 700, verify that all of the requirements in this sec- tion are met before beginning the installation. -
Page 18: Environmental Requirements
Table 2–2: Acoustics Parameter Measurement 4.1 bels (L = 3.8 bels) (bystander) 27 dBA Preliminary declared values per ISO 9296 and ISO 7779. Current values are available from Digital representatives. 2.2 Environmental Requirements Environmental requirements for temperature and humidity must be within the ranges shown in Table 2–3. -
Page 19: Electrical Requirements
2.3 Electrical Requirements The power at the electrical outlet must match the requirements shown in Table 2–4. The instructions assume that an appropriate AC power source is within 1.8 m (6.0 ft) of the DECserver 700. Table 2–4: Electrical Requirements Parameter DECserver 700 Line voltage... -
Page 21: Cabling The Site
Cabling the Site This chapter shows you how to install the cables and associated devices used by the DECserver 700. 3.1 Preinstallation Checks Before beginning the DECserver 700 installation, use the following checklist to make sure that the site preparation is complete: Arrangements have been made to connect the DECserver 700 Ethernet port to an Ethernet interface device (if required). -
Page 22: Installing The Ethernet Cables And Devices
(Figure 3–1) by connecting to: Another transceiver cable section. (You connect to another section by using a Etherjack Junction Box.) A DELNI local area network. A transceiver on a standard Ethernet coaxial cable for Digital Equipment Corporation baseband networks. 3–2 Site Preparation and Maintenance... -
Page 23: Standard Ethernet Coaxial Cable Connection
Figure 3–1: Standard Ethernet Coaxial Cable Connection Transceiver Standard Ethernet coaxial cable Transceiver cable DELNI Etherjack DECserver 700 DECserver 700 Transceiver cables DECserver 700 LKG-5570-91I Cabling the Site 3–3... -
Page 24: Installing The 10Baset Ethernet Cables And Devices
BN24F cable for local wiring requiring crossover BN25G cable for pin-to-pin building wiring Figure 3–2: 10BaseT Ethernet Connection Transceiver Standard Ethernet coaxial cable DETPR Transceiver cable DECserver 700-08 BN25G cable (Building wiring pin-to-pin) Wallplate DECserver 700-08 BN24F cable BN24F cable LKG-5571-91I 3–4... -
Page 25: Installing The Thinwire Ethernet Cables And Devices
3.2.3 Installing the ThinWire Ethernet Cables and Devices You can connect the DECserver 700 to a ThinWire Ethernet (Figure 3–3) as follows: 1. Connecting the MAU to the standard Ethernet connector 2. Connecting the ThinWire cable to the MAU Figure 3–3: Connecting the DECserver 700 to ThinWire Ethernet Cable ThinWire cable... - Page 26 CAUTION A ThinWire segment must begin and end in a 50-ohm terminator (H8225) as shown in Figure 3–4. Figure 3–5 shows the DECserver 700 connected as part of a DEMPR ThinWire Ethernet segment. NOTE The DEMPR and DESPR terminate the line internally in 50 ohms so that it is not necessary to use a 50-ohm ter- minator (H8225).
-
Page 27: Thinwire Ethernet Standalone Segment
Figure 3–4: ThinWire Ethernet Standalone Segment VAXstation 2000 Terminator T-connector Connector ThinWire Ethernet cable DECserver 700 Connector T-connector Connector ThinWire Ethernet cable DECrouter 250 Connector T-connector Connector ThinWire Ethernet cable VAXstation 2000 Connector T-connector Terminator LKG-5573-91I Cabling the Site 3–7... -
Page 28: Dempr Thinwire Connection
Figure 3–5: DEMPR ThinWire Connection DEMPR VAXstation 2000 ThinWire Ethernet cables DECrouter 250 DECrouter 250 DECrouter 250 DECserver 700-08 DECserver 700-08 Connector T-connector Terminator LKG-3153-91I 3–8 Site Preparation and Maintenance... -
Page 29: Installing Serial Cables And Devices On The Decserver 700-16
Figure 3–6: DEMPR Connections Terminators ThinWire cables LKG-2596-91I 3.3 Installing Serial Cables and Devices on the DECserver 700-16 The DECserver 700-16 can be configured by the software to support one of the two sets of signals. One set consists of: Clear to send (CTS) —... -
Page 30: Cables And Adapters For The Decserver 700-16
Data terminal ready (DTR) Before installing cables to the DECserver 700 ports, you must verify with the person managing the DECserver 700 what modem signals are supported. This information is necessary to determine what cables to use. For more information on the signals, refer to the Network Access Server Management manual. -
Page 31: Installing Serial Cables And Devices On The Decserver 700-08
3.4 Installing Serial Cables and Devices on the DECserver 700-08 Use the following cables to connect EIA-232-D devices to the DECserver 700-08 25-pin D-connectors: Table 3–2: Cables and Adapters for the DECserver 700-08 Cable Description BC17D Shielded Null-Modem Use this cable to connect asynchronous devices that use Cable modem signals. -
Page 32: Cabling Requirements
3.5 Cabling Requirements Table 3–3 shows the maximum communication distances for different types of cable used between the DECserver 700 and the Ethernet device. Table 3–4 shows the maximum cable lengths for a number of data rates using DECserver 700 supported line protocols. -
Page 33: Standard Ethernet Connection
Table 3–4: Maximum Cable Lengths — DECserver 700 to Devices Line Protocol Data Rate (b/s) Cable Length EIA-432-A/V.10 4.8 K 500 m (1600 ft) 9.6 K 280 m (900 ft) 19.2 K 150 m (500 ft) 38.4 K 85 m (280 ft) 57.6 K 30 m (100 ft) 115.2 K... -
Page 34: 10Baset Ethernet Connection
3.5.2 10BaseT Ethernet Connection The 10BaseT Ethernet installation must conform to the following configuration rules: The twisted-pair cable must not exceed the maximum distance listed in Table 3-3. No other signal should be used in the same cable sheath. For example, voice and data signals cannot be run within the same sheath. -
Page 35: Installing The Decserver 700 In A Rack
The DECserver 700 can be wall mounted. If the DEC- server is installed on a wall, the DECserver 700 must be installed with the port connectors pointing up or point- ing down. Digital Equipment Corporation does not sup- ply wall mounting hardware for the DECserver 700. Cabling the Site... -
Page 36: How To Fit The Brackets To Recess The Decserver 700
CAUTION To prevent damage to the DECserver 700, it is recom- mended that you not ship the DECserver 700 mounted in a rack mounted cabinet. Figure 3–7: How to Fit the Brackets to Recess the DECserver 700 LKG-5962-91l 3–16 Site Preparation and Maintenance... -
Page 37: Removing The Brackets
Figure 3–8: Removing the Brackets 1. Place the DECserver 700 on a table top with the bracket overhanging the edge. 2. Place your thumb or finger on the bracket, where indicated. 3. Push the bracket down and out. LKG-5955-91I Cabling the Site 3–17... -
Page 39: Connector And Cable Pin Descriptions
4.1 Connector Pin Descriptions This section describes the pins for the following DECserver 700 connectors: Standard Ethernet/IEEE 802.3 transceiver interface 10BaseT Ethernet/IEEE 802.3 transceiver interface DECserver 700-08 serial port connectors DECserver 700-16 serial port connectors 4–1... -
Page 40: Standard Ethernet
4.1.1 Standard Ethernet The standard Ethernet connector matches the signal specifications described in The Ethernet: A Local Area Network: Data Link Layer and Physical Layer Specification. Figure 4-1 shows how the pins are numbered on a standard Ethernet transceiver in- terface connector and lists the signals for the standard Ethernet connector pins. -
Page 41: 10Baset Ethernet
4.1.2 10BaseT Ethernet The 10BaseT Ethernet connector is an 8-pin modular jack (MJ8). Figure 4-2 shows how the pins are numbered on a 10BaseT Ethernet connector and lists the signals for the 10BaseT Ethernet connector. Figure 4–2: Pin Numbers and Signals for 10BaseT Ethernet Connector PIN 1 Pin Number Signal Name... -
Page 42: Decserver 700-08 Serial Line Ports
4.1.3 DECserver 700-08 Serial Line Ports The DECserver 700-08 uses a 25-pin D-sub connector on the serial line ports. Figure 4-3 shows how the connector pins are numbered and describes the signals on each pin. Figure 4–3: Pin Numbers and Signals for 25-Pin D-sub Connector... -
Page 43: Decserver 700-16 Serial Line Ports
4.1.4 DECserver 700-16 Serial Line Ports The DECserver 700-16 uses an MJ8 connector on the serial ports. Figure 4-4 shows how the pins are numbered on an MJ8 connector and lists the signals on the pins. You can set pins 4, 5, and 8 to either CTS, RTS, DSR or RI, DSRS, DCD. (Refer to Sec- tion 3.3.) Figure 4–4: Pin Numbers and Signals for the MJ8 Connector... -
Page 44: Cable Connections
4.2 Cable Connections The following table describes the cable connections that are compatible with the DECserver 700 Ethernet and serial line connectors. Wiring diagrams of individual cables are provided for use in troubleshooting and cable building. Table 4–1: Cable Connections Cable Type Description 10BaseT Ethernet Cable... - Page 45 Table 4-1 (Cont.): Cable Connections Cable Type Description BN25G MP8 to MP8 Equipment Cable The BN25G is a four twisted-pair cable with standard 8-pin modular plugs. Can be used with the DECserver 700-16. H8584-AA MP8 to MMJ Adapter The H8584-AA MP8 to MMJ adapter is used to convert a serial port to a DECserver 300 terminal server configuration.
-
Page 46: Adapters And Connectors Used With The Decserver 700
Figure 4–5: Adapters and Connectors Used with the DECserver 700 V.24/RS-232-C Adapter BC22R Shielded Null-Modem 25-Pin female 25-Pin male 25-Pin female 25-Pin male D-connector D-connector D-connector D-connector TXCLK TXCLK RXCLK RXCLK LOC LPBK REM LPBK DSRS DSRS DSRS TEST IND TEST IND BC22E or BC22F Shielded Straight-Through BC22D Shielded Null-Modem... - Page 47 Figure 4–5 (Cont.): Adapters and Connectors used with the DECserver 700 H8585-AC MJ8 to DB25 Modem Adapter H8585-AB MJ8 to DB25 Modem Adapter 8-Pin 8-Pin DB25 Modular Modular DB25 Plug Jack Jack Plug DSRS DSRS TXD GND SIG GND TXD GND SIG GND RXD GND RXD GND...
-
Page 49: Replacing And Adding Memory
Replacing and Adding Memory This chapter shows how to replace a faulty single-in-line memory module (SIM) and add additional memory. CAUTION SIMs are sensitive to static and and are packed in anti- static packaging. Electro Static Discharge (ESD) can cause failure of electronic components and can reduce the long term reliability of the DECserver 700. -
Page 50: Additional Memory Supported
8. Remove the anti-static kit. 9. Replace the cover (Figure 5–8). 10. Connect a terminal to the DECserver 700 (Section 7.5). 11. Reconnect the cables and test the DECserver 700 (refer to the DECserver 700 Hardware Installation Card). NOTE If the SIM memory is faulty, the DECserver 700 flashes “C”... - Page 51 8 Mbytes (one 4 Mbytes SIM per connector) NOTE The DECserver 700 supports only 36 bit wide SIMs. If you are not using Digital Equipment Corporation SIMs MS40-WA or MS40-WB, check the specification of your SIM to verify that it is 36 bit wide. SIMs that are not 36 bit wide will not work but may not be detected by the DECserver 700 diagnostics.
-
Page 52: Installing Extra Memory
5.3 Installing Extra Memory To install a SIM: 1. Disconnect all cables from the DECserver 700. 2. Remove the DECserver 700 brackets, if fitted (Figure 5–1). 3. Remove the DECserver 700 cover (Figure 5–2). 4. Fit the anti-static kit (Figure 5–3). 5. -
Page 53: Removing The Brackets
Figure 5–1: Removing the Brackets 1. Place the DECserver 700 on a table top with the bracket overhanging the edge. 2. Place your thumb or finger on the bracket, where indicated. 3. Push the bracket down and out. LKG-5955-91I Replacing and Adding Memory 5–5... -
Page 54: Removing The Covers
Figure 5–2: Removing the Covers Lift cover Push Bottom of unit tabs LKG–5964–91I 5–6 Site Preparation and Maintenance... -
Page 55: Fitting The Anti-Static Kit
Figure 5–3: Fitting the Anti-Static Kit 4. Attach clip to power supply. 2. Attach clip to power supply. 3. Put strap on wrist. 1. Place mat on work surface. LKG–7302–91I Replacing and Adding Memory 5–7... -
Page 56: Locating The Sims Connectors
Figure 5–4: Locating the SIMs Connectors SIMs Flash RAM Connector Connectors LKG–7303–91I 5–8 Site Preparation and Maintenance... -
Page 57: Removing A Sim
Figure 5–5: Removing a SIM 1. Release both latches. Push latch to release. 2. Push the SIM forward. 3. Lift the SIM from the connector. LKG–5959–91I Replacing and Adding Memory 5–9... -
Page 58: Inserting The Replacement Sim
Figure 5–6: Inserting the Replacement SIM 1. Align SIM with connector slot. 2. Insert SIM into connector slot. 3. Push SIM back against connector. Latch Mounting pin gripping 4. Check that mounting pins are centered centered and latches are gripping SIM. LKG–5960–91I 5–10 Site Preparation and Maintenance... -
Page 59: Adding An Additional Sim
Figure 5–7: Adding an Additional SIM 1. Align SIM with connector slot. 2. Insert SIM into connector slot. 3. Push SIM back against connector. Latch Mounting pin gripping 4. Check that mounting pins are centered centered and latches are gripping SIM. LKG–5961–91I Replacing and Adding Memory 5–11... -
Page 60: Replacing The Covers
Figure 5–8: Replacing the Covers LKG–7304–91I 5–12 Site Preparation and Maintenance... -
Page 61: Replacing And Adding Flash Ram
Electrostatic Discharge (ESD) can cause failure of elec- tronic components and can reduce the long term reli- ability of the DECserver 700. Digital Equipment Corporation recommends you use the anti-static kit (Part No. 29-26246-00) or ESD wrist strap (Part No. - Page 62 6. Insert the replacement or Flash RAM Card update in the connector (Figure 6-2). NOTE The Flash RAM socket is keyed. Ensure that you follow the instructions located on the Flash RAM card when installing. 7. Remove the anti-static kit. 8.
-
Page 63: Locating The Flash Ram Card Connector
Figure 6–1: Locating the Flash RAM Card Connector SIMs Flash RAM Connector Connectors LKG–7303–91I Replacing and Adding Memory 6–3... -
Page 64: Inserting The Flash Ram Card
Figure 6–2: Inserting the Flash RAM Card LKG–7305–92I 6–4 Site Preparation and Maintenance... -
Page 65: What To Do If You Have Problems
What to Do If You Have Problems This chapter helps you identify and correct problems you may encounter during and after the installation of the DECserver 700 hardware. The troubleshooting proce- dures are for diagnosing and correcting hardware-related problems only. Notify the network manager if the troubleshooting procedures indicate the problem is software related or if the procedures do not correct the problem. -
Page 66: Seven-Segment Display Off And System Ok Led Off
NOTE On power up, the seven-segment display will show an “8”. Allow about 3 minutes to elapse before determin- ing the state of the display. Table 7–1: Display/Indications Device Definition State Indication Corrective Action System OK LED Diagnostic Self-test passed Fatal error Section 7.4 Flashing... -
Page 67: System Ok Led Off/Seven-Segment Display Flashing "C", "D", Or "N
The DECserver 700 hardware is defective. Correction: Notify the network manager that the DECserver 700 must be returned to Digital Equipment Corporation for repair or replacement. Refer to the Network Access Server Problem Solving manual for information about returning the unit to Digital Equipment Corporation. -
Page 68: System Ok Led Flashing
Correction: There is no corrective procedure for this problem except for SIM fail- ure (refer to note). Notify the network manager that the DECserver 700 must be re- turned to Digital Equipment Corporation for repair or replacement. Refer to the Network Access Server Problem Solving manual for information about returning the unit to Digital Equipment Corporation. -
Page 69: Error Message 952
If this corrects the problem, the fault is external to the DECserver 700. If this fails to correct the problem, notify the network manager that the DECserver 700 must be returned to Digital Equipment Corporation for repair or for replacement. Refer to the Network Access Server Problem Solving manual for information about returning the unit to Digital Equipment Corporation. - Page 70 DECserver 700. If this fails to correct the problem, notify the network manager that the DECserver 700 must be returned to Digital Equipment Corporation for re- pair or for replacement. Refer to the Network Access Server Problem Solving manual for information about returning the unit to Digital Equipment Corporation.
- Page 71 Section 7.6.1 and Section 7.6.2 describe the messages that might appear on the termi- nal. 7.6.1 Downline Load Starts, Then Fails The following sequence of messages appears on the console terminal at various time intervals: Local –953– [IP] Attempting to locate load host, [ETHERNET] Local –953–...
- Page 72 7.6.2 Downline Load Does Not Start The following sequence of messages appears on the console terminal at various time intervals: Local –953– [IP] Attempting to locate load host, [ETHERNET] Local –953– [MOP] Attempting to locate load host, [ISO8802] Local –953– [MOP] Attempting to locate load host, [ETHERNET] Local –951–...
- Page 73 No power or display broken Initial power on Initialization DECserver 700 internal test SIM 1 test SIM 2 test DECserver 700 internal test DECserver 700 internal test DECserver 700 internal test DECserver 700 internal test NI external test Firmware loading from Flash RAM Requesting load Load request backoff Loading...
-
Page 74: Network Activity Led
7.8 Network Activity LED Table 7–2: Network Activity LED Ethernet Selected Connection Status LED Display 10BaseT Open/incorrectly terminated Correctly terminated / no network activity Correctly terminated / network activity FLASHING (rate independent of network activity) Standard Ethernet Open Correctly connected / no network activity Correctly connected / network activity Flashing or ON, depending on network... - Page 75 DECserver 700 Site Preparation and Maintenance (Hardware Owner’s Manual) EK-DSRVW-MG. B01 READER’S COMMENTS What do you think of this manual? Your comments and suggestions will help us to improve the quality and usefulness of our publications. Please rate this manual: Poor Excellent Accuracy...
- Page 76 DO NOT CUT – FOLD HERE AND TAPE NO POSTAGE NECESSARY IF MAILED IN THE UNITED STATES BUSINESS REPLY LABEL FIRST CLASS PERMIT NO. 33 MAYNARD MASS. POSTAGE WILL BE PAID BY ADDRESSEE Telecommunications and Networks Publications 550 King Street Littleton, MA 01460–1289 DO NOT CUT –...
- Page 77 Printed in U.S.A.
Need help?
Do you have a question about the DECserver 700-08 and is the answer not in the manual?
Questions and answers