Table of Contents
Advertisement
Advertisement
Table of Contents
Troubleshooting

Subscribe to Our Youtube Channel
Related Manuals for Technogym CROSS FORMA


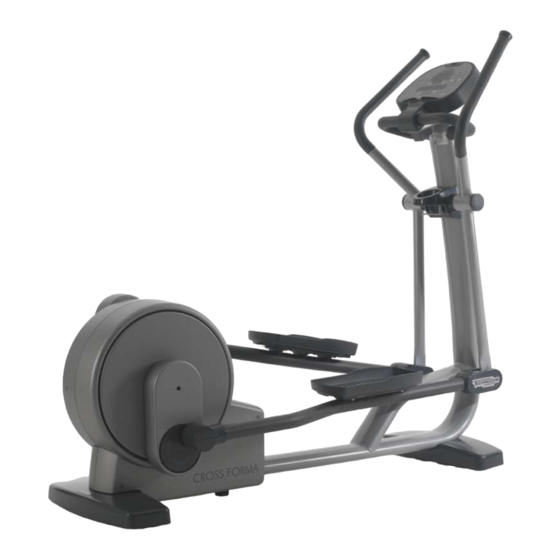
Summary of Contents for Technogym CROSS FORMA
- Page 1 & ERVICE MAINTENANCE MANUAL . 2.1...
- Page 3 The information contained in this document is subject to change without notice. Technogym does not guarantee this documentation in any way. Technogym shall not be held responsible for any errors contained in this manual and declines all liability for accidents or damages resulting from the supply, characteristics or use of this manual.
-
Page 5: Table Of Contents
CROSS FORMA: Service & Maintenance Manual - rev. 2.1 Contents 1. GENERAL NOTICES ............................. 1.1 1.1. I ..............................1.1 NTRODUCTION 1.2. R ............................1.1 ECOMMENDATIONS 1.3. G ......................1.2 ENERAL RULES FOR REPAIR PROCEDURES 2. TECHNICAL CHARACTERISTICS ........................2.1 2.1. C .............................. - Page 6 CROSS FORMA: Service & Maintenance Manual - rev. 2.1 6.7. T ........................6.14 HE SPEED SIGNAL IS INCORRECT 6.8. T ......................6.16 HE MACHINE DOES NOT READ THE TGS 6.9. T ........................6.18 HERE IS NO HEART RATE SIGNAL 6.10. T ......................
- Page 7 CROSS FORMA: Service & Maintenance Manual - rev. 2.1 9.2.5. Low kit menu ............................9.10 9.2.5.1. Low kit version ................................9.11 9.2.5.2. Low Kit fault code ..............................9.11 9.2.6. High kit version ............................ 9.11 9.2.7. BOOT version ............................9.11 10. SCHEDULED MAINTENANCE ......................... 10.1 10.1.
- Page 8 CROSS FORMA: Service & Maintenance Manual - rev. 2.1 Page intentionally left blank Page iv...
-
Page 9: General Notices
1. GENERAL NOTICES 1.1. INTRODUCTION This document is reserved for Technogym Service technicians, and is intended to provide authorized personnel with the necessary information to correctly carry out repairs and maintenance. A thorough knowledge of the technical information contained in this manual is essential for completing the professional training of the operator. -
Page 10: General Rules For Repair Procedures
1. Always mark any parts or positions which may be confused with each other at the time of reassembly. 2. Use original Technogym spare parts and lubricants of the recommended brands. 3. Use special tools where specified. 4. Consult the Technical Newsletters, which may contain more up-to-date information on adjustments and maintenance than those contained in this manual. -
Page 11: Technical Characteristics
CROSS FORMA: Service & Maintenance Manual - rev. 2.1 2. TECHNICAL CHARACTERISTICS 2.1. CHARACTERISTICS 30-400 Watt Power CSafe Cardio receiver Quick start Goal Training programs 6 profiles Test functions Fitness test 2.2. MECHANICAL CHARACTERISTICS 67 cm - 27 in Width Length 192.5 cm - 76 in... -
Page 12: Ambient Specifications
CROSS FORMA: Service & Maintenance Manual - rev. 2.1 2.4. AMBIENT SPECIFICATIONS Operating from 5° to 35° C Temperature Storage from -10° to 70° C Operating from 30% to 80% non-condensing Humidity Storage from 5% to 85% non-condensing 2.5. CONFORMITY TO REGULATIONS... -
Page 13: Product Codes
CROSS FORMA: Service & Maintenance Manual - rev. 2.1 2.6. PRODUCT CODES The machine codes take into account all the possible variants and options available for the products. The machine code, which does not include the Serial Number, consists of 16 alphanumeric... -
Page 14: Wiring Diagram
CROSS FORMA: Service & Maintenance Manual - rev. 2.1 2.7. WIRING DIAGRAM CSAFE BOARD CBQ-13 BOARD CBQ-32 REC-00 DISPLAY BOARD RECEIVER KEYBOARD DISPLAY CF-04 CF-02 Patch Patch Patch conn. 2 conn. 1 conn. 3 CF-05 CF-01 CF-03 POWER BRAKE ENTRY... -
Page 15: Cables
CROSS FORMA: Service & Maintenance Manual - rev. 2.1 2.8. CABLES CB-51: Brake supply cable Brake board – Brake – Speed sensor Brake board Signal Color Brake Speed sensor Brake supply + Brown Brake supply - White Faston connected Yellow... - Page 16 CROSS FORMA: Service & Maintenance Manual - rev. 2.1 CF-03: Serial communication cable between upper and lower assemblies Brake board – Patch conn. 3 Brake board Signal Color Patch conn. 3 Brown Brown-White Digital Gnd Blue Download Blue-White Reset Green...
- Page 17 CROSS FORMA: Service & Maintenance Manual - rev. 2.1 REC-00: HFU receiver cable Display board – HFU receiver Display board Signal Color HFU receiver +5 Vdc power supply Pulse (beat to beat) Blue Black Page 2.7...
- Page 18 CROSS FORMA: Service & Maintenance Manual - rev. 2.1 Page intentionally left blank Page 2.8...
-
Page 19: Principles Of Operation
CROSS FORMA: Service & Maintenance Manual - rev. 2.1 3. PRINCIPLES OF OPERATION 3.1. BLOCK DIAGRAM The machine block diagram is illustrated in the figure below: DISPLAY CSAFE BOARD CARDIO DISPLAY BOARD KEYBOARD POWER ENTRY BRAKE BOARD MODULE BRAKE SPEED SENSOR Page 3.1... -
Page 20: Display Board
CROSS FORMA: Service & Maintenance Manual - rev. 2.1 3.1.1. ISPLAY BOARD The display contains: • ISPLAY OARD The Display includes a single board which contains the CPU, an ARM microprocessor, the logic for its operation and the EPROM FLASH containing the equipment's work program, and also acts as a connection centre for all the display components and a connection point with the Brake Board. -
Page 21: Cardio Receiver
CROSS FORMA: Service & Maintenance Manual - rev. 2.1 3.1.4. ARDIO RECEIVER This is the Board that manages the signal sent by the Telemetric Transmitter (Heart Rate Band), used by the user during training sessions. The Receiver Board receives a power supply of +5Vdc from the Display Board. -
Page 22: Brake
CROSS FORMA: Service & Maintenance Manual - rev. 2.1 On the Brake Board there are some signal LEDs: LED Name Colour Description If ON, the board is supplying power to the winding of the brake. LED1 GREEN If it is FLASHING, there is a fault on the Brake Board and there is no current on the brake. -
Page 23: Power Entry Module
Situated on the side of the rear platform. The Power entry module has a maximum current rating of 7A. This determines the maximum number of machines that can be connected together. Therefore, do not connect more than 24 Cross Forma machines with a 220 VAC mains supply, or 12 machines with a 110 VAC mains supply. -
Page 24: Brake Control
CROSS FORMA: Service & Maintenance Manual - rev. 2.1 3.2. BRAKE CONTROL 3.2.1. T ECHANICS The movement of the pedals sets the primary shaft into rotation. The primary shaft is attached to the secondary shaft and then to the brake, via a belt. The speed sensor, built into the frame, detects the heads of the screws that fix the disk to the flywheel and generates a signal representing the speed. - Page 25 "on" to flashing mode and sends an appropriate error message to the Display Board which visualizes the following message on the display: “THE EQUIPMENT IS BLOCKED. CONTACT THE TECHNOGYM TECHNICAL SERVICE (X)”, where “X” represents the Error Code for the error that has occurred.
-
Page 26: The Signals Involved
CROSS FORMA: Service & Maintenance Manual - rev. 2.1 3.2.3. T HE SIGNALS INVOLVED During control, the following signals may occur: • RS-485 Signal It is a digital signal between the Brake Board and Display Board. We have no possibility of monitoring its state. - Page 27 CROSS FORMA: Service & Maintenance Manual - rev. 2.1 Page intentionally left blank Page 3.9...
-
Page 29: Accessories
CROSS FORMA: Service & Maintenance Manual - rev. 2.1 4. ACCESSORIES 4.1. CARDIO THEATER CONNECTION The machine can be connected to the CardioTheater by means of the RJ45 connector on the CSafe board. The CardioTheater unit must be provided with a power cable having the following pin-out:... -
Page 30: Programming Plug For Csafe Board
CROSS FORMA: Service & Maintenance Manual - rev. 2.1 4.3. PROGRAMMING PLUG FOR CSAFE BOARD When programming the machine using the 0WC00434AA connecting cable described above, it is necessary to fit plug (code 0WC00638AA) into the free RJ-45 port on one side of the front platform, to avoid any type of interference during the operation. -
Page 31: Installation Instructions
CROSS FORMA: Service & Maintenance Manual - rev. 2.1 5. INSTALLATION INSTRUCTIONS 5.1. SPECIFICATIONS AND REQUIREMENTS For correct machine installation, make sure that: 1. The machine is installed on a level surface that is free of vibrations and has sufficient carrying capacity for the combined weight of the machine and user. -
Page 32: Installation
CROSS FORMA: Service & Maintenance Manual - rev. 2.1 Power entry module”. 10. Position the mains lead of the machine where it will not be underfoot. 5.2. INSTALLATION To correctly install the machine, proceed as follows: 1. Ensure that the specifications and requirements for installation have been met (see paragraph 5.1. -
Page 33: First Power-On
CROSS FORMA: Service & Maintenance Manual - rev. 2.1 5.3. FIRST POWER-ON After completing the installation procedure, the machine is ready for use. Simply turn the on/off switch from position 0 to position 1. On power-up the machine performs a self test of the upper and lower assemblies. At the end of this the machine goes into standby, awaiting a keyboard command. -
Page 35: Troubleshooting
CROSS FORMA: Service & Maintenance Manual - rev. 2.1 6. TROUBLESHOOTING The troubleshooting procedures are shown in the form of flow charts. In order to facilitate consultation, the following standard box shapes are used. This type of box is the START point of the troubleshooting procedure. It typically contains a description of the problem or malfunction. -
Page 36: Service Troubleshooting Menu
CROSS FORMA: Service & Maintenance Manual - rev. 2.1 6.1. SERVICE TROUBLESHOOTING MENU This section can be used to test the operation of certain machine components (brake board, LED display, keyboard, serial ports). It is invoked when the machine is in standby by simultaneously pressing the keys 369. -
Page 37: I2C Devices Test
CROSS FORMA: Service & Maintenance Manual - rev. 2.1 return to the higher menu level, holding it down for a few seconds. The various manual tests are described below. 6.1.1.1. I2C Devices Test The I2C Device test checks the operation of the 32K and 256K memories. The test can have two outcomes: •... -
Page 38: The Display Fails To Illuminate
CROSS FORMA: Service & Maintenance Manual - rev. 2.1 6.2. THE DISPLAY FAILS TO ILLUMINATE This error occurs when the power supply voltage does not reach the upper assembly. This may also be due to a short circuit on the brake winding, which interrupts the output voltage of the brake board, causing the upper assembly to switch off. - Page 39 CROSS FORMA: Service & Maintenance Manual - rev. 2.1 Does the mains v oltage Replace cable reach the input to the CF-00 brake board? Are the DC v oltages at the Replace the brake output of the brake board board...
- Page 40 CROSS FORMA: Service & Maintenance Manual - rev. 2.1 Using a tester, check that all the output voltages on connector CN1 of the brake board are correct, referring to paragraph 2.8. “Cables”. As for step (3) but on the patch connector 1.
-
Page 41: The Equipment Is Blocked" Message On The Display
CROSS FORMA: Service & Maintenance Manual - rev. 2.1 6.3. “THE EQUIPMENT IS BLOCKED” MESSAGE ON THE DISPLAY This error message can be caused by: • loss of communication between the lower and upper assemblies; • the brake board has detected an error condition, causing it to generate an alarm and store the error code in memory. -
Page 42: Error Detected By Brake Board
CROSS FORMA: Service & Maintenance Manual - rev. 2.1 6.4. ERROR DETECTED BY BRAKE BOARD When the Brake Board detects an error, it blocks by interrupting the power supply and memorizes a numeric code in its memory which identifies the detected error. In addition it sends a signal regarding the status of the error to the DISPLAY Board, via the serial line. - Page 43 CROSS FORMA: Service & Maintenance Manual - rev. 2.1 Error Description Meaning Solution Cod. Upgrade the Firmware (FW) on the Brake Board. If the same errors occur after upgrading been Not used. successfully completed, the problem brake board. The error relates to the...
- Page 44 CROSS FORMA: Service & Maintenance Manual - rev. 2.1 Error Description Meaning Solution Cod. Corrupt EEPROM. This happens when the flag relating to the Re-load the braking EEPROM Fault. CURRENT zone and the flag relating to the table. MIRROR zone (in EEPROM) indicate results that are not consistent.
-
Page 45: There Is No Resistance
CROSS FORMA: Service & Maintenance Manual - rev. 2.1 6.5. THERE IS NO RESISTANCE The machine will not produce resistance if: • the display board is not receiving a speed signal; • the brake board is not generating current; • the brake is defective. -
Page 46: The Resistance Is Incorrect
CROSS FORMA: Service & Maintenance Manual - rev. 2.1 6.6. THE RESISTANCE IS INCORRECT The equipment produces an incorrect resistance if: 1. the mechanics are not perfect; 2. the speed as measured is not correct; 3. the Brake Board is faulty;... - Page 47 CROSS FORMA: Service & Maintenance Manual - rev. 2.1 Follow the chart step by step in order to make a correct diagnosis. In particular, pay attention to the checks highlighted in the numbered boxes and listed here below: Carry out the Standard Settings, as described in the relevant paragraph of the Service menu.
-
Page 48: The Speed Signal Is Incorrect
CROSS FORMA: Service & Maintenance Manual - rev. 2.1 6.7. THE SPEED SIGNAL IS INCORRECT The speed signal is not correct if: 1. The disk of the Electromagnetic Brake is incorrectly mounted on the flywheel; 2. The special speed measurement screws are missing or badly assembled (only for Crossover) 3. - Page 49 CROSS FORMA: Service & Maintenance Manual - rev. 2.1 Follow the chart step by step in order to make a correct diagnosis. In particular, pay attention to the checks highlighted in the numbered boxes and listed here below: Carry out the Standard Settings, as described in the paragraph: “STANDARD SETTINGS”.
-
Page 50: The Machine Does Not Read The Tgs
CROSS FORMA: Service & Maintenance Manual - rev. 2.1 6.8. THE MACHINE DOES NOT READ THE TGS The machine displays this error if the TGS reader is not working properly, or if it is not supplied by the display board. - Page 51 CROSS FORMA: Service & Maintenance Manual - rev. 2.1 Place the tester probes across pins 1 and 3 of connector CN1 of the TGS reader. The measured value should be +12 Vdc. As for step (1) but across pins 1 and 9 of connector CN3 on the display board.
-
Page 52: There Is No Heart Rate Signal
CROSS FORMA: Service & Maintenance Manual - rev. 2.1 6.9. THERE IS NO HEART RATE SIGNAL THERE IS NO HR SIGNAL (Chest Belt) Check if it works properly using Chest Belt a chest belt you are sure it's ok. defective... - Page 53 CROSS FORMA: Service & Maintenance Manual - rev. 2.1 Follow the chart step by step in order to make a correct diagnosis. In particular, pay attention to the checks highlighted in the numbered boxes and listed here below: Check on the correct SW version, according to the “EXCITE SW SMART TABLE” table found in the TG Direct.
-
Page 54: The Telemetric Hr Signal Is Incorrect
CROSS FORMA: Service & Maintenance Manual - rev. 2.1 6.10. THE TELEMETRIC HR SIGNAL IS INCORRECT CORRECT USE OF BAND: Place the heart-rate band on the chest in direct contact with the skin and make sure that it is moist in the contact area. - Page 55 CROSS FORMA: Service & Maintenance Manual - rev. 2.1 Are there sources of Receiver Board defective. electromagnetic noise near the Replace it. receiver? The problem does not depend on the equipment Follow the chart step by step in order to make a correct diagnosis. In particular, pay attention to the checks highlighted in the numbered boxes and listed here below: Check on the correct SW version, according to the “EXCITE SW SMART TABLE”...
- Page 56 CROSS FORMA: Service & Maintenance Manual - rev. 2.1 Comply with the distance and positioning of the pieces of equipment with each other, keeping to the following diagram: Figure 6-1 The lateral range (130cm) is greater than the frontal range (90cm) even though it covers a tighter area.
- Page 57 CROSS FORMA: Service & Maintenance Manual - rev. 2.1 Check on the correct positioning of the Receiver Board as indicated in the relevant paragraph. In order to check whether there is electromagnetic noise near the equipment, use the Text Box Excite as detailed below.
-
Page 59: Disassembly Of Components
CROSS FORMA: Service & Maintenance Manual - rev. 2.1 7. DISASSEMBLY OF COMPONENTS 7.1. DISASSEMBLING THE DISPLAY 1. Turn off the machine and unplug the mains lead from the wall outlet. 2. Back off the 6 screws a using a medium Phillips screwdriver. - Page 60 CROSS FORMA: Service & Maintenance Manual - rev. 2.1 7. Back off the two screws d using a 13-mm wrench. 8. Remove the handlebar e from the machine. 9. Back off the 3 screws b, using a 6-mm Allen wrench, to remove the rear display support.
-
Page 61: Disassembling The Circuit Boards On The Display
CROSS FORMA: Service & Maintenance Manual - rev. 2.1 7.2. DISASSEMBLING THE CIRCUIT BOARDS ON THE DISPLAY Carry out the procedure described in paragraph 7.1. “Disassembling the display”. Then place the display on a work bench. It is now possible to disassemble its five circuit boards: •... -
Page 62: Disassembling The Keyboard
CROSS FORMA: Service & Maintenance Manual - rev. 2.1 7.3. DISASSEMBLING THE KEYBOARD Carry out the procedure described in paragraph 7.1. “Disassembling the display”. 1. Unplug the keyboard connector shown in the figure. Figure 7.3-1 With the display placed on a work bench: 2. -
Page 63: Disassembling The Cardio Receiver
CROSS FORMA: Service & Maintenance Manual - rev. 2.1 7.4. DISASSEMBLING THE CARDIO RECEIVER 1. Back off the 2 screws a using a 3-mm Allen wrench. Figure 7.4-1 2. Unplug the connector b. 3. Remove the receiver. Figure 7.4-2 To assemble the new receiver: 1. - Page 64 CROSS FORMA: Service & Maintenance Manual - rev. 2.1 4. Place the receiver in the sponge c as shown in the picture to side. 5. Use adhesive tape or a cable tie to secure the receiver in the sponge. The receiving coil must be oriented upwards and toward the user.
-
Page 65: Disassembling The Tidy Rack
CROSS FORMA: Service & Maintenance Manual - rev. 2.1 7.5. DISASSEMBLING THE TIDY RACK 1. Back off the 5 screws a using a medium Phillips screwdriver. 2. Remove the upper casing of the tidy rack. 3. Back off the 3 screws b using a 3-mm Allen wrench. -
Page 66: Disassembling The Guards
CROSS FORMA: Service & Maintenance Manual - rev. 2.1 7.6. DISASSEMBLING THE GUARDS 1. On the right side of the machine , back of the 3 screws a using a 4-mm hex wrench. During reassembly, lock down the screws “a” using a torque wrench set for 2 Nm. - Page 67 CROSS FORMA: Service & Maintenance Manual - rev. 2.1 On both sides of the machine: 6. Back off the screws e using a medium Phillips screwdriver and remove the upper casing. 7. Back off the 2 screws f using a 3-mm hex wrench.
- Page 68 CROSS FORMA: Service & Maintenance Manual - rev. 2.1 14. Back off the 2 screws m using a 3-mm hex wrench. 15. Remove the guard n from the machine. During reassembly, lock down the screws “m” using a torque wrench set for 1 Nm.
- Page 69 CROSS FORMA: Service & Maintenance Manual - rev. 2.1 20. Back off the 3 screws s using a 4-mm hex wrench. 21. Back off the 2 screws t using a 4-mm hex wrench. Do not back off the screws “t” on the opposite side of the machine, because they hold on the two spacer brackets.
-
Page 70: Disassembling The Levers
CROSS FORMA: Service & Maintenance Manual - rev. 2.1 7.7. DISASSEMBLING THE LEVERS 1. Back off the screws a using a medium Phillips screwdriver and remove the upper casing. 2. Back off the 2 screws b using a 3-mm hex wrench. - Page 71 CROSS FORMA: Service & Maintenance Manual - rev. 2.1 7. Back off the screws g using a medium Phillips screwdriver and remove the rear casing. Figure 7.7-4 8. Back off the screws h using a medium Phillips screwdriver and remove the front casing.
- Page 72 CROSS FORMA: Service & Maintenance Manual - rev. 2.1 To reassemble the lever: 11. Using the pin k included in the machine tool kit, insert the pin on the upper lever and fit the two spacers j on top of it.
-
Page 73: Disassembling The Crank Belt
CROSS FORMA: Service & Maintenance Manual - rev. 2.1 7.8. DISASSEMBLING THE CRANK BELT Carry out the operations described in paragraph 7.6. “Disassembling the guards”, only to disassemble the guards on the side you need. 1. Back off the screw a using a 6-mm hex wrench, locking down the pin on the opposite side with another 6-mm hex wrench. - Page 74 CROSS FORMA: Service & Maintenance Manual - rev. 2.1 To remove the toothed wheels on the crank: 6. Back off the 3 screws g using a 4-mm hex wrench. 7. Back off the 2 screws h using a 6-mm hex wrench.
-
Page 75: Disassembling The Brake Board
CROSS FORMA: Service & Maintenance Manual - rev. 2.1 7.9. DISASSEMBLING THE BRAKE BOARD Carry out the procedure described in paragraph 7.6. “Disassembling guards” only disassembling the right casing. 1. Unplug the connectors indicated in the figure to side. 2. Back off the two screws a using a 4-mm Allen wrench. -
Page 76: Disassembling The Belt
CROSS FORMA: Service & Maintenance Manual - rev. 2.1 7.10. DISASSEMBLING THE BELT Carry out the procedure described in paragraph 7.6. “Disassembling guards” only disassembling right casing, 7.7. “Disassembling levers” 7.8. “Disassembling the crank belt”. 1. Back off the counternut a using a 17-mm wrench. -
Page 77: Disassembling The Pedals
CROSS FORMA: Service & Maintenance Manual - rev. 2.1 7.11. DISASSEMBLING THE PEDALS 1. Back off the screws a using a 13-mm wrench and remove the pedal. To reassemble the pedals and the pedal, carry out the above steps in reverse order. -
Page 78: Disassembling The Primary Shaft
CROSS FORMA: Service & Maintenance Manual - rev. 2.1 7.12. DISASSEMBLING THE PRIMARY SHAFT Carry out the operations described in paragraphs 7.10. “Disassembling the belt” disassembling also the left guards. On both sides of the machine: 1. Back off the 2 screws d using an 8-mm hex wrench, lock down the nuts on the opposite side using a 17-mm wrench. -
Page 79: Disassembling The Secondary Shaft
CROSS FORMA: Service & Maintenance Manual - rev. 2.1 7.13. DISASSEMBLING THE SECONDARY SHAFT Carry out the operations described in paragraphs paragraph 7.6. “Disassembling the guards”, 7.10. “Disassembling the belt”. 1. Back off the ring nut a, using a 20-mm ring nut spanner. -
Page 80: Disassembling The Brake Winding
CROSS FORMA: Service & Maintenance Manual - rev. 2.1 7.14. DISASSEMBLING THE BRAKE WINDING Carry out the procedure described in paragraph 7.6. “Disassembling the guards” up to step 5. 1. Unplug the two Faston connectors a from the winding. 2. Back off the fixing screws b on the machine frame, using a 3-mm Allen wrench. -
Page 81: Disassembling The Speed Sensor
CROSS FORMA: Service & Maintenance Manual - rev. 2.1 7.15. DISASSEMBLING THE SPEED SENSOR Carry out the procedure described in paragraph 7.6. “Disassembling guards” only disassembling the right casing. 1. Unplug the fastom indicated in the figure to side. 2. Cut the cable tie a. -
Page 82: Disassembling The Front Platform
CROSS FORMA: Service & Maintenance Manual - rev. 2.1 7.16. DISASSEMBLING THE FRONT PLATFORM 1. Turn the machine over on one side, resting the frame on a box to keep the platform raised off the ground. 2. Back off the 2 screws a using an 8-mm hex wrench. -
Page 83: Disassembling The Rear Platform
CROSS FORMA: Service & Maintenance Manual - rev. 2.1 7.17. DISASSEMBLING THE REAR PLATFORM Disassembling the platforms (this procedure applies for both platforms): 1. Back off the 2 screws a using a medium Phillips screwdriver, to disconnect the power entry module plug b from the platform. - Page 84 CROSS FORMA: Service & Maintenance Manual - rev. 2.1 Page intentionally left blank Page 7.26...
-
Page 85: Adjustments
CROSS FORMA: Service & Maintenance Manual - rev. 2.1 8. ADJUSTMENTS 8.1. BELT TENSION Carry out the procedure described in paragraph 7.6. “Disassembling the guards” disassembling only the right guards. 1. Back off the counter nut a. 2. Act on the screw b to adjust the tension of the belt. -
Page 86: Speed Sensor Position
CROSS FORMA: Service & Maintenance Manual - rev. 2.1 8.2. SPEED SENSOR POSITION Carry out the procedure described in paragraph 7.6. “Disassembling the guards” disassembling only the right guards. 1. Back off the 2 screws a and shift the speed sensor support to the side, so that it is 0.7... -
Page 87: Brake Assembly
CROSS FORMA: Service & Maintenance Manual - rev. 2.1 8.3. BRAKE ASSEMBLY Carry out the procedure described in paragraph 7.6. “Disassembling the guards” disassembling only the right guards. 1. Back off the 2 screws a and shift the brake winding support to the side. -
Page 88: Crank Belt Tension
CROSS FORMA: Service & Maintenance Manual - rev. 2.1 8.4. CRANK BELT TENSION To adjust the tension of the belt: 1. Screw the eccentric pin of the pulley a to set the right tension of the belt of 210±8 Hz. -
Page 89: Phase Of The Crank & Of The Cam
CROSS FORMA: Service & Maintenance Manual - rev. 2.1 8.5. PHASE OF THE CRANK & OF THE CAM For a rough synchronization adjustment of the right crank, with the crank assembly placed on the floor: 1. Align the 3 centre points 1, 2 and 3 on the same line. - Page 90 CROSS FORMA: Service & Maintenance Manual - rev. 2.1 Page intentionally left blank Page 8.6...
-
Page 91: Machine Configuration
CROSS FORMA: Service & Maintenance Manual - rev. 2.1 9. MACHINE CONFIGURATION 9.1. USER MENU CONFIGURATION The configuration procedure is invoked when the machine is in standby mode by simultaneously pressing the keys 369. The following prompt appears on the LED display: ENTER PASSWORD: To access the procedure, type in the password 2406 and press ENTER to confirm. -
Page 92: Units Of Measurement
CROSS FORMA: Service & Maintenance Manual - rev. 2.1 9.1.2. NITS OF MEASUREMENT It is possible to choose between EUROPEAN units (kg and km) or IMPERIAL units (pounds and miles). To change the selection, when the display shows the current setting:... -
Page 93: Enable Tgs
CROSS FORMA: Service & Maintenance Manual - rev. 2.1 9.1.5. NABLE It is possible to enable or disable the use of the TGS reader. To change the selection, when the display shows the current setting: TGS : xxx Press the +/- GOAL keys to select the desired option out of those listed in the table below: ENABLED <default>... -
Page 94: Enable Custom Messages
CROSS FORMA: Service & Maintenance Manual - rev. 2.1 9.1.8. NABLE CUSTOM MESSAGES It is possible to configure whether a custom message is displayed when the machine is in the standby state. To change the selection, when the display shows the current setting: CUSTOM MESS. -
Page 95: Service Menu Configuration
CROSS FORMA: Service & Maintenance Manual - rev. 2.1 9.2. SERVICE MENU CONFIGURATION The configuration procedure is invoked when the machine is in standby mode. Simultaneously press the keys 369. The following prompt appears on the display: ENTER PASSWORD: To access the procedure, type in the password 2501 which protects against unauthorized access and press the “Enter”... -
Page 96: Read From Low Kit
CROSS FORMA: Service & Maintenance Manual - rev. 2.1 press ENTER. This function is structured as follows: READ FROM LOW KIT PARAM. LOW KIT ? Par.01 ....... Par.13 WRITE TO LOW KIT ? DEFAULT SETTINGS ? In addition to the 13 configuration parameters, this function also includes the 3 sub-functions described below: 9.2.1.1. -
Page 97: Table Of Configuration Parameters
CROSS FORMA: Service & Maintenance Manual - rev. 2.1 9.2.1.4. Table of configuration parameters Display Description Default value parameter Par 01 Transmission ratio Par 02 Speed ratio Par 03 Minimum braking current (standby position) Par 04 Maximum continuous power Par 05... -
Page 98: Read From Low Kit
CROSS FORMA: Service & Maintenance Manual - rev. 2.1 9.2.2.1. Read from low kit To read the parameter values from the low kit memory and view them on the display, scroll using the +/- keys until the display shows: READ FROM LOW KIT ? press ENTER to read the parameters from the low kit, and return to the upper menu level by pressing CLEAR for a few seconds. -
Page 99: Read From Low Kit
CROSS FORMA: Service & Maintenance Manual - rev. 2.1 READ FROM ERRORS LOG LOW KIT ? Error 1 ....... Error 10 RESET ERRORS ? COM.Fault In addition to the error history log, this function also includes the 3 sub-functions described below: 9.2.3.1. -
Page 100: View Errors
CROSS FORMA: Service & Maintenance Manual - rev. 2.1 9.2.3.4. View Errors The error history log records the following information for each of the errors generated by the machine: • Error code • Type of error • Current when the error occurred •... -
Page 101: Low Kit Version
CROSS FORMA: Service & Maintenance Manual - rev. 2.1 Low Kit Version LOW KIT MENU Low Kit fault code 9.2.5.1. Low kit version This function displays the brake board firmware version. To access this menu, when the display shows: LOW KIT VERSION... - Page 102 CROSS FORMA: Service & Maintenance Manual - rev. 2.1 Page intentionally left blank Page 9.12...
-
Page 103: Scheduled Maintenance
CROSS FORMA: Service & Maintenance Manual - rev. 2.1 10. SCHEDULED MAINTENANCE To keep the machine in perfect working order and forestall possible problems it is necessary to carry out the scheduled maintenance operations described below. The maintenance operations can essentially be classified according to the frequency with which they need to be performed: •... -
Page 104: Monthly Maintenance Operations
CROSS FORMA: Service & Maintenance Manual - rev. 2.1 10.2. MONTHLY MAINTENANCE OPERATIONS These operations can be carried out by the machine owner and do not require any special skills. The monthly maintenance operations consist of simple checks on the machine’s operation and state of wear, to ensure its safe and correct functioning. -
Page 105: Twice-Yearly Maintenance Operations
10.3. TWICE-YEARLY MAINTENANCE OPERATIONS These operations can only be carried out by a qualified technician specifically trained by Technogym and authorized to carry out machine installation and adjustments, as well as special maintenance operations or repairs which require special knowledge of the machine, its operation, safety systems and working procedures. - Page 106 CROSS FORMA: Service & Maintenance Manual - rev. 2.1 • Isolation of the individual wires toward ground. Repair and/or replace any non-conforming wires. 2. Check the condition of the fuses using a tester. Page 10.4...
-
Page 107: Appendix
CROSS FORMA: Service & Maintenance Manual - rev. 2.1 11. APPENDIX 11.1. UPDATING THE SW To update the machine SW it is necessary to change the contents of the FLASH EPROM on the 386 board by means of an external PC connected to the CSAFE port on the machine, situated on the lower part of the display panel. -
Page 108: Required Tools
CROSS FORMA: Service & Maintenance Manual - rev. 2.1 11.2. REQUIRED TOOLS The following tools are required for carrying out the various disassembly, adjustment and maintenance action on the machine: • Small Phillips screwdriver; • Medium Phillips screwdriver; • 13-mm wrench;... - Page 110 TECHNOGYM S.p.A. Via G. Perticari, 20 47035 Gambettola (FC) ITALIA Tel.: +39-0547-650638 Fax: +39-0547-650150 e-mail: service@technogym.com 0SM00398AA-UK...
Need help?
Do you have a question about the CROSS FORMA and is the answer not in the manual?
Questions and answers