
Related Manuals for Nidek Medical TONOREF II


Summary of Contents for Nidek Medical TONOREF II
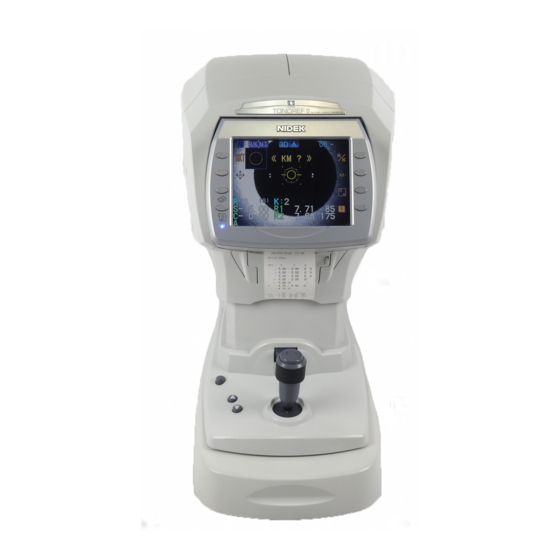
- Page 1 AUTO REF/KERATO/TONOMETER TONOREF II Model NETWORK SETTING MANUAL March, 2009 XRKT2*RDA002A/E...
- Page 2 NIDEK CO., LTD. : 34-14, Maehama, Hiroishi-cho, Gamagori, Aichi 443-0038, Japan (Manufacturer) Telephone: 81-533-67-6611 Facsimile: 81-533-67-6610 NIDEK CO., LTD : 3F Sumitomo Fudosan Hongo Bldg., 3-22-5, Hongo, (Tokyo Office) Bunkyo-Ku, Tokyo 113-0033, Japan Telephone: 81-3-5844-2641 Facsimile: 81-3-5844-2642 NIDEK INCORPORATED : 47651 Westinghouse Drive, Fremont, California 94539, U. S. A. (United States Agent) Telephone: 1-510-226-5700 Facsimile: 1-510-226-5750...
- Page 3 : OUTLINE OF THIS MANUAL OUTLINE OF THIS MANUAL This manual describes the connection method to the PC via LAN connection for the TONOREF II. In this manual, the procedures to replace the circuit board of devices that do not support LAN connec- tion, to upgrade programs (V1.06 or earlier to V1.07 or later), and to perform LAN connection settings...
- Page 4 : LAN CONNECTION XRKT2*RDA002A/E LAN CONNECTION It becomes possible to transfer TONOREF II measured data to the PC via network. By transferring measured data to the PC, data management is possible utilizing various types of database software. Basic Communication Specifications...
- Page 5 XRKT2*RDA002A/E : REPLACEMENT OF EA01 REPLACEMENT OF EA01 Replace 15601-EA01 (primary power supply) with the LAN support board. Put the device on a stable table. Push the main body to the side on which it will be laid and secure it using the locking lever, then gently lay the device on its side.
- Page 6 : REPLACEMENT OF EA01 XRKT2*RDA002A/E Unscrew BS3×8 (n = 4), remove the switching power supply (80602-00102), then disconnect the P001 connector. Unscrew FC3×6 (n = 4), then remove the FC3×6 BA05 board (15601-BA05) to replace 15601- EA01 EA01 with the LAN support board. BA05 Reassemble the parts in the reverse order.
-
Page 7: Software Upgrade
XRKT2*RDA002A/E : SOFTWARE UPGRADE SOFTWARE UPGRADE • When parameters have been set by customers, print the parameter settings in advance so that they can be restored. Save the upgrade program to a USB flash drive. Upgrade software RKT2_softwrite_V***.mot (V 1.07 or later) The latest program is written in the CD-R of the RKT-2 upgrade kit (32106-0600). - Page 8 : SOFTWARE UPGRADE XRKT2*RDA002A/E The upgrade confirmation screen appears. Press OK. The screen shown to the right appears and upgrade starts. When upgrade is complete, the screen shown to the right appears. Turn off the power. Remove the USB flash drive from the device. Turn on the power and confirm that the device starts properly.
- Page 9 Network hub (HUB) LAN cable Receiver PC TONOREF II Connecting the Barcode Scanner/ Magnetic Card Reader Turn off the main body and then connect the barcode scanner or magnetic card reader to the USB-A connector on the underside of the device.
- Page 10 : DEVICE CONNECTION XRKT2*RDA002A/E System Diagram Example The diagram shown below illustrates the connection of an actual system. The system diagram below is only an example. It may be changed significantly depending on the connection network scale. To confirm the system diagram, contact the network administrator of the facility.
- Page 11 : CONFIRMATION AND SETTING OF RECEIVER PC CONFIRMATION AND SETTING OF RECEIVER PC Reception Structure of Measured Data Measured data transmitted from the TONOREF II is captured by the receiver PC as shown in the illus- tration below. Receiver PC...
- Page 12 : CONFIRMATION AND SETTING OF RECEIVER PC XRKT2*RDA002A/E ex.) Setting a shared folder (folder name: RKT) to the desktop of the receiver PC 1) Newly create a folder on desktop and name the folder with “RKT”. 2) Open the “RKT Properties” dialog box of the RKT folder and select “Share this folder”...
- Page 13 XRKT2*RDA002A/E : CONFIRMATION AND SETTING OF RECEIVER PC Confirming Items Necessary for Other Settings Confirm the following settings necessary for device connection. (If necessary, confirm to the network administrator.) • Login user name of the receiver PC • Login password of the receiver PC •...
- Page 14 : CONFIRMATION AND SETTING OF DEVICE XRKT2*RDA002A/E CONFIRMATION AND SETTING OF DEVICE Setting the MAC Address No MAC address is set for products shipped before LAN support. This item is intended for products shipped before LAN support. • A MAC address needs to be issued. Take a note of the serial number and then ask the service department to issue an address.
- Page 15 XRKT2*RDA002A/E : CONFIRMATION AND SETTING OF DEVICE Setting the Device Transmission Set the network parameters of the device based on the information of “6.3 Confirming Items Neces- sary for Other Settings” (page 11). Turn on the device to enter the PARAMETER SETTING screen. Follow steps 6 to 7 of “7.1 Setting the MAC Address”...
- Page 16 : CONFIRMATION AND SETTING OF DEVICE XRKT2*RDA002A/E Input the IP address based on the information of “6.3 Confirming Items Necessary for Other Settings” (page 11) by the following button operation. (e.g.: 10. 50. 1. 10) Press or start Moves the cursor. button.
- Page 17 XRKT2*RDA002A/E : CONFIRMATION AND SETTING OF DEVICE Press the execute button to enter USER NAME setting mode. Input the login user name based on the information of “6.3 Confirming Items Necessary for Other Settings” (page 11) by the following button operation. * Entry is case insensitive.
- Page 18 : CONFIRMATION AND SETTING OF DEVICE XRKT2*RDA002A/E Select the PC NAME parameter and set the connected computer name in the same manner as steps 11 to 16 based on the information of “6.3 Confirming Items Necessary for Other Settings” (page 11). (e.g.: 10.
- Page 19 XRKT2*RDA002A/E : CONFIRMATION AND SETTING OF DEVICE Testing the Device Network Setting After completing up to step 23 of “7.2 Setting the Device Transmission” (page 13) in the previous sec- tion and rebooting, enter the PARAMETER SETTING screen. Select NETWORK as in the previous section to enter the NETWORK setting screen.
- Page 20 : CONFIRMATION AND SETTING OF DEVICE XRKT2*RDA002A/E Setting the Barcode Reader/ Magnetic Card Reader Pressing the execute button after selecting the READER parameter on the PARAMETER SET- TING screen displays the read screen (READER screen) of the barcode scanner/ magnetic card reader.
- Page 21 XRKT2*RDA002A/E : CONFIRMATION OF TRANSMITTED MEASURED DATA CONFIRMATION OF TRANSMITTED MEASURED DATA Data Structure in the Shared Holder Transmitted data is saved in the shared folder and lower levels in the folder structure shown below. If data has not been captured in the receiver software, check whether data is written in any folder below including device error code.
- Page 22 : LAN CONNECTION ERROR CODES XRKT2*RDA002A/E LAN CONNECTION ERROR CODES The following table indicates error codes on LAN setting. When the device displays an error code, refer to the table. Error code Details Remedy Message No. • Check the LAN cable connection. •...
- Page 23 XRKT2*RDA002A/E : LAN CONNECTION ERROR CODES Error code Details Remedy Message No. • Cable connection error • Check the LAN cable connection. ERR771 The LAN cable is not connected. • The deleting process of measured data files by the receiver software did not finish within the specified time.
- Page 24 : LAN CONNECTION ERROR CODES XRKT2*RDA002A/E...
Need help?
Do you have a question about the TONOREF II and is the answer not in the manual?
Questions and answers