Toshiba E-STUDIO45 Operator's Manual
Digital plain paper copier / facsimile functions
Hide thumbs
Also See for E-STUDIO45:
- Operator's manual (130 pages) ,
- Operator's manual (53 pages) ,
- Operator's manual (102 pages)
Table of Contents
Advertisement
Quick Links
Advertisement
Table of Contents

Related Manuals for Toshiba E-STUDIO45


Summary of Contents for Toshiba E-STUDIO45
- Page 2 ID number and name on pages 5-12 to 5-14 in this manual. This equipment is hearing aid compatible. The telecommunication line cable of minimum No.26 AWG wire must be used. TOSHIBA AMERICA BUSINESS SOLUTIONS, INC. Electronic Imaging Division 2 Musick, Irvine, CA 92618-1631...
- Page 3 For Canada only NOTICE: The Industry Canada label identifies certified equipment. This certification means that the equipment meets telecommunications network protective, operational and safety requirements as pre- scribed in the appropriate Terminal Equipment Technical Requirements document(s). The Department does not guarantee the equipment will operate to the user's satisfaction. Before installing this equipment, users should ensure that it is permissible to connect a facsimile to the facilities of their local telecommunications company.
- Page 4 être raccordés à une interface. La terminaison d’une interface téléphonique peut consister en une combinaison de quelques dispositifs, à la seule condition que la somme d’indices d’équivalence de la sonnerie de tous les dispositifs n’excède pas 5. TOSHIBA OF CANADA LIMITED Office Product Group 191 McNABB STREET...
-
Page 5: Preface
• When the digital copier is used as a copier and a printer, be sure to read the Operator’s Manuals for Copying Functions and for Printing Functions. To ensure correct and safe use of the Toshiba Digital Copier e-STUDIO45/35, this Operator’s Manual describes safety precautions according to the following three levels of warning: Before reading this Operator’s Manual, you should fully understand the meaning and importance of... -
Page 6: Features Of The E-Studio45/35 Fax
Features of the e-STUDIO45/35 FAX Super G3 High-speed Communications High-speed communication is available in the super G3 mode. * Super G3 FAX is the name of the FAX that has a modem compatible to ITU-T V.34 which is the new high-speed modem standard. -
Page 7: Table Of Contents
TABLE OF CONTENTS Preface ............................... 4 Features of the e-STUDIO45/35 FAX ....................5 Table of contents ..........................6 General precautions .......................... 8 When a Power Failure Occurs ......................8 1. Description of the digital copier ....................1-1 1. Description of the digital copier and the optional equipment ............. 1-2 •... - Page 8 • Polling transmission ........................ 3-17 8. Chain dial communication ......................3-18 4. Receiving a FAX ..........................4-1 1. Reception modes ........................4-2 2. Reception settings ........................4-3 3. Memory RX ..........................4-5 4. Mailbox (ITU-T compatible) (reception) ..................4-6 • Receiving (retrieving) a document from a mailbox (remote hub) ..........4-6 5.
-
Page 9: General Precautions
GENERAL PRECAUTIONS When a Power Failure Occurs In the event of a power failure, neither facsimile functions nor telephone functions of the unit are available. To avoid FAX and/or copier failure, please pay attention to the following items. Be sure to leave the power switch ON unless you suspend the facsimile function. If you turn OFF the power switch or when the power has failed: •... -
Page 10: Description Of The Digital Copier
1. DESCRIPTION OF THE DIGITAL COPIER 1. Description of the digital copier and the optional equipment..• Main components ..................1-2 • Optional equipment ..................1-3 • Control panel ....................1-4 • Touch panel ....................1-6 • Connecting the cables ................. 1-7... -
Page 11: Description Of The Digital Copier And The Optional Equipment
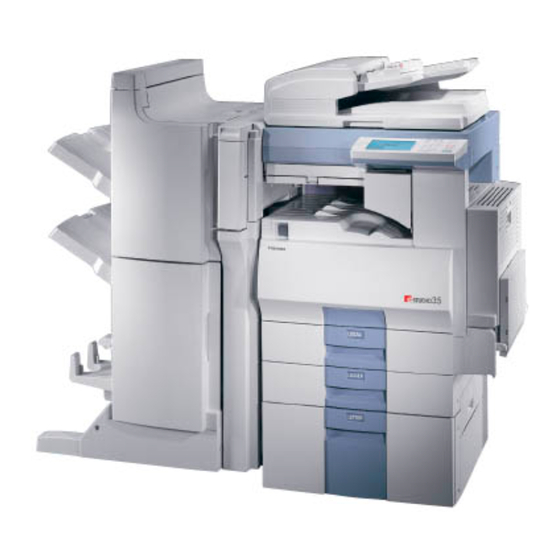
1. DESCRIPTION OF THE DIGITAL COPIER AND THE OPTIONAL EQUIPMENT Main Components Original Cover (The reversing automatic document feeder is standard equipment when the facsimile function is installed.) Operator’s Manual Pocket (Back side) Original Scale Original Glass Control Panel Inner Tray Main Power Automatic Duplexer Switch... -
Page 12: Optional Equipment
Automatically feeds from a placed stack of originals one by one to have them transmitted. Large-capacity feeder Feeds up to 2500 sheets of LT/A4-sized paper (recommended by Toshiba) continuously. A paper feed pedestal can be also installed instead. Consult your service technician for detail. -
Page 13: Control Panel
1. DESCRIPTION OF THE DIGITAL COPIER AND THE OPTIONAL EQUIPMENT (Cont.) Control Panel Touch panel Displays the copier conditions, operating procedures, and various instructions and information to the user in text and graphics. PRINTER/NETWORK key If you have an optional printer installed, press this key to access the printer function. DATA LED/ERROR LED DATA LED lights when the copier received the data. - Page 14 Digital keys Use these keys to enter the telephone and FAX numbers, ID numbers and passwords. INTERRUPT key Use this key only when you are using the copying function. FUNCTION CLEAR key When this key is pressed, all selected modes are cleared to default settings. CLEAR/STOP key Use this key to cancel the selected remote FAX, etc.
-
Page 15: Touch Panel
1. DESCRIPTION OF THE DIGITAL COPIER AND THE OPTIONAL EQUIPMENT (Cont.) Touch Panel The functions currently selected and used, and the copier’s status are displayed on the touch panel. When a graphic symbol blinks, rectify the problem referring to “7. When graphic symbols blink on the touch panel”... -
Page 16: Connecting The Cables
Connecting the Cables Before you connect the cables, ensure that the power switch is at the OFF position. Note Do not connect this device and a telephone to a telephone connector in parallel..Connect the telephone line (when the 2nd line board is installed). LINE2 .. - Page 17 DESCRIPTION OF THE DIGITAL COPIER...
-
Page 18: Sending A Fax (Basic)
2. SENDING A FAX (BASIC) 1. Transmission modes ..............2. Preparation for transmission ............. • Switching to the FAX mode ................2-4 3. Originals ..................• Original size / Original scanning range ............2-5 • Setting originals ................... 2-6 4. Setting the transmission conditions........... •... -
Page 19: Transmission Modes
1. TRANSMISSION MODES • Keypad Dialing (Digital key entry) You can dial the telephone number of the remote FAX directly using the digital keys. • Phone Book (Group) Dialing You can specify a remote FAX from the phone book (group) registered beforehand. •... - Page 20 • Mailbox Transmission You can have confidential, bulletin board, multi-address relay mail communication with remote FAXes that support the ITU-T F code functions. • Polling Transmission You can store originals in the memory, and wait for a request to send the originals from a remote FAX. When a request arrives, the originals are automatically sent to the remote FAX that sent the request.
-
Page 21: Preparation For Transmission
2. PREPARATION FOR TRANSMISSION Switching to the FAX Mode Open the cover and turn ON the main power switch. • This message appears on the message panel of the Basic Screen: Wait Warming Up About 30 seconds later, the copier will become ready for copying. -
Page 22: Originals
3. ORIGINALS Original Size / Original Scanning Range Originals Size The following table shows the size and thickness of originals that can be sent on this copier. Maximum Number Remarks Setting Types of Original Original Size That Can be Set Position Do not place any Glass... -
Page 23: Setting Originals
3. ORIGINALS (Cont.) Setting Originals When Setting Originals on the Glass Originals are sent in the order that they are placed on the origi- nal glass in both the memory TX and direct TX modes. Raising the reversing automatic document feeder, place the original face down on the glass. - Page 24 Advice for when Using the Reversing Automatic Document Feeder Do not use the following types of originals as they tend to misfeed or become damaged: (1) Badly wrinkled or folded originals; in particular, (4) Clipped or stapled originals originals whose leading edge is curled may fail to be correctly fed.
- Page 25 3. ORIGINALS (Cont.) Setting Originals (Cont.) When Using the Reversing Automatic Document Feeder • When the originals are placed on the reversing automatic docu- ment feeder, they start to be both scanned and sent from the uppermost page. After aligning the edges of originals well, place them face up and align the slides to the width of the origi- nals.
-
Page 26: Setting The Transmission Conditions
4. SETTING THE TRANSMISSION CONDITIONS You can send originals under different transmission conditions (resolution, image quality mode, expo- sure, transmission mode, original size, ECM, quality TX and line). If you change the transmission conditions, the new settings are valid for one transmission only. The following describes the settings of each item. - Page 27 4. SETTING THE TRANSMISSION CONDITIONS (Cont.) Place the original. Page 2-6 Press the PHONE BOOK key to display the phone book menu, then the OPTION key. Press the desired keys. • Press the NEXT key to switch between the setting items. •...
-
Page 28: Setting The Scanning Conditions For Each Page (Book Transmission)
Setting the Scanning Conditions for Each Page (Book Transmission) When you want to send multi-page originals by placing them on the original glass, you can change the following scanning conditions (among the transmission conditions (settings)) for each page: • Resolution •... -
Page 29: Specifying The Remote Fax
5. SPECIFYING THE REMOTE FAX Direct Entry (Specifying by Digital keys) Direct entry refers to as the method for specifying remote FAX numbers by the digital keys. Enter the remote FAX number using the digital keys PRINTER/ MAIN POWER NETWORK COPY on the control panel. -
Page 30: Phone Book Entry
Phone Book Entry Phone book entry refers to the method for specifying remote FAX numbers by pressing the remote FAX keys which have previously been entered. It is convenient if frequently used destinations are entered in the phone book. • Entering into phone book Page 5-2 Press the PHONE BOOK key to display the phone book menu. -
Page 31: Group Entry
5. SPECIFYING THE REMOTE FAX (Cont.) Group Entry Group entry refers to the method for specifying remote FAX numbers by pressing the group key which has previously been entered. It is convenient if the frequently used multiple destinations are entered into a group. -
Page 32: Multi-Address Transmission
Multi-address Transmission The “multi-address transmission” function allows you to send the same original to two or more remote FAXes in a single operation, which can be done by combining direct entry (digital keys), phone book and group. This eliminates the trouble of placing the original in the copier and then dialing the number for each destination. -
Page 33: Searching By Id Number
5. SPECIFYING THE REMOTE FAX (Cont.) Searching by ID Number When selecting the remote FAXes entered in the phone book and group, searching by the ID number immediately displays the screen including the searched-for ID number. Press the PHONE BOOK key to display the phone book menu, then the SEARCH ID key. -
Page 34: Searching By Spelling
Searching by Spelling When selecting the remote FAXes entered in the phone book and group, pressing a letter key displays the remote FAXes whose names start with the letter on the screen, which makes it easy to choose the desired remote FAXes. Press the PHONE BOOK key to display the phone book menu. -
Page 35: Sending Originals
6. SENDING ORIGINALS Memory TX In the memory transmission, when you have placed the originals and performed the sending operation, the original is scanned and temporarily stored in the memory, and then sent. • Originals are scanned at high speed and stored in the memory. So, you can return originals to files and filing cabinets immediately. -
Page 36: Direct Tx
Direct TX When you have placed the originals and performed the sending operation, the remote FAX is immedi- ately dialed, and the originals are sent after connecting with the remote FAX with each page scanned separately. • You can check immediately if the original has been sent to the remote FAX. •... -
Page 37: Other Transmissions
6. SENDING ORIGINALS (Cont.) Other Transmissions On-hook Transmission Place the original. Page 2-6 Set the transmission conditions. Page 2-10 Press the MONITOR/PAUSE key. PRINTER/ NETWORK COPY MAIN POWER • You can hear the monitor tone from the built-in speaker. POWER DATA MEMORY RX •... - Page 38 Off-hook Transmission Tips • An external telephone is required. Place the original. Page 2-6 Set the transmission conditions. Page 2-10 Pick up the handset of an external telephone. Specify the remote FAX number. • Specifying by digital keys Page 2-12 •...
-
Page 39: Canceling Transmissions
7. CANCELING TRANSMISSIONS Canceling Transmissions (during Scanning) Press the CLEAR/STOP key while the original PRINTER/ NETWORK COPY MAIN POWER is being scanned. Scanning (storing into memory) POWER DATA MEMORY RX is paused. ERROR INTERRUPT To cancel the job during the scanning pause, press FUNCTION CLEAR the FUNCTION CLEAR key. - Page 40 Press the YES key if you want to cancel the job, or press the NO key if you do not want to. Canceling Transmissions (during Memory Transmission) Press the JOB STATUS key to display the job status menu, then press the COMM RESERVATION key.
- Page 41 7. CANCELING TRANSMISSIONS (Cont.) Canceling Direct Transmission (during Scanning) Press the CLEAR/STOP key during transmis- PRINTER/ NETWORK COPY MAIN POWER sion (scanning). POWER DATA MEMORY RX • The transmission (scanning) operation is paused. ERROR INTERRUPT To cancel the paused transmission, press the FUNCTION CLEAR FUNCTION CLEAR key.
-
Page 42: Checking Transmission Results
8. CHECKING TRANSMISSION RESULTS Checking Communication Status on the Touch Panel Check the communications status (executing/reservation/recovery standby/execution result, including the polling transmission and reception) of the transmission files that are set in the memory TX or direct TX modes. The following information of each communication status can be confirmed on the touch panel. •... -
Page 43: Checking Communication Status On The Touch Panel
8. CHECKING TRANSMISSION RESULTS (Cont.) Checking Communication Status on the Touch Panel (Cont.) • The following are displayed in the list of the REVIEW TX REPORT screen: OK: Transmission succeeded NG: Transmission failed To view destinations not displayed on the screen, press the NEXT key to switch the... -
Page 44: Checking Transmission Results By Printing Tx Reports
Checking Transmission Results by Printing TX Reports Print out the TX Report (Transmission Journal) of one transmission job you want to confirm to check the transmission results. * Sample of the journal Page 5-34 Press the JOB STATUS key to display the job sta- tus menu, then the REVIEW TX REPORT key. -
Page 45: Checking Transmission Results By Printing A List (Transmission Journal)
8. CHECKING TRANSMISSION RESULTS (Cont.) Checking Transmission Results by Printing a List (Transmission Journal) Print out the Transmission Journal (40 or 120 communications) to check the transmission results. The transmission journal can be output as required, but it is automatically output when 40 (or 120) commu- nications have been performed. -
Page 46: Checking Reserved Transmissions By Printing Lists (Reservation List)
Checking Reserved Transmissions by Printing Lists (Reservation List) Print out the Reservation List to check the reservation and recovery transmission standing-by job status. * Sample of the reservation list Page 5-35 Press the SETTINGS key to display the settings menu, then the LISTS key. - Page 47 2-30 SENDING A FAX (BASIC)
-
Page 48: Sending A Fax (Advanced)
3. SENDING A FAX (ADVANCED) 1. Transmitting at a specified time (delayed TX reservation) ..2. Priority transmission ..............3. Programmed transmission ............4. Sending two-sided originals (two-sided scanning) ....5. Quality transmission ..............6. Mailbox (ITU-T compatible)(transmission) ......... • Setting up and deleting a mailbox in the mailbox hub ........3-8 •... -
Page 49: Transmitting At A Specified Time (Delayed Tx Reservation)
1. TRANSMITTING AT A SPECIFIED TIME (DELAYED TX RESERVATION) This function allows you to send originals to a remote FAX at a specified day and time. This function comes in handy when you want to make use of off-peak discounts (e.g. night time) and consider time differences when sending overseas. -
Page 50: Priority Transmission
2. PRIORITY TRANSMISSION “Priority TX” allows you to execute a transmission before other reserved transmissions (including redial standby). • You can dial by digital keys directly or phone book. • Priority reservation is good for single transmissions only. Press the ADVANCED key to display the advanced menu, then the PRIORITY RESERVE key. -
Page 51: Programmed Transmission
3. PROGRAMMED TRANSMISSION • You can enter combinations of frequently used functions as a “program” to the program keys and call up these programs whenever they are needed. • You can enter up to 24 programs. • For details on how to enter programs, see “Entering Programs”. Page 5-14 Place the original. -
Page 52: Sending Two-Sided Originals (Two-Sided Scanning)
4. SENDING TWO-SIDED ORIGINALS (TWO-SIDED SCANNING) You can scan and send two-sided originals using the reversing automatic document feeder. • Setting originals when sending LT/A4 two-sided originals. To set the originals on the reversing automatic document feeder, change the direction of original feeding depending on the bound position. -
Page 53: Quality Transmission
5. QUALITY TRANSMISSION • You can set Quality TX in either the memory TX or direct TX modes. • You can set Quality TX in the phone book or settings menu. When Quality TX is set to “ON” in the phone book menu, the new setting is valid for only one transmis- sion. -
Page 54: Mailbox (Itu-T Compatible)(Transmission)
6. MAILBOX (ITU-T COMPATIBLE) (TRANSMISSION) Mailbox allows storage and retrieval of documents via mailboxes that are already set up in a mailbox hub. The following three types of Mailboxes are available: • Confidential Box: Confidential Box allows a one-time document retrieval from the mailbox. Once a document is retrieved, it is cleared. -
Page 55: Setting Up And Deleting A Mailbox In The Mailbox Hub
6. MAILBOX (ITU-T COMPATIBLE) (TRANSMISSION) (Cont.) Setting Up and Deleting a Mailbox in the Mailbox Hub In order to carry out ITU-T communications, you must previously set up an Open Mailbox in the mailbox hub. You can set up a maximum of 100 Confidential, Bulletin Board and Multi-address relay mailboxes in total. Setting Up a Mailbox of Confidential and Bulletin Board Press the ADVANCED key to display the advanced menu, then the... - Page 56 Setting Up the Relay Mailbox This section describes how to set up the relay mailbox in the local hub. Perform steps 1 to 4 of the procedure for “Setting Up a Mailbox of Confidential and Bulletin Board”. • Press the RELAY key in step 2. Select the remote FAXes for multi-address relay mail by the phone book or group.
- Page 57 6. MAILBOX (ITU-T COMPATIBLE) (TRANSMISSION) (Cont.) Setting Up and Deleting a Mailbox in the Mailbox Hub (Cont.) Deleting a Mailbox Press the ADVANCED key to display the advanced menu, then the ITU MAILBOX key. • If the key for the desired function is not shown, press the Next key to switch the screen.
- Page 58 Correcting the Relay Mailbox Press the ADVANCED key to display the advanced menu, then the ITU MAILBOX key. • If the key for the desired function is not shown, press the Next key to switch the screen. Press the RELAY key, then the MODIFY key. Press the SET key.
- Page 59 6. MAILBOX (ITU-T COMPATIBLE) (TRANSMISSION) (Cont.) Setting Up and Deleting a Mailbox in the Mailbox Hub (Cont.) Select whether you want to register the destination to which the multi-address relay unit mail transmis- sion result is to be replied. • If you press the NO key, the relay box correction proce- dure is completed, and the box will be opened.
-
Page 60: Confidential / Bulletin Board / Multi-Address Relay Mail
Confidential / Bulletin Board / Multi-address Relay Mail Storing a Document in a Mailbox of Confidential and Bulletin Board (Local Hub) This section describes how to store a document in a mailbox in a local hub. Place the original. Page 2-6 Set the transmission conditions. - Page 61 6. MAILBOX (ITU-T COMPATIBLE) (TRANSMISSION) (Cont.) Confidential / Bulletin Board / Multi-address Relay Mail (cont.) Sending a Document to a Mailbox (Remote Hub) This section describes how to send a document to a remote hub from the local hub. Place the original. Page 2-6 Set the transmission conditions.
- Page 62 Printing a Document from a Mailbox (Local Hub) This section describes how to print a document stored in the mailbox at the local hub. Press the ADVANCED key to display the advanced menu, then the ITU MAILBOX key. • If the key for the desired function is not shown, press the Next key to switch the screen.
- Page 63 6. MAILBOX (ITU-T COMPATIBLE) (TRANSMISSION) (Cont.) Confidential / Bulletin Board / Multi-address Relay Mail (cont.) Canceling (Deleting) a Document from a Mailbox (Local Hub) This section describes how to delete a document stored in the mailbox at the local hub. Press the ADVANCED key to display the advanced menu, then the ITU MAILBOX...
-
Page 64: Polling Communications (Transmission)
FAXes not having the same polling number can be inhibited by appending the originals with a password and the receiver’s telephone number information at the FAX sending the originals. * Polled communication appended with a password can be sent and received only on Toshiba FAXes. Place the original. -
Page 65: Chain Dial Communication
8. CHAIN DIAL COMMUNICATION More than one dialing operation can be combined. Any combinations of dialing by the phone book and direct entry by the digital keys are available. This function is convenient when you make use of the FAX communication network. Press the ADVANCED key to display the advanced menu, then the CHAIN DIAL COMM. -
Page 66: Receiving A Fax
4. RECEIVING A FAX 1. Reception modes ..............2. Reception settings ..............3. Memory RX ................4. Mailbox (ITU-T compatible) (reception) ........• Receiving (retrieving) a document from a mailbox (remote hub) ....4-6 5. Polling communications (reception) .......... • Polling reception ..................4-7 Cassette exclusively for FAX Cassettes can be set for FAX only. -
Page 67: Reception Modes
1. RECEPTION MODES • Automatic RX FAXes are automatically received when there is an incoming call. • Manual RX FAXes start to be received when you confirm the call on the telephone, press the MANUAL RECEIVE key in the advanced menu and then the START key. -
Page 68: Reception Settings
2. RECEPTION SETTINGS There are two reception modes : auto reception and manual reception. • AUTO reception : Set this mode when the line is being used exclusively by the FAX. The FAX automatically receives incoming originals. • MANUAL reception : Set this mode when the FAX is connected to a line used as the telephone line only. - Page 69 2. RECEPTION SETTINGS (Cont.) Manual Reception When the bell rings, pick up the handset of an exter- nal telephone. • If the incoming call is a telephone call, start talking with the other party. If you hear a low-pitched tone, press the ADVANCED key to display the advanced menu, then the...
-
Page 70: Memory Rx
3. MEMORY RX This digital copier automatically stores the information of received originals in the memory to ensure communications even if some trouble (e.g. a paper jam or no more paper in the copier) occurs during reception and prevents the originals from being printed. Memory RX is carried out in the following instances: •... -
Page 71: Mailbox (Itu-T Compatible) (Reception)
4. MAILBOX (ITU-T COMPATIBLE) (RECEPTION) Receiving (Retrieving) a Document from a Mailbox (Remote Hub) Mailbox allows storage and retrieval of documents via mailboxes that are already set up in a mailbox hub. Mailbox Page 3-7 This section describes how to retrieve a document from mailboxes of confidential and bulletin board setup in a remote hub. -
Page 72: Polling Communications (Reception)
FAXes not having the same polling number can be inhibited by appending the originals with a pass- word at the FAX sending the originals. • Polled originals appended with a password can be sent and received only on Toshiba FAXes. Press the ADVANCED key to display the advanced... - Page 73 RECEIVING A FAX...
-
Page 74: Entering And Setting Items
5. ENTERING AND SETTING ITEMS 1. Entering the remote FAX numbers ..........• Entering into phone book ................5-2 • Entering into groups ..................5-7 2. Entering various functions ............5-11 • Entering the terminal ID ................5-11 • Entering programs ..................5-14 3. -
Page 75: Entering The Remote Fax Numbers
(with the FAX board attached). • Transmission attenuator --- Set the transmission attenuator for each remote FAX. * For details on setting, consult your nearest Toshiba Service Station. Press the SETTINGS key to display the settings menu, then the TELEPHONE NUMBERS key. - Page 76 Press the PHONE BOOK ENTRY key. Press the ID number that you want to enter. • Press the PRE or NEXT key to switch between the ID number screens until the desired remote FAX is found. • You cannot specify an ID number already assigned. Press the NAME key, and enter the name of the remote FAX in the letter entry screen.
- Page 77 *To use this function, the remote FAX must be a model capable of setting an ITU-T compatible sub-address or password. For details, contact your nearest Toshiba Service Station. Check the settings that have been entered, and press the SET key.
- Page 78 Correcting Phone Book Entries Press the SETTINGS key to display the settings menu, then the TELEPHONE NUMBERS key. Press the PHONE BOOK MODIFY key. Press the ID number that has items to be corrected. • Press the NEXT key to switch between the ID number screens until the desired remote FAX is found.
- Page 79 1. ENTERING THE REMOTE FAX NUMBERS (Cont.) Entering into Phone Book (Cont.) Deleting Phone Book Entries Press the SETTINGS key to display the settings menu, then the TELEPHONE NUMBERS key. Press the PHONE BOOK MODIFY key. Press the ID number to be deleted. •...
-
Page 80: Entering Into Groups
Entering into Groups If you have already entered numbers into a phone book, you can combine them as a “group.” Up to 50 groups can be registered. You can enter the following items. • ID number ------------------ Enter a number within the range 01 to 50. This number can be used to find a remote FAX number by ID number. - Page 81 1. ENTERING THE REMOTE FAX NUMBERS (Cont.) Entering into Groups (Cont.) Press the key of the remote FAX to enter to the group to highlight it. • Press the NEXT key to switch between the remote FAX screens to select all the remote FAXes to be registered.
- Page 82 Press the ID number of the group to be corrected. • Press the PRE or NEXT key to switch between the ID number screens until the desired remote FAX is found. • You cannot specify non-assigned ID numbers. If you want to correct the group name, press the GROUP NAME key, correct it, and press the SET key.
- Page 83 1. ENTERING THE REMOTE FAX NUMBERS (Cont.) Entering into Groups (Cont.) Press the GROUP NO. MODIFY key. Press the ID number of the group to be deleted. • Press the PRE or NEXT key to switch between the ID number screens until the desired remote FAX is found. •...
-
Page 84: Entering Various Functions
ID number and name on pages 5-12 to 5-14 in this manual. (Example of how Sender’s Information is Printed on Originals Received by the Remote FAX ) 11-09-'00 15:08 P01/01 T-069 F-049 FROM- TOSHIBA 1234567890 File number Remote FAX ID Sender’s... - Page 85 2. ENTERING VARIOUS FUNCTIONS (Cont.) Entering the Terminal ID (Cont.) Press the SETTINGS key to display the settings menu, then the INITIAL SETUP key. Press the TERMINAL ID key. Press the ID NAME key and enter the ID name in the letter entry screen (up to 20 characters).
- Page 86 Press either the YES or NO key for adding the international code. If you add the international code (your country code) in ad- vance, you can let the remote FAX to know your country when communicating with overseas. <Example> Registration by adding international code in the terminal ID (234-567-8901).
-
Page 87: Entering Programs
2. ENTERING VARIOUS FUNCTIONS (Cont.) Entering Programs You can enter frequently used functions and destinations into the program keys, and call up these combinations whenever they are needed. Each combination is referred to as a “program.” You can enter up to 24 programs. Once you have entered a program, it cannot be canceled. - Page 88 When you have finished entering the program name, press the key. • The screen returns to the settings menu. • Press the FUNCTION CLEAR key on the control panel to complete the setting. The registered items can be confirmed in the program informa- tion.
-
Page 89: Setting Various Functions
3. SETTING VARIOUS FUNCTIONS Setting the Initial Transmission Mode (Home Position) Set the initial settings for the original transmission conditions and transmission type. When you send an original without changing the original conditions and transmission mode settings, the original is sent at the values set in the home position. Resolution : STANDARD, FINE, U-FINE Image quality mode... -
Page 90: Setting The Reception Mode
Setting the Reception Mode Set reception mode such as the volume settings and line-related items. Monitor tone volume : Adjustable 0-7 steps (0: tone OFF) The “monitor tone” refers to the line monitor tone when the MONITOR/PAUSE key is pressed. Completion tone volume : Adjustable 0-7 stages The “completion tone”... - Page 91 3. SETTING VARIOUS FUNCTIONS (Cont.) Setting the Reception Mode (Cont.) Press the desired key for each item. • The screens on the right shows the default settings. • With the monitor tone volume, you can adjust the line moni- tor tone volume in the on-hook mode. •...
-
Page 92: Setting At The 2Nd Line Board (Optional) Installation
Setting at the 2nd Line Board (optional) Installation Installing the 2nd line board (optional) allows transmission during reception, reception during transmis- sion, and simultaneous two communications of transmission / reception. When the 2nd line is used, the following function setting and registration are required. •... - Page 93 3. SETTING VARIOUS FUNCTIONS (Cont.) Setting at 2nd Line Board (optional) Installation (Cont.) 2nd Line Setting When the optional 2nd line board is installed, its operation can be selected from the following: • Transmission/Reception : Both transmission and reception are available all the time. •...
- Page 94 Reception Only Press the RX ONLY(24HR) key. Making the 2nd line standby for the reception all the time Press the key. Using the 2nd line for reception only during the speci- fied period Press the RX ONLY (TIMER) key. • Enter the START time and END time using the digital keys. •...
-
Page 95: Setting Recovery Transmission
3. SETTING VARIOUS FUNCTIONS (Cont.) Setting Recovery Transmission This function allows the operator to select and retransmit a document held in the memory after the initially specified number of redial attempts have failed. Setting Document-Holding Time in the Memory Press the SETTINGS key to display the settings menu, then the RECOVERY TX key. -
Page 96: Setting The Authorization Code
Setting the Authorization Code An authorization code can be set in this copier in addition to the password for each open mailbox. The authorization code could delete any box. • Mailbox Page 3-7 Press the SETTINGS key to display the settings menu, then the AUTHORIZATION CODE key. -
Page 97: Setting Reception And Printing
4. SETTING RECEPTION AND PRINTING Relationship between Original and Copy Paper Copy paper size Originals received on the FAX can be output to LD, LG, LT, ST, A3, B4, A4, B5 and A5 size paper, and are printed in the printing range of each size of copy paper. - Page 98 Paper Priority when there is no Same Size Paper • When RX reduction printing and discard printing are set to “ON”, paper is selected according to the following priority: 1. Paper of the same size and same orientation as the received original 2.
- Page 99 4. SETTING RECEPTION AND PRINTING (Cont.) Relationship between Original and Copy Paper (Cont.) European Sizes Size of Original being Received FOLID Priority FOLID FOLIO FOLIO Reduced to 75% Reduced to 75% The paper priority varies according to the RX reduction printing and discard printing settings. For details, contact your service technician.
-
Page 100: Setting Rx Printing
Setting RX Printing Set printer settings for when originals received on the FAX are printed. Two print installations are available: discard printing and RX reduction printing. • Discard Printing : ON, OFF ON (initial setting) : If the received original is longer than the recording paper by 10mm, the excess data for the received original will be discarded. -
Page 101: Setting Duplex Printing
4. SETTING RECEPTION AND PRINTING (Cont.) Setting Duplex Printing This printer setting sets whether or not to print received originals on both sides of the paper loaded in the copier. * Two-sided printing is possible only for the same size of the received originals. * When the copier runs out of paper during duplex printing, the rest of the document is printed in double- sided on another size of paper. -
Page 102: Setting The Alternation
Setting the Alternation The printer setting sets whether or not to output every job of received originals alternately. * Alternate printing is possible only for LT/A4-sized paper. Set the LT and LT-R, or A4 and A4-R cassettes. * When the copier runs out of paper during alternate printing, the rest of the document is printed on the remaining paper. -
Page 103: Rdc Password Setting
5. RDC PASSWORD SETTING Set the security password for RDC communication. For details of RDC communication, consult your service technician. Press the SETTINGS key to display the settings menu, the NEXT key, then the RDC PASSWORD key. Press the PASSWORD key. Enter the RDC password using the digital keys and press the SET key. -
Page 104: Outputting Lists & Reports
6. OUTPUTTING LISTS & REPORTS Manually Outputting Lists and Reports You can output the following lists and reports. • Lists and reports are output on LT/A4-size paper. • If the copier is out of LT/A4-size paper, lists and reports are output on larger size paper. •... - Page 105 6. OUTPUTTING LISTS & REPORTS (Cont.) Manually Outputting Lists and Reports (Cont.) Setting the Number of Communications Output on Transmission/Reception Journal The number of communications on the transmission/reception journal manually output can be selected from 40 and 120. Press the SETTINGS key to display the settings menu, then the PRINTER key.
-
Page 106: Automatically Outputting Lists And Reports
ON after the power has failed during FAX communication. Initial settings are as follows: For details on how to change these settings, contact a Toshiba service technician. Initial Setting Output Condition when Setting is ON Transmission journal This report is output after every 40 or 120 transmissions. -
Page 107: Samples Of Lists & Reports
• If any errors occur during transmission, the error code is displayed after the “STATUS” (NG). Page 5-32 TRANSMISSION JOURNAL TIME : 09-11-’00 17:55 TEL NO.1 : +2131234567 TEL NO.2 : +2131235678 NAME : TOSHIBA L.A. FILE NO. DATE TIME DURATION DEPT MODE STATUS 09.11 16:59 00:23 TOSHIBA NY OFFICE EC C03 09.11... - Page 108 • The mark G on the “TO” refers to group. RESERVATION LIST TIME : 09-11-’00 18:41 TEL NO.1 : +2131234567 TEL NO.2 : +2131235678 NAME : TOSHIBA L.A. TX/RX FILE NO. DATE TIME FUNCTION DELAY TIME 09.11 18:41 MULTI TX G ABC EXPRESS 09.11 18:41...
- Page 109 “TO” refers to the top of the telephone number. PROGRAM INFORMATION TIME : 09-11-’00 17:56 TEL NO.1 : +2131234567 TEL NO.2 : +2131235678 NAME : TOSHIBA L.A. PROGRAM NUMBER : 01 PROGRAM NAME : GROUP 1 RESOLUTION : U-FINE MODE : TEXT/PHOTO...
- Page 110 “TEL NUMBER” is appended when the 2nd TEL NUMBER is used for transmission. PHONE BOOK NUMBER INFORMATION TIME : 09-11-’00 17:55 TEL NO.1 : +2131234567 TEL NO.2 : +2131235678 NAME : TOSHIBA L.A. NAME TEL NUMBER QUALITY TX TX TYPE LINE SALES DEPT. 1234567890 DIRECT LINE1 ABC &...
- Page 111 This is the list of current system settings. FUNCTION LIST TIME : 09-11-’00 17:57 TEL NO.1 : +2131234567 TEL NO.2 : +2131235678 NAME : TOSHIBA L.A. INITIAL SETUP LINE SELECT MONITOR VOLUME COMPLETE VOLUME RX MODE : AUTO DIAL TYPE : MF...
- Page 112 This is the report of the current status of the mailboxes. MAILBOX/RELAY BOX REPORT TIME : 09-11-’00 18:00 TEL NO.1 : +2131234567 TEL NO.2 : +2131235678 NAME : TOSHIBA L.A. MAILBOX BOX NO. BOX TYPE PGS FILE NO. DATE TIME FROM 0987654321 BULLETIN B.D 1234567890 CONFIDENTIAL 09.11 17:24 LOCAL...
- Page 113 ) on the “FILE NO.” refers to the communication using the mailbox. MULTI TRANSMISSION REPORT TIME : 09-11-’00 18:17 TEL NO.1 : +2131234567 TEL NO.2 : +2131235678 NAME : TOSHIBA L.A. FILE NO. : 013 DATE : 9.11 18:01 DOCUMENT PAGES START TIME : 09.11 18:01 END TIME : 9.11 18:17 (RECOVERY TIME : 09.12 00:17)
- Page 114 ) on the “FILE NO.” refers to the communication using the mailbox. POLLING REPORT TIME : 09-11-’00 18:18 TEL NO.1 : +2131234567 TEL NO.2 : +2131235678 NAME : TOSHIBA L.A. FILE NO. : 014 DATE : 09.11 18:02 START TIME : 09.11 18:17 END TIME : 09.11 18:18...
- Page 115 • This report is output when any error occurs. RELAY TX END TERMINAL REPORT TIME : 09-20-’00 14:46 TEL NO.1 : +2131234567 TEL NO.2 : +2131235678 NAME : TOSHIBA L.A. FILE NO. : 013 DATE : 09.20 14:45 DOCUMENT PAGES START TIME : 09.20 14:45 END TIME : 09.20 14:46...
- Page 116 ON after the power has failed during FAX communication. POWER FAILURE LIST TIME : 09-11-’00 17:53 TEL NO.1 : +2131234567 TEL NO.2 : +2131235678 NAME : TOSHIBA L.A. TX/RX FILE NO. DATE TIME FUNCTION 09.11 17:04 MEMORY TX 09.11 17:06 MULTI TX ITU MAILBOX FILE NO.
- Page 117 5-44 ENTERING AND SETTING ITEMS...
-
Page 118: Troubleshooting
6. TROUBLESHOOTING When the following messages appear .............. 6-2 Transmission trouble ..................6-3 Reception trouble ..................... 6-4 Graphic symbols for indicating the state of the copier appear on the touch panel. When any graphic symbol flashes, rectify the problem referring to “When Graphic Symbols Flash on the Touch Panel”... -
Page 119: When The Following Messages Appear
WHEN THE FOLLOWING MESSAGES APPEAR When the following messages appear on the message area of the touch panel, press the FUNCTION CLEAR key to clear the error message and carry out the appropriate remedy for the error. For details on other messages not listed below, refer to the Operator’s Manual for Copying Functions. Message Cause Remedy... -
Page 120: Transmission Trouble
TRANSMISSION TROUBLE Check the following points if you are having trouble sending originals. If you cannot rectify the trouble by checking these points, or trouble not listed below occurs, call service for assistance. Trouble Check Point • Did you replace the handset before you pressed the START key? When you are making a call on the handset to send a FAX, do not “TRANSMIT”... -
Page 121: Reception Trouble
RECEPTION TROUBLE Check the following points if you are having trouble receiving originals. If you cannot rectify the trouble by checking these points, or trouble not listed below occurs, call service for assistance. Trouble Check Point • Did you wait for the bell to ring before you picked up the handset? •... -
Page 122: Specifications
7. SPECIFICATIONS Using the telephone ..............Main specifications .............. -
Page 123: Using The Telephone
USING THE TELEPHONE An externally connected telephone is required. On-hook Dialing Press the MONITOR / PAUSE key on the control PRINTER/ MAIN POWER NETWORK COPY panel. POWER DATA MEMORY RX ERROR Specify the remote FAX number. INTERRUPT • Specifying by digital keys Page 2-12 FUNCTION CLEAR •... -
Page 124: Main Specifications
MAIN SPECIFICATIONS Name DP-4500/3500 Size of Original LD, LG, LT, ST, COMP , A3, A4, A5, B4, B5, FOLIO Recording Paper Size 11” × 17”(LD), 8.5” × 14”(LG), 8.5” × 11”(LT), 5.5” × 8.5”(ST), 10.1/8” × 14”(COMP) 297mm × 420mm(A3) 210mm × 297mm(A4) 148mm × 210mm(A5) 257mm ×...
Need help?
Do you have a question about the E-STUDIO45 and is the answer not in the manual?
Questions and answers