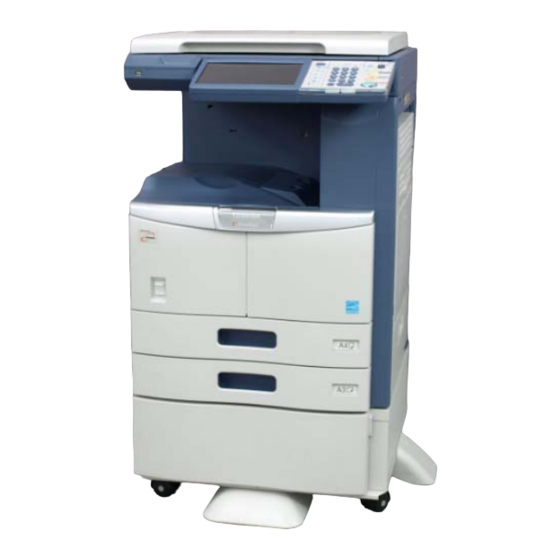
Toshiba e-STUDIO206L User Manual
E-studio206l; e-studio256; e-studio306; e-studio356; e-studio456
Hide thumbs
Also See for e-STUDIO206L:
- Service manual (1524 pages) ,
- Troubleshooting manual (132 pages) ,
- Quick start manual (90 pages)
Advertisement
Quick Links
II. UNPACKING AND SETUP
II-1. e-STUDIO206L/256/306/356/456
UNPACKING (1)
ACCESSORIES
SETUP FOR ORIGINAL COVER KA-1640PC
UNPACKING (2)
SETUP FOR DEVELOPER UNIT
AUTOMATIC SET-UP MODE
AUTO-TONER SENSOR ADJUSTMENT
SETUP FOR TONER CARTRIDGE
AUTOMATIC GAMMA ADJUSTMENT
SETTING DATE AND TIME
DATA ENCRYPTION FUNCTION
COPY OPERATION AND COPY QUALITY
© TOSHIBA TEC CORPORATION 2012 All Rights Reserved.
Main
Menu
Menu
1
Advertisement

Related Manuals for Toshiba e-STUDIO206L


Summary of Contents for Toshiba e-STUDIO206L
- Page 1 SETUP FOR DEVELOPER UNIT AUTOMATIC SET-UP MODE AUTO-TONER SENSOR ADJUSTMENT SETUP FOR TONER CARTRIDGE AUTOMATIC GAMMA ADJUSTMENT SETTING DATE AND TIME DATA ENCRYPTION FUNCTION COPY OPERATION AND COPY QUALITY Main Menu Menu © TOSHIBA TEC CORPORATION 2012 All Rights Reserved.
- Page 2 Prior to the setup of the e-STUDIO356, keep the following consumables at the ready: - DEVELOPER MATERIAL - TONER CARTRIDGE - PLAIN PAPER * Only for North America and Europe © TOSHIBA TEC CORPORATION 2012 All Rights Reserved.
- Page 3 II-1. e-STUDIO206L/256/306/356/456 UNPACKING (1) Sub Menu * At least 2 service technicians are required to unpack and set up the e-STUDIO. Cut 2 straps. Lift up the packing carton to remove it. © TOSHIBA TEC CORPORATION 2012 All Rights Reserved.
- Page 4 II. UNPACKING AND SETUP II-1. e-STUDIO206L/256/306/356/456 UNPACKING (1) Sub Menu Remove the packing materials. Lower the plastic bag. Take out the unpacking instructions. © TOSHIBA TEC CORPORATION 2012 All Rights Reserved.
- Page 5 UNPACKING (1) Sub Menu Remove the packing sheet from the original glass. Remove the packing material and accessories from the inner receiving tray to the paper exit side. Remove the packing sheet. © TOSHIBA TEC CORPORATION 2012 All Rights Reserved.
- Page 6 II. UNPACKING AND SETUP II-1. e-STUDIO206L/256/306/356/456 UNPACKING (1) Sub Menu Prepare the options and the desk. Pull out 2 handles at the paper feed side. © TOSHIBA TEC CORPORATION 2012 All Rights Reserved.
- Page 7 Gently place the e-STUDIO on the desk fitting the positioning pins of the desk into the slots of the e-STUDIO. * Place the e-STUDIO so that its front is aligned to that of the desk. © TOSHIBA TEC CORPORATION 2012 All Rights Reserved.
- Page 8 Peel off the adhesive tape and the packing materials. * Do not remove the adhesive tape holding the platen switch lever at this point. Peel if off when the original cover or the RADF is installed. © TOSHIBA TEC CORPORATION 2012 All Rights Reserved.
- Page 9 Completely pull out the upper drawer. Take out the accessories. Peel off the adhesive tape and remove the packing material. Close the upper drawer. Completely pull out the lower drawer. Peel off the adhesive tape. Close the lower drawer. © TOSHIBA TEC CORPORATION 2012 All Rights Reserved.
- Page 10 II. UNPACKING AND SETUP II-1. e-STUDIO206L/256/306/356/456 UNPACKING (1) Sub Menu Remove the 2 screws holding the carriage. © TOSHIBA TEC CORPORATION 2012 All Rights Reserved.
-
Page 11: Power Cable
TONER CARTRIDGE DEVELOPER MATERIAL 5 RUBBER CAPS (except for NAD, (except for NAD and MJD) MJD, JPD and FJP) OPERATOR'S MANUAL POCKET POWER CABLE (for JPD and FJP) (for JPD and FJP) © TOSHIBA TEC CORPORATION 2012 All Rights Reserved. -
Page 12: Safety Information
II. UNPACKING AND SETUP II-1. e-STUDIO206L/256/306/356/456 ACCESSORIES Sub Menu QUICK START GUIDE SAFETY INFORMATION USER CLIENT UTILITY DOCUMENTATION CD-ROM CD-ROM © TOSHIBA TEC CORPORATION 2012 All Rights Reserved. - Page 13 Place the platen sheet on the original glass with the edges of the sheet aligned to the original scales at both the rear and left sides. Remove the backing paper from the double-faced tape on both sides of the sheet. © TOSHIBA TEC CORPORATION 2012 All Rights Reserved.
- Page 14 Close the original cover. Gently press it down to stick the platen sheet on it. Gently open the original cover. Confirm that the platen sheet is fully stuck on the original cover. Remove the adhesive tape from the platen switch lever. © TOSHIBA TEC CORPORATION 2012 All Rights Reserved.
- Page 15 II. UNPACKING AND SETUP II-1. e-STUDIO206L/256/306/356/456 UNPACKING (2) Sub Menu Cover the screw holes on the top surface with 5 rubber caps. © TOSHIBA TEC CORPORATION 2012 All Rights Reserved.
- Page 16 II. UNPACKING AND SETUP SETUP FOR DEVELOPER UNIT II-1. e-STUDIO206L/256/306/356/456 Sub Menu Open the ADU. Lower the pressure release levers on both sides. © TOSHIBA TEC CORPORATION 2012 All Rights Reserved.
- Page 17 Remove 1 screw. Take off the pressure release metal plate on the left while lowering it. Take off the pressure release metal plate on the right in the same manner. * Keep the removed screws and pressure release metal plates safe. © TOSHIBA TEC CORPORATION 2012 All Rights Reserved.
- Page 18 II. UNPACKING AND SETUP SETUP FOR DEVELOPER UNIT II-1. e-STUDIO206L/256/306/356/456 Sub Menu Raise both pressure release levers to apply pressure. Open the front cover. © TOSHIBA TEC CORPORATION 2012 All Rights Reserved.
- Page 19 II. UNPACKING AND SETUP SETUP FOR DEVELOPER UNIT II-1. e-STUDIO206L/256/306/356/456 Sub Menu Secure the pressure release metal plates on both sides with 2 screws each. Fully loosen 2 hand screws. Pull out the process unit. © TOSHIBA TEC CORPORATION 2012 All Rights Reserved.
- Page 20 SETUP FOR DEVELOPER UNIT II-1. e-STUDIO206L/256/306/356/456 Sub Menu Take off the developer material cover. Fully shake the developer Remove the cap from the developer material material bottle. bottle. Attach the developer nozzle to the bottle. © TOSHIBA TEC CORPORATION 2012 All Rights Reserved.
- Page 21 Turn the gear at the rear of the developer unit the developer material. as indicated by the arrow. Spread out the developer material over the developer sleeve. Install the developer material cover. © TOSHIBA TEC CORPORATION 2012 All Rights Reserved.
- Page 22 SETUP FOR DEVELOPER UNIT II-1. e-STUDIO206L/256/306/356/456 Sub Menu Push the process unit into the e-STUDIO as far as it goes. Secure it with 2 hand screws. Close the front cover and the ADU. © TOSHIBA TEC CORPORATION 2012 All Rights Reserved.
- Page 23 AUTO-TONER SENSOR ADJUSTMENT SETUP FOR TONER CARTRIDGE AUTOMATIC GAMMA ADJUSTMENT * Never turn the power OFF with the main power switch until the automatic gamma adjustment has been completed. © TOSHIBA TEC CORPORATION 2012 All Rights Reserved.
- Page 24 Turn the power ON with the main power switch. Press [OK] on the AUTHENTICATION screen. A password is unnecessary. 主電源 When "Start easy setup. Press [OK]." appears, press [OK]. The auto-toner sensor adjustment starts. © TOSHIBA TEC CORPORATION 2012 All Rights Reserved.
- Page 25 Close the cover." appears, set the toner cartridge following the procedure below. 主電源 Open the front cover. Peel off the adhesive tape at the toner supply opening of the process unit. © TOSHIBA TEC CORPORATION 2012 All Rights Reserved.
- Page 26 Shake the toner cartridge well about 10 times while tilting it more than 90 degrees or over. Face the toner supply opening upward. Pull out the seal at the toner supply opening of the cartridge. © TOSHIBA TEC CORPORATION 2012 All Rights Reserved.
- Page 27 II. UNPACKING AND SETUP SETUP FOR TONER CARTRIDGE II-1. e-STUDIO206L/256/306/356/456 Sub Menu Insert the toner cartridge into the e-STUDIO until the end. Close the front cover according to the instructions on the screen. © TOSHIBA TEC CORPORATION 2012 All Rights Reserved.
- Page 28 II-1. e-STUDIO206L/256/306/356/456 Sub Menu When "Press [OK]" appears, press [OK]. When "Execute gamma adjustment. Set 4A/LT paper in the drawer 1 and press [OK]" appears, set A4-size paper in the upper drawer. © TOSHIBA TEC CORPORATION 2012 All Rights Reserved.
- Page 29 II. UNPACKING AND SETUP AUTOMATIC GAMMA ADJUSTMENT II-1. e-STUDIO206L/256/306/356/456 Sub Menu Press [OK]. The test chart for the adjustment is output. © TOSHIBA TEC CORPORATION 2012 All Rights Reserved.
- Page 30 Be sure to set the original chart aligning to the top left corner. Close the original cover or the ADU. Press [OK]. © TOSHIBA TEC CORPORATION 2012 All Rights Reserved.
- Page 31 When pressing [CANCEL], shut down the equipment by pressing the [ON/OFF] button until you hear a sound. Turn the power back ON. Reset the test chart on the original glass and restart the adjustment. © TOSHIBA TEC CORPORATION 2012 All Rights Reserved.
-
Page 32: Setting Date And Time
II-1. e-STUDIO206L/256/306/356/456 SETTING DATE AND TIME Sub Menu Turn the power ON with the main power switch. Press the [USER FUNCTIONS] button on the control panel to enter the USER FUNCTIONS menu. © TOSHIBA TEC CORPORATION 2012 All Rights Reserved. - Page 33 II. UNPACKING AND SETUP II-1. e-STUDIO206L/256/306/356/456 SETTING DATE AND TIME Sub Menu Press [ADMIN]. Enter a password. © TOSHIBA TEC CORPORATION 2012 All Rights Reserved.
- Page 34 II. UNPACKING AND SETUP II-1. e-STUDIO206L/256/306/356/456 SETTING DATE AND TIME Sub Menu Press [GENERAL]. Press [CLOCK]. Press [DATE/TIME]. © TOSHIBA TEC CORPORATION 2012 All Rights Reserved.
- Page 35 II. UNPACKING AND SETUP II-1. e-STUDIO206L/256/306/356/456 SETTING DATE AND TIME Sub Menu Enter the values for the year, month, date, hour and minute. Press [OK]. © TOSHIBA TEC CORPORATION 2012 All Rights Reserved.
- Page 36 Turn the power ON with the main power switch while pressing [0] and [8] simultaneously. Key in [9397], and then press the [START] button. © TOSHIBA TEC CORPORATION 2012 All Rights Reserved.
- Page 37 1: Enabled (giving priority to the security 2: Enabled (giving priority to the performance) Shut down the equipment by pressing the [ON/OFF] button until you hear a sound. Turn the power OFF with the main power switch. © TOSHIBA TEC CORPORATION 2012 All Rights Reserved.
- Page 38 Turn the power ON with the main power switch. "Security Level Change Execution Please Security Level Change Wait... Operation in Progress…" indicates that Execution Please Wait... data encryption has been underway. … Operation in Progress © TOSHIBA TEC CORPORATION 2012 All Rights Reserved.
- Page 39 Sub Menu Set the test chart on the original glass. Make a copy and check the following contents. Paper feed performance [Upper drawer] [Lower drawer] [Bypass feed] Fusing or cleaning performance Control panel © TOSHIBA TEC CORPORATION 2012 All Rights Reserved.
- Page 40 COPY OPERATION AND COPY QUALITY II-1. e-STUDIO206L/256/306/356/456 Sub Menu Confirm that copying is performed properly when paper is fed from the drawers or the bypass tray. Fusing and cleaning are performed properly. © TOSHIBA TEC CORPORATION 2012 All Rights Reserved.
- Page 41 II. UNPACKING AND SETUP COPY OPERATION AND COPY QUALITY II-1. e-STUDIO206L/256/306/356/456 Sub Menu There is no problem with the indications or the buttons on the control panel. © TOSHIBA TEC CORPORATION 2012 All Rights Reserved.
- Page 42 II. UNPACKING AND SETUP II-1. e-STUDIO206L/256/306/356/456 Sub Menu Main Menu Menu Next Chapter © TOSHIBA TEC CORPORATION 2012 All Rights Reserved.
Need help?
Do you have a question about the e-STUDIO206L and is the answer not in the manual?
Questions and answers