Table of Contents
Advertisement
Quick Links
Advertisement
Table of Contents

Related Manuals for IEI Technology AFL3-08A-BT


Summary of Contents for IEI Technology AFL3-08A-BT
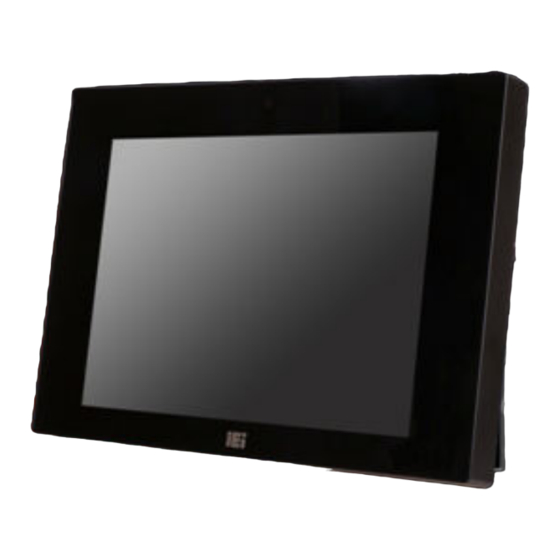
- Page 1 AFL3-08A-BT Panel PC MODEL: AFL3-08A-BT Flat Bezel Panel PC with Intel® Celeron® J1900 Quad-Core CPU, Touchscreen, Dual USB 3.0, Dual GbE LAN, RS-232, HD Audio, Wi-Fi 802.11a/b/g/n/ac and RoHS User Manual User Manual Page I Rev. 1.01 - November 25, 2016...
- Page 2 AFL3-08A-BT Panel PC Revision Date Version Changes November 25, 2016 1.01 Added warning messages in the following sections: - Section 1.7: System Specifications - Section 3.4: Removing the Back Cover - Section 3.12: Powering On the System - Section 6.2.1: Battery Connector (BAT1) July 5, 2016 1.00...
-
Page 3: Safety Instructions
AFL3-08A-BT Panel PC Safety Instructions Warning! Read the user manual before connecting the system to the power source. Vorsicht! Bitte lesen Sie die Bedienungsanleitung, bevor Sie das System an eine Stromquelle anschließen. Attention! Avant de brancher le système à la source d'alimentation, consultez le mode d'emploi. - Page 4 AFL3-08A-BT Panel PC Warning! Use only the adapter and power cord approved for this system. Use of another type of adapter may risk fire or explosion. Please refer to the user manual for the power adapter specifications. Vorsicht! Nur zugelassene Netzteile und Netzkabel dürfen verwendet werden. Die Benutzung von anderen Netzteilen kann einen Brand oder eine Explosion zur Folge haben.
-
Page 5: Copyright Notice
AFL3-08A-BT Panel PC Copyright COPYRIGHT NOTICE The information in this document is subject to change without prior notice in order to improve reliability, design and function and does not represent a commitment on the part of the manufacturer. In no event will the manufacturer be liable for direct, indirect, special, incidental, or consequential damages arising out of the use or inability to use the product or documentation, even if advised of the possibility of such damages. -
Page 6: Manual Conventions
AFL3-08A-BT Panel PC Manual Conventions WARNING Warnings appear where overlooked details may cause damage to the equipment or result in personal injury. Warnings should be taken seriously. CAUTION Cautionary messages should be heeded to help reduce the chance of losing data or damaging the product. -
Page 7: Mounting The System
AFL3-08A-BT Panel PC 3.11 Mounting the System The methods of mounting the AFL3-08A-BT are listed below. Wall mounting Panel mounting Rack mounting Arm mounting Stand mounting V-Stand mounting The mounting methods are described below. - Page 8 AFL3-08A-BT Panel PC Figure 3-11: Wall-mounting Bracket Step 6: Insert the four monitor mounting screws provided in the wall mount kit into the four screw holes on the real panel of the flat bezel panel PC and tighten until the screw shank is secured against the rear panel (Figure 3-12).
- Page 9 (Figure 3-12). Ensure that all four of the mounting screws fit snugly into their respective slotted holes. Always keep the AFL3-08A-BT in landscape orientation when mounting on the wall. NOTE: In the diagram below the bracket is already installed on the wall.
-
Page 10: Panel Mounting
AFL3-08A-BT Panel PC Figure 3-13: Secure the Panel PC 3.11.2 Panel Mounting To mount the AFL3-08A-BT flat bezel panel PC into a panel, please follow the steps below. Step 1: Select the position on the panel to mount the panel PC. - Page 11 AFL3-08A-BT Panel PC Step 3: Slide the panel PC through the hole until the frame is flush against the panel. Step 4: Insert a M5*50 screw into the screw hole on the side of the panel mounting bracket. Then, install the following components onto the screw in sequence.
-
Page 12: Cabinet And Rack Installation
Figure 3-16: Securing Panel Mounting Brackets 3.11.3 Cabinet and Rack Installation The AFL3-08A-BT flat bezel panel PC can be installed into a cabinet or rack. The installation procedures are similar to the panel mounting installation. To do this, please follow the steps below:... - Page 13 AFL3-08A-BT flat bezel panel PC and the rack/cabinet into which the AFL3-08A-BT is installed. Slide the rear chassis of the AFL3-08A-BT panel PC through the rack/cabinet Step 1: bracket until the frame is flush against the front of the bracket (Figure 3-17).
- Page 14 AFL3-08A-BT Panel PC Step 3: Repeat Step 4 to install the other three screws into the sides of the two rack mounting brackets. Figure 3-18: Rack Mounting Kit Installation Align the rack mounting bracket screw holes with the VESA mounting holes on Step 4: the rear of the panel PC.
- Page 15 AFL3-08A-BT Panel PC Figure 3-19: Securing Rack Mounting Brackets Step 6: Slide the panel PC with the attached rack/cabinet bracket into a rack or cabinet (Figure 3-20). Figure 3-20: Install into a Rack/Cabinet Page 35...
-
Page 16: Arm Mounting
3.11.4 Arm Mounting The AFL3-08A-BT is VESA (Video Electronics Standards Association) compliant and can be mounted on an arm with a 75 mm interface pad. To mount the AFL3-08A-BT on an arm, please follow the steps below. The arm is a separately purchased item. Please correctly mount the arm onto Step 1: the surface it uses as a base. - Page 17 AFL3-08A-BT Panel PC Figure 3-21: Arm Mounting Retention Screw Holes Secure the AFL3-08A-BT to the interface pad by inserting four retention screws Step 4: through the mounting arm interface pad and into the AFL3-08A-BT.S t e p 0 : Figure 3-22: Arm Mounting...
-
Page 18: Stand Mounting
AFL3-08A-BT Panel PC 3.11.5 Stand Mounting To mount the AFL3-08A-BT using the stand mounting kit, please follow the steps below. Step 1: Locate the screw holes on the rear of the AFL3-08A-BT. This is where the bracket will be attached. - Page 19 AFL3-08A-BT Panel PC 3.11.6 V-Stand Mounting To mount the AFL3-08A-BT using the optional V-Stand mounting kit, please follow the steps below. Step 1: Carefully mark the locations of the four V-Stand screw holes on the mounting area. Drill four pilot holes at the marked locations for the V-Stand retention screws.
- Page 20 AFL3-08A-BT Panel PC Figure 3-25: Secure V-Stand to System Step 5: Align the V-Stand screw holes with the pilot holes on the mounting area. Mount the V-Stand by inserting the retention screws into the four pilot holes and tightening them.
- Page 21 AFL3-W15B-H81 Panel PC MODEL: AFL3-W15B-H81 Flat Bezel Panel PC with Intel® H81 Chipset, Touchscreen, Dual GbE LAN, Wi-Fi 802.11a/b/g/n/ac, Dual USB 3.0, 2-Megapixel Camera and IP 64 Compliant Front Panel User Manual User Manual Page i Rev. 1.00 - July 1, 2015...
- Page 22 AFL3-W15B-H81 Panel PC Revision Date Version Changes July 1, 2015 1.00 Initial release Page ii...
-
Page 23: Copyright Notice
AFL3-W15B-H81 Panel PC Copyright COPYRIGHT NOTICE The information in this document is subject to change without prior notice in order to improve reliability, design and function and does not represent a commitment on the part of the manufacturer. In no event will the manufacturer be liable for direct, indirect, special, incidental, or consequential damages arising out of the use or inability to use the product or documentation, even if advised of the possibility of such damages. -
Page 24: Manual Conventions
AFL3-W15B-H81 Panel PC Manual Conventions WARNING Warnings appear where overlooked details may cause damage to the equipment or result in personal injury. Warnings should be taken seriously. CAUTION Cautionary messages should be heeded to help reduce the chance of losing data or damaging the product. NOTE These messages inform the reader of essential but non-critical information. -
Page 25: Installation
AFL3-W15B-H81 Panel PC Chapter Installation Page 17... -
Page 26: Anti - Static Precautions
AFL3-W15B-H81 Panel PC 3.1 Anti-static Precautions WARNING: Failure to take ESD precautions during the maintenance of the AFL3-W15B-H81 result permanent damage AFL3-W15B-H81 and severe injury to the user. Electrostatic discharge (ESD) can cause serious damage to electronic components, including the AFL3-W15B-H81. Dry climates are especially susceptible to ESD. It is therefore critical that whenever the AFL3-W15B-H81 is accessed internally, or any other electrical component is handled, the following anti-static precautions are strictly adhered Wear an anti-static wristband: Wearing a simple anti-static wristband can... -
Page 27: At Power Mode
AFL3-W15B-H81 Panel PC 3.11.1 AT Power Mode With the AT mode selected, the power is controlled by a central power unit rather than a power switch. The AFL3-W15B-H81 panel PC turns on automatically when the power is connected. The AT mode benefits a production line to control multiple panel PCs from a central management center and other applications including: Self-service kiosk Plant environment monitoring system... -
Page 28: Wall Mounting
AFL3-W15B-H81 Panel PC 3.12.1 Wall Mounting To mount the flat bezel panel PC onto the wall, please follow the steps below. Step 1: Select the location on the wall for the wall-mounting bracket. Step 2: Carefully mark the locations of the four screw holes in the bracket on the wall. Step 3: Drill four pilot holes at the marked locations on the wall for the bracket retention screws. - Page 29 AFL3-W15B-H81 Panel PC Step 6: Insert the four monitor mounting screws provided in the wall mount kit into the four screw holes on the real panel of the flat bezel panel PC and tighten until the screw shank is secured against the rear panel (Figure 3-14). WARNING: Please use the M4 screws provided in the wall mount kit for the rear panel.
- Page 30 AFL3-W15B-H81 Panel PC Figure 3-14: Chassis Support Screws Step 9: Secure the panel PC by fastening the retention screw of the wall-mounting bracket (Figure 3-15). Figure 3-15: Secure the Panel PC Page 31...
-
Page 31: Panel Mounting
AFL3-W15B-H81 Panel PC 3.12.2 Panel Mounting To mount the AFL3-W15B-H81 flat bezel panel PC into a panel, please follow the steps below. Step 1: Select the position on the panel to mount the flat bezel panel PC. Step 2: Cut out a section corresponding to the size shown below. The size must be smaller then the outer edge. - Page 32 AFL3-W15B-H81 Panel PC Step 5: Repeat Step 4 to install the other three screws into the sides of the two panel mounting brackets. Figure 3-17: Panel Mounting Kit Installation Step 6: Align the panel mounting bracket screw holes with the VESA mounting holes on the rear of the panel PC.
-
Page 33: Cabinet And Rack Installation
AFL3-W15B-H81 Panel PC Figure 3-18: Securing Panel Mounting Brackets 3.12.3 Cabinet and Rack Installation The AFL3-W15B-H81 flat bezel panel PC can be installed into a cabinet or rack. The installation procedures are similar to the panel mounting installation. To do this, please follow the steps below: NOTE: When purchasing the cabinet/rack installation bracket, make sure it is... - Page 34 AFL3-W15B-H81 Panel PC Figure 3-19: Rack/Cabinet Bracket Installation Insert a M5*50 screw into the screw hole on the side of the rack mounting Step 2: bracket. Then, install the following components onto the screw in sequence. See Figure 3-20. Sequence Item Photo Instruction...
- Page 35 AFL3-W15B-H81 Panel PC Figure 3-20: Rack Mounting Kit Installation Step 4: Align the rack mounting bracket screw holes with the VESA mounting holes on the rear of the panel PC. Step 5: Secure the two rack mounting brackets to the rear of the panel PC by inserting the four retention screws into the VESA mounting holes and tightening them (Figure 3-21).
- Page 36 AFL3-W15B-H81 Panel PC Figure 3-21: Securing Rack Mounting Brackets Step 6: Slide the flat bezel panel PC with the attached rack/cabinet bracket into a rack or cabinet (Figure 3-22). Figure 3-22: Install into a Rack/Cabinet Page 37...
-
Page 37: Arm Mounting
AFL3-W15B-H81 Panel PC Step 7: Once the flat bezel panel PC with the attached rack/cabinet bracket has been properly inserted into the rack or cabinet, secure the front of the rack/cabinet bracket to the front of the rack or cabinet (Figure 3-22). 3.12.4 Arm Mounting The AFL3-W15B-H81 is VESA (Video Electronics Standards Association) compliant and can be mounted on an arm with a 75 mm or a 100 mm interface pad. - Page 38 AFL3-W15B-H81 Panel PC Figure 3-23: Arm Mounting Retention Screw Holes Step 4: Secure the AFL3-W15B-H81 to the interface pad by inserting four retention screws through the mounting arm interface pad and into the AFL3-W15B-H81. S t e p 0 : Figure 3-24: Arm Mounting Page 39...
-
Page 39: Stand Mounting
AFL3-W15B-H81 Panel PC 3.12.5 Stand Mounting To mount the AFL3-W15B-H81 using the stand mounting kit, please follow the steps below. Step 1: Locate the screw holes on the rear of the AFL3-W15B-H81. This is where the bracket will be attached. Step 2: Align the bracket with the screw holes. - Page 40 AFL3-W10A/12A/W15A-BT Panel PC MODEL: AFL3-W10A/12A/W15A-BT Flat Bezel Panel PC with Intel® Celeron® J1900 Quad-Core CPU, Touchscreen, Dual USB 3.0, Dual GbE LAN, RS-232, HD Audio, Wi-Fi 802.11a/b/g/n/ac and RoHS User Manual User Manual Page I Rev. 1.05 - June 27, 2016...
- Page 41 AFL3-W10A/12A/W15A-BT Panel PC Revision Date Version Changes June 27, 2016 1.05 Added Section 3.15: OS Installation Updated Chapter 4: BIOS Setup March 7, 2016 1.04 Added a note in Section 1.6 Updated AFL3-W10A-BT specifications in Section 1.7 September 10, 2015 1.03 Added AFL3-W10A-BT model July 23, 2015...
- Page 42 AFL3-W10A/12A/W15A-BT Panel PC Copyright COPYRIGHT NOTICE The information in this document is subject to change without prior notice in order to improve reliability, design and function and does not represent a commitment on the part of the manufacturer. In no event will the manufacturer be liable for direct, indirect, special, incidental, or consequential damages arising out of the use or inability to use the product or documentation, even if advised of the possibility of such damages.
- Page 43 AFL3-W10A/12A/W15A-BT Panel PC Manual Conventions WARNING Warnings appear where overlooked details may cause damage to the equipment or result in personal injury. Warnings should be taken seriously. CAUTION Cautionary messages should be heeded to help reduce the chance of losing data or damaging the product. NOTE These messages inform the reader of essential but non-critical information.
- Page 44 AFL3-W10A/12A/W15A-BT Panel PC The D-sub 9 connector pinouts of the RJ-45 to DB-9 cable are listed below. PIN NO. DESCRIPTION PIN NO. DESCRIPTION NDCD1 NDSR1 NRX1 NRTS1 NTX1 NCTS1 NDTR1 NRI1 Table 3-5: DB-9 Serial Port (COM1) Pinouts 3.12 Mounting the System The methods of mounting the AFL3-W10A/12A/W15A-BT are listed below.
- Page 45 AFL3-W10A/12A/W15A-BT Panel PC Step 5: Secure the mounting-bracket to the wall by inserting the retention screws into the four pilot holes and tightening them (Figure 3-16). Figure 3-16: Wall-mounting Bracket Page 34...
- Page 46 AFL3-W10A/12A/W15A-BT Panel PC Step 6: Insert the four monitor mounting screws provided in the wall mount kit into the four screw holes on the real panel of the flat bezel panel PC and tighten until the screw shank is secured against the rear panel (Figure 3-17). WARNING: Please use the M4 screws provided in the wall mount kit for the rear panel.
- Page 47 AFL3-W10A/12A/W15A-BT Panel PC Figure 3-17: Chassis Support Screws Step 9: Secure the panel PC by fastening the retention screw of the wall-mounting bracket (Figure 3-18). Figure 3-18: Secure the Panel PC Page 36...
- Page 48 AFL3-W10A/12A/W15A-BT Panel PC 3.12.2 Panel Mounting To mount the AFL3-W10A/12A/W15A-BT flat bezel panel PC into a panel, please follow the steps below. Step 1: Select the position on the panel to mount the panel PC. Step 2: Cut out a section corresponding to the size shown below. The size must be smaller then the outer edge.
- Page 49 AFL3-W10A/12A/W15A-BT Panel PC Figure 3-21: AFL-W15A-BT Cutout Dimensions Slide the panel PC through the hole until the frame is flush against the panel. Step 3: Step 4: Insert a M5*50 screw into the screw hole on the side of the panel mounting bracket.
- Page 50 AFL3-W10A/12A/W15A-BT Panel PC Figure 3-22: Panel Mounting Kit Installation Step 6: Align the panel mounting bracket screw holes with the VESA mounting holes on the rear of the panel PC. Secure the two panel mounting brackets to the rear of the panel PC by inserting Step 7: the four retention screws into the VESA mounting holes and tightening them (Figure...
- Page 51 AFL3-W10A/12A/W15A-BT Panel PC Figure 3-23: Securing Panel Mounting Brackets 3.12.3 Cabinet and Rack Installation The AFL3-W10A/12A/W15A-BT flat bezel panel PC can be installed into a cabinet or rack. The installation procedures are similar to the panel mounting installation. To do this, please follow the steps below: NOTE: When purchasing the cabinet/rack installation bracket, make sure it is...
- Page 52 AFL3-W10A/12A/W15A-BT Panel PC Figure 3-24: Rack/Cabinet Bracket Installation Insert a M5*50 screw into the screw hole on the side of the rack mounting Step 2: bracket. Then, install the following components onto the screw in sequence. See Figure 3-22. Sequence Item Photo Instruction...
- Page 53 AFL3-W10A/12A/W15A-BT Panel PC Figure 3-25: Rack Mounting Kit Installation Step 4: Align the rack mounting bracket screw holes with the VESA mounting holes on the rear of the panel PC. Secure the two rack mounting brackets to the rear of the panel PC by inserting Step 5: the four retention screws into the VESA mounting holes and tightening them (Figure 3-26).
- Page 54 AFL3-W10A/12A/W15A-BT Panel PC Figure 3-26: Securing Rack Mounting Brackets Step 6: Slide the panel PC with the attached rack/cabinet bracket into a rack or cabinet (Figure 3-27). Figure 3-27: Install into a Rack/Cabinet Page 43...
- Page 55 AFL3-W10A/12A/W15A-BT Panel PC Step 7: Once the panel PC with the attached rack/cabinet bracket has been properly inserted into the rack or cabinet, secure the front of the rack/cabinet bracket to the front of the rack or cabinet (Figure 3-27). 3.12.4 Arm Mounting The AFL3-W10A/12A/W15A-BT is VESA (Video Electronics Standards Association) compliant and can be mounted on an arm with a 75 mm or a 100 mm interface pad.
- Page 56 AFL3-W10A/12A/W15A-BT Panel PC Figure 3-28: Arm Mounting Retention Screw Holes (10.1”) Figure 3-29: Arm Mounting Retention Screw Holes (12.1” & 15.6”) Step 4: Secure the AFL3-W10A/12A/W15A-BT to the interface pad by inserting four retention screws through the mounting arm interface pad and into the AFL3-W10A/12A/W15A-BT.S t e p 0 : Page 45...
- Page 57 AFL3-W10A/12A/W15A-BT Panel PC Figure 3-30: Arm Mounting 3.12.5 Stand Mounting To mount the AFL3-W10A/12A/W15A-BT using the stand mounting kit, please follow the steps below. Step 1: Locate the screw holes on the rear of the AFL3-W10A/12A/W15A-BT. This is where the bracket will be attached. Align the bracket with the screw holes.
- Page 58 AFL3-W10A/12A/W15A-BT Panel PC Figure 3-31: Stand Mounting (Stand-A/Bxx) 3.12.6 V-Stand Mounting (10.1” and 12.1” Models Only) To mount the AFL3-W10A-BT or the AFL3-12A-BT using the optional V-Stand mounting kit, please follow the steps below. Step 1: Carefully mark the locations of the four V-Stand screw holes on the mounting area.
- Page 59 AFL3-W10A/12A/W15A-BT Panel PC Figure 3-32: Drill Pilot Holes for V-Stand Step 2: Align the screw holes on the V-Stand with the VESA mount screw holes on the system rear panel. Step 3: Insert the four VESA mount screws into the four screw holes on the system rear panel.
-
Page 60: Powering On The System
AFL3-W10A/12A/W15A-BT Panel PC Step 5: Align the V-Stand screw holes with the pilot holes on the mounting area. Mount the V-Stand by inserting the retention screws into the four pilot holes and tightening them. Step 6: Adjust the V-Stand to have a best viewing angle to operate the system.S t e p 0 : Figure 3-34: Secure V-Stand to Mounting Area 3.13 Powering On the System...
Need help?
Do you have a question about the AFL3-08A-BT and is the answer not in the manual?
Questions and answers