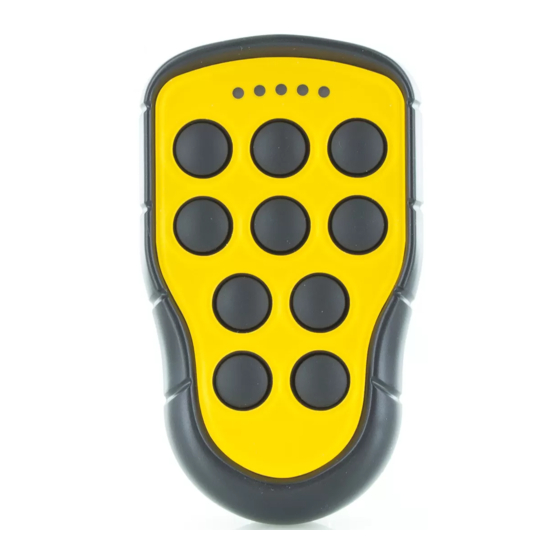
Summary of Contents for Tele Radio Panther
- Page 1 Panther Installation instructions PN-T21-3 Transmitters PN-T21-4 PN-T21-6 PN-T21-8 PN-T21-10 IM-PN-TX105-A04-EN Language: English (original)
-
Page 2: Table Of Contents
CONTENTS CHAPTER 1: CUSTOMER INFORMATION Thank you for purchasing a Tele Radio AB product About this document Warnings & restrictions CHAPTER 2: PRODUCT DESCRIPTION Transmitter front Transmitter back Technical data Frequency band CHAPTER 3: OPERATION Register the transmitter in the receiver Start the transmitter Switch the transmitter off CHAPTER 4: CONFIGURATION SETTINGS Radio mode... -
Page 3: Chapter 1: Customer Information
Read all instructions and warnings carefully before mounting, installing and configuring the products. These instructions have been published by Tele Radio AB and are not subject to any guarantee. The instructions may be withdrawn or revised by Tele Radio AB at any time and without further notice. -
Page 4: About This Document
ABOUT THIS DOCUMENT Every care has been taken in the preparation of this manual. Please inform Tele Radio AB of any inaccuracies or omissions. These installation instructions cover general safety issues, main technical specifications, standard installation, configuration and operating instructions, general troubleshooting and battery information. - Page 5 Operation Only qualified personnel should be permitted to access the transmitter and operate the equipment. Make sure that the user satisfies the age requirements in your country for operating the equipment. Make sure that the user is not under the influence of drugs, alcohol and medications. ...
-
Page 6: Chapter 2: Product Description
CHAPTER 2: PRODUCT DESCRIPTION TRANSMITTER FRONT NOTE! Performing a “factory reset” of the unit will return the settings to the factory defaults and all button remapping will be lost. PN-T21-8 PN-T21-10 PN-T21-6 PN-T21-4 PN-T21-3 1. LED 1 (red) 6. -
Page 7: Transmitter Back
TRANSMITTER BACK 1. I/O switch 2. Clip 3. Product label I/O switch The I/O switch on the back of the transmitter interrupts the power supply from the battery. When in the O/off position, the transmitter cannot be started unless the charger plug is connected. IMPORTANT! When the transmitter is to be transported by air, the I/O switch must be in the O/off position. -
Page 8: Frequency Band
FREQUENCY BAND Channel Frequency 2405 MHz 2410 MHz 2415 MHz 2420 MHz 2425 MHz 2430 MHz 2435 MHz 2440 MHz 2445 MHz 2450 MHz 2455 MHz 2460 MHz 2465 MHz 2470 MHz 2475 MHz 2480 MHz - 8 -... -
Page 9: Chapter 3: Operation
CHAPTER 3: OPERATION REGISTER THE TRANSMITTER IN THE RECEIVER Do not perform this action when the receiver is in a session with another transmitter. The radio communication may be interrupted or broken. NOTE! Only keep the transmitters that you intend to use registered in the receivers. NOTE! To establish a radio link between the transmitter and the receiver, both units must be set to the same radio mode. -
Page 10: Chapter 4: Configuration Settings
CHAPTER 4: CONFIGURATION SETTINGS RADIO MODE NOTE! You cannot change the radio mode from the transmitter. Contact your representative for assistance. NOTE! To establish a radio link between the transmitter and the receiver, both units must be set to the same radio mode. -
Page 11: Chapter 5: Battery Guide
CHAPTER 5: BATTERY GUIDE BATTERY PRECAUTIONS Carefully read through the following safety instructions and warnings before using, charging or disposing of the batteries. Batteries contain flammable substances such as lithium or other organic solvents, which may result in overheating, rupture or combustion. Failure to read and follow the below instructions may result in fire, personal injury and damage to property if charged or used improperly. -
Page 12: Battery Information
BATTERY INFORMATION Do not recharge the batteries. Attempts to recharge may cause rupture or hazardous liquids to leak, which will corrode the equipment. NOTE! Electronics and batteries must be physically separated before disposal. Make sure that electronics or batteries are not disposed of in household waste. NOTE! When approximately 10 % of battery capacity remains, the top LED lights red. -
Page 13: Chapter 6: Guarantee, Service, Repairs And Maintenance
Tele Radio AB products are covered by a guarantee/warranty against material, construction and manufacturing faults. During the guarantee/warranty period, Tele Radio AB may replace the product or faulty parts. Work under guarantee/warranty must be carried out by Tele Radio AB or by an authorized service centre specified by Tele Radio AB. -
Page 14: Chapter 7: Regulatory Information
Applies to: PN-T21-3, PN-T21-4, PN-T21-6, PN-T21-8, PN-T21-10 CE MARKING Hereby, Tele Radio AB, declares that the radio equipment type(s) listed above is/ are in compliance with Directive 2014/53/EU. The latest version of the complete EU Declaration of Conformity is available on the Tele Radio AB website, www.tele-radio.com. -
Page 15: Ic Statement
IC STATEMENT This product complies with Industry Canada's licence-exempt RSSs. Operation is subject to the following two conditions: (1) This device may not cause interference; and (2) This device must accept any interference, including interference that may cause undesired operation of device. Le présent appareil est conforme aux CNR d’Industrie Canada applicables aux appareils radio exempts de licence. -
Page 16: Annex A: Frequent Terms
ANNEX A: FREQUENT TERMS Numerical code stored in both the transmitter and receiver unit. The receiver unit Configuration ID can only be controlled by a transmitter with the correct configuration ID. Continuous radio When in continuous radio mode the transmitter unit transmits continuously when mode it is switched on. - Page 17 (This page has intentionally been left blank) - 17 -...
- Page 18 These installation instructions are subject to change without prior notice. Download the latest installation instructions from www.tele-radio.com...


Need help?
Do you have a question about the Panther and is the answer not in the manual?
Questions and answers