
Subscribe to Our Youtube Channel
Related Manuals for KT&C KPC-HZA302M


Summary of Contents for KT&C KPC-HZA302M
-
Page 1: Color Camera
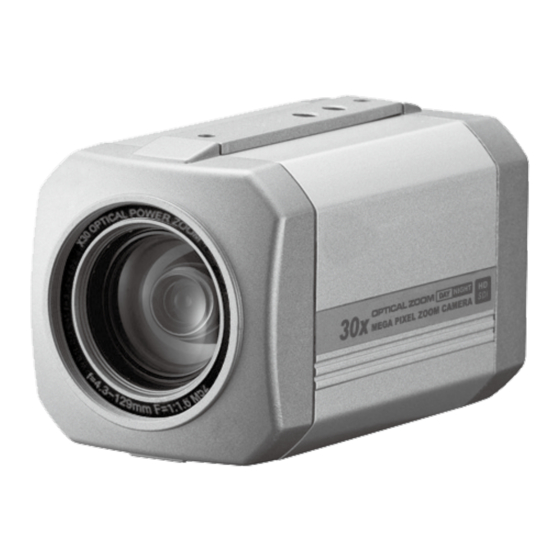
M1 8 0 -HZ A3 0 2 -0 0 1 HD CCTV Mega Pixel 30X ZOOM COLOR CAMERA OP ERATION M ANUAL Thank you for choosing our high quality camera. Before attempting to connect operate this unit, please read and follow these instructions. - Page 2 C AUT ION These servicing instructions are for use by qualified service personnel only. To reduce the risk of electric shock do not perform any servicing other than that contained in the operating instructions unless you are qualified to do so. Use Class 2 Power Supply Only...
- Page 3 C O NT E NT S 1 . CAUTIO NS 2 . IM PORT A NT SAF E T Y I N S T R U C T IO N 3 . FEATURE S 4 . COMPO NENT S 5 . NAME AN D F UNCT I ON 6 .
- Page 4 1 . C AUT IO N S This device complies with Part 15 of the FCC Rules. Operation is subject to the following two conditions; 1. This device may not cause harmful interference. 2. This device must accept any interference received, including interference that may cause undesired operation.
-
Page 5: Correct Disposal Of This Product (Waste Electrical & Electronic Equipment)
1 . C AUT IO N S Correct Disposal of This Product (Waste Electrical & Electronic Equipment) (Applicable in the European Union and other European countries with separate collection systems) This marking shown on the product or its literature, indicate that it should not be disposed with other household wastes at the end of its working life. -
Page 6: Important Safety Instruction
2 . IMP O R TA NT S A FE T Y I NS T RU C T I O N Read these instructions. Keep these instructions. Heed all warnings. Follow all instructions. Do not use this apparatus near water. Clean only with dry cloth. - Page 7 3 . P RE CA UT I O N S Do not operate under extreme temperature conditions. Using the camera in temperatures exceeding 50˚C or below -10˚C may lower image quality or cause the camera to malfunction. Do not operate in high humidity environments. Using the camera in places with high humidity may lessen picture quality because of moisture on the lens.
- Page 8 4 . FE AT U R E S 1) 1/2.8” Sony CMOS Sensor 2) X30 Optical Zoom 3) 1080P 60fps Resolution 4) WDR (Wide Dynamic Range) 5) DNR (Digital Noise Reduction) 6) LSC (Lens Shading Compensation) 7) DIS (Digital Image Stabilizer) 8) Digital Effect (Mirror, Freeze, Negative) 9) Motion Detection/ 10) Privacy Masking...
-
Page 9: Tripod Mounting
5 . CO MP ON E NT S Package Operation Manual Operation Manual 30x Zoom Camera Tripod Mounting Hole Install the camera on an optional tripod. The tripod must be equipped with screws with specifications shown on the right. Tripod Mounting Tripod Mounting bracket is assembled to the top and buttom of the camera. - Page 10 6 . D IM EN S I O N S Unit:mm 1/4” - 20NUF 62.7 121.8...
-
Page 11: Rear View
7 . OV ER V I E W Rear View Vi de o O ut J ack HD MI Key B ut t ons HD -S DI J ack Po we r LED Cont r ol P owe r In put I n terf ace T er mi na l Key Buttons... -
Page 12: Installation
8 . INS T AL LA TI O N Connecting to Monitor • Connect Video Out Jack to the monitor’s Video In Jack as shown below. BNC Female Video HDMI CABLE BNC Female Video • Connection methods may vary depending on the video equipment. Please refer to the model specific instruction manual. -
Page 13: Connecting To Power
8 . INS T AL LA TI O N Connecting to Power Connect the power cable to the camera’s power in as shown in the figure below DC12V Regulated Power Supply Resistance of copper wire [at 20℃ (68˚F)] Copper wire size (AWG) (0.22㎟) (0.33㎟) - Page 14 8 . INS T AL LA TI O N Control Interfaces(Communication Control Connector) The camera can be controlled by using external controllers like as the keyboard controller. (RS-485 Communication) Connecting PC or DVR (Serial Port) RS-232C TO RS-485 CONVERTER Connecting to RS-485 Controller...
- Page 15 8 . INS T AL LA TI O N Connecting to External Controller E XT & G N D O p en : D A Y E XT & G ND C lo se: N IGH T...
-
Page 16: Specification
9 . SP ECI F I CA TI O N Image Device 1/2.9” Sony Exmor CMOS Sensor Effective Pixels A b o u t 2 . 1 4 M e g a p i x e l 0 .6 l x ( F 1 . 6 , 3 0 I R E , I C R O F F ) / D S S o n : 0 . 0 2 l x Minimum illumination 0 .0 6 l x ( F 1 . -
Page 17: Entering Main Menu
1 0. OS D M E N U ST R U CT U R E OSD Working • Entering Main menu A. If you press ENTER button for more than 3sec then menu will appear on the monitor. B. If you press TELE button then cursor will move to UP MENU BAR, and if you press WIDE button then cursor will move to DOWN MENU BAR. -
Page 18: Menu Details
1 0. OS D M E N U ST R U CT U R E • Exiting from Menu A. At Main-menu, move menu-bar to EXIT MENU, and press ENTER button. B. At Sub-menu, move menu-bar to EXIT MENU, and press ENTER button. C. -
Page 19: Zoom Speed
1 0. OS D M E N U ST R U CT U R E 3. AF TIME Set AF time. When AF is completed, Focus mode will be Manual. Even when AF is not completed, it stops when time is up.(unit : sec) AF TIME: 5 →... - Page 20 1 0. OS D M E N U ST R U CT U R E • AE SETUP At Main-menu, select AE SETUP MENU, and press ENTER button. AE SETUP AE MODE AUTO BACKLIGHT DAY / NIGHT EXIT RETURN 1. AE MODE Set AE MODE.
-
Page 21: Backlight Setup
1 0. OS D M E N U ST R U CT U R E SHUT FIX: Low / High shutter speed is fixed, Exposure is controlled automatically by Iris and Gain. You can adjust SHUTTER , MAX AGC , BRIGHTNESS . ZOOM PROP.IRIS. SHUTTER: AUTO →... - Page 22 1 0. OS D M E N U ST R U CT U R E You can move BLC area by TELE,WIDE,NEAR,FAR buttons. If you press ENTER button, BLC AREA will move to NEXT SET. You can Change BLC area size by TELE,WIDE,NEAR,FAR buttons. If you press ENTER button, EXIT SET.
- Page 23 1 0. OS D M E N U ST R U CT U R E You can change the 4 area of HLC. You can move HLC AREA by TELE,WIDE,NEAR,FAR buttons. If you press ENTER button, HLC AREA will move to NEXT SET. You can Change HLC AREA size by TELE,WIDE,NEAR,FAR buttons.
- Page 24 1 0. OS D M E N U ST R U CT U R E 3. DAY/NIGHT MODE Set DAY/NIGHT MODE DAY/NIGHT function works as following order. DAY / NIGHT: AUTO → DAY → NIGHT → EXT DAY / NIGHT MODE AUTO DWELL TIME...
-
Page 25: Manual Mode
1 0. OS D M E N U ST R U CT U R E • AWB SETUP At Main-menu, select AWB SETUP MENU, and press FAR button. WHITE BALRANCE MODE RED GAIN BLUE GAIN EXIT RETURN 1. ATW MODE Color temperature is directly related to environment and it influences on the color of image. -
Page 26: Privacy Mask
1 0. OS D M E N U ST R U CT U R E • SMART SETUP At Main-menu, select SMART SETUP MENU, and press ENTER button. SMART SETUP PRIVACY MASK MOTION DETECT EXIT RETURN 1. PRIVACY MASK PZM(Privacy Zone Mask) is to hide the unwanted view to protect privacy invasion. It works with Zoom/Pan/Tilt operation. -
Page 27: Motion Detection
1 0. OS D M E N U ST R U CT U R E DISPLAY: PRIVACY MASK area can be displayed or not-displayed during PRIVACY MASK setting. PRIVACY MASK area can be color display or mosaic display during setting. DISPLAY: OFF →... -
Page 28: Advanced Setup
1 0. OS D M E N U ST R U CT U R E You can move PZM area by TELE,WIDE,NEAR,FAR buttons. If you press ENTER button, MOTION DETECTION AREA will move to NEXT SET. You can Change PZM area size by TELE,WIDE,NEAR,FAR buttons. If you press ENTER button, EXIT SET. -
Page 29: Osd Menu Structure
10 . O S D M E NU S T RU CT U R E 2. Digital ZOOM D-ZOOM is accomplished electronically, with no adjustment of the camera’s optics, and no optical resolution is gained in the process. You can decide whether will use D-ZOOM function. D-ZOOM: OFF →... -
Page 30: Lens Shade
1 0. OS D M E N U ST R U CT U R E EDIT: If you select EDIT MENU, and press ENTER button. You can configure the area of DEFOG. You can move DEFOG area by TELE,WIDE,NEAR,FAR buttons. If you press ENTER button, DEFOG AREA will move to NEXT SET. -
Page 31: General Setup
1 0. OS D M E N U ST R U CT U R E • ADJUST SETUP At Main-menu, select ADJUST SETUP MENU, and press ENTER button. ADJUST SETUP DEFECT SHARPNESS EXIT RETURN 1. DEFECT Defect function works as following order. Defect ON case be able to set the defect level. -
Page 32: Osd Display
1 0. OS D M E N U ST R U CT U R E 3. OSD DISPLAY It displays current operating state of Camera. MENU OFF TIME: OFF → 5 SEC → …. → 60 SEC Display Default Position ID(PLACE): CAMERA ID can be shown on monitor. - Page 33 1 0. OS D M E N U ST R U CT U R E 4. COMMUNICATION At Main-menu, select COMMUNICATION MENU, and press ENTER button. COMMUNICATION PROTOCOL AUTO BAUD RATE 2400 EXIT RETURN ID can be configured between 1~255. If you want to change the ID, press the ENTER button.
-
Page 34: Factory Reset
1 0. O SD M EN U S T RU C TU R E CVBS: Set CVBS output. NTSC and PAL , 2 steps CVBS: NTSC → PAL 7. FACTORY RESET At Main-menu, select FACTORY RESET MENU, and press ENTER button. Move menu-bar to “CLEAR”...
Need help?
Do you have a question about the KPC-HZA302M and is the answer not in the manual?
Questions and answers