Wacker Neuson BS50-2 Operator's Manual
Vibratory rammer
Hide thumbs
Also See for BS50-2:
- Operator's manual (56 pages) ,
- Repair manual (194 pages) ,
- Operator's manual (36 pages)

Related Manuals for Wacker Neuson BS50-2


Summary of Contents for Wacker Neuson BS50-2
- Page 1 Operator’s Manual Vibratory Rammer BS50-2, BS50-2i BS60-2, BS60-2i BS70-2, BS70-2i BS65-V Type BS50-2, BS50-2i, BS60-2, BS60-2i, BS70-2, BS70-2i, BS65-V Document 5200016051 1116 Date Revision Language 5 2 0 0 0 1 6 0 5 1...
- Page 2 Copyright notice © Copyright 2016 by Wacker Neuson Production Americas LLC All rights, including copying and distribution rights, are reserved. This publication may be photocopied by the original purchaser of the machine. Any other type of reproduction is prohibited without express written permission from Wacker Neuson Production Americas LLC.
-
Page 3: Foreword
Foreword SAVE THESE INSTRUCTIONS—This manual contains important instructions for the machine models below. These instructions have been written expressly by Wacker Neuson Production Americas LLC and must be followed during installation, operation, and maintenance of the machines. Machine Item Number... - Page 4 ■ Use the separate Parts Book supplied with the machine to order replacement parts. ■ If you are missing either of these documents, please contact Wacker Neuson to order a replacement or visit www.wackerneuson.com. ■ When ordering parts or requesting service information, be prepared to provide the machine model number, item number, revision number, and serial number.
- Page 5 ■ Serious injury hazards to the operator and persons in the work area ■ Permanent damage to the machine which will not be covered under warranty Contact your Wacker Neuson dealer immediately if you have questions about approved or unapproved parts, attachments, or modifications.
- Page 6 Foreword Rammer Notes wc_tx003550gb_FM10.fm...
-
Page 7: Ec Declaration Of Conformity
2006/42/EC, 2000/14/EC, 2005/88/EC, 2014/30/EU, EN 500-1, EN 500-4 Authorized Person for Technical Documents Robert Raethsel, Wacker Neuson Produktion GmbH & Co. KG, Wackerstrasse 6, 85084 Reichertshofen, Germany Menomonee Falls, WI, USA, 08.07.2016 Paul Sina... - Page 9 2006/42/EC, 2000/14/EC, 2005/88/EC, 2014/30/EU, EN 500-1, EN 500-4 Authorized Person for Technical Documents Robert Raethsel, Wacker Neuson Produktion GmbH & Co. KG, Wackerstrasse 6, 85084 Reichertshofen, Germany Menomonee Falls, WI, USA, 28.07.16 Keith Herr...
- Page 11 2006/42/EC, 2000/14/EC, 2005/88/EC, 2014/30/EU, EN 500-1, EN 500-4 Authorized Person for Technical Documents Robert Raethsel, Wacker Neuson Produktion GmbH & Co. KG, Wackerstrasse 6, 85084 Reichertshofen, Germany Menomonee Falls, WI, USA, 13.05.2016 Keith Herr...
- Page 13 2006/42/EC, 2000/14/EC, 2005/88/EC, 2014/30/EU, EN 500-1, EN 500-4 Authorized Person for Technical Documents Robert Raethsel, Wacker Neuson Produktion GmbH & Co. KG, Wackerstrasse 6, 85084 Reichertshofen, Germany Menomonee Falls, WI, USA, 13.05.2016 Keith Herr...
-
Page 15: Table Of Contents
Rammer Table of Contents Foreword EC Declaration of Conformity Safety Information Signal Words Used in this Manual ............. 17 Machine Description and Intended Use ..........18 Safety Guidelines for Operating the Machine ........19 Safety Guidelines for Lifting and Transporting the Machine ....20 Service Safety .................. - Page 16 7.17 Dimensions—BS 50-2i, BS 50-2 ............75 7.18 Dimensions—BS 60-2i, BS 60-2, BS 70-2i, BS 70-2, BS 65-V ...76 Emission Control Systems Information and Warranty—Gasoline Emission Control System Background Information ......77 Limited Defect Warranty for Wacker Neuson Emission Control Systems ....................78...
-
Page 17: Safety Information
Rammer Safety Information Safety Information Signal Words Used in this Manual This manual contains DANGER, WARNING, CAUTION, NOTICE, and NOTE signal words which must be followed to reduce the possibility of personal injury, damage to the equipment, or improper service. This is the safety alert symbol. -
Page 18: Machine Description And Intended Use
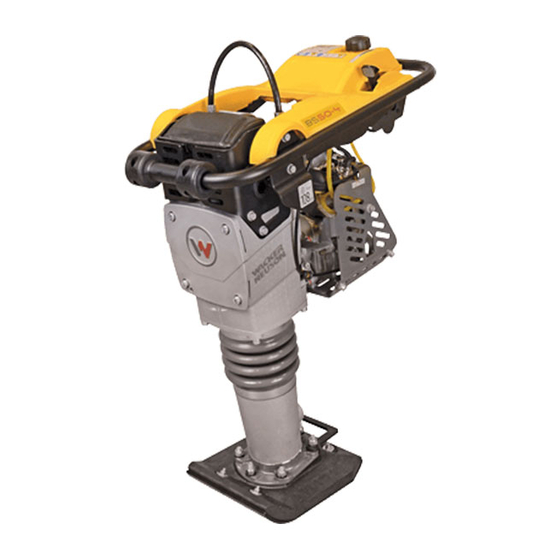
Rammer Machine Description and Intended Use This machine is a vibratory rammer. The Wacker Neuson Rammer consists of a gasoline or diesel engine, a clutch, a fuel tank, a spring-loaded ramming system, a ramming shoe, and a handle. The engine transmits power through the ramming system and ramming shoe, generating percussive impact force to compact soil. -
Page 19: Safety Guidelines For Operating The Machine
To ensure safe operation of the machine: ■ Do not operate the machine if any safety devices or guards are missing or inoperative. ■ Do not modify or defeat the safety devices. ■ Only use accessories or attachments that are approved by Wacker Neuson. wc_si000836gb_FM10.fm... -
Page 20: Safety Guidelines For Lifting And Transporting The Machine
Safety Information Rammer Safe When operating this rammer: operating ■ Remain aware of the rammer’s moving parts. Keep hands, feet, and loose practices clothing away from the rammer’s moving parts. ■ When working near the edges of pits, slopes, trenches, and platforms, always operate the rammer in such a way that there is no possibility of it tipping over or falling in. -
Page 21: Service Safety
Machine When servicing or maintaining the machine: modifications ■ Use only accessories/attachments that are approved by Wacker Neuson. When servicing or maintaining the machine: ■ Do not defeat safety devices. ■ Do not modify the machine without the express written approval of Wacker Neuson. - Page 22 Safety Information Rammer ■ Replace worn or damaged components. Replacing parts and ■ Replace all missing and hard-to-read labels. labels ■ When replacing electrical components, use components that are identical in rating and performance to the original components. ■ When replacement parts are required for this machine, use only Wacker Neuson replacement parts or those parts equivalent to the original in all types of specifications, such as physical dimensions, type, strength, and material.
-
Page 23: Operator Safety While Using Internal Combustion Engines
Rammer Safety Information Operator Safety while Using Internal Combustion Engines WARNING Internal combustion engines present special hazards during operation and fueling. Failure to follow the warnings and safety standards could result in severe injury or death. ► Read and follow the warning instructions in the engine owner’s manual and the safety guidelines below. -
Page 24: Labels
Labels Rammer Labels Label Locations BS 50-2i/BS 60-2i/BS 70-2i BS 50-2/BS 60-2/BS 70-2, BS 65-V wc_gr010404 BS 65-V wc_gr011507 wc_si000837gb_FM10.fm... -
Page 25: Label Meanings
Rammer Labels Label Meanings DANGER Asphyxiation hazard. ■ Engines emit carbon monoxide. ■ Do not run the machine indoors or in an enclosed area unless adequate ventilation, through such items as exhaust fans or hoses, is provided. ■ No sparks, flames, or burning objects near the machine. - Page 26 Labels Rammer WARNING WARNING WARNING Springs are compressed. Release cover slowly to avoid spring ejection. See the Repair Manual for proper disassembly instructions. The springs are compressed. In order to avoid ejection of the springs, refer to Repair Manual for proper disassembly instructions.
- Page 27 Rammer Labels Guaranteed sound power level in dB(A) Wacker Neuson label 5200015661 Use only clean, filtered fuel. Turtle = Idle/slow engine speed Rabbit = Full/fast engine speed 5200000314 5200000314 1. Move the throttle to the IDLE position. 2. Close the choke.
- Page 28 Labels Rammer Engine oil tank ■ Use only Wacker Neuson two-cycle or other fully syn- thetic oil meeting the NMMA TC-W3, JASO FD, or JASO FD JASO FD ISO-L-EGD ISO-L-EGD TC-W3 TC-W3 ISO-L-EGD specification. Read the Operator’s Manual. WARNING WARNING...
- Page 29 Rammer Labels Locking lever label Refer to Selecting Ramming Stroke and Adjusting Ramming Stroke for explanation of this label. CAUTION Cutting hazard. Moving parts under the housing cover can cut skin and catch clothing. Do not operate the machine while the housing cover is open. Lifting the rammer Use proper lifting device (crane or hoist) with proper 90 kg...
-
Page 30: Lifting And Transporting
Lifting and Transporting Rammer Lifting and Transporting Lifting the Rammer ■ Lifting device (crane or hoist) capable of supporting the rammer’s weight (see Requirements the identification plate on the rammer) ■ Lifting gear (hooks, slings, and/or chains) capable of supporting the rammer’s weight ■... -
Page 31: Transporting The Rammer
Rammer Lifting and Transporting Transporting the Rammer Overview This rammer can be transported in a vehicle, or manually, depending on job site conditions and distance to be traveled. NOTICE: Do not tow this rammer. ■ Engine stopped and cool to the touch Requirements ■... - Page 32 Lifting and Transporting Rammer Continued from the previous page. If the rammer cannot be secured in the upright position, a. Drain the fuel tank to prevent fuel from leaking from the cap (c). b. Lay the rammer down only as shown and tie it to the vehicle at points (a) and (b). wc_gr010406 Transporting Rollers (d) enable the rammer to be rolled from one location to another.
- Page 33 Rammer Lifting and Transporting Notes wc_tx003551gb_FM10.fm...
-
Page 34: Operation
1. Make sure all loose packaging materials have been removed from the machine. 2. Check the machine and its components for damage. If there is visible damage, do not operate the machine! Contact your Wacker Neuson dealer immediately for assistance. -
Page 35: Recommended Fuel
Before using an oxygenated fuel, confirm the fuel’s contents. Some states and provinces require this information to be posted on the fuel pump. The following is the Wacker Neuson approved percentage of oxygenates: ETHANOL - (ethyl or grain alcohol) 10% by volume. You may use gasoline containing up to 10% ethanol by volume (commonly referred to as E10). - Page 36 NOTICE: Use only the recommended gasoline/oil mixture to fuel this machine. Using gasoline alone will severely damage the engine. ■ Use only Wacker Neuson two-cycle or other fully synthetic oil meeting the Requirements NMMA TC-W3, JASO FD, or ISO-L-EGD specification.
-
Page 37: Refueling The Machine
Rammer Operation Refueling the Machine ■ Machine shut down Requirements ■ Engine cool ■ Machine standing upright on the ramming shoe ■ Fresh, clean fuel supply Procedure Perform the procedure below to refuel the machine. WARNING Fire and burn hazard. Fuel and its vapors are extremely flammable. ►... -
Page 38: Filling The Oil Tank
Requirements ■ Engine cool ■ Machine standing upright on the ramming shoe ■ Wacker Neuson 2-cycle or equivalent oil Procedure Perform the procedure below to fill the oil tank. 1. Remove the oil tank cap (c).Fill the oil tank up to the base of the neck (d). -
Page 39: Purging The Oil Lines
Rammer Operation Purging the Oil Lines For rammers with oil injection (BS 50-2i, BS 60-2i, BS 70-2i) If the rammer has a fuel tank (a) and an oil tank (b), it has oil injection. The oil lines may need purging. wc_gr010452 When As needed: when air bubbles are visible in the oil supply line or discharge line... - Page 40 Operation Rammer Continued from the previous page. Purging the Perform the procedure below to purge the oil discharge line. oil discharge 1. Locate the oil discharge line (c). line wc_gr012472 2. If air bubbles are visible in the oil discharge line, they must be manually purged using the following method: Disconnect the oil discharge line at the oil pump (d).
-
Page 41: Position Of The Operator
Rammer Operation Position of the Operator For optimal control, performance, and minimal hand/arm vibration, follow the guidelines below when using the machine. Grasp the handle with both hands as shown. wc_gr011468 Stand behind the rammer, walking slowly and guiding the direction of travel as the machine moves forward. -
Page 42: Starting, Operating, And Stopping The Machine
Operation Rammer Starting, Operating, and Stopping the Machine ■ Rammer is in serviceable condition and has been properly maintained Requirements ■ There is fuel in the tank Starting the Perform the procedure below to start the machine. machine 1. Move the throttle to the idle position (c2). This will automatically start the flow of fuel.
Need help?
Do you have a question about the BS50-2 and is the answer not in the manual?
Questions and answers