
Related Manuals for DAP Technologies CE8640B

Summary of Contents for DAP Technologies CE8640B
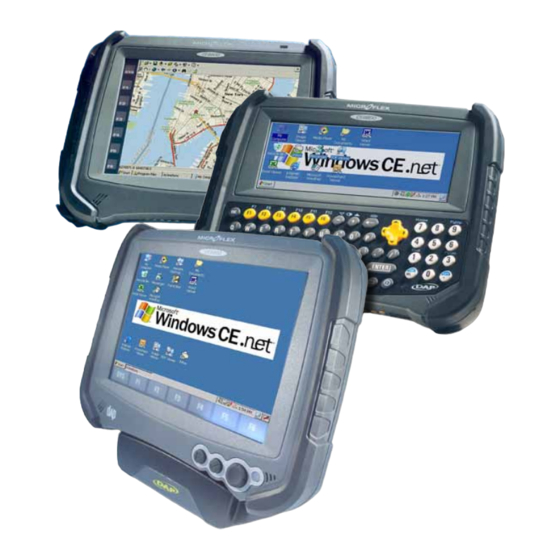
- Page 1 CE8000B and CE8000BWE User Guide Agile Performer HandHeld Mobile Computer 2010/03 CMU055-A2a www.daptech.com...
-
Page 3: Table Of Contents
CE8640B & CE8640BWE Front View . . . . . . . . . . . . . . . . . . - Page 4 Table of Contents IrDA interface (Selected mode) . . . . . . . . . . . . . . . . . . . . . . . . . . . . . . . . . . . . . . . . . . . . . . . . . . . . . . . .32 Transferring Files in FTP Mode .
-
Page 5: Iso 9001:2000 Certification
ISO 9001:2000 Certification DAP Technologies has documented and implemented a Quality Management System in accordance with ISO 9001:2000 International Standard (Certificate number: 95786) . This International recognition has been made possible thanks to the continual efforts put forth by DAP’s Personnel . -
Page 6: Introduction
Introduction INTENDED USE This User Guide is intended to assist in the operation of the CE8000B series and applies to the CE8640B, CE8800B & CE8820B running Windows CE .NET 5 .0 Operating System, Release Pack P or later and manufac- tured after May 1st, 2009 . -
Page 7: Product Specifications
Introduction PRODUCT SPECIFICATIONS For current product specifications, please contact DAP Technologies, or visit our web site www.daptech.com . DAP Technologies reserves the right to change specifications without notice. WArNING / CAUTION / NOTE DEfINITION The words WARNING, CAUTION, and NOTE carry special meanings and should be carefully reviewed . -
Page 8: Symbols
Symbols Warning or Caution, pay special attention when this symbol is present . In accordance with European Directive 2002/96/EC on Waste Electrical and Electronic Equipment (WEEE), this symbol indicates that the product must not be disposed of as unsorted municipal waste, but should be collected separately . Refer to your local distributor for return and/or collection systems available in your country . -
Page 9: Safety Precautions
DAP Technologies, we recommend that you contact your Customer Service Representative nearest you . WArNING For CE8000B units with the Summit WLAN adapter: • Depending upon the configuration of your unit, it may have the additional Summit Wireless area network (WLAN) adapter . -
Page 10: Quick Tour
Quick Tour CE8640B & CE8640BWE FRONT VIEW 1 . Function Keys (F1 to F6) 2 . Backspace Key 3 . Navigation Key (Left, Right . Top & Bottom) 4 . Laser Led 5 . ON/OFF Key 6 . Folder Key 7 . -
Page 11: Ce8810B & Ce8810Bwe Front View
Quick Tour CE8810B & CE8810BWE FRONT VIEW 1 . Light Sensor 2 . Microphone 3 . Battery Status Indicator 4 . Navigation Key (Left, Right, Top & Bottom) 5 . Enter Key 6 . Function Key 7 . Speaker 8 . Function Keys www.daptech.com CMU055-A2a... -
Page 12: Ce8820B & Ce8820Bwe Front View
Quick Tour CE8820B & CE8820BWE FRONT VIEW 1 . Microphone 2 . Battery Status Indicator 3 . Navigation Key (Left, Right, Top & Bottom) 4 . Enter Key 5 . Function Key 6 . Speaker 7 . Function Keys 8 . Access to System Key CMU055-A2a www.daptech.com... -
Page 13: Ce8000B & Ce8000Bwe Back View
Quick Tour CE8000B & CE8000BWE BACK VIEW 1 . Carrying Strap 2 . Stylus (Pen) 3 . PCMCIA Expansion Bay 4 . Release Screw for Battery Compartment 5 . Battery Compartment 6 . Laser Trigger Button www.daptech.com CMU055-A2a... -
Page 14: Ce8000B & Ce8000Bwe Side View
Quick Tour CE8000B & CE8000BWE SIDE VIEW 1 . RJ45 for Ethernet Connection; or 1D/2D BarcodeScanner; or Laser Scanner 2 . Charging Connector 3 . Carrying Strap 4 . Carrying Strap Fastener (available on both sides of the unit) 5 . Charging Connectors When Inserted in Cradle 6 . -
Page 15: Getting Started
Getting Started WArNING Upon receiving your CE8000B unit, it is strongly recommended that you first charge the batteries prior to use . These following messages are likely to appear due to the length of time the unit was stored . When the battery reaches the low level, the battery status indicator will flash red . -
Page 16: Installing The Battery
Getting Started INSTALLING THE BATTERY Note: All CE8000B units are delivered with battery not installed . Install battery prior to charging the unit . 1 . Place the battery in the compartment located at the back of the unit . 2 . -
Page 17: Charging The Battery
Note: If the unit was turned off, it should turn back on after a few seconds or after 2 to 3 minutes if the Battery Status indicator on CE8640B main battery charge has been very low for some time . Processing will resume exactly where it was interrupted once re-charging starts . -
Page 18: From The Communication Cradle
Vehicle Cradles for Office Cradles use . The installation requires a Modular 1) CS512 with a 240 CSCE800-NA Charger available from DAP Technologies . cm (95 in) power cable CSCE800-EU CSCE800-UK 2 . Before charging the CE8000B unit, you must first power up the Communication Cradle . -
Page 19: From The External Battery Charger
. Charging may take up to 5 hours . Note: If the unit was turned off, it should turn back Battery Status indicator on CE8640B on after a few seconds or after 2 to 3 minutes if the main battery charge has been very low for some time . -
Page 20: Battery Status Indicator Color Definition
2 to 3 minutes if the main battery charge has been very low for some Battery Status indicator on CE8640B time . Processing will resume exactly where it was interrupted once re-charging starts . -
Page 21: Operation Guide
3 minutes . Turn Unit On 1 . To turn on the CE8640B unit, press on the ON button for about 2 to 3 seconds . 2 . To turn on the CE8810B or the CE8820B . -
Page 22: Automatic Shut-Off
Operation Guide TURNING THE UNIT ON & OFF (CONTINUED) Turn Off the CE8800B Unit 1 . Click on the SYS key . 2 . Click on Suspend . Automatic Shut-Off If the unit remains inactive for more than 3 minutes, it will turn off automatically in order to save battery . The unit will also save the exact status of your application program and data before shutting sown . -
Page 23: Using The Touch Screen
Operation Guide TOUCH SCREEN (CONTINUED) Using the Touch Screen 1 . To touch screen, simply Stylus provided with Unit . WArNING Apply normal pressure when using the Touch Screen . Excessive pressure may permanently damage the screen and hinder performance . 1 . -
Page 24: Using The Keyboard
Control Panel, go to the Start Button located at the bottom left of the screen . USING THE KEYBOARD CE8640B & BW “@” Press the blue key followed by the desired character . e .g .: Pressing the blue key + W will generate the Blue Characters Press the blue key followed by the backspace key;... -
Page 25: Ce8800B
Operation Guide USING THE KEYBOARD (CONTINUED) CE8810B & BW, CE8820B & BW Press the System Key (SYS) to access the system applet and adjust backlighting Screen & Keyboard Backlight Screen Contrast Adjustment Using the virtual keyboard, press the shift key followed by any letter to generate an upper case letter . If CAPS Lock is on, this will then generate a lower case letter . -
Page 26: Function Keys
Operation Guide USING THE KEYBOARD (CONTINUED) Function Keys Function Keys are used to directly access specific functions to the application being used in unit . F1 Function is set by default to call “Activsync” communication . No other Function keys have been pre-programmed . - Page 27 Operation Guide USING THE KEYBOARD (CONTINUED) Virtual Keyboard (Continued) 1 . Standard Keyboard 2 . Press to toggle between the standard and extended language Keyboard . 3 . Press the Shift Key on the virtual Keyboard to access additional characters . www.daptech.com CMU055-A2a...
-
Page 28: Using Pc Cards
WArNING The Application may not allow the insertion of a PC Card while it is running . Refer to your Supervisor, the application provider or a DAP Technologies Representative for further instructions . Inserting PC Cards 1 . Turn the unit off . -
Page 29: Removing Pc Cards
WArNING The Application may not allow the removal of a PC Card while it is running . Refer to your Supervisor, the application provider or a DAP Technologies Representative for further instructions . 1 . Turn the unit off . -
Page 30: Using Sdio Cards
WArNING The Application may not allow the insertion of an SDIO Card while it is running . Refer to your Supervisor, the application provider or a DAP Technologies Representative for further instructions . Inserting SDIO Cards 1 . Turn the unit off . -
Page 31: Removing Sdio Cards
WArNING The Application may not allow the removal of an SDIO Card while it is running . Refer to your Supervisor, the application provider or a DAP Technologies Representative for further instructions . Removing SDIO Cards 1 . Turn the unit off . -
Page 32: Irda Interface (Selected Mode)
Operation Guide IRDA INTERFACE (SELECTED MODE) An IrDA ‘Infrared Data Association” makes communication & data exchange possible over infrared light . IrDA interfaces are used in palmtop computers, mobile phones, and laptop computers etc ., (although today, many laptops no longer offer IrDA in favor of Bluetooth) . Often, this interface is used primarily for communication between PCs, to communicate to server or for printing . -
Page 33: Transferring Files In Ftp Mode
Operation Guide TRANSFERRING FILES IN FTP MODE The CE8000B unit includes an FTP Server access which makes transferring files easy and does not require the use of ActivSync . 1 . Insert the CE8000B unit into the Office Cradle . Note: Once unit is inserted this will automatically activate the FTP server . -
Page 34: Wireless & Bluetooth Options (Bwe Versions)
Operation Guide WIRELESS & BLUETOOTH OPTIONS (BWE VERSIONS) Using Wireless To set wireless options, click on: 1 . Start 2 . Settings 3 . Control Panel 4 . _Wireless 5 . Check to activate or un-check the options to deactivate these features . 6 . -
Page 35: Using Bluetooth
Operation Guide WIRELESS & BLUETOOTH OPTIONS (CONTINUED) Using Wireless (Continued) 9 . To configure network connection, double click on the desired access point . 10 . Once network connection is established successfully, the network applet will display as active . Using BlueTooth To set wireless options, click on: 1 . - Page 36 Operation Guide WIRELESS & BLUETOOTH OPTIONS (CONTINUED) Using BlueTooth (Continued) 8 . Use this applet to locate peripheral or delete Bluetooth partnership . 9 . Click on Scan to locate peripheral . 10 . Authentication might be required, refer to your supervisor for authentication and identification codes .
-
Page 37: Ce8000B Options
CE8000B Options Note: Only one option can be installed on unit at one time . Part Number Description AGE650 Laser Scanner AGE655 1D/2D Barcode Scanner AGE301 RJ45 - Ethernet Connection AGE650 AGE655 AGE301 www.daptech.com CMU055-A2a... -
Page 38: Barcode Readers
CE8000B Options BARCODE READERS right Laser Scanner The ‘Laser Scanner’ function will depend on the application used and a special software driver . Refer to your application’s User Guide for further instructions . Information included basic scanning instructions . Wrong Refer to the diagram to the right for right and wrong scanning methods . -
Page 39: 2D Barcode Reader
CE8000B Options BARCODE READERS (CONTINUED) 2D Barcode Reader This special option is usually installed and configured in-house at the manufacturer’s . The 2D Barcode Reader is primarily controlled by the client application and a special driver . Therefore, please refer to your application specialist or supervisor for further instructions . Note: You may also refer to the CE8000B Technical Guide located on DOCUDAP for further instructions on programming . -
Page 40: Advanced Settings
Advanced Settings ADVANCED BATTERY OPTIONS To See Power Remaining 1 . Under Windows CE 5 .0, click on: a) Start b) Settings c) Control Panel d) Power e) Battery Preserving Power It is possible to extend battery life by modifying the power delays of the unit, screen and backlighting settings . -
Page 41: Activesync Communication
1 . Download the latest version of the Microsoft ActiveSync Software from one of the following sites: a) From the Microsoft Web Site b) From DAP Technologies Customer Support Web Site @ www.daptech.com Note: It is strongly recommended to use ActiveSync 3 .8 or higher . -
Page 42: Partnership With Ethernet Cradle
An initial Ethernet connection normally requires a “Partnership” with your “Host” computer using a serial or USB port . DAP Technologies has made these following programs available to assist in the creation of the “ Ethernet Partnership” when using the Ethernet cradle: •... - Page 43 Advanced Settings PARTNERSHIP WITH ETHERNET CRADLE (CONTINUED) 3 . To establish PartnerShip, click on: a) Start b) Communication c) Set PartnerShip 4 . The Ethernet PartnerShip should be established within a few seconds . Note: This procedure needs only to be done once to create the first “PartnerShip”...
-
Page 44: Advanced User Information
Advanced Settings ADVANCED USER INFORMATION To obtain the most current technical information on your CE8000B unit, you must first register your unit DocuDap Technical Web Site . 1 . Click on Control Panel . 2 . Click on the _System Applet . 3 . - Page 45 Advanced Settings ADVANCED USER INFORMATION (CONTINUED) 6 . Click on “register a Serial number or Access Code” . 7 . Enter your CE8000B unit’s serial number noted earlier . 8 . Enter a valid Email address and your user information and password will be forwarded to you .
-
Page 46: Companion Programs
It is not the intent of this User Guide to describe the applications included . Please refer to DAP Technologies Technical Web Site for further instructions on DAP Technologies programs included or the Microsoft Web Site for Microsoft Programs included . -
Page 47: Microsoft Programs
Companion Programs MICROSOFT PROGRAMS Icon Name Definition Inbox Send and receive Emails by synchronizing Desktop with CE8000B unit . Microsoft Viewer Suite Will display Excel files, images, PDF, PowerPoint and Word files . Internet Explorer Surf the Web by synchronizing pages with desktop computer or by connecting to Internet . -
Page 48: Troubleshooting Guide
Troubleshooting Guide Problem / failure recommended Action Low Battery Messages on the Main Battery. 1 . Still some power remains but it is recommended that you replace the battery before Data is lost . If neither of these 2 icons appear in the Task 1 . -
Page 49: Storage & Maintenance
Storage & Maintenance The CE8000B Unit is a reliable product requiring little maintenance . Only occasional replacement of the battery and the carrying strap is required . WArNING There are no user-serviceable parts inside the CE8000B Unit . Do not try to repair the unit as this may affect proper functioning as well as void the warranty . -
Page 50: Battery Maintenance
DAP Technologies equipment, it is strongly recommended that these be purchased directly through DAP Technologies or one of its distributors . (Check for the DAP or DAP Technologies logo on the battery) . -
Page 51: Touch Screen Maintenance
Storage & Maintenance TOUCH SCREEN MAINTENANCE The Touch Screen requires minimal maintenance . Only appropriate care when using and cleaning the Touch Screen is required . Use the Stylus provided with the unit when using the Touch Screen to ensure other pointed devices do not damage the screen . -
Page 52: Recycling Passport
. In accordance to this directive, DAP Technologies will assist you in the proper disposal of your DAP Units . For further instructions on how to dispose of these units, please refer to our web site: www.daptech.com. -
Page 53: Ce Conformity
CE Conformity The CE8640B, CE8810B & CE8820B have been tested and are in compliance with the 89/336/EEC European Directive for Electromagnetic Compatibility . Electromagnetic Emissions & Electromagnetic Immunity Standards Definition EN 55022 Radiated & Conducted, Class B ENV 50204 Radiated Electromagnetic field from Radio Telephones... -
Page 54: Fcc Statement, Copyright Policy
COPYRIGHT POLICY Any software described in this document is provided under a license agreement or non-disclosure agreement . It is strictly prohibited by law to copy any portion of the software provided by DAP Technologies onto any media format . -
Page 55: Microsoft End-User License Agreement
Microsoft End-User License Agreement You have acquired a DAP Technologies device that includes software licensed from Microsoft Corporation . The Microsoft software included in your device, as well as associated media, printed materials, and online documentation are all protected by Copyright Laws and International Copyright Treaties . If you do not agree with this End-User License Agreement (“EULA”), use of this device, or use and copying of, any installed... -
Page 56: Warranty
Authorized Service Center . DAP TECHNOLOGIES cannot be held responsible for any damage caused by the misuse of the equipment or by any other software or hardware added . The device and its accessories should not be used in applications where device failure could result in physical harm or loss of life . -
Page 57: International Addresses
International Addresses DAP Technologies Worldwide Customer Support Office Locations Technical Support Canada & International Canada 875 Charest Boulevard West, Suite 200 + 1 (418) 681-7833 Quebec City, Quebec + 1 (800) 363-1993 Canada G1N 2C9 TechSupportCanada@daptech .com T: (418) 681-9394... - Page 58 Canada 875 Charest Boulevard West Suite 200 Quebec City, Quebec Canada G1N 2C9 T: (418) 681-9394 TF: (800) 363-1993 F: (418) 681-0799 E: SalesNA@daptech .com United States 7450, South Priest Drive Tempe, Arizona United States, 85283 TF: (800) 363-1993 E: SalesNA@daptech .com United Kingdom 25 Nuffield Way Abingdon OX14 1RL...
Need help?
Do you have a question about the CE8640B and is the answer not in the manual?
Questions and answers