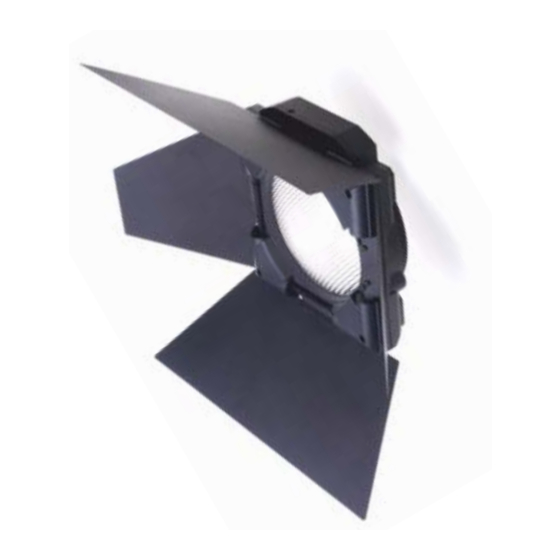
Martin MAC 2000 WASH BARNDOORS User Manual
Hide thumbs
Also See for MAC 2000 WASH BARNDOORS:
- User manual (52 pages) ,
- Service manual (35 pages) ,
- Installation manual (34 pages)
Advertisement
Quick Links
Advertisement

Related Manuals for Martin MAC 2000 WASH BARNDOORS


Summary of Contents for Martin MAC 2000 WASH BARNDOORS
- Page 1 MAC 2000 Wash Barndoors user manual...
- Page 2 © 2003 Martin Professional A/S, Denmark. All rights reserved. No part of this manual may be reproduced, in any form or by any means, without permission in writing from Martin Professional A/S, Denmark. Printed in Denmark. P/N 35000558 Rev. B...
-
Page 3: Table Of Contents
........4 OUNTING AND OPERATING THE BARNDOOR UNIT Before starting . -
Page 4: Mounting And Operating The Barndoor Unit
IN towards the lens as shown here. If the triangles point away from the lens, you can contact your Martin Dealer and have them perform the modification, or you can do it yourself: 1 Lock the head in the horizontal position with the top-side up. -
Page 5: Mounting The Barndoors
Mounting the barndoors Warning For safety reasons we do not recommend that this procedure be performed while the fixture is rigged. 1 Referring to the instructions in the MAC 2000 Wash user manual (P/N 35000114), set the personality settings on the MAC 2000 Wash to match the lens that is installed in the barndoor unit. If the PC lens is installed then use the control panel to set PERS>bdL>PC L. - Page 6 7 Hook the fold of safety-wire slack under the lip of the MAC 2000 Wash head cover as shown in the following illustration. 8 Rotate the barndoor unit to the upright neutral position. MAC 2000 Wash Barndoors...
-
Page 7: Operating The Barndoors
When updated firmware becomes available for the barndoor unit it will be made available for download from the Martin Support site (http://www.martin.dk/service/service.asp). Instructions for performing the upload procedure will also be made available on the support site. Mounting and operating the barndoor unit... -
Page 8: Removing The Barndoor Unit
3 Lock the fixture head in the “top” horizontal position. 4 Manually rotate the MAC 2000 Wash Barndoors to the neutral position (shown in the following illustrations). 5 Open the barndoor blades to an angle sufficient to access the four recessed quarter-turn screws with a flat head screwdriver. - Page 9 7 Loosen the safety-cable thumb-screw and detach the safety cable. 8 Do not operate the MAC 2000 Wash without a front lens or barndoors installed. If installing one of the standard lenses, attach the safety wire and place the lens on the fixture. Lock it into place using the 4 quarter-turn screws.
-
Page 10: Changing The Lens In The Barndoor Unit
HANGING THE LENS IN THE BARNDOOR UNIT The MAC 2000 Wash Barndoors are supplied with a diffuser lens. The lenses that are supplied with the MAC 2000 Wash can be removed form their housings and installed in the barndoor unit, or you can order the lens individually from your Martin Dealer. - Page 11 The following diagrams show an overview of the lens chassis (J) and rotation assembly (I) of the barndoors with labels at the key positions that are referred to in the following steps. 4 Move the rotation assembly (I) to a position where it is free of the sensor at position E. 5 Release the roller at position D by pressing down on the spring-loaded bolt.
- Page 12 8 The lens is held in place in the chassis (J) by four plates. To release each plate, push the sprung bolts from underneath the lens chassis. This will release the pressure on the plates and allow you to pull them free. MAC 2000 Wash Barndoors...
- Page 13 9 Push the lens free of the chassis (J) and remove it. 10 Place the replacement lens into position in the chassis (J) being careful to avoid the rotation stop bracket (marked with an arrow in the following illustration). Note If you are installing the standard diffuser lens, the textured side should face the lamp and the rotation assembly.
- Page 14 Gather the slack in the rubber drive belt of the rotation assembly in your fingers over rollers F, G and H, ensuring that there are no twists, and place the rotation assembly onto the lens chassis (J). Do not press, or force, the ring into place. MAC 2000 Wash Barndoors...
- Page 15 13 Keeping the tension in the drive belt, place it inside rollers F and H, and over roller G, as illustrated here. Move rollers F or H to provide more slack if necessary. 14 Ensure that the rotation assembly (I) is free of the sensor at position D. 15 Pull back on the spring-loaded clamps at positions B and C simultaneously using your thumbs and the rotation assembly (I) should fall into place and “click”...
- Page 16 If this is not the case then the rotation assembly is probably not installed correctly; remove the lens and repeat the re-assembly steps in this procedure. 19 Replace the front and rear casings by replacing the Phillips screws at each corner. MAC 2000 Wash Barndoors...
- Page 17 20 Replace the four barndoor blades. The smaller blades are the left and right blades, the larger ones are the upper and lower blades. 21 Mount the barndoor unit on the MAC 2000 Wash using the procedure in “Mounting and operating the barndoor unit”...
Need help?
Do you have a question about the MAC 2000 WASH BARNDOORS and is the answer not in the manual?
Questions and answers