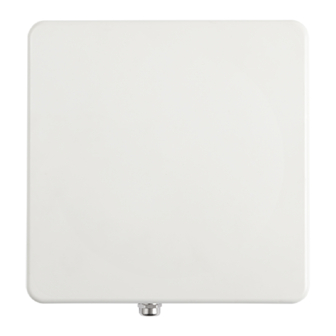
Cambium PMP Synchronization Solutions User Guide January 2017 V7.0...
Page 2
Accuracy While reasonable efforts have been made to assure the accuracy of this document, Cambium Networks assumes no liability resulting from any inaccuracies or omissions in this document, or from use of the information obtained herein. Cambium reserves the right to make changes to any products described...
PMP Synchronization Solutions User Guide Safety and regulatory information This section describes important safety and regulatory guidelines that must be observed by personnel installing or operating Cambium wireless equipment. Important safety information To prevent loss of life or physical injury, observe the safety guidelines in this section. Power lines Exercise extreme care when working near power lines.
Page 4
PMP Synchronization Solutions User Guide RF exposure near the antenna Radio frequency (RF) fields will be present close to the antenna when the transmitter is on. Always turn off the power to the unit before undertaking maintenance activities in front of the antenna. Minimum separation distances Install the AP/SM/BH so as to provide and maintain the minimum separation distances from all persons.
Contents Safety and regulatory information .................... i Important safety information ........................i General information ............................xi Version information ...........................xi Contacting Cambium Networks .......................xi Caring for the environment ..........................xii Introduction to synchronization ................ 1-1 Chapter 1: Interference and reliability ..........................1-2 Exclusivity and free use of spectrum ....................1-2 Sources of interference ..........................
Page 7
PMP Synchronization Solutions User Guide Standard Ethernet Cabling Configuration ..................3-11 Power Planning ............................. 3-16 Syncing Two Co-located CMMs Together ..................3-18 Cables ..............................3-20 EtherWAN Switch Information ........................3-24 Configuring a CMM4 ........................... 3-26 Configuring IP Communications Parameters ..................3-26 Overriding Forgotten IP Addresses, Usernames, or Passwords ............
Page 8
PMP Synchronization Solutions User Guide Power from the Radio via UGPS Timing Port 1 or UGPS Timing Port 2 ........... 4-8 UGPS and CMM Configurations ........................ 4-14 Product Specifications ..........................4-15 UGPS installation and operation ........................ 4-16 UGPS Installation Procedure ........................4-18 IP default bypass ............................
Page 9
PMP Synchronization Solutions User Guide List of Figures Figure 1 GPS Synchronization ........................... 1-4 Figure 2 One unsynchronized AP in cluster resulting in self-interference ............ 1-6 Figure 3: Universal GPS (UGPS) ......................... 1-7 Figure 7: CMM5 Controller ..........................1-8 Figure 8: CMM5 Injector ............................1-8 Figure 4: CMM4 Rack Mount ..........................
Page 10
PMP Synchronization Solutions User Guide Figure 38 Delete User tab of CMM4 ........................ 3-33 Figure 39 Port Configuration tab of CMM4 ....................3-33 Figure 40 CMM4 Configuration tab ......................... 3-34 Figure 41 SNMP tab of CMM4 ......................... 3-37 Figure 42 VLAN tab of CMM4 .......................... 3-39 Figure 43 Unit Settings Tab of CMM4 ......................
Page 11
PMP Synchronization Solutions User Guide Figure 79 Configuring the sync input and disabling UGPS power - PMP 100/400/430 and PTP 100/200 series ................................4-18 Figure 80 Configuring the sync source - PMP 320 series ................4-18 Figure 81 Configuring the sync input and enabling UGPS power - PTP 230 series ........4-20 Figure 82 CMM port conifguration for UGPS power ..................
Page 12
PMP Synchronization Solutions User Guide List of Tables Table 1 CMM4 model numbers and Ethernet switch configurations ............3-2 Table 2 Power supply part numbers ......................... 3-6 Table 3 CMM4 specifications ..........................3-8 Table 4 Rackmount CMM4 specifications......................3-9 Table 5 Recommended Ethernet cables ......................3-20 Table 6 RJ-45 pinouts for straight-through Ethernet cable - 30 VDC ............
005v000 January 2016 Update UGPS power supply information 006v000 February 2016 ePMP Updates 007v000 January 2017 Adds CMM5 Contacting Cambium Networks PMP support website: http://www.cambiumnetworks.com/support Cambium main website: http://www.cambiumnetworks.com/ Sales enquiries: sales@cambiumnetworks.com Email support: support@cambiumnetworks.com Telephone numbers: For full list of Cambium support telephone numbers, see: http://www.cambiumnetworks.com/support/contact-support...
Caring for the environment The following information describes national or regional requirements for the disposal of Cambium Networks supplied equipment and for the approved disposal of surplus packaging. In EU countries The following information is provided to enable regulatory compliance with the European Union (EU) directives identified and any amendments made to these directives when using Cambium equipment in EU countries.
PMP Synchronization Solutions User Guide Interference and reliability Interference and reliability In the unlicensed wireless environment, interference can be defined as unwanted, competing radio signals in the same frequency band. These interfering signals can disrupt, delay and reduce the reliability and quality of your network traffic and performance. In licensed frequency bands where no outside signals are competing, the issue is self- interference, i.e., your own network’s signals competing with each other.
PMP Synchronization Solutions User Guide Interference and reliability Sources of interference In general, there are three basic categories of interference: Self-interference Emanating from an organization’s own operating environment, self-interference is a factor in both licensed and unlicensed frequencies. In either band, self-interference occurs when distinct signals come from a network under your control, whether from the same tower location or from several miles away.
PMP Synchronization Solutions User Guide Neutralizing interference Neutralizing interference GPS synchronization Cambium leads the wireless industry in its usage of powerful GPS synchronization capabilities in all its PMP networks. This valuable capability dramatically reduces self- interference in licensed or unlicensed frequency bands. GPS synchronization allows all sites to be set to the exact same clock so network timing is very precise.
PMP Synchronization Solutions User Guide Neutralizing interference The Oncore GPS Receiver tracks eight or more NAVSTAR or GLONASS satellites. The CMM uses the signal from at least four of these satellites to generate a one-second interval clock that has a rise time of 100 nsec. This clock directly synchronizes APs and which, in turn, synchronize the SMs in the network.
PMP Synchronization Solutions User Guide Neutralizing interference Alternative to GPS synchronization A link can operate without sync, but cannot operate without sync. The alternative to GPS sync is to configure the AP in the link to generate a sync pulse to pass to the SM. Depending on the RF environment in which the link operates, this latter alternative may or may not be plausible.
PMP Synchronization Solutions User Guide Cambium’s synchronization solutions Cambium’s synchronization solutions Cambium’s entire Point-to-Multipoint (PMP) technology portfolio offers GPS synchronization to limit the network’s own self-interference. The Cluster Management CMM provides Global Positioning System (GPS) synchronization to the Access Point (AP) and all associated Subscriber Modules (SM).
PMP Synchronization Solutions User Guide Cambium’s synchronization solutions CMM5 The CMM5 (Cluster Management Module) is the latest generation of solutions for the distribution of TDD Sync signals and “Power-over-Ethernet (PoE)” in the field. Figure 4: CMM5 Controller Figure 5: CMM5 Injector CMM4 (Rack Mount) The cluster management module (CMM) is the heart of the Cambium system’s synchronization capability, which allows network operators to reuse frequencies and add...
PMP Synchronization Solutions User Guide Cambium’s synchronization solutions CMM4 (Cabinet with switch) Designed to deliver consistent and reliable wireless broadband service, the PMP system gracefully scales to support large deployments. The cluster management module is the heart of the system’s synchronization capability which allows network operators to re-use frequencies and add capacity while ensuring consistency in the quality of service to customers.
PMP Synchronization Solutions User Guide Cambium’s synchronization solutions CMMmicro (CMM3) – Product is End of Life and no longer available for new shipments The Cluster Management Module 3 (CMM3), also known as the CMMmicro, allows network operators to reduce the time and labor cost of system installation and maintenance in AP Clusters.
PMP Synchronization Solutions User Guide Cambium’s synchronization solutions Chapter 2: Cambium Cluster Management Module (CMM5) The CMM5 consists of 4 subsystems, described in the following sections: • CMM5 Controller Module • CMM5 Injector (29 volt and 56 volt versions) • Power supply(s) (240/600 watt) •...
Support for PMP 450m (cnMedusa™) • Future support for integration into (cnMedusa™) for cloud or NOC-based management Cluster Management: Scenario 1 The following is a CMM5 Cluster Management scenario using four PMP 450i Access Points. Scenario Equipment Needed Features Four PMP 450i Access 56 Volt Injector •...
No management or resiliance required Figure 9: Cluster Management: Scenario 1 Cluster Management: Scenario 2 The following is a CMM5 Cluster Management scenario using four PMP 450i Access Points and four PMP 450 Access Points. Scenario Equipment Needed Features Four PMP 450i Access •...
PMP Synchronization Solutions User Guide Product Overview Figure 10: Cluster Management: Scenario 2 CMM5 Controller Module The major features of the CMM5 Controller Module are: • Auto-detect/control up to 8 Power Injectors • Monitor SYNC/Power/GPS status • Manage (up/down ports) •...
PMP Synchronization Solutions User Guide Product Overview CMM5 Injector Module The CMM5 Injector Module has the following features: • Stand-alone mode or used with controller for mgmt. • +/- 48VDC input with green/amber LED’s for status • Injects SYNC pulse from uGPS •...
PMP Synchronization Solutions User Guide Product Overview CMM5 Specifications The following table provides specifications for the CMM5 Power & Sync Injector (56 Volts). CMM5 Power and Sync Injector 56 Volts C000000L556A Model Number 4 each RJ45 Gigabit Powered output ports “To Data Interface Radios”...
PMP Synchronization Solutions User Guide Product Overview 240 Watt Power Supply The CMM5 240 watt power supply Cambium Networks part number: N000000L054B 600 Watt Power Supply The CMM5 600 watt power supply. Cambium Networks part number: N000000L101A PMP-0297 007v001 (January, 2017)
In order to meet regulatory requirements in all deployment scenarios, a power line filter module is recommended to be installed on the DC side of the power supply. This module may be ordered from Cambium Networks (part number N000000L056A). Figure 13: DC Line Filter...
PMP Synchronization Solutions User Guide Product Overview Ferrite Beads Ferrite beads are recommended to be attached to RJ-45 Ethernet cables to suppress noise and EMI. What’s in Each Box The following paragraphs describe the contents (product and accessories) for each ordered component of the CMM5.
CMM5 provides power to the uGPS module. You only need one uGPS for the entire chain. Cable straight-Through RJ-12 (6-pins) from SYNC-OUT (uGPS) to the uGPS port on the first Injector of the Daisy-Chain. You can procure your own cable or purchase this cable from Cambium Networks. N000000L103A CMM5 to uGPS Shielded Cable (20 meter)
PMP Synchronization Solutions User Guide CMM5 Planning CMM5 Planning The following paragraphs describe planning for the CMM5 module. Injector Cabling The following table describes Injector cables. Nomenclature Function Cable Required PRIMARY Primary 48VDC Power connector SECONDARY Optional Secondary 48 VDC Power connector in put for backup/resilience TO RADIOS...
PMP Synchronization Solutions User Guide CMM5 Injector Initial Startup CMM5 Injector Initial Startup The following paragraphs describe CMM5 Injector configuration. Injector Initial Startup Perform the following steps to configure the injector. Procedure 1 Configure the Injector Connect the uGPS antenna to the uGPS port on the front of the CMM5. Connect the power to the CMM5 Power Ports marked “Primary”...
PMP Synchronization Solutions User Guide CMM5 Controller Initial Startup CMM5 Controller Initial Startup The following paragraphs describe CMM5 Controller initial startup. Controller Initial Startup Perform the following steps to configure the injector. Procedure 2 Initial Startup of the Controller. Connect the power supply. A red light on the front panel indicates the device is powered on.
PMP Synchronization Solutions User Guide CMM5 Controller Configuration CMM5 Controller Configuration The following paragraphs describe the tasks necessary to configure the CMM5. Log In Perform the following steps to log into the CMM5. Procedure 3 Log In to the CMM5 Enter your Username.
PMP Synchronization Solutions User Guide CMM5 Controller Configuration View System Status This screen displays the following information: • System Information • Memory • Network Information PMP-0297 007v001 (January, 2017) 2-25...
PMP Synchronization Solutions User Guide CMM5 Controller Configuration View Network -Interface Status This screen displays the status of an existing interface: • Uptime • MAC address • IPv4 address • Rx packets • Tx packets You can perform the following actions from this screen: •...
PMP Synchronization Solutions User Guide CMM5 Controller Configuration Status – Firewall The Status – Firewall screen will display current rules applied to firewall. Note: It is not expected that any changes would be required. View Synchronization Status The main Services screen will display the status of Synchronization (ON/OFF). PMP-0297 007v001 (January, 2017) 2-27...
PMP Synchronization Solutions User Guide CMM5 Controller Configuration View Chassis Status From the main “Services” screen, you can view the general status of a chassis. • Chassis Name • Chassis Serial Number • Chassis Type • Chassis Temperature PMP-0297 007v001 (January, 2017) 2-28...
PMP Synchronization Solutions User Guide CMM5 Controller Configuration Identify a Chassis From the main “Services” screen, use the Blink/Query functions to identify a chassis. • Blink - “Blink” causes the red LEDs on the ODU ports of the selected power injector chassis to light up for one second.
PMP Synchronization Solutions User Guide CMM5 Controller Configuration View Port Status From the main “Services” screen, view port status (ON/OFF). PMP-0297 007v001 (January, 2017) 2-30...
PMP Synchronization Solutions User Guide CMM5 Controller Configuration View/Configure Static Routes From the Network – Static Routes screen, you can view existing static routes (IPv4/IPv6) and add new ones. Note: It is not expected that any changes would be required. PMP-0297 007v001 (January, 2017) 2-31...
PMP Synchronization Solutions User Guide CMM5 Controller Configuration Set Local Time/NTP Protocol From the System screen, you can perform the following: • Set Local Time • Set the Time Zone • Enable NTP Client/Server PMP-0297 007v001 (January, 2017) 2-32...
PMP Synchronization Solutions User Guide CMM5 Controller Configuration Update Injector Firmware Perform the following steps to update Injector firmware: Procedure 5 Update Injector Firmware Create a directory on the PC and copy over the firmware (*.hex) and TeraTerm macro (*.ttl) files. Bring up a TeraTerm terminal window and establish communication with the CMM5 serial port.
PMP Synchronization Solutions User Guide CMM5 Controller Configuration Update Controller Firmware Perform the following steps to update Controller firmware: Procedure 6 Update Controller Firmware From the System screen, select Backup/Flash Firmware. Select Browse and select a sysupgrade-compatible image. Once you have selected an image, select Flash Image. Place a check mark in the “Keep Settings”...
PMP Synchronization Solutions User Guide Installing the CMM5 Installing the CMM5 Ensure that you comply with standard local or national electrical and climbing procedures when you install the CMM5. WARNING! Installing a CMM involves electrical power and can involve height and exposure to RF (Radio Frequency) energy.
PMP Synchronization Solutions User Guide Installing the CMM5 Conforming to Regulations For all electrical purposes, ensure that your network conforms to applicable country and local codes, such as the NEC (National Electrical Code) in the U.S.A. If you are uncertain of code requirements, engage the services of a licensed electrician.
PMP Synchronization Solutions User Guide Installing the CMM5 Installing a uGPS Antenna Please refer to 4-16 for instructions on installing a uGPS antenna. Note that the CMM5 Injector provides power to the uGPS. Installing a Single Controller Perform the following procedure to install a single CMM5 Controller: Procedure 1 Installing the Controller Ensure that the following hardware is available: •...
PMP Synchronization Solutions User Guide Installing the CMM5 Use 2 mounting screws to secure the other end of the mounting ear to the rack. Figure 15 Installing a Single Controller PMP-0297 007v001 (January, 2017) 2-38...
PMP Synchronization Solutions User Guide Installing the CMM5 Installing a Single Injector Perform the following procedure to install a single CMM5 Injector. Note that the injector requires 2U of rackspace to account for the heat dissipation. The heat sink extends into the Unit of rackspace.
PMP Synchronization Solutions User Guide Installing the CMM5 Installing Two Injectors side by side Perform the following procedure to install two Injectors side by side in a 19” rack. Procedure 3 Installing Two Injectors Ensure that the following hardware is available: •...
PMP Synchronization Solutions User Guide Installing the CMM5 Figure 17: Two Injectors with Joining Bar Figure 18: Rear Attaching Screw PMP-0297 007v001 (January, 2017) 2-41...
PMP Synchronization Solutions User Guide Installing the CMM5 Installing a Controller/Injector side by side Perform the following procedure to install a Controller/Injector combination. Procedure 4 Installing a Controller/Injector Combination Ensure that the following hardware is available: • (2) standard mounting ears for a 19-inch rack •...
PMP Synchronization Solutions User Guide Installing the CMM5 Figure 19: Injector/Controller Combination Installing a 600 Watt Power Supply Perform the following procedure to install a 600 Watt Power Supply. Procedure 4 Installing Two Injectors Ensure that the following hardware is available: •...
PMP Synchronization Solutions User Guide Installing the CMM5 Installing a Split DC Power Line A split DC power line is used in situations where you have one injector and one controller. Procedure 4 Installing a Split DC Power Line Ensure that the following hardware is available: •...
PMP Synchronization Solutions User Guide Installing the CMM5 Cabling the CMM5 Refer to the following table for cabling requirements for the CMM5 Injector. Nomenclature Function Cable Required PRIMARY Primary 48VDC Power connector SECONDARY Optiona: Secondary 48 Power connector TO RADIOS To Access Points RJ-45 connector TO SWITCH ARRAY...
PMP Synchronization Solutions User Guide Installing the CMM5 Class A Emissions Requirements The following are the major requirements for the CMM5 to meet Class A Emission requirements when fully loaded with access points. • 240W and 600W AC Power supplies: It is recommended to us a DC line filter as described above.
PMP Synchronization Solutions User Guide Chapter 3: Cambium Cluster Management Module (CMM4) The CMM4 consists of 3 subsystems, described in the following sections: • The CMM4 enclosure and controller board • Power supply(s) • An EtherWAN switch (contained only in 1090CKHH models - mounted in the CMM4) pmp-0297 006v000 (January, 2017)
PMP Synchronization Solutions User Guide CMM4 and Controller Board CMM4 and Controller Board The Cluster Management Module 4 (CMM4) provides power, sync, and network connectivity for up to eight APs, backhauls, and Ethernet terrestrial feeds in a variety of configurations. The CMM4 provides •...
PMP Synchronization Solutions User Guide CMM4 and Controller Board Inside the CMM4 enclosure is a controller board, an EtherWAN switch (model 1090CKHH only), and a GPS coax surge suppressor. The controller board injects power and synchronization on up to eight Ethernet ports and provides the equivalent of 600SS surge suppression on each of the eight ports.
PMP Synchronization Solutions User Guide CMM4 and Controller Board Figure 26 GPS Antenna The model 1090CKHHand model 1091HH CMM4 as shipped includes: • Weatherized enclosure containing the controller board, EtherWAN Ethernet Switch, and GPS coax surge suppressor. See page for details on EtherWAN switch options. •...
PMP Synchronization Solutions User Guide Power Power The power supply or supplies, 30 VDC and/or 54 VDC, are ordered separately. See Table 2 pictures of the 30 VDC and 54 VDC supplies and for power supply part numbers. The 30 VDC power supply N000000L055A and the 54 VDC power supply N000000L054A are equipped with a screw terminal and come with no cables.
PMP Synchronization Solutions User Guide Ethernet Switch Ethernet Switch The model 1090CKHH CMM4 is available with a hardened, full-featured Ethernet switch made by EtherWAN Systems mounted inside the CMM4 enclosure. The CMM4 ships with a 14-port EtherWAN switch. Earlier units shipped with a 9-port EtherWAN switch. For details on the EtherWAN switch, including the download site for its separate manual, see page 3-24.
PMP Synchronization Solutions User Guide Specifications Specifications Table 3 CMM4 specifications Specification System Range Max length from CMM to any 328 cable feet (100 meters) radio Max length from CMM to GPS 100 cable feet (30.5 meters) antenna Max length from CMM to another CMM, if GPS sync cable 100 cable feet (30.5 meters) is used...
PMP Synchronization Solutions User Guide Specifications Table 4 Rackmount CMM4 specifications Specification System Range Max length from CMM to any 328 cable feet (100 meters) radio Max length from CMM to GPS 100 cable feet (30.5 meters) antenna Max length from CMM to another CMM, if GPS sync cable 100 cable feet (30.5 meters) is used...
PMP Synchronization Solutions User Guide Providing sync to CMM via UGPS Module Providing sync to CMM via UGPS Module A UGPS module may also be used as a GPS synchronization source (or backup GPS synchronization source) for the CMM4 units. The UGPS provides GPS synchronization to the CMM unit via the CMM’s Aux Sync port (location data is not provided by the UGPS module).
PMP Synchronization Solutions User Guide CMM Planning CMM Planning The following sections discuss Ethernet cabling, power, syncing two co-located CMMs together, and engineering and ordering cables. Typical Ethernet Cabling Physical connectivity and cabling of the CMM4 is variable and is done per the specific requirements of a given installation.
PMP Synchronization Solutions User Guide CMM Planning Figure 27 CMM4 Standard Configuration Figure 28 Rackmount CMM4 Standard Configuration CAUTION! Do not mis-cable in such a way as to put power on the controller board Management Port. The 30 VDC CMM4 power supply is labeled as 30 VDC and typically measures 30 VDC at its output.
Page 76
PMP Synchronization Solutions User Guide CMM Planning When powering PMP 450i AP, ePMP 1000 Connectorized with GPS Sync, or Force 110 PTP devices with a 56 V powered CMM, a crossover cable must be used, or Cambium dongle N000045L001A may also be used (these devices require pins 8,7 +Vcc and pins 4, 5 DC return).
PMP Synchronization Solutions User Guide CMM Planning Figure 29 CMM4 cabled to use Gigabit Ethernet feed Configured for Cambium PTP 400, 500, and 600 Series Ethernet Bridges PTP 400, 500, and 600 Series Ethernet bridges can use the CMM4’s EtherWAN switch for their network connectivity.
PMP Synchronization Solutions User Guide CMM Planning Figure 30 CMM4 cabled to support PTP 500/600 PTP 400 Series bridges operate at less than 100 Mbit speeds and so can be cabled to one of the eight Ethernet ports on the controller board, thus taking advantage of the controller board for surge suppression.
• PMP 49400 OFDM APs • PTP 49200 OFDM BHs • PMP 450i OFDM APs (requires crossover cable N000045L001A for Ethernet • connection) NOTE: n most cases SMs use the same voltage as their associated APs. Three exceptions to be aware of are ◦...
Page 80
PMP Synchronization Solutions User Guide CMM Planning The 30 VDC CMM4 power supply is labeled as 30 VDC and typically measures 30 VDC at its output. The associated CMM4 terminal blocks are marked 29 VDC, and some associated SM All of these components are elements of a nominal 30 VDC power supplies are labeled 29.5 VDC.
To enable regulatory compliance with the European Union (EU) directives, a power line filter module must be installed on the DC side of the power supply. This module may be ordered from Cambium Networks (part number N000000L056A). Please reference section EU countries only –...
Page 82
PMP Synchronization Solutions User Guide CMM Planning Case 1 – Redundant Sync In this case, each CMM is connected to its own GPS antenna via coax in the standard way, and the two CMMs are connected via a special cable between the auxiliary sync RJ-11 ports of each CMM. If one CMM loses sync due to problems with its GPS antenna, coax cable, or GPS module, that CMM can be re-configured remotely over the network to get sync from the other CMM by going to the Configuration >...
PMP Synchronization Solutions User Guide CMM Planning Cables Ethernet Cables The operator provides the Ethernet cables between the CMM4 and the radios it supports. They must be engineered to length and are not included with the CMM4. The cable length from the CMM4 to any radio must be under 100 m (328 ft).
PMP Synchronization Solutions User Guide CMM Planning NOTE: The CMM4 has a female N-type coax connector on the outside of the enclosure, whereas the CMMmicro has a female BNC-type connector inside the enclosure. Take this into account when ordering or fabricating cables, and when replacing a CMMmicro with a CMM4.
PMP Synchronization Solutions User Guide CMM Planning CMM Sync and UGPS Sync Cable As described in on page 3-18, two CMMs (two CMMmicros, two CMM4s, or a CMMmicro and a CMM4) can be connected together with a CMM sync cable to provide either •...
PMP Synchronization Solutions User Guide EtherWAN Switch Information EtherWAN Switch Information This section includes key information on the EtherWAN switch. For full details and configuration information, EtherWAN switch manuals are downloadable from http://www.etherwan.com/support-mo.php. Consult Table 10 to obtain the appropriate model number for your EtherWAN switch to use to download the correct manual.
Page 88
PMP Synchronization Solutions User Guide EtherWAN Switch Information The 9-port EtherWAN switch may be reset (rebooted) remotely by accessing the CMM4 controller board web page, navigating to Configuration > CMM and clicking the Reset OEM Switch button. does not This button power cycles the EtherWAN switch but reset it to factory defaults.
PMP Synchronization Solutions User Guide Configuring a CMM4 Configuring a CMM4 Web pages on the CMM4 provide status information and support configuration. The eight Ethernet ports can be configured, and information is provided on GPS status, Port configuration, FPGA and software revision. EtherWAN Switch Manual.
PMP Synchronization Solutions User Guide Configuring a CMM4 Attribute Meaning Default This is the default gateway of the CMM4 (controller board). The EtherWAN Gateway Switch has a separate default gateway setting that is set using the Ethernet Switch web or serial interface. The default for this parameter is 169.254.0.0.
Page 91
PMP Synchronization Solutions User Guide Configuring a CMM4 To override a lost or unknown IP address or password, perform the following steps. Procedure 8 Overriding forgotten IP addresses, usernames, or passwords IMPORTANT! When rebooted into override mode the ports on the CMM4 are temporarily unpowered.
Page 92
PMP Synchronization Solutions User Guide Configuring a CMM4 RECOMMENDATION: Note or print the IP settings from the Configuration > IP tab. Ensure that you can readily associate these IP settings with the module for future use. NOTE: An override/default plug (an RJ-11 connector with pins 4 and 6 tied together) inserted into the auxiliary port before booting the CMM4 is equivalent to using the toggle switch and will also temporarily override a lost or unknown IP address, username, or password.
PMP Synchronization Solutions User Guide Configuring a CMM4 Log In An example of the CMM4 Login page is displayed in Figure Figure 35 Login page of CMM4 With a new CMM4 or one that has been reset to factory defaults, a user can access all web pages and tabs without using a username or password.
PMP Synchronization Solutions User Guide Configuring a CMM4 All CMM user accounts are local to the device. User Update An example of the CMM4 User Update tab is displayed in Figure 15.. Figure 36 Changer Users Password tab of CMM4 The Change Users Password tab provides the following options: Table 12 Change User Password tab attributes Attribute...
PMP Synchronization Solutions User Guide Configuring a CMM4 Add User An example of the CMM4 Add User tab is displayed in Figure 16. Figure 37 Add User tab of CMM4 If you are of ADMINISTRATOR level, the Add User Tab provides the following options to you. Table 13 Add User attributes Attribute Meaning...
PMP Synchronization Solutions User Guide Configuring a CMM4 Delete User An example of the CMM4 Delete User tab is displayed in Figure Figure 38 Delete User tab of CMM4 If you are of ADMINISTRATOR level and want to remove a user, the Delete Users Password tab allows you to do so as follows: Table 14 Delete User attributes Attribute...
PMP Synchronization Solutions User Guide Configuring a CMM4 The Port Configurations tab provides the following parameters. Table 15 Port Configuration attributes Attribute Meaning Port 1 to 8: Description This is a user-defined field that identifies the port. It appears in the Home -> General Status page. Port 1 to 8: Power On or Off Select Power On to restore power over Ethernet to the device that is connected to this port or Power Off to...
PMP Synchronization Solutions User Guide Configuring a CMM4 The CMM4 Configuration tab provides the following parameters. Table 16 CMM tab attributes Attribute Meaning Enter the expiry in seconds for remote management sessions via Session Timeout HTTP, telnet, or ftp access to the CMM4 up to a maximum of 2592000 seconds.
PMP Synchronization Solutions User Guide Configuring a CMM4 Attribute Meaning If you wish to force the CMM4 to a speed or duplex state, or to return Link Speeds the module to auto-negotiating speed and duplex state, change the selection for the port. The range of selections is defined below: Table 17 Link Speed selections for CMM4 Selection Result...
PMP Synchronization Solutions User Guide Configuring a CMM4 Figure 41 SNMP tab of CMM4 CMM supports up to SNMPv2. PMP-0297 007v001 (January, 2017) 3-37...
PMP Synchronization Solutions User Guide Configuring a CMM4 The SNMP tab provides the following parameters. Table 18 SNMP tab attributes Attribute Meaning Community String Specify a control string that allows Prizm or a Element Management System (EMS) to access the CMM4 via SNMP. No spaces are allowed in this string.
PMP Synchronization Solutions User Guide Configuring a CMM4 Attribute Meaning Site Name Enter a name for the physical module. What you enter here will be shown on the General Status tab in the Home page of the CMM4. This information is also set into the sysName SNMP MIB-II object and can be polled by an SNMP management server.
PMP Synchronization Solutions User Guide Configuring a CMM4 Attribute Meaning Active This field indicates the status of the current configuration. For example, Configuration VLAN tagging enabled with “1” set as the management VLAN tag would display the following: Untagged Ingress VID: 1 Management VID: 1 Current VID Member Set: VID Number...
PMP Synchronization Solutions User Guide Configuring a CMM4 Viewing the ARP Table (Statistics) The ARP table provides information on the data devices connected to the CMM4. The ARP Table maps the IP address to the MAC address. The table also shows the age of the entry in the table, the interface (in this case it will always be Ethernet “et1”), and whether the packets are “pending.”...
PMP Synchronization Solutions User Guide Configuring a CMM4 Viewing General Status An example of the CMM4 General Status tab is displayed in Figure Figure 45 General status tab of CMM4 The General Status tab provides information on the operation of the CMM4. This is the tab that opens by default when you access the GUI.
PMP Synchronization Solutions User Guide Configuring a CMM4 Table 22 General Status tab attributes Attribute Meaning Device This field indicates the type of module and provides its MAC address. Software Version This field indicates the CMM4 release and the time and date of the release. If you request technical support, provide the information from this field.
Page 107
PMP Synchronization Solutions User Guide Configuring a CMM4 Attribute Meaning Tracking Mode If the CMM4 receives the signals from a GPS antenna, then this field describes the degree to which the CMM4 is accurately computing position information, given the satellites that it is tracking. Latitude If the CMM4 receives the signal from a GPS antenna, then this field displays the latitude of the site.
PMP Synchronization Solutions User Guide Configuring a CMM4 Viewing Sync Status An example of the CMM4 Sync Status tab is displayed in Figure 25. Figure 46 Sync Status tab of CMM4 The Sync Status tab provides information on the GPS receiver in the CMM4 and the signals that it is receiving.
PMP Synchronization Solutions User Guide Configuring a CMM4 Attribute Meaning This field displays the month, day, and year that the CMM4 receives. Date from GPS This field displays the hour, minute, and second that the CMM4 receives. Time from GPS This field indicates the health of the connection between the CMM4 and the Antenna GPS antenna.
PMP Synchronization Solutions User Guide Configuring a CMM4 Viewing the Network Interface Figure 48 Network Interface tab of the CMM The Network Interface screen allows the operator to view the LAN settings for the CMM4 device. It is a read-only screen. Table 24 Network Interface tab attributes Attribute Meaning...
PMP Synchronization Solutions User Guide Installing a CMM4 Installing a CMM4 Ensure that you comply with standard local or national electrical and climbing procedures when you install the CMM4. WARNING! Installing a CMM involves electrical power and can involve height and exposure to RF (Radio Frequency) energy.
PMP Synchronization Solutions User Guide Installing a CMM4 Conforming to Regulations For all electrical purposes, ensure that your network conforms to applicable country and local codes, such as the NEC (National Electrical Code) in the U.S.A. If you are uncertain of code requirements, engage the services of a licensed electrician.
PMP Synchronization Solutions User Guide Installing a CMM4 Recommended Tools for GPS Antenna Mounting The following tools may be needed for mounting the GPS antenna: • 3/8” nut driver • 12” adjustable wrench • 7/16” wrench • Needle-nose pliers Mounting a GPS Antenna Perform the following procedure to mount a GPS antenna.
PMP Synchronization Solutions User Guide Installing a CMM4 Cabling the GPS Antenna Connect the GPS coax cable to the female N-connector on the GPS antenna. Information on the coax cable is covered on page 3-21. Weatherproof the connection following Weatherproofing an N-type antenna connector.
PMP Synchronization Solutions User Guide Installing a CMM4 Cabling the UGPS Module When using the UGPS as a synchronization source for a CMM4, a special sync cable must be used. This cable may be constructed from an RJ-11 cable using the pin configuration in Figure Connect this cable from one of the UGPS module’s sync ports to the Aux Sync port of the CMM4 unit.
PMP Synchronization Solutions User Guide Installing a CMM4 Installing the power supply for the CMM4 (30 VDC or 54 VDC) WARNING! Although the output of the power supply is 30 VDC or 54 VDC, the power rating classifies the converter as a Class 2 electric device. For this first reason, whenever you work on power in the CMM4, you must disconnect the DC supply from the AC power source.
To enable regulatory compliance with the European Union (EU) directives, a power line filter module must be installed on the DC side of the power supply. This module may be ordered from Cambium Networks (part number N000000L056A). Please reference section EU countries only –...
To enable regulator compliance with the European Union (EU) directives, a power line filter module must be installed on the DC side of the power supply. This module may be ordered from Cambium Networks (part number N000000L056A). Procedure 11 Installing the power line filter (EU only) Ensure that all equipment is disconnected from main power.
PMP Synchronization Solutions User Guide Installing a CMM4 Figure 56 Rackmount CMM line filter installation (EU only) Using spade lugs, connect the DC cables from the CMM DC input screw terminals to the “Load” side of the filter. • (29V installations) The length of 14 AWG or 16 AWG cabling between the CMM and filter should be 10.5 in +/- 0.5 in (27 cm +/- 1 cm) .
Page 120
PMP Synchronization Solutions User Guide Installing a CMM4 Discontinued power supply notice – ACPS112WA only The following procedure is only applicable to operators using a CMM4 that supplies power to both 30V devices (PMP100 radios) and 56V devices (PMP430 or PMP320 radios). The discontinued 30V model ACPS120WA power supply does NOT require the 1k 5W resistor on the CMM4 29V terminals (This new 30V power supply was made available for order around December 3, 2010).
PMP Synchronization Solutions User Guide Installing a CMM4 Insert the wired resistor assembly into either terminal block labeled "+29 V" as shown below ensuring that the powered lead is inserted into the correct termination. Figure 57 Resistor when using both 56 VDC and 30 VDC power Screw terminal block screws down tight.
PMP Synchronization Solutions User Guide Installing a CMM4 Perform the following procedure to install the CMM4. Procedure 13 Mounting the CMM4 Ensure that the mounting position is not • further than 328 feet (100 meters) from the furthest AP or BH that the CMM4 will serve.
PMP Synchronization Solutions User Guide Installing a CMM4 Installing a Rackmount CMM4 (Model 1092HH) Perform the following procedure to install the Rackmount CMM4. Procedure 14 Mounting the Rackmount CMM4 Ensure that the mounting position • is not further than 328 feet (100 meters) from the furthest AP or BH that the CMM4 will serve.
PMP Synchronization Solutions User Guide Installing a CMM4 Select a 19” rack space in which the CMM4 may be mounted and use the (4) provided Phillips head screws to attach the front of the CMM4 to the rack Figure 60 Rackmount CMM4 rack screws Cabling a CMM4 (Models 1090CKHH and 1091HH) Perform the following procedure to cable the CMM4: Procedure 15 Cabling the CMM4...
PMP Synchronization Solutions User Guide Installing a CMM4 Route Ethernet cables through the cable gland connectors to the Ethernet ports inside the CMM4 cabinet (see the grey cables in Figure 61). Stagger the cables (see Figure 62) to make it easier to feed them through the gland. Figure 61 Ethernet port connections Figure 62 Staggered Ethernet cables PMP-0297 007v001 (January, 2017)
Page 126
PMP Synchronization Solutions User Guide Installing a CMM4 Connect Ethernet cables as follows (see page 3-11 for typical diagrams and planning information): • APs, BH10s, or BH20s (PTP 100 Series bridges), PTP 230 Series bridges: cable to powered ports of the controller board. The controller board provides sync, power, and surge suppression for these connections.
PMP Synchronization Solutions User Guide Installing a CMM4 Consistent with practices in your company, note the above information to add later to the company equipment database. Connect the coax cable from the female N-connector on the GPS antenna to the female N- connector on the outside of the CMM4.
Page 128
PMP Synchronization Solutions User Guide Installing a CMM4 CAUTION! Surge suppressors should be installed on any cables where they enter a building to reduce the possibility of overvoltages or overcurrents damaging any equipment in the building. The following equipment, mounted outside of a communications hut or building at the point where the cables penetrate the building, is recommended: ◦...
PMP Synchronization Solutions User Guide Installing a CMM4 Cabling a Rackmount CMM4 Perform the following procedure to cable the Rackmount CMM4: Procedure 16 Cabling the Rackmount CMM4 Connect Ethernet cables as follows (see page 3-11 for typical diagrams and planning information): •...
PMP Synchronization Solutions User Guide Installing a CMM4 The indicator LEDs are shown in Figure 64. Color indicates position, but not state. For example, the red Power LED, in the left most position, lights when power is applied to the unit, but does not change color at any point.
PMP Synchronization Solutions User Guide Installing a CMM4 Power Faults If excessive current is drawn on a port, the analog circuitry reports a PoE fault. The system then turns the port power off. The power will be restored when the fault is removed. In this power fault detection system, each port is designed with an electronic fuse that opens the DC circuit in 26ms if the 1A maximum limit is reached.
UGPS Product Description and Overview UGPS Product Description and Overview The Cambium Networks Universal Global Positioning System (UGPS) is a stand-alone GPS antenna and receiver with the capability to provide a 1PPS GPS synchronization signal to Cambium Networks access points (APs), backhaul masters (BHMs), or cluster management modules (CMMs).
PMP Synchronization Solutions User Guide UGPS Product Description and Overview The connector interface for the UGPS is detailed in Figure Figure 66 UGPS connector interface PMP-0297 007v001 (January, 2017)
PMP Synchronization Solutions User Guide UGPS Power Source Configurations UGPS Power Source Configurations The UGPS module may be powered by an external source via the UGPS External Power Port. Alternately, the UGPS may be powered by a PTP 230 backhaul master or PMP 450 Platform AP via one of the UGPS Timing Ports.
PMP Synchronization Solutions User Guide UGPS Power Source Configurations Figure 68 PMP 100 AP receiving synchronization from external-powered UGPS Power Supply Power Supply IP Default Bypass PMP-0297 007v001 (January, 2017)
PMP Synchronization Solutions User Guide UGPS Power Source Configurations Figure 69 PMP 320 receiving synchronization from external-powered UGPS 29.5V Power Supply Power Supply 29.5V Power Supply Power Supply IP Default Bypass PMP-0297 007v001 (January, 2017)
PMP Synchronization Solutions User Guide UGPS Power Source Configurations Figure 70 One PMP 400/430 AP and one PMP 100 AP receiving synchronization from external-powered UGPS 29.5V Power Supply Power Supply 29.5V Power Supply Power Supply 29.5V Power Supply Power Supply IP Default Bypass PMP-0297 007v001 (January, 2017)
UGPS is powered in this fashion. This UGPS powering mode is currently supported only by PTP 230 BHM and PMP 450 Platform AP. Future Cambium Networks hardware releases will also support providing power to the UGPS. When powering the UGPS via AP or BHM, the system uses a straight-through 6-pin RJ-11 cable to provide power to the UGPS and to retrieve GPS synchronization pulses and data from the UGPS.
PMP Synchronization Solutions User Guide UGPS Power Source Configurations 450i Series AP/BHM to UGPS cable The 450i Series requires a special cable to connect the AP or BHM to a UGPS module. The AP/BHM to UGPS cable can be constructed from RJ12 to RJ 45 cable using the ping configuration described in Table Figure 72 AP/BHM to UGPS cable...
PMP Synchronization Solutions User Guide UGPS Power Source Configurations Figure 74 PMP 450 AP powering UGPS and receiving synchronization 29.5V Power Supply Power Supply IP Default Bypass IP Default Bypass Note: 450 only, 450i excluded PMP-0297 007v001 (January, 2017) 4-11...
PMP Synchronization Solutions User Guide UGPS Power Source Configurations Figure 75 Two PTP 230 backhaul master units powering UGPS and receiving synchronization 29.5V Power Supply Power Supply 29.5V Power Supply Power Supply IP Default Bypass PMP-0297 007v001 (January, 2017) 4-12...
PMP Synchronization Solutions User Guide UGPS Power Source Configurations Figure 76 PTP 230 backhaul master powering UGPS/receiving synchronization and PMP 100/430 receiving synchronization 29.5V Power Supply Power Supply 29.5V Power Supply Power Supply 29.5V Power Supply Power Supply IP Default Bypass PMP-0297 007v001 (January, 2017) 4-13...
UGPS and CMM Configurations UGPS and CMM Configurations The UGPS may be used as a GPS synchronization source for Cambium Networks CMM3 and CMM4 (Cluster Management Module) units. The UGPS provides GPS synchronization to the CMM unit via the CMM’s sync port. This allows any access points or backhaul masters connected to the CMM to receive sync.
Observe cable length specifications in Table • Cambium Networks recommends using shielded Category 5E cables for outdoor installations. • The UGPS Power over Ethernet pinout (External Power Port) differs from IEEE Standard 803.3af, and the two should not be intermixed. The UGPS Power over Ethernet pinout is the same as Cambium Networks FSK broadband radios.
This UGPS powering mode is supported only by PMP 450 Platform AP and PTP 230 BHM . Future Cambium Networks hardware releases will also support providing power to the UGPS. When using the UGPS as a synchronization source for a CMM3 or CMM4, a special sync cable must be used.
PMP Synchronization Solutions User Guide UGPS Installation Procedure UGPS Installation Procedure Use the following procedure to install the UGPS module and to verify operation. Procedure 17 UGPS installation – external-powered Pole mount or surface mount the GPS antenna following the installation guidelines and specifications listed in this chapter.
Page 150
PMP Synchronization Solutions User Guide UGPS Installation Procedure For PMP 100/400/430/450 and PTP 100/200 series, click Save Changes and reboot the radio. For PMP 320 series, click Update, click the Save icon and reboot the radio. If connecting the UGPS to a CMM3 or CMM4, configure the CMM (via the CMM web management interface) to Slave mode (access points/backhaul masters connected to the CMM will need to be set to receive GPS sync signal from the power port).
Page 151
Pole mount or surface mount the GPS antenna following the installation guidelines and specifications listed in this chapter. Verify that the CMM is powered by a 30V Cambium Networks power supply. This ensures that the CMM can provide the proper power-over-Ethernet output via CMM ports.
PMP Synchronization Solutions User Guide UGPS Installation Procedure Connect an RJ-45 8 pin Ethernet cable from the External Power Port of the UGPS to an Ethernet port on the CMM4. On the CMM4 web management GUI navigate to Configuration > Ports. In this configuration the CMM4 port connected to the UGPS via RJ-45 cable must be configured with Power On and Device Type Canopy 29V as Port 1 in Figure 82.
PMP Synchronization Solutions User Guide IP default bypass IP default bypass Since the UGPS is connected to the access point/backhaul master timing port, the UGPS module provides a bypass to perform an IP Default to a device connected on UGPS Timing Port 1 or 2. To perform an IP Default for a radio connected to the UGPS follow the procedures below ( applicable to 450i Series Procedure 20 IP default procedure –...
PMP Synchronization Solutions User Guide IP default bypass Reboot the radio to be defaulted while the RJ-45 pins are jumpered. After the radio has finished rebooting, the software will be restored to a factory default configuration. Figure 83 IP default bypass - default radio on timing port 1 TIMING TIMING PORT 1 (to...
PMP Synchronization Solutions User Guide IP default bypass Figure 84 IP default bypass - default radio on timing port 2 TIMING TIMING PORT 2 (to PORT 1 be defaulted) RJ11-6 RJ11-6 EXT. POWER and AP IP DEFAULT IP BYPASS PORT RJ45 PMP-0297 007v001 (January, 2017) 4-24...
PMP Synchronization Solutions User Guide GPS status and location data readout GPS status and location data readout The UGPS provides location data to connected synchronized devices and may be retrieved by the access point/backhaul/cluster management module web GUI or by SNMP. GPS status and location data readout is currently available on PMP 100/320/400/430, and PTP 100/200/230, series radios.
PMP Synchronization Solutions User Guide GPS status and location data readout Procedure 23 Retrieving GPS status and location data via radio web management GUI – PMP 320 With the UGPS powered and connected to the radio, navigate to Configuration > General >...
PMP Synchronization Solutions User Guide GPS status and location data readout Perform a “snmpget” command for the OID desired based on Table 29. Table 31 GPS SNMP OIDs - PMP 100/400/430 and PTP 100/200/230 series Object Name, OID Description whispGPSStatus, GPS synchronization info (1: GPS .1.3.6.1.4.1.161.19.3.1.3.1 Synchronized, 2: GPS Lost Sync, 3: Generating...
PMP Synchronization Solutions User Guide GPS status and location data readout Procedure 25 Retrieving GPS status and location data via SNMP – PMP 320 With the UGPS powered and connected to the radio, on the radio web management GUI navigate to Administration > User Management and verify SNMP user data.
PMP Synchronization Solutions User Guide UGPS Power Port and Timing Port Pinouts UGPS Power Port and Timing Port Pinouts Table 31 Table 32 below for UGPS pinout information. Table 33 UGPS Power Port Pinout Function Ground (for IP Default jumper to Pin 2) Timing Port 2 AP IP Default Pin Ground (For IP Default jumper to Pin 6) Ground (+Vaux Return)
PMP Synchronization Solutions User Guide Chapter 5: CMM Regulatory and Legal Notices Important Note on Modifications Intentional or unintentional changes or modifications to the equipment must not be made unless under the express consent of the party responsible for compliance. Any such modifications could void the user’s authority to operate the equipment and will void the manufacturer’s warranty.
PMP Synchronization Solutions User Guide National and Regional Regulatory Notices National and Regional Regulatory Notices U.S. Federal Communication Commission (FCC) Notification This equipment has been tested and found to comply with the limits for a Class A digital device, pursuant to Part 15 of the US FCC Rules. These limits are designed to provide reasonable protection against harmful interference in a residential installation.
PMP Synchronization Solutions User Guide National and Regional Regulatory Notices Equipment Disposal Waste (Disposal) of Electronic and Electric Equipment Please do not dispose of Electronic and Electric Equipment or Electronic and Electric Accessories with your household waste. In some countries or regions, collection systems have been set up to handle waste of electrical and electronic equipment.
PMP Synchronization Solutions User Guide RF Exposure Separation Distances RF Exposure Separation Distances To protect from overexposure to radio frequency (RF) energy, install Cambium radios so as to provide and maintain the minimum separation distances from all persons shown in Table 35. Table 36 Exposure separation distances Module Type Separation Distance from Persons...
PMP Synchronization Solutions User Guide Legal Notices Legal Notices Software License Terms and Conditions ONLY OPEN THE PACKAGE, OR USE THE SOFTWARE AND RELATED PRODUCT IF YOU ACCEPT THE TERMS OF THIS LICENSE. BY BREAKING THE SEAL ON THIS DISK KIT / CDROM, OR IF YOU USE THE SOFTWARE OR RELATED PRODUCT, YOU ACCEPT THE TERMS OF THIS LICENSE AGREEMENT.
Page 167
PMP Synchronization Solutions User Guide Legal Notices Limited Warranty. Cambium warrants for a period of ninety (90) days from Cambium’s or its customer’s shipment of the Software to you that (i) the disk(s) on which the Software is recorded will be free from defects in materials and workmanship under normal use and (ii) the Software, under normal use, will perform substantially in accordance with Cambium’s published specifications for that release level of the Software.
Page 168
PMP Synchronization Solutions User Guide Legal Notices Transfer. In the case of software designed to operate on Cambium equipment, you may not transfer the Software to another party except: (1) if you are an end-user, when you are transferring the Software together with the Cambium equipment on which it operates; or 2) if you are a Cambium licensed distributor, when you are transferring the Software either together with such Cambium equipment or are transferring the Software as a licensed duly paid for upgrade, update, patch, new release, enhancement or replacement of a prior version of the Software.
PMP Synchronization Solutions User Guide Legal Notices Hardware Warranty in U.S. Cambium’s standard hardware warranty is for one (1) year from date of shipment from Cambium or a Cambium distributor. Cambium warrants that hardware will conform to the relevant published specifications and will be free from material defects in material and workmanship under normal use and service.
PMP Synchronization Solutions User Guide Chapter 6: UGPS Regulatory, Legal, and Safety Notices IMPORTANT NOTE ON MODIFICATIONS Intentional or unintentional changes or modifications to the equipment must not be made unless under the express consent of the party responsible for compliance. Any such modifications could void the user’s authority to operate the equipment and voids the manufacturer’s warranty.
Page 171
PMP Synchronization Solutions User Guide Legal Notices This equipment has been tested and found to comply with the limits for a Class B digital device, pursuant to Part 15 of the US FCC Rules. These limits are designed to provide reasonable protection against harmful interference in a residential installation.
LIMIT OF LIABILITY IN NO EVENT SHALL CAMBIUM NETWORKS BE LIABLE TO YOU OR ANY OTHER PARTY FOR ANY DIRECT, INDIRECT, GENERAL, SPECIAL, INCIDENTAL, CONSEQUENTIAL, EXEMPLARY OR OTHER DAMAGE ARISING OUT OF THE USE OR INABILITY TO USE THE PRODUCT (INCLUDING,...
Need help?
Do you have a question about the PMP 450i and is the answer not in the manual?
Questions and answers