AnyTone D868UV Instruction Manual
Hide thumbs
Also See for D868UV:
- Programming manual (26 pages) ,
- Firmware updating manual (2 pages) ,
- Firmware update (15 pages)
Table of Contents
Advertisement
Advertisement
Table of Contents

Related Manuals for AnyTone D868UV


Summary of Contents for AnyTone D868UV
- Page 2 D 868UV Instruction Manual...
- Page 3 D868UV has Text message, recording, voice message, digital encryption, emergency alarm, Man down alarm, lone work, GPS, Vibration and Analog DTMF, 2TONE, 5TONE, CTCSS/DCS encode/decode functions.
-
Page 4: Notice To The User
Then contact local AnyTone dealers. ATTENTION: All tips above apply to accessories of your AnyTone two way radio. If any device can not work normally, please contact local AnyTone dealers. If you use any accessories made by other companies, AnyTone company does not guarantee the... -
Page 5: Unpacking And Checking The Equipment
Unpacking and Checking the Equipment Unpack the radio carefully. We recommend that you identify the items listed in the following table before discarding the packing materials. If any items are missing or have been damaged during shipment, please contact the carrier or the dealers immediately. -
Page 6: Safety Training Information
SAFETY TRAINING INFORMATION our Qixiang Electron Science& Technology Co., Ltd radio generators RF electromagnetic during transmit mode.This radio is designed for and classified as"Occupational Use Only", meaning it must be used only during the course of employment by individuals aware of the hazards,and the ways To Minimize Such hazards. -
Page 7: Electromagnetic Interference/Compatibility
Electromagnetic Interference/Compatibility During transmissions, Qixiang Electron Science& Technology Co., Ltd radio generates RF energy that can possibly cause interference with other devices or systems. To avoid such interference, turn off the radio in areas where signs are posted to do so. DO NOT operate the transmitter in areas that are sensitive to electromagnetic radiation such as hospitals, aircraft, and blasting sites. -
Page 8: Supplied Accessories
Supplied Accessories Item Number Quantity Antenna Li-ion Battery Pack Battery Charger AC Adaptor Belt Clip Hand Strap Instruction Manual Professional FM Transceiver... -
Page 9: Standard Accessories
Standard Accessories Antenna* Li-ion Battery Pack Charger AC Adaptor Belt Clip * Note: For frequency band of antenna, please refer to label indicated in the bottom of the antenna. Instruction Note: Car Charger and QBC-44L Charger should be used together. Manual Optional Accessories USB Programming... -
Page 10: Charging Operation
Charging Operation The battery pack is not charged at the factory; please charge it before use. Charging the battery pack for the first time after purchase or extended storage ( more than 2 months) may not bring the battery pack to its normal operating capacity. After fully charging/discharging cycle for two or three times, the operating capacity will reach its best performance. -
Page 11: How To Charge
5. Do not recharge the battery pack if it is already fully charged. This may shorten the life of the battery pack or damage the battery pack. 6. Do not charge the battery or the radio if it is damp. Dry it before charging to avoid danger. WARNING: When keys, ornamental chain or other electric metals contact the battery terminal, the battery may cause damage or hurt bodies. -
Page 12: Charging Process
NOTE: when charging a power-on radio equipped with battery, the indicating lamp will not turn into green to show the fully charged status. Only when the transceiver is switched off, the lamp can indicate normally. The radio consumers energy when it is power-on, and the charger can not detect the voltage when the battery has been fully charged. -
Page 13: Normal Charging Tips
Normal Charging Tips 1. Self- Examination: When charging, orange light twinkles for 1 second and goes out, which means the charger has passed it self-examination and it can charge the battery normally. If the light remains orange or the red light twinkles, it means the charger can not pass it self-examination or charge the battery. - Page 14 WARNING: 1. Do not short circuit battery terminals. 2. Never attempt to remove the casing from the battery pack. 3. Never assemble the battery in dangerous surroundings, spark may cause explosion. 4. Do not put the battery in hot environment or throw it into fire, it may cause explosion. Professional FM Transceiver...
-
Page 15: Installing / Removing The Battery
Installing / Removing the Battery 1. Match the two grooves of the battery pack with the corresponding guides on the back of the radio and then push it. 2. To remove the battery pack, slide up the release l a t c h a n d r e m o v e t h e p a c k a w a y f r o m t h e transceiver. -
Page 16: Installing / Removing The Belt Clip
Installing / Removing the Belt Clip ■ Installing the Belt Clip: Place the belt clip to the corresponding grooves on the back of the radio, and then clockwise screw it. ■ Removing the Belt Clip: Anticlockwise turn the screws to remove the belt clip. Installing the Additional Speaker/ Microphone (Optional) Unveil the MIC-SP jack cover and then insert the Speaker/Microphone plug into MIC-Sp jack. -
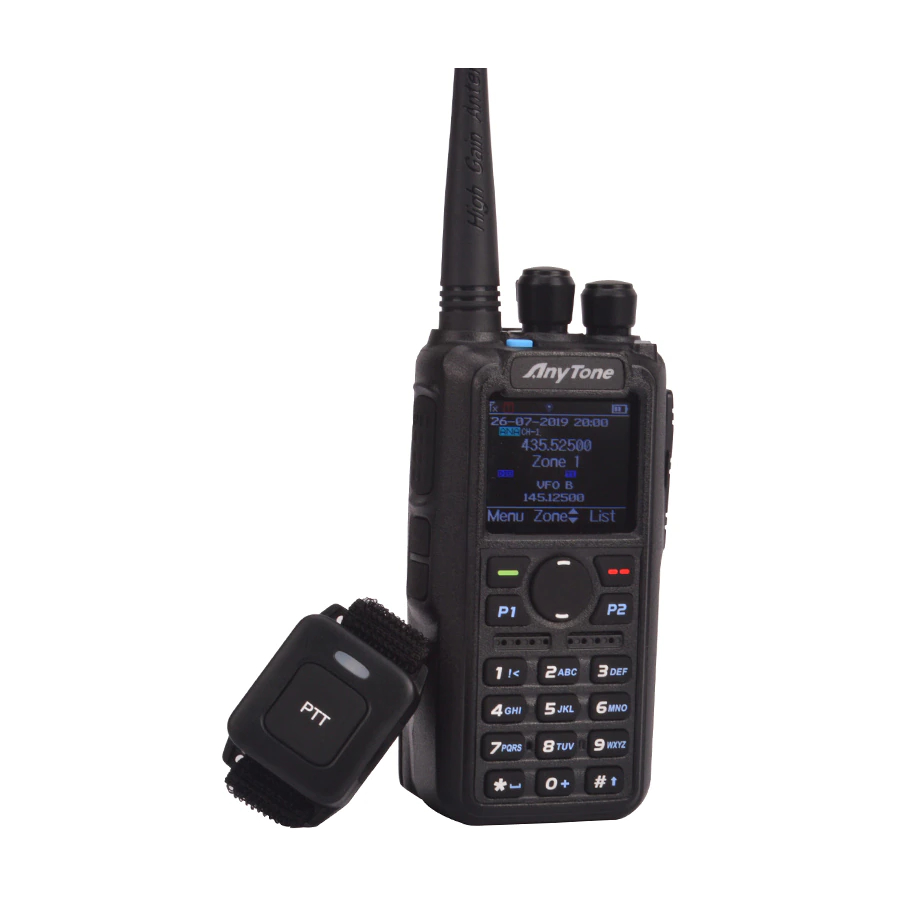
Page 17: Radio Overview
Radio Overview Professional FM Transceiver... - Page 18 Antenna Channel Switch POWER/VOLUME Switch Turn clockwise to switch on the radio Turn counterclockwise till a click is heard to switch off the radio. Rotate to adjust the volume after turning on the radio. MIC Input Please keep your mouth about 10cm away from the microphone to achieve the best voice quality Speaker Display the frequency/channel information, operation and status.
- Page 19 to receive the signals. [PF1]/[PF2] Key Programmable in PC software for different functions. Speaker/Microphone Jacks. PC program connector Status Indicator Indicate the different working status Professional FM Transceiver...
- Page 20 Programmed Key In PC software – Public - Optional Setting - Key function, it is able to set different functions for PF1, PF2, PF3, P1, P2 keys. No Function Voltage Check the current battery capacity voltage Power Switch the power between super high, high, middle and low power. Relay Switch between talk around and repeater mode Invert...
-
Page 21: Default Function
Record Start/stop recording. When stop recording, the radio will remind repeat or send the record. In digital channel, press to enter into messages Dial Start the manually dial Check the GPS position information Monitor Monitor the weak signal or the signal with unmatched ID. Main channel Choose channel A or channel B as the main channel switch... - Page 22 Hot Key In PC software – Public – Hot key, it is able to set different functions for hot key 1~6 and Func+ number key. Details please refer to the PC software. Analog Should edit the analog quick call firstly, then choose analog in the hot key set.
- Page 23 Quick access to Messages in the menu New Msg Quick access to New Msg in the Menu - Messages Quick Text Quick access to Quick Text in the Menu - Messages Inbox Quick access to Inbox in the Menu - Messages Outbox Quick access to Out box in the Menu - Messages Contact list...
-
Page 24: Power On The Radio
Power on the radio Turn on the radio by turning the Power/Volume switch clockwise till a click is heard, LCD displays the start up message, you will hear a beep after 7seconds. Adjust Volume Rotate the Power/Volume knob to adjust the volume. Turn clockwise to increase the volume and counterclockwise to decrease the volume, LCD will display the volume status during adjusting. -
Page 25: Set Up Vfo Frequency
Set up VFO frequency Turn the radio to VFO mode, press P1 key to switch the channel to main band, the VFO frequency can only be set up when the channel is in main band. Operation 1: Input the VFO frequency directly by keyboard. Operation 2: Turn the channel switch to adjust the VFO frequency in step. -
Page 26: Select A Channel
Select a Channel Operation 1: Turn the channel switch to select a channel. Operation 2: Press P2 key to switch the radio to Channel mode, input the channel numbers by keyboard. For example, if you want switch to channel 99, input 0,0,9,9 total 4numbers, it will switch to channel 99. -
Page 27: Making A Call
Making a Call You can choose a target radio by 3 methods. Operation 1: from the Channel switch Turn the channel switch to choose a programmed channel. Operation 2: from the Contact list 1.Turn the channel switch to choose a programmed channel; 2.Press exit key to enter Contact List, press UP/DOWN key to choose a contact. -
Page 28: Temporary Monitor
Temporary Monitor In standby, press and hold the PF2 key to enter Temporary Monitor. When receiving matched carrier but the signaling/ ID is unmatched or the signal is too weak, this function allows monitor the weak signal and signal with unmatched ID. Release the PF2 key to shut off speaker and return to standby. -
Page 29: Advanced Features For Private Call
Advanced features for Private Call Operation 1: Access from Contact list 1.Press Exit key to enter Contact list, press UP/DOWN key to a private call ID name. 2.Press Select to View Contact, press Select to see the contact information. 3.Press Option to access the advanced features. Operation 2: Access from Manual Dial 1.Press Menu key to Contacts, press UP/DOWN key to Manual Dial 2.Press Select to enter Manual Dial... -
Page 30: Gps Positioning Function
send a message of GPS position to the transmit radio. 4.Check Radio Select Check Radio, it will send out a radio check, the target radio will send back a message if it is available or not available to the transmit radio. With this feature, you can determine if another radio is active in the system. -
Page 31: Check The Gps Information
Check the GPS Information Operation1: Check GPS info from Menu Press Menu key to enter Main Menu, press UP/DOWN key to GPS info, press select to check the GPS info. Operation1: Check GPS info from programmed key In PC software, Public – Optional Setting – Key function, program a key as GPS, press the programmed key to check the GPS info. -
Page 32: Man Down Alarm
Man Down Alarm 1. Press Menu to enter main Menu, press UP/DOWN key to Settings. 2. Select Radio Set, press UP/DOWN key to 25 Man Down. 3. Select Man Down On to turn on the function. When the function is on, the radio will start alarm if the radio is falling to the ground. Raise the radio to stop the alarm. - Page 33 3. Select a Record to see the detail information 4. Select Record Play to play the record. Send the Record 1. Press Menu to enter main Menu, press UP/DOWN key to Record. 2. Select Record List to enter Record list, select a Record list to enter the Record file 3.
-
Page 34: Main Menu
Main Menu Contacts Contacts List: Will display the digital contact list which had been programmed in PC software. New Contact: Allows create a new digital contact Manual Dial : Input the group ID or private ID to access a contact quickly. Messages New Msg: Create a new message and send to a contact. - Page 35 Select a Scan list as current scan list, you can also reset the priority channel 1 and priority channel 2 in the scan list. Settings Radio Set 1.Beep Beep On: The radio will beep when you press the keypad Beep Off: No beep when you press the keypad. 2.Back Light LCD backlight level 1~5 adjustable 3.Light Time...
- Page 36 keypad. Auto Lock: Radio will auto lock the keypad when standby for a while. Press Func, then press the * key to unlock the keypad 6.Power Off Allow to set up auto power off when standby for a period, 10minutes, 30minutes, 1hour or 2 hours for option.
- Page 37 Sub Channel Off: Turn on the sub channel, radio will display main channel and sub channel. 12.Msg Note Different prompt options when receive a new message. 13.Call Ring Different prompt options when receive a new call. 14.Freq Step 2.5K,5K,6.25K,10K,12.5K,20K,25K,30K,50K, total 9steps for optional. 15.SQ level Adjust the squelch level to receive signal with different signal strength, total 5levels for optional.
- Page 38 talking lost. 0.5s-3s, total 26 levels for optional. 20.Scan Mod SCM TO: When scan with a signal, stay at the channel 5s and resume scan SCM CO: When scan with a signal, stay at the channel until the signal disappear, 2s later resume scan.
- Page 39 27-31 Key PF1, PF2,PF3, P1,P2 You can program the key as different functions. 33.Time Zone Set up the time zone of your location. 32.Date Time Time Check: Allow set up the date and time manually. Use the up-down key to set the current year. Move to the month by pushing the P1 key.
- Page 40 Set up the CTCSS/DCS code for the RX. 4.RTCDT – for analog channel only Set up the CTCSS/DCS code for both TX and RX CTCSS code: 62.5Hz~254.1Hz, total 51groups DCS code: 000N~7771, total 1024groups 5.TX Power Set up the TX power for current channel 6.Tone Dec –...
- Page 41 When this function is enabled, the RX frequency, TX frequency and CTCSS/DCS encode/decode will be reversed. 10.RX Freq Input the RX frequency by keypad, click menu key to save, press P2 key to return. 11.TX Freq Input the TX frequency by keypad, click menu key to save, press P2 key to return. 12.Talk Around When the TX and RX radio both set up with Talk Around on, they can communicate directly without repeater.
- Page 42 Analog Address Book – Number. In Digital channel, it will show the DMR ID which must be programmed firstly in PC software – Digital – DMR ID list- DMR ID. Allow edit and select an ID for the channel, each channel allow one ID. 17.DTMF Enc –...
- Page 43 programmed work alone key to confirm continuing work alone, otherwise, the radio will start alarm and send the alarm in the channel when reach the preset response time. 21.TX Allow – for digital channel only OFF: Always allow transmit BU: Allow transmit when the channel is free CD: Allow transmit when receive matched signal but different color code.
-
Page 44: Device Info
Device Info Show the Radio ID, Radio name, serial number, model name, frequency range, firmware version, radio data version, latest program date, picture version, language version etc.. Professional FM Transceiver... -
Page 45: Troubleshooting Guide
TROUBLE SHOOTING GUIDE Problems Solutions A. Battery pack may not be installed properly. The radio cannot be switched on or no Remove the battery pack and install it again. display afterswitched on. B. Battery power may be insufficient. Recharge or replace the battery pack. -
Page 46: Technical Specifications
TECHNICAL SPECIFICATIONS General Spurious Emission ≤-57dB ≤-57dB Spurious Rejection ≥70dB ≥70dB 136-174MHz (V) ; Frequency Range 400-480MHz (U) 84db Blocking Hum & Noise ≥45dB ≥40dB Channel Capacity 4000 channels 25KHz (Wide Band) Audio Distortion ≤5% Channel Spacing 12.5KHz (Narrow Band) Audio Power Output 1000mW/16Ω...
Need help?
Do you have a question about the D868UV and is the answer not in the manual?
Questions and answers