Table of Contents
Advertisement
Advertisement
Table of Contents

Subscribe to Our Youtube Channel
Related Manuals for AnyTone D868


Summary of Contents for AnyTone D868
- Page 2 D868 USER'S MANUAL...
- Page 3 This transceiver includes both analog and DMR digital communication with CTCSS/DCS encode/decode function. It can do private call, group call, all-call and multi-call type digital communication. The D868 is a cost-effective,Multi-functional, professional DMR digital transceiver . We are convinced that you will be satisfied with this transceiver’s quality and functions.
- Page 4 SAFETY TRAINING INFORMATION our Qixiang Electron Science& Technology Co., Ltd radio generators RF electromagnetic during transmit mode.This radio is designed for and classified as"Occupational Use Only", meaning it must be used only during the course of employment by individuals aware of the hazards,and the ways To Minimize Such hazards.
- Page 5 Electromagnetic Interference/Compatibility During transmissions, Qixiang Electron Science& Technology Co., Ltd radio generates RF energy that can possibly cause interference with other devices or systems. To avoid such interference, turn off the radio in areas where signs are posted to do so. DO NOT operate the transmitter in areas that are sensitive to electromagnetic radiation such as hospitals, aircraft, and blasting sites.
- Page 6 SAFETY INFORMATION FOR USER The transceiver is excellently designed with advanced technology. Please observe the following precautions to perform your obligation, prevent personal injury and ensure the safety of transceiver usage. Keep the transceiver and accessories away from children. Please do not try to open or modify the transceiver without permission, non-professionals process may also cause damage.
-
Page 7: Table Of Contents
CONTENTS UNPACKING ............................1 Supplied Accessories .......................... 1 STANDARD ACCESSORIES ........................2 Standard Accessories ......................... 2 BATTERY INFORMATION ........................3 Charging Operation ..........................3 Charger Applied ..........................3 Notice for Charging Battery ......................... 3 How to Charge ............................ 4 Normal Charging Tips ......................... 6 How to Store the Battery ........................ - Page 8 CONTENTS Adjust Volume ............................. 14 LED Indicator ............................14 Alert Tone ............................14 Receive and make a digital call ......................15 Selecting a zone ..........................15 Selecting a Radio Channel, Subscriber ID, or Group ID ..............15 Receiving and Responding to a Radio Call ..................15 Receiving and Responding to a Group Call ..................
- Page 9 CONTENTS Scan ..............................21 Scan lists ............................21 Scan ..............................21 Starting and stopping Scan ......................22 Priority Scan ............................. 22 Responding to a call during scan ..................... 22 Setting ..............................23 Setting the Squelch Level ........................ 23 Setting the Power Level ........................23 Turning the Voice Operating Transmission (VOX) Feature On or Off ..........
-
Page 10: Unpacking
UNPACKING Carefully unpack the transceiver. We recommend you to identify the items listed in the following table before discarding the packing material. If any items are missing or have been damaged during shipment, please contact your dealer immediately. Supplied Accessories Item Number Quantity... -
Page 11: Standard Accessories
STANDARD ACCESSORIES Standard Accessories Antenna* Li-ion Battery Pack Charger AC Adaptor Belt Clip Hand Strap QA13V (136-174MHz) (2000mAh) QB-44L QBC-44L (12V/500mA) QPS-01 BC09 GS01 * Note: For frequency band of antenna, please refer to label indicated in the bottom of the antenna. Instruction Note: Car Charger and QBC-44L Charger should be used together. -
Page 12: Battery Information
BATTERY INFORMATION Charging Operation The battery pack is not charged at the factory; please charge it before use. Charging the battery pack for the first time or after extended storage (more than 2 moths) may not bring the battery pack to its normal operating capacity. The peak operating capacity of the battery will be reached after two or three charge/discharge cycles. -
Page 13: How To Charge
BATTERY INFORMATION WARNING: If the battery terminals short circuit, it will generate a lot of heat and possibly a fire. When using or storing the radio (or just the battery), keep keys and other metal objects away from the battery terminal contacts. How to Charge Plug the AC adapter into the AC outlet, and then plug the cable of the AC adapter into the DC jack located... - Page 14 BATTERY INFORMATION NOTE: When charging a power-on transceiver equipped with battery, the indicating lamp will not turn into green to show the fully charged status. Only when the transceiver is switched off, can the lamp indicate normally. The transceiver consumes energy when it is power-on, and the charger can not detect the voltage when the battery has been fully charged.
-
Page 15: Normal Charging Tips
BATTERY INFORMATION Normal Charging Tips Self- Examination: When charging, orange light twinkles for 1 second and goes out, which means the charger has passed its self-examination and it can charge the battery normally. If the light remains orange or the red light twinkles, it means the charger can not pass its self- examination or charge the battery. - Page 16 BATTERY INFORMATION WARNING: ▼ Do not short circuit battery terminals. ▼ Never attempt to remove the casing from the battery pack. ▼ Never assemble the battery in dangerous surroundings, spark may cause explosion. ▼ Do not put the battery in hot environment or throw it into fire, it may cause explosion. Professional FM Transceiver...
-
Page 17: Preparation
PREPARATION Installing / Removing the Battery Match the two grooves of the battery pack with the corresponding guides on the back of the transceiver, and then push it. Press the battery pack until the release latch on the top of the transceiver locks. After hearing a “click”... -
Page 18: Installing / Removing The Belt Clip
PREPARATION Installing / Removing the Belt Clip ■ Installing the Belt Clip: Place the belt clip to the corresponding grooves on the back of the transceiver and secure with the provided screws. Installing the Additional Speaker/ Microphone Open the MIC-SP jack cover and then insert the Speaker/Microphone plug into MIC-SP jack. -
Page 19: Installing/ Removing The Hand Strap
PREPARATION Installing/ Removing the Hand Strap Slide the loop of the hand strap through the eyelet on the upper rear of the transceiver, then pull the entire hand strap through the loop to secure the hand strap in place and lastly tighten the hand strap. Professional FM Transceiver... -
Page 20: Getting Acquainted
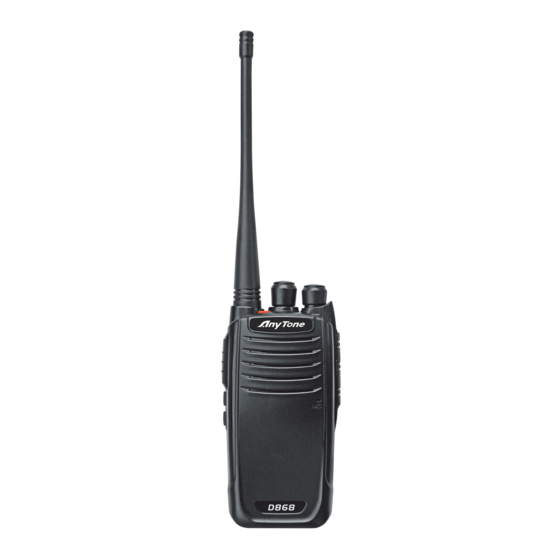
GETTING ACQUAINTED Professional FM Transceiver... - Page 21 GETTING ACQUAINTED Antenna POWER / VOLUME Switch: Turn clockwise to switch on the transceiver, and turn anticlockwise till hearing “click” to switch off the transceiver. After switching on the transceiver, turn clockwise to increase the volume and anticlockwise to decrease the volume. Channel Selector Knob Turn the selector knob to select desired channel.
- Page 22 GETTING ACQUAINTED Side key: Unassigned One Touch Access 6 All Alert Tones On/Off Scan On/Off High/Low power Tight/ Normal Squelch Monitor Privacy On/Off One Touch Access 1 VOX On/Off One Touch Access 2 Zone Toggle One Touch Access 3 Battery Indicator One Touch Access 4 Lone Work On/Off One Touch Access 5...
-
Page 23: Summary
SUMMARY Power on the radio Power on the radio: Turn on the radio by turning the Power/Volume switch clockwise till a click is heard, and you will hear a Power up beep if the dealer has set it. The radio is now in Rx mode. Adjust Volume Rotate the Power/Volume knob to adjust the volume. -
Page 24: Receive And Make A Digital Call
FUNCTION INTRODUCTION Receive and make a digital call 1.Selecting a zone A zone is a group of channels. Your radio supports 2 zones, with a maximum of 16 channels per zone, total 32 channels. Press zone key. You can hear a confirmed alert tone, that's mean the radio already switch from zone 1 to zone 2, or you can hear an unconfirmed alert tone, that's means the radio already switch from zone 2 to zone 1. -
Page 25: Receiving And Responding To A Private Call
FUNCTION INTRODUCTION The green LED turns on. Hold the radio vertically 1 to 2 inches ( 2.5 to 5.0cm) from your mouth. If the channel Free Indication feature is enabled, you will hear a short alert tone the moment the transmitting radio releases the [PTT] key, indicating the channel is free for you to respond. -
Page 26: Receiving An All Call
FUNCTION INTRODUCTION 6.Receiving an All Call An All Call is a call from an individual radio to every radio on the channel. It is used to make important announcements requiring the user's full attention. When you receive an All Call: A Tone sounds and the Green LED turns on. -
Page 27: Making A Private Call
FUNCTION INTRODUCTION Press the [PTT] key to make the call. The Red LED turns on. Wait for the Talk permit Tone to finish ( if enabled) and speak clearly into the microphone. Release the [PTT] key to listen. When the target radio responds, the green LED turns on. If the Channel Free Indication feature is enabled, you will hear a short alert tone the moment the target radio releases the [PTT] key, indicating the channel is free for you to respond. -
Page 28: Making A Group Or Private Call With The One Touch Call Key
FUNCTION INTRODUCTION Press the [PTT] key to make the call. The Red LED turns on. Wait for the Talk Permit Tone to finish ( if enabled) and speak clearly into the microphone. USers on the channel can not respond to an All Call. 11.Making a Group or Private Call with the One Touch Call key The one Touch Call feature allows you to make a Group or Private call to a predefined ID easily. -
Page 29: Encryption On/Off
FUNCTION INTRODUCTION You can sending the Text Message by key, maximum predefined 50 Text messages. Press the One Touch Call key to send a predefined Text message to a predefined ID. Red LED turns on. If the message is sent, two "click" sounds. If the message is not sent, a low tone sounds. Encryption On/Off Under standby mode, press "Encryption On/Off "... -
Page 30: Lone Work
FUNCTION INTRODUCTION will be no response (call) from the target radio unless you press the PTT button to initiate the call. Silent w/Voice: Radio transmits an alarm signal and is able to receive an incoming call without any audio until you press PTT button to initiate or response to the call. Turn on/off Emergency mode by "... -
Page 31: Starting And Stopping Scan
FUNCTION INTRODUCTION There are two ways of initiating scan: ● Main Channel Scan( Manual): Your radio scans all the channels/groups in your scan list. On entering scan, your radio may depending on the settings, automatically start on the last scanned " active"... -
Page 32: Setting
FUNCTION INTRODUCTION Wait for the Talk Permit Tone to finish ( if enabled) and speak clearly into the microphone. Release [PTT] key to listen. If you do not respond within hang time, the radio returns to scanning other channels/Setting group. Setting 1.Setting the Squelch Level You can adjust your radio's squelch level to filter out unwanted calls with low signal strength or... -
Page 33: Turning The Voice Operating Transmission (Vox) Feature On Or Off
FUNCTION INTRODUCTION 3.Turning the Voice Operating Transmission (VOX) Feature On or Off This feature allows you to initiate a hands-free voice activated call on a channel. The radio automatically transmits for a period, whenever the microphone detects voice. Pressing the PTT key during radio operation will disable VOX. To re-enable VOX, do one of the following: Turn the radio off and powering it on again. -
Page 34: Battery Capacity Enquiry
FUNCTION INTRODUCTION 5.Battery Capacity Enquiry You can check battery capacity. Setup: The yellow LED turns on means the battery is in charging, the green LED turns on means battery capacity is full. Press " Battery Indicator" key and check the battery capacity by BEEP alert tone. high power : 3 beeps middle power: 2 beeps low power : 1 beep... -
Page 35: Trouble Shooting Guide
TROUBLE SHOOTING GUIDE Problem Corrective Action The battery may be depleted. Recharge or replace the battery. No power The battery may not be installed correctly. Remove the battery and instal it again. The battery life is finished. replace the battery pack with Battery power dies shortly after charging. -
Page 36: Technical Specifications
TECHNICAL SPECIFICATIONS General Spurious Rejection ≥70dB 84db Digital: 136-174MHz Blocking Frequency Range Analog: 136-174MHz Hum & Noise ≥40dB Channel Capacity 32 channels Audio Distortion ≤5% Channel Spacing 12.5KHz Audio Power Output 1000mW/16Ω Phase-locked Step 5KHz, 6.25KHz Operating Voltage 7.4V DC ±20% / (2000mAh) Transmitting Part Frequency Stability...
Need help?
Do you have a question about the D868 and is the answer not in the manual?
Questions and answers