
Related Manuals for Zennio ACTinBOX MAX6


Summary of Contents for Zennio ACTinBOX MAX6
- Page 1 ACTinBOX MAX6 6 Outputs Actuator ZN1IO-AB60 Program version: 3.0 Manual edition: a...
-
Page 2: Table Of Contents
INDEX 1. Introduction .............................. 3 1.1. ACTinBOX MAX6 ..........................3 1.2. Installation ............................4 2. Configuration ............................. 5 2.1. Individual outputs ........................... 5 2.2. Shutter channels ..........................6 2.3. Relay control using IR remote ......................7 3. ETS Parameterization ..........................9 3.1. -
Page 3: Introduction
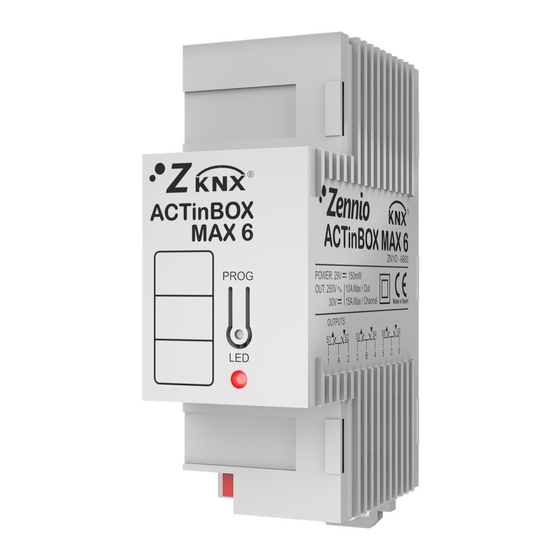
1. INTRODUCTION 1.1. ACTINBOX MAX6 ACTinBOX MAX6 is a KNX actuator that combines in a same device the following features: 6 multifunction binary outputs (relay outputs), with 10A each, configured as: Up to 3 shutter channels (with or without slats). -
Page 4: Installation
Programming button (2): a short press on this button set the actuator in programming mode, and the associated LED (3) lights red. (Note: If this button is held while plugging the device into de KNX bus, ACTinBOX MAX6 goes into secure mode. The LED blinks red every 0.5 seconds). -
Page 5: Configuration
Every individual output can be configured as normally open (the output is ON when its relay closes) or normally closed (the output is ON when its relay opens). Besides the type, ACTinBOX MAX6 allows the configuration of the following functionalities of the individual outputs: Timers. -
Page 6: Shutter Channels
2.2. SHUTTER CHANNELS ACTinBOX MAX6 allows installing up to 3 different shutter drive control (or similar) on its channels. These channels allow controlling the shutter movements in a domotic installation. Basic control: lower/raise the shutter Precise control: precise controlling of the shutter and the slats (for blinds with slats) Each channel (associated to a letter from A to C) consists of two consecutive individual outputs;... -
Page 7: Relay Control Using Ir Remote
ACTinBOX MAX6 actuator incorporates in its design an infrared receiver, located next to the programming LED. This functionality allows testing the actuator outputs, during the installation, from the Zennio infrared remote control (the same used to control the touch panel InZennio Z38i. See Figure 2.1). - Page 8 The relay control using IR remote is just an output test of the actuator. None of its parameterized functions (such as scenes, timers, etc.) are taken into account at the moment to open and close the relays remotely. ZENNiO AVANCE Y TECNOLOGÍA vwww.zennio.com...
-
Page 9: Ets Parameterization
3.1. DEFAULT CONFIGURATION This section shows the default configuration from which the device parameterization starts. When entering for the first time to the parameters edition of ACTinBOX MAX6, the following window will be shown: Figure 3.1. Configuration screen by default As seen in figure 3.1, the outputs and the logical functions are disabled by default, so there will be... -
Page 10: Outputs
The outputs are grouped (in pairs) by channels, up to 3, named from A to C, disabled by default. When selecting one of them, it is shown a drop-down box to configure the outputs as individual outputs or shutter channels. Figure 3.3. Possible configurations of the Channels ZENNiO AVANCE Y TECNOLOGÍA vwww.zennio.com... -
Page 11: Individual Outputs
Normally open: the output will be activated (ON) when its relay closes. The output will be deactivated (OFF) when its relay opens. Normally closed: the output will be activated (ON) when its relay opens. The output will be deactivated (OFF) when its relay closes. ZENNiO AVANCE Y TECNOLOGÍA vwww.zennio.com... - Page 12 These parameters are used in the timer as follows: When ACTinBOX MAX6 receives a "1" value through the communication object "[OX] Timer", an ON order is sent to the output, applying the On Delay and the On Duration (if a value different from 0 has been parameterized in these fields).
- Page 13 It can be also defined the status of the output after the last repetition (ON or OFF). Figure 3.6. Timers screen: Flashing It is important to know that ACTinBOX MAX6 allows parameterizing both a simple timer and a flashing for the same output.
- Page 14 128-191. ACTinBOX MAX6 allows running and/or learning up to 5 different scenes for each output. Alarm: it can be configured one alarm for each output. Once activated, this alarm will have priority over the rest of orders that the actuator receives, i.e., any order received while...
- Page 15 When the cyclical monitoring period comes to its end, ACTinBOX MAX6 activates the alarm, which will execute the parameterized action (unless the output status has not changed). If a new alarm activation is not wanted, it will be necessary to receive the opposite value to Trigger through the Alarm object before the cyclical monitoring period ends.
- Page 16 End (reaction when alarm ends): this parameter sets the output response in one of these statuses when the alarm finishes: ZENNiO AVANCE Y TECNOLOGÍA vwww.zennio.com...
- Page 17 Besides, it can be defined a sending delay. If a value 0 is set, the status is sent immediately. Note: The initial status is always sent through the object “[OX] Status”. ZENNiO AVANCE Y TECNOLOGÍA vwww.zennio.com...
-
Page 18: Shutter Channel
3.2.2. SHUTTER CHANNEL ACTinBOX MAX6 also allows configuring its outputs as shutter channels, being able to control up to 3 different shutters in an installation. When a channel is configured in ETS as a shutter channel, it appears in the topology window a 1 bit communication object (“[CX] Block”) associated to each enabled channel, that allows blocking the... - Page 19 In the next figures it can be seen the windows that appear when configuring an output channel as Shutter (no slats) and as Blind (with slats). Figure 3.11. Channel A configured as Shutter (no slats) Figure 3.12. Channel B configured as Blind (with slats) ZENNiO AVANCE Y TECNOLOGÍA vwww.zennio.com...
- Page 20 If the shutter is the type Blind with slats (see figure 3.12), some other times and specific parameters appear. All of them are explained in detail in the Annex I of this manual. Note: After programming the device with ETS, ACTinBOX MAX6 considers the shutter is completely raised, so any raising order will be ignored.
- Page 21 Shutter in Channel A (No slats) takes 15 seconds to be lowered and 20 seconds to be raised. An additional time of 2 seconds is added when the shutter gets its limit. The ACTinBOX MAX6 parameterization should remain as follows:...
- Page 22 ACTinBOX MAX6 through the 1 byte object “Scenes (Shutter Channels)”. Besides running scenes, it is possible to learn (modify) scenes, taking into account that the associated numerical values to learn scenes are in the range 128-191 (the values 0-63 are reserved for running scenes).
- Page 23 Please see the following example of scenes configuration. Example: Consider a facility where 3 scenes will be used (4, 6 and 18) in ACTinBOX MAX6 to locate the blind with slats in a precise position: - Scene 4 shutter up - Scene 6 ...
- Page 24 When two alarms are configured, ACTinBOX MAX6 could carry out different actions to two external events. Figure 3.14. Alarms Configure the following parameters: Number of alarms: set whether to use one or two alarms. Both of them can be independently managed through their corresponding communication objects (“[CX] Alarm”...
- Page 25 “1” and the reaction of the actuator when the alarm is activated is to raise the shutter and when the alarm is deactivated, ACTinBOX MAX6 lowers the shutter. Figure that the shutter is down. At this moment, a “1” is received through the communication object “[CX] Alarm 1”, so the Alarm 1 will be activated, thus raising the shutter.
- Page 26 "[CX] Move" and stops it when receiving the value "1"). Therefore, if this function is enabled, ACTinBOX MAX6 will raise the shutter when receiving the value "1" and will lower it when receiving the value "0" in the object "[CX] Reversed Moving".
- Page 27 “[CX] Save Position” and “[CX] Save Position 2”. To save a new position it is necessary to send a “1” to these objects when the shutter is located in the desired position. Note: To save a new position, the shutter must be stopped. ZENNiO AVANCE Y TECNOLOGÍA vwww.zennio.com...
- Page 28 When a default configuration is chosen, after a partial or complete download from ETS, ACTinBOX MAX6 interprets that the shutter is completely up (0%), independently of its real status. For the blinds with slats, ACTinBOX MAX6 asummes that they are completely opened (0%), no matter their real status.
-
Page 29: Logical Functions
3.3. LOGICAL FUNCTIONS This section in ACTinBOX MAX6 is meant to perform binary logic operations with incoming data from the KNX bus, to send the result through other communication objects specifically enabled in the actuator for this operation. Up to 10 different logical functions can be enabled, independent of each other, which can carry out up to 4 operations each. -
Page 30: Annex I. Slats Precise Control
Shutter (No slats) Blind (with slats) Depending on the type of shutter, the ACTinBOX MAX6 application program will show different options. In this concrete section, the parameters of the Blinds with slats will be explained. - Page 31 Additional time when shutter gets the limit. All of them were already explained in section 3.2.2 of this manual. On the other hand, the times referred to the slats movement: ZENNiO AVANCE Y TECNOLOGÍA vwww.zennio.com...
- Page 32 100% position. At this point, the blind has completed its motion. Then, ACTinBOX MAX6 will correct the slats position, moving them until they reach the position they had before (50%, in this example), thus making the blind move slightly, until the slats are in the 50% position.
- Page 33 Start-up configuration Initial position: Specific position. The position percentages of the blind and slats can be configured independently. To obtain more detailed information about configuration and options oof the functions of the shutter channels, please read the section 3.2.2 of this manual. ZENNiO AVANCE Y TECNOLOGÍA vwww.zennio.com...
-
Page 34: Annex Ii. Communication Objects
[LF] Function 10 RESULT (1 bit) Function 10 Result [LF] Function 1 RESULT (1 byte) Function 1 Result (1 byte) 76-85 1 byte 0-255 Last … … [LF] Function 10 RESULT (1 byte) Function 10 Result (1 byte) ZENNiO AVANCE Y TECNOLOGÍA vwww.zennio.com... - Page 35 Indifferent Indifferent [OX] Flashing 1=Start flashing; 0=End flash 1=Alarm; 0=No alarm [OX] Alarm 126-131 1 bit Parameteriz. Last 0=Alarm; 1=No alarm Alarm=0 + Unf.=1 End Alarm 138-143 1 bit Indifferent Indifferent [OX] Unfreeze Alarm ZENNiO AVANCE Y TECNOLOGÍA vwww.zennio.com...
- Page 36 1 byte 0-255 Indifferent Indifferent [CX] Current shutter position 0=0%=Top; 255=100%=Bottom. 147-149 1 byte 0-255 Last [CX] Shutter positioning 0=0%=Top; 255=100%=Bottom. 150-152 1 bit Indifferent Indifferent [CX] Unfreeze Alarm Alarm=0 + Unf.=1 End Alarm ZENNiO AVANCE Y TECNOLOGÍA vwww.zennio.com...
- Page 37 VALUES NUMBER SIZE IN/OUT FLAGS NAME DESCRIPTION SECTION RANGE 1st TIME RESET 1 bit Reset 0 Voltage recovery -> Sending of 0 RESET 1 bit Reset 1 Voltage recovery -> Sending of 1 ZENNiO AVANCE Y TECNOLOGÍA vwww.zennio.com...
- Page 38 BECOME USER! http://zennioenglish.zendesk.com TECHNICAL SUPPORT...
Need help?
Do you have a question about the ACTinBOX MAX6 and is the answer not in the manual?
Questions and answers