Table of Contents
Advertisement
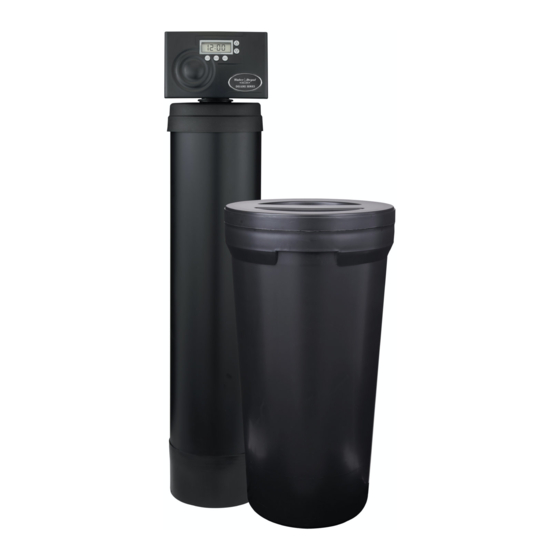
By Water Depot
DELUXE SERIES
OWNER'S MANUAL
FOR ALL DELUXE WATER SOFTENERS
THIS MANUAL IS TO BE LEFT WITH THE OWNER OF THE EQUIPMENT FOR REFERENCE AND
PURPOSES AND TECHNICAL GUIDANCE. IT IS STRONGLY RECOMMENDED THAT QUALIFIED
DEALER SERVICE PERSONNEL BE CONTACTED IN THE EVENT OF AN UNKNOWN INTERRUPTION
OF SERVICE OR APPARENT PRODUCT MALFUNCTION. AN ANNUAL PREVENTATIVE MAINTENANCE
INSPECTION BY A WATER PROFESSIONAL IS RECOMMENDED TO ENSURE TROUBLE-FREE AND
CONTINUOUS OPERATION.
www.waterdepotinc.com
Advertisement
Table of Contents

Related Manuals for Water Depot Deluxe Series


Summary of Contents for Water Depot Deluxe Series
- Page 1 By Water Depot DELUXE SERIES OWNER’S MANUAL FOR ALL DELUXE WATER SOFTENERS THIS MANUAL IS TO BE LEFT WITH THE OWNER OF THE EQUIPMENT FOR REFERENCE AND PURPOSES AND TECHNICAL GUIDANCE. IT IS STRONGLY RECOMMENDED THAT QUALIFIED DEALER SERVICE PERSONNEL BE CONTACTED IN THE EVENT OF AN UNKNOWN INTERRUPTION OF SERVICE OR APPARENT PRODUCT MALFUNCTION.
-
Page 2: Table Of Contents
TABLE OF CONTENTS Control Valve Specifications Control Valve Function and Cycles of Operation General Instructions System Setup Setting Options Table Bypass Valve Installation Installer Settings Normal Display Settings General Information Start Up Instructions Drawings and Part Numbers MR Front Cover and Drive Assembly WS1MR Drive Cap, Pistons and Spacer Stack Replacement Parts Installation Fittings Assemblies... -
Page 3: Control Valve Specifications
CONTROL VALVE SPECIFICATIONS... -
Page 4: Control Valve Function And Cycles Of Operation
CONTROL VALVE FUNCTION AND CYCLES OF OPERATION This glass filled Noryl¹ (or equivalent) fully automatic control valve is designed as the primary control center to direct and regulate all cycles of a water softener or filter. When the WS1MR control valve is manufactured as a softener, the control valve can be ordered to perform downflow or upflow regeneration. -
Page 5: Table
Table 2 Regeneration Cycles Filtering ADJUSTABLE CYCLES Table 3 shows the order and cycle times for the adjustable cycles. Table 3 Fill values are pounds of salt if softening is selected and gallons if filtering is selected. All other values are in minutes. PRESET PROGRAM CODES A variety of preset program codes are available. -
Page 6: Table
Table 4 Down Flow Softener Program Codes Table 5 Up Flow Softener Program Codes Table 6 Regenerating Filter Program Codes Table 7 Non-Regenerating Filter Program Codes... -
Page 7: Table
The control valve with a water meter can be set for Demand Initiated Regeneration (DIR) only, Time Clock operation only or DIR and Time Clock whichever comes first, depending upon what settings are selected for Day Override and Gallon Capacity.2 See Table 8. If a control valve does not contain a meter, the valve can only act as a time clock, and day override should be set to any number and gallon capacity should be set to off. -
Page 8: General Instructions
GENERAL INSTRUCTIONS The control valve offers multiple procedures that allow the valve to be modified to suit the needs of the installation. These procedures are: System Setup Installer Settings Normal Display Settings Diagnostics Valve History These procedures can be accessed in any order. Details on each of the procedures are provided on the following pages. -
Page 9: System Setup
SYSTEM SETUP STEP 1S – Press NEXT and ▼ buttons simultaneously for 3 seconds. If screen in step 2S does not appear in 5 seconds the lock on the valve is activated. To unlock press ▼, NEXT, ▲, and CLOCK in sequence, then press NEXT and ▼ simultaneously for 3 seconds. -
Page 10: Table
P-Code 1 Selecting pre-set programs. If the unit Adj1 is set to 1.25, P60 - P69 will not be Select between available. SOFTENING or FILT Select between SOFTENING or FILT Adj2 P-Code 2 Set upflow or downflow regeneration on a 1” control. Set pounds of salt or gallons of fill. - Page 11 10Step 9S – Set Regeneration Time Options using the ▲ or ▼ buttons: • “NORMAL” means regeneration will occur at the preset time; • “on 0” means regeneration will occur immediately when the gallons capacity reaches 0 (zero); or • “NORMAL + on 0” means regeneration will occur at one of the following: •...
-
Page 12: Setting Options Table
SETTING OPTIONS TABLE STEP 1I STEP 2I STEP 3I STEP 4I Reserve capacity estimate is based on history of water usage... -
Page 13: Bypass Valve
BYPASS VALVE The bypass valve is typically used to isolate the control valve from the plumbing system‟s water pressure in order to perform control valve repairs or maintenance. The 1" full flow bypass valve incorporates four positions including a diagnostic position that allows a service technician to have pressure to test a system while providing untreated bypass water to the building. -
Page 14: Installation
INSTALLATION GENERAL INSTALLATION & SERVICE WARNINGS The control valve, fittings and/or bypass are designed to accommodate minor plumbing misalignments but are not designed to support the weight of a system or the plumbing. Do not use Vaseline, oils, other hydrocarbon lubricants or spray silicone anywhere. A silicone lubricant may be used on black o-rings, but is not necessary. - Page 15 INSTALLATION INLET/OUTLET PLUMBING: Connect to a supply line downstream of outdoor spigots. Install an inlet shutoff valve and plumb to the unit‟s bypass valve inlet located at the right rear as you face the unit. There are a variety of installation fittings available.
-
Page 16: Installer Settings
INSTALLER SETTINGS ▲ STEP 1I - Press NEXT and simultaneously for 3 seconds. STEP 2I – Hardness: Set the amount of hardness in grains of hardness as ▲ or ▼ calcium carbonate per gallon using the buttons. The default is 20 with value ranges from 1 to 150 in 1 grain increments. -
Page 17: Normal Display Settings
NORMAL DISPLAY SETTINGS GENERAL OPERATION When the system is operating, one of six displays may be shown. Pressing NEXT will alternate between the displays. One of the displays is always the current time of day. The second display is one of the following: days remaining or volume remaining. - Page 18 REGENERATION MODE Typically a system is set to regenerate at a time of low water usage. An example of a time with low water usage is when a household is asleep. If there is a demand for water when the system is regenerating, untreated water will be used.
-
Page 19: General Information
GENERAL INFORMATION POWER LOSS If the power goes out for less than two hours, the system will automatically reset itself. If an extended power outage occurs, the time of day will flash on and off which indicates the time of day should be reset. The system will remember the rest. -
Page 20: Start Up Instructions
START UP INSTRUCTIONS • After installation is completed rotate the bypass handles to the bypass position (see bypass valve diagram page ). • Turn on water and check for leaks. • Fully open a cold water faucet. • Allow water to run until clear to rid pipes of debris which may have occurred during installation. •... -
Page 21: Mr Front Cover And Drive Assembly
MR FRONT COVER AND DRIVE ASSEMBLY Relay Specifications: To insure proper fit and correct operation the following relay and relay socket manufactured by Idec or the exact equivalent should be used. The relay supplies 2 sets of dry contacts for user applications. The wiring of these contacts is application specific... -
Page 22: Ws1Mr Drive Cap, Pistons And Spacer Stack
WS1MR DRIVE CAP ASSEMBLY, DOWNFLOW PISTON, UPFLOW PISTON, REGENERANT PISTON AND SPACER STACK ASSEMBLY Drawing Order No. Description Quantity V3005 WS1 Spacer Stack Assembly V3004 Drive Cap ASY V3372 WS1MR Drive Back Plate WS1 Piston Downflow ASY V3011* WS1 Piston Upflow ASY V3011-01* V3174 WS1 Regenerant Piston... -
Page 23: Replacement Parts
REPLACEMENT PARTS... - Page 24 REPLACEMENT PARTS...
- Page 25 REPLACEMENT PARTS...
- Page 26 REPLACEMENT PARTS...
-
Page 27: Installation Fittings Assemblies
INSTALLATION FITTING ASSEMBLIES... -
Page 28: Ws1 Identification Figure
WS1 IDENTIFICATION FIGURE WS1 WITH 1.050" DISTRIBUTOR TUBE OPENING IDENTIFICATION... -
Page 29: Troubleshooting
TROUBLESHOOTING PROCEDURES 1 Problem Cause Solution a. Transformer Unplugged a. Reconnect transformer b. No power at outlet b. Repair or use working outlet 1. Timer does not display time of c. Defective transformer c. Replace transformer d. Defective PC board d. - Page 30 TROUBLESHOOTING PROCEDURES 2 Problem Cause Solution a. Motor not operating a. Replace motor b. Repair outlet or use working b. No power at outlet outlet c. Defective transformer c. Replace transformer d. Defective PC board d. Replace PC board 6. Valve stalled in regeneration e.
- Page 31 431 HURONIA RD., UNIT #8 BARRIE, ONTARIO L4N 9B3 www.waterdepotinc.com...
Need help?
Do you have a question about the Deluxe Series and is the answer not in the manual?
Questions and answers