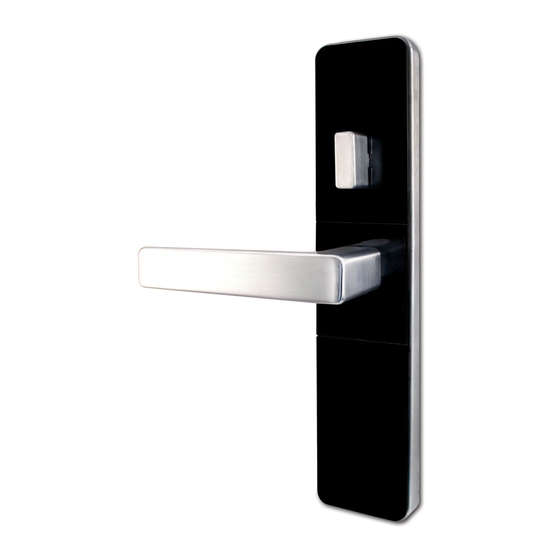
Summary of Contents for Dormakaba Confidant RFID
- Page 1 Confidant RFID Complete Lock with ASM Mortise / Tubular Latch Installation instructions PK3621-T - 2019 - 02...
-
Page 2: Table Of Contents
: (1) l'appareil ne doit pas produire de brouillage, et (2) l'utilisateur de l'appareil doit accepter tout brouillage radioélectrique subi, même si le brouillage est susceptible d'en compromettre le fonctionnement. Made in Canada © 2018 dormakaba. All trademarks and registered trademarks are the property of their respective owners. Confidant RFID ASM Mortise / Tubular Latch... -
Page 3: Disclaimer
B - Screw Driver Phillips #1 & #2 E - 25mm / 24mm / 19mm / 12mm / 10mm Drill Bit C - Screw Driver Torx T-20 F - Needle Nose Pliers Confidant RFID ASM Mortise / Tubular Latch PK3692_T 02-19... -
Page 4: Inventory
2- Inventory - American Steel Mortise (ASM) Hardware Bag Inside Trim Inside Trim with Thumbturn without Thumbturn ASM Mortise Confidant RFID ASM Mortise / Tubular Latch PK3621_T 02-19... -
Page 5: Tubular Latch
2- Inventory - Tubular latch Inside Trim Inside Trim Hardware Bag with Thumbturn without Thumbturn Tubular Latch Confidant RFID ASM Mortise / Tubular Latch PK3692_T 02-19... -
Page 6: Install Spindle
2- Insert Spindle . Adjust for Right Hand (RH) or Left Hand (LH) 3- Attach and Clamp Spindle Clip to Spindle as shown . Ensure legs are firmly clamped against the spindle Confidant RFID ASM Mortise / Tubular Latch PK3621_T 02-19... -
Page 7: Install Outside Lever
4- Install Outside Lever Left Hand Note: Hold down the outside lever against the outside housing while tightening the lever set screw. Right Hand Confidant RFID ASM Mortise / Tubular Latch PK3692_T 02-19... -
Page 8: Adjust Handing (Tubular Latch Lock With Privacy Only)
Handing RH to LH 1- Remove 3- Assemble 2- Rotate 180˙ Handing LH to RH 1- Remove 3- Assemble 2- Rotate 180˙ 5B- Prepare Inside Housing Inside Right Hand Housing Inside Left Hand Housing Confidant RFID ASM Mortise / Tubular Latch PK3621_T 02-19... -
Page 9: Change Position Of Stopper If Required (Asm And Adb)
- Spring NOT required for Automatic Dead Bolt (ADB) versions American Steel Mortise Version Automatic Dead Bolt Version 5D- Apply Privacy Thumb Turn Sticker (applicable only for multihousing locks or locks with automatic dead bolt) RH/RHR LH/LHR Confidant RFID ASM Mortise / Tubular Latch PK3692_T 02-19... -
Page 10: Install Lock On Door
- ASM / Tubular Latch See Annex B for exterior applications WARNING Assemble spacers on screws CAUTION IMPORTANT After connecting all cables, make sure all excess cables are pushed inside the hole(s) in the door. Confidant RFID ASM Mortise / Tubular Latch PK3621_T 02-19... -
Page 11: Install Inside Trim Cover
C - Rotate Outside Lever to Check Bolt Retraction D - Release Outside Lever, Should Move Freely E - Rotate Inside Lever to Check Bolt Retraction F - Check Bolt Projection from Thumbturn Confidant RFID ASM Mortise / Tubular Latch PK3692_T 02-19... -
Page 12: Program Lock - With Jack Cable
For security reasons, lock must be programmed BEFORE installing the battery door. Every time the bat- tery door is removed pass an emergency card or connect lock to FDU/M-Unit to reset the tamper alarm. Audit information is not affected. CAUTION Confidant RFID ASM Mortise / Tubular Latch PK3621_T 02-19 IMPORTANT... -
Page 13: Annex A
IMPORTANT Door Door Frame For Auto Deadbolt models the gap between the mortise front plate and the strike must Mortise not exceed 1/4 “ Left Hand Reverse (LHR) Max . 1/4" Confidant RFID ASM Mortise / Tubular Latch PK3692_T 02-19... -
Page 14: Reversing The Mortise Handing
If the deadbolt extends past this point, gently press it in until it locks at 5/16" throw, or start step Proceed to step 3 . 2 again. 5/16" Confidant RFID ASM Mortise / Tubular Latch PK3621_T 02-19... - Page 15 Use a small screwdriver to push the lock mechanism back on lock position (see step 1 and 2) . IMPORTANT The lock mechanism has to be horizontal on lock position Confidant RFID ASM Mortise / Tubular Latch PK3692_T 02-19...
- Page 16 180°, and replace it. The auxiliary latch slides easily in and out of the mortise. (re-insert) 180° For RH (right hand) X (crescent = must be reversed) and LHR (left hand reverse) Confidant RFID ASM Mortise / Tubular Latch PK3621_T 02-19...
-
Page 17: Annex B
Annex B- Install Outside Housing with Gasket (Exterior and Ocean Front Versions) Annex C • Remove Battery Holder Unscrew Remove Door Unclip Battery Holder Remove Battery Holder Confidant RFID ASM Mortise / Tubular Latch PK3692_T 02-19... -
Page 18: Annex D
Annex D- Install Bluetooth and Messenger module Battery must be disconnected before adding Bluetooth and Messenger module. See Annex E for instructions of how to remove the cover from the module. Confidant RFID ASM Mortise / Tubular Latch PK3621_T 02-19... - Page 19 How to change orientation of Messenger antenna board. The lock is provided with orien- tation of board for Messenger hub outside the room. MESSENGER-B MESSENGER-A Orientation when Messenger Orientation when Messenger Position of Bluetooth hub outside the room hub inside the room antenna board Confidant RFID ASM Mortise / Tubular Latch PK3692_T 02-19...
-
Page 20: Annex E
Annex E • Remove cover of Bluetooth and Messenger module DETAIL DETAIL SCALE 1:1 Confidant RFID ASM Mortise / Tubular Latch PK3621_T 02-19... - Page 21 Confidant RFID ASM Mortise / Tubular Latch PK3692_T 02-19...
- Page 22 Customer Services & Support Ilco: 1.877.468.3555 / + 1.514.340.9025 Saflok: 1.800.999.6213 / + 1.248.837.3700 General Information: www.kabalodging.com Online Consumable Orders: www.ilcostore.com www.saflokstore.com To access all of our easy steps, please visit our Support Website: www.kabalodgingsupport.com www.dormakaba.com...


Need help?
Do you have a question about the Confidant RFID and is the answer not in the manual?
Questions and answers