
Subscribe to Our Youtube Channel
Related Manuals for Intelix DIGI-USB2


Summary of Contents for Intelix DIGI-USB2
-
Page 1: User Manual
USB 2.0 DIGI-USB2 1-Port USB 2.0 100m Category 5e/6/6a/7 Extender Set with Flexible Power User Manual Revision 171213... - Page 2 CE Statement We, Liberty AV Solutions, declare under our sole responsibility that the USB 2.0 DIGI-USB2, to which this declaration relates, is in conformity with European Standard EN 55022, EN 61000, and EN 55024.
- Page 3 Table of Contents Introduction USB DIGI-USB2 Product Contents Requirements Features The LEX Extender (LEX) The Remote Extender (REX) Installation Guide Mounting the LEX or REX Preparing for Installation Installing the LEX Installing the REX Installing Flexible Power Connecting the LEX to the REX...
-
Page 4: Introduction
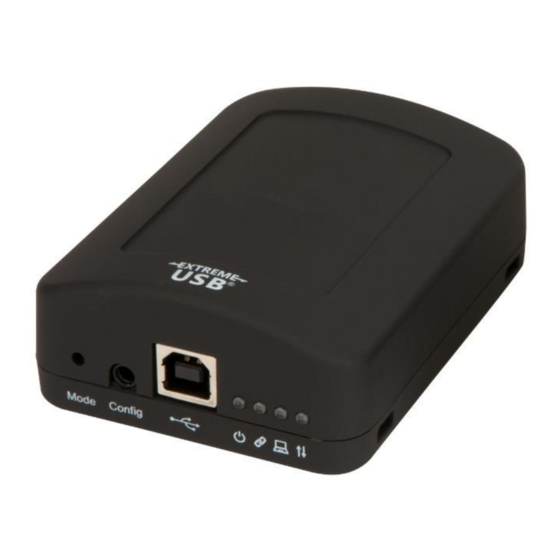
RJ45 connectors (if using premise cabling) Features The USB 2.0 DIGI-USB2 enables users to extend beyond the standard 5m cable limit for USB peripheral devices. With the DIGI-USB2, USB device(s) can be located up to 100 meters (330 feet) from the computer. - Page 5 The LEX (LEX) The LEX connects to the computer using a standard USB cable (included). Power for the LEX is provided by the host computer. Power for the REX is provided by the 24V AC adapter connected at either the LEX or REX.
- Page 6 The REX The REX provides a USB Type A port for connecting standard USB devices. The REX allows you to connect one USB device directly. Additional devices may be connected by attaching USB hubs to the REX. The REX is powered either directly by the included power supply, or via the CAT 5e/6/7 link extension cable from the LEX.
-
Page 7: Installation Guide
(2) Determine where you want to locate the USB device(s). (3) If you are using surface cabling, the DIGI-USB2 supports a maximum distance of 100m. If you are using premise cabling, ensure CAT 5e/6/7 cable is installed between the two locations, with CAT 5e/6/7 information outlets located near both the computer and the USB device(s), and the total length, including patch cords is no more than 100m. -
Page 8: Installing The Lex
(1) Connect 24V 1A supplied AC power adapter to the LEX or REX, based on installation requirement. NOTE: The DIGI-USB2 features flexible power, allowing the installer to connect the supplied 24V, 1A power adapter to either the LEX or REX unit for normal extension system operation. Please note,... -
Page 9: Compatibility
LEDs are permanently off, then the cabling between the LEX and REX may not be installed properly or is defective. (2) For Windows users (XP, 7, 8, 8.1, 10), open Device Manager to confirm that the DIGI-USB2 extender system has been installed correctly. Expand the entry for Universal Serial Bus controllers by clicking the “+”... -
Page 10: Troubleshooting
The following table provides troubleshooting tips. The topics are arranged in the order in which they should be executed in most situations. If you are unable to resolve the problem after following these instructions, please contact Technical Support for further assistance. PROBLEM CAUSE SOLUTION... - Page 11 If you are experiencing problems not referenced in the Troubleshooting Guide, contact Technical Support and provide them with the following information: • Host computer make and mode • Type of operating system installed (e.g. Windows 10, macOS 10.12, etc.) • Part number and serial number of both the LEX and REX unit •...
-
Page 12: Technical Glossary
REX. You may use either the T568A scheme (Table 1) or the T568B scheme (Table 2) for cable termination as the DIGI-USB2 requires all four pairs of the cable. RJ45 connectors are sometimes also referred to as 8P8C connectors. Note that any give cable must be terminated using the same T568 scheme on both ends to operate correctly. -
Page 13: Specifications
Specifications Page 13 of 13...
Need help?
Do you have a question about the DIGI-USB2 and is the answer not in the manual?
Questions and answers