Table of Contents
Advertisement
Advertisement
Table of Contents

Related Manuals for Carel Humisonic


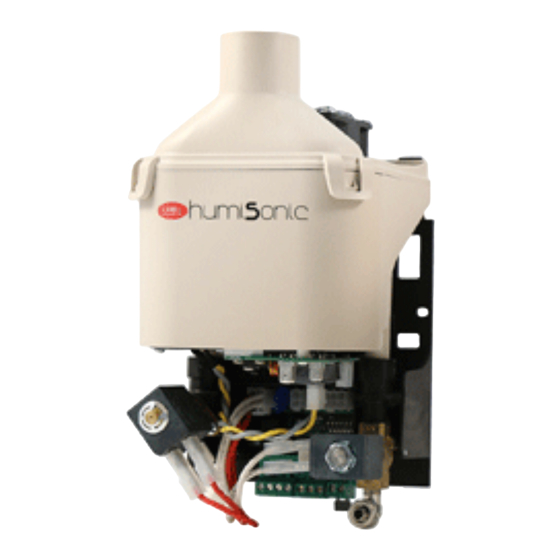
Summary of Contents for Carel Humisonic
-
Page 1: User Manual
Ultrasound humidifi er User manual H i g h E f f i c i e n c y S o l u t i o n s... - Page 3 The liability of CAREL in relation to its products is specifi ed in the CAREL general for the specifi c application. The failure to complete such operations, which contract conditions, available on the website www.carel.com and/or by...
- Page 5 Content 10. WIRING DIAGRAMS 1. INTRODUCTION AND ASSEMBLY 10.1 Diagram ........................24 Ultrasound humidifi er ....................7 Dimensions and weights ..................7 11. GENERAL FEATURES AND MODELS Opening the packaging ..................7 11.1 Ultrasound humidifi er models for fan coils and electrical Positioning ........................7 specifi...
- Page 6 Fig.1 - Packaging Note: before proceeding with the installation, remove the tank from the stand, pushing the fi ns black as shown. “Ultrasound humidifi er for fan coils” +0300056EN - rel. 1.5 - 24.06.2015...
-
Page 7: Introduction And Assembly
1. INTRODUCTION AND ASSEMBLY 1.1 Ultrasound humidifi er 1.4 Positioning • Ultrasound humidifi ers can be used for vast variety of applications, e.g. The humidifi er may only be accessed by specialist personnel; • data centers, climate rooms, close control units and food preservation, for make sure the humidifi... -
Page 8: Humidifi Er Assembly
1.6 Humidifi er assembly Connect the valves as shown in Figure 1.d and 1.e Important: Important: insert an o-ring before the drain valve Drain Fill Fig. 1.d Fig. 1.g CLICK!! CLICK!! Fig. 1.e Important: Important: correct wiring of the ultrasound humidifi er is the responsibility of the fi... -
Page 9: Water Connections
2. WATER CONNECTIONS 2.1 Supply water Important: before proceeding with the water connections, The ultrasound humidifi er works on demineralised water. Using normal make sure that the humidifi er is not connected to the mains water will shorten transducer life; specifi cally, maintenance intervals for power supply. -
Page 10: Atomised Water Distribution
The air fl ow conveyor can be installed on the top of the fan (removing the protection grill) so as to take in air from a diff erent place to where humiSonic is installed. “Ultrasound humidifi er for fan coils” +0300056EN - rel. 1.5 - 24.06.2015... -
Page 11: Installation Example In Fan-Coil
3.7 Duct installation example (UU01G) Duct installation example. Fig. 3.h Connect the humiSonic fan inlet to the duct, in a position between the main fan and the connection created for delivering atomised water into the duct. Carel can supply the fan conveyor (P/N UUKCY00000) to create the connections between the fan, duct and hose (P/N 1312955AXX). -
Page 12: Electrical Connections
(preset at 50%rH and modifi ed via dipswitches 5-6, see Tab.4.a) The setpoint can be changed by connecting the trimmer (optional) to F terminal (fi g 4.a) Fig. 4.b Communication OFF Serial 485 Carel/Modbus M 14 ON tLAN 2-3 tLAN address (if 1 is ON) OFF/OFF - -... -
Page 13: Auxiliary Card Connections (Optional)
Note: in industrial environments (IEC EN61000-6-2) the signal cables leaving the unit must not exceed 10 m (33 ft) in length: remote If non-CAREL probes are used, check: on/off digital input (terminals M14.1...M14.2) and shielded cable for • voltage signal: 0 to 10 Vdc, 2 to 10 Vdc, terminal M10.1 (GND: M10.2);... -
Page 14: Starting, User Interface And Basic Functions
5. STARTING, USER INTERFACE AND BASIC FUNCTIONS 5.5 Disabling Before starting the humidifi er, check: The humidifi er can be disabled in three diff erent ways: □ water connections: chap. 2, in the event of water leaks, do not start •... -
Page 15: Lcd Terminal (Optional)
6. LCD TERMINAL OPTIONAL 6.1 Remote display terminal (UUKDI00000) Humidity production in progress Tank fi lling The LCD terminal is an option and can only be used if the auxiliary card Water in the tank is fi tted, this too an option. Water draining from the tank Tab. -
Page 16: Display Software Release
6.5 Display software release 1) on power-up the display shows “rel. x.y” (e.g. rel. 1.2); 2) during operation; a) on the display: from the main screen press ESC and UP together, the following are shown in sequence: humidifi er size, supply, number of phases and software release;... -
Page 17: Basic Parameters
CONFIGURATION PARAMETERS To access and set the following parameters, see chapters 6 and 12. 7.1 Basic parameters Parameter range note Operating mode 0 = On/Off mode from auxiliary card probe input 1 = Proportional mode from auxiliary probe input 2 = Humidity probe mode from auxiliary card probe input 3 = Auto mode: if fi... - Page 18 Parameter b0 b0 Unit of measure Periodical washing Drain SV in Alarm relay Alarm relay logic Reverse osmosis Wash due Auto- of par. b1 EC = at the end of the standby AL= active alarms NO= norm. open Off = wash due to inactivity test M = minutes production cycle...
- Page 19 b0 Unit of measure Periodical washing Drain SV in Alarm relay Alarm relay logic Reverse osmosis Wash due Auto- of par. b1 EC = at the end of the standby AL= active alarms NO= norm. open Off = wash due to inactivity test M = minutes production cycle...
- Page 20 b0 Unit of measure Periodical washing Drain SV in Alarm relay Alarm relay logic Reverse osmosis Wash due Auto- of par. b1 EC = at the end of the standby AL= active alarms NO= norm. open Off = wash due to inactivity test M = minutes production cycle...
-
Page 21: Serial Connection Parameters
b0 Unit of measure Periodical washing Drain SV in Alarm relay Alarm relay logic Reverse osmosis Wash due Auto- of par. b1 EC = at the end of the standby AL= active alarms NO= norm. open Off = wash due to inactivity test M = minutes production cycle... -
Page 22: Alarms
20%rH 4 slow fl ashes EEPROM alarm Problems in the EEPROM If the problem persists, humidifi cation If this persists contact the CAREL interrupted contact service service centre 1 fast fl ash Functional test not Functional test not If the problem persists, humidifi... -
Page 23: Maintenance And Spare Parts
9. MAINTENANCE AND SPARE PARTS 9.1 Spare parts 9.2 Tank cleaning and maintenance Replacement Table of water circuit, electrical and electronic spare part numbers Important: replacement must only be carried out by qualifi ed part number pos. fi g. personnel, with the humidifi er disconnected from the power Water circuit supply. -
Page 24: Wiring Diagrams
10. WIRING DIAGRAMS 10.1 Diagram LOW LEV. HIGH LEV. +21V Fig. 10.a “Ultrasound humidifi er for fan coils” +0300056EN - rel. 1.5 - 24.06.2015... -
Page 25: General Features And Models
11. GENERAL FEATURES AND MODELS 11.1 Ultrasound humidifi er models for fan coils and electrical specifi cations The table below summarises the electrical data (power supply voltages) of the various models, as well as their functional characteristics. Note that some models can be powered at diff... -
Page 26: Humidifier Control Via Network
- Baud rate 19200 bps - Frame 8,N,2 12.1 Supervisor variable list “A” analogue variables* (Modbus®: REGISTERS) CAREL - Modbus® param. d0: Th probe temperature reading param. d1: Th probe humidity reading param. d2: Probe reading param. d5: Set point trimmer reading “I”... -
Page 27: Production Control Via Network
To manage the production with a humidity probe managed by the master: • Set D 37 = 1; • Set parameter A0 = 2 (Carel 20, Modbus 148, Humidity probe Mode); • Set integer variable 60 Carel (188 Modbus) to the desired level (0-1000 = 0-100.0 rH%); •... -
Page 28: Control Principles
13. OPERATING PRINCIPLES 13.1 Ultrasound atomisation Automatic control with humidity probe Humidity production is controlled based on the reading of the relative Ultrasound humidifi ers atomise water through propagation of a wave humidity probe (TH or connection via optional card). generated by a piezoelectric element to the surface of the water. -
Page 29: Automatic Insuffi Cient Supply Water Management
13.4 Series fl ow-rate modulation 13.7 Automatic control of leaking drain (4-transducer ver. only, dipswitch 8 On) solenoid valve and fi ll solenoid valve fl ow-rate Atomised water fl ow-rate can be modulated as a percentage of rated production, from 10% to 100%. Each pair of transducers generates Parameter A9 sets a minimum production time (default 1 minute);... - Page 30 Notes “Ultrasound humidifi er for fan coils” +0300056EN - rel. 1.5 - 24.06.2015...
- Page 32 Agenzia / Agency: CAREL INDUSTRIES HQs Via dell’Industria, 11 - 35020 Brugine - Padova (Italy) Tel. (+39) 049.9716611 - Fax (+39) 049.9716600 e-mail: carel@carel.com - www.carel.com...
Need help?
Do you have a question about the Humisonic and is the answer not in the manual?
Questions and answers