Table of Contents
Advertisement
Advertisement
Table of Contents

Related Manuals for Total Gym ELEVATE Jump


Summary of Contents for Total Gym ELEVATE Jump
- Page 1 ELEVATE JUMP OWNER’S GUIDE ®...
- Page 2 ™ Your Total Gym product arrives with assembly required. Simply follow the directions for assembly and set-up your ELEVATE Jump to be operational. In this Owner’s Guide, you will find information about your ELEVATE Jump and its component parts, operation, maintenance and care.
- Page 3 ELEVATE ® JUMP OWNER’S GUIDE TABLE OF CONTENTS Safety Precautions ..................4 Slide Distance Regulator (SDR) Instructions ..........12 Parts Identifier .....................5 Variable Resistance Band Instructions ............12 Specifications and Limitations ...............6 Resistance Chart ..................12 Assembly Instructions ................7-10 Maintenance and Care ................. 13 Maintenance Schedule .....................13 Getting Started ...................
-
Page 4: Safety Precautions
• Follow instructions in this Owner’s Guide for using the unit. Improper use could result in severe or fatal injury. Your ELEVATE Jump must be bolted to the floor on a flat, can assist in planning a program that is age and ability specific. Certain solid surface with nonskid material underneath. -
Page 5: Parts Identifier
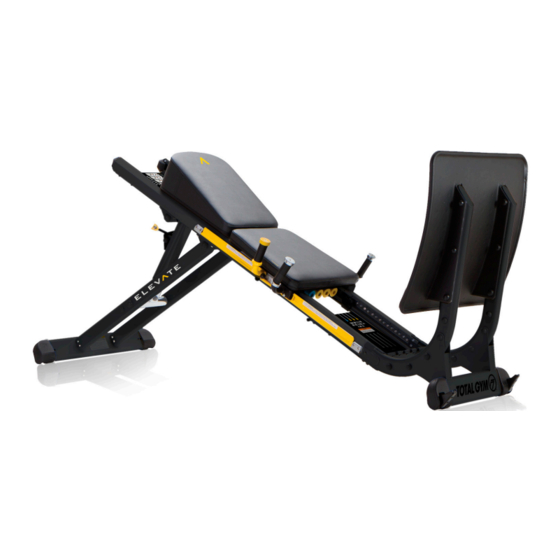
ELEVATE ® JUMP OWNER’S GUIDE PARTS IDENTIFIER Slide Distance Regulator (SDR) Right Rail Left Rail Squat Stand Glideboard Handles Incline Release Lever Incline Strut Safety Lock Variable Resistance Bands Rear Struts Right Squat Strut Rear Base Anchor Foot with Bolt Holes Left Squat Strut Front Base Anchor Foot... -
Page 6: Specifications And Limitations
JUMP JUMP OWNER’S GUIDE OWNER’S GUIDE SPECIFICATIONS & LIMITATIONS ELEVATE Jump has been preset to the fitness setting by the • manufacturer. • MUST BE BOLTED TO THE FLOOR • Glideboard Range of Motion: 38 inches [97 cm] • Weight Capacity: Maximum user weight capacity of 400 lbs [180 kg] •... - Page 7 5 mm Hex Key 4 mm Hex Key STEP 1. Carefully unpack all the parts and the hardware kit for your ELEVATE Jump 17 mm wrench and inspect to see if anything is missing or damaged. Contact Total Gym Customer...
- Page 8 ELEVATE ® JUMP OWNER’S GUIDE Next, attach Front Base to holes 2, 3 and STEP 2. Insert the Left Squat Strut on to STEP 3. Repeat STEP 2 on other side, STEP 4. Install the hardware (G, F) on 4 as shown below using hardware (H,K,J) the Left Rail by positioning the bottom of attaching the Right Squat Strut to the both rails as shown below.
- Page 9 ® JUMP OWNER’S GUIDE STEP 6. Using the hardware (D, C) as STEP 7. Lay the ELEVATE Jump on STEP 8. Turn the ELEVATE Jump upright STEP 9. IMPORTANT: RETURN TO STEPS 2-4 AND TIGHTEN ALL SCREWS indicated; attach the Rear Base to the its side.
- Page 10 ® JUMP OWNER’S GUIDE STEP 11. Move the ELEVATE Jump to Bolt down machine at Front Base through STEP 13. Anchor the Front Base to the floor using appropriate bolts for your floor as the permanent location and position it the Bolt Holes provided on the Anchor shown below.
-
Page 11: Getting Started
OWNER’S GUIDE GETTING STARTED EXERCISE INSTRUCTIONS As a facility offering the use of the ELEVATE Jump to customers, or as a personal Follow the instructions on the placard Select appropriate resistance level. user of the product, you – the owner of the product – assumes the responsibility to... -
Page 12: Variable Resistance Band Instructions
ELEVATE ® JUMP OWNER’S GUIDE SLIDE DISTANCE RESISTANCE CHART REGULATOR Squat Resistance % of Your Body Weight (lbs/kgs) Nominal INSTRUCTIONS % of Level Bodyweight 100/45 130/59 150/68 180/82 200/91 300/136 400/181 The function of the Slide Distance Regulator (SDR) is to reduce the motion of the glideboard in the downward direction to prevent excessive knee flexion in rehabilitation exercises. -
Page 13: Maintenance And Care
ELEVATE ® JUMP OWNER’S GUIDE MAINTENANCE AND CARE MAINTENANCE SCHEDULE Your ELEVATE Jump unit will offer you WEEKLY MONTHLY or your facility and your clientele years 1. Wipe down rails with a non-corrosive, 1. Visually inspect the rollers. Clean any... -
Page 14: Glideboard: Roller Removal And Assembly
ELEVATE ® JUMP OWNER’S GUIDE GLIDEBOARD: ROLLER REMOVAL AND ASSEMBLY STEP 1. Remove the six M6 screws from STEP 2. Remove the gas strut brake by STEP 4. To remove the rollers use a 13 STEP 5. Replace the rollers as needed both the Rail End Caps on the top end of unscrewing two screws below the top mm socket wrench and a 13 mm open-... -
Page 15: Warranty Information
If the package appears to have sustained • Parts & Upholstery – 1 year damage in shipping, or if your ELEVATE Jump appears to have shifted in delivery but • Foam, Rubber & Bands – 90 days no damage is evident, retain the shipping boxes until the Total Gym has been fully assembled to ensure there is no functional damage that is not initially visible. - Page 16 5225 Avenida Encinas Suite C, Carlsbad CA 92008 ©2017 Total Gym Global Corp. All rights reserved. Total Gym and ELEVATE are registered trademarks of TGG Global Corp. Unauthorized duplication of this booklet is punishable by law. Covered by one or more of U.S. Pat. Nos. D574,901, 7,775,950, 8,075,457, 7,938,763, 8,834,332, D493,853, 6,921,355, 7,503,880, 7,270,628, D694347, 7,892,159, 8,702,575, 5,967,955, D734,409, D741,960, 361898, D741,420: 5,967,955; 6,921,355;...
Need help?
Do you have a question about the ELEVATE Jump and is the answer not in the manual?
Questions and answers