Table of Contents
Advertisement
Advertisement
Table of Contents

Subscribe to Our Youtube Channel
Related Manuals for Total Gym ELEVATE ENCOMPASS


Summary of Contents for Total Gym ELEVATE ENCOMPASS
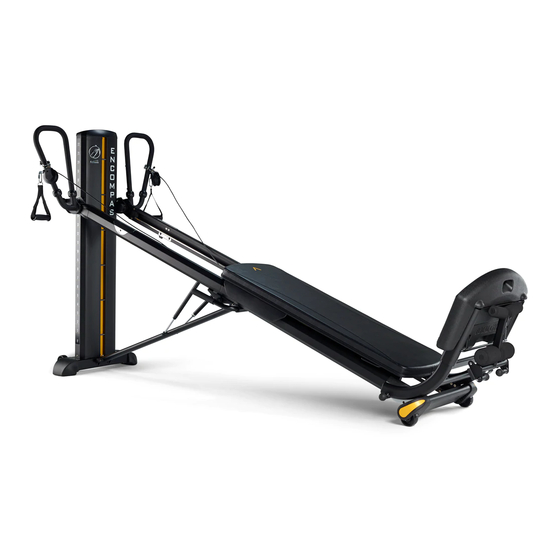
- Page 1 ELEVATE ENCOMPASS OWNER’S GUIDE ®...
- Page 2 Your ELEVATE Encompass enables you to fine-tune exercise regimens to meet your desired goal, or that of your client, or in multi-client sessions.
-
Page 3: Table Of Contents
ELEVATE ® ENCOMPASS OWNER’S GUIDE TABLE OF CONTENTS Assembly and Set-Up Instructions ..............4-9 Repositioning ..................... 23 Safety Precautions ..................10 Transporting ....................23 Specifications and Limitations ..............11 Getting Started ..................24-25 Parts Identifiers ..................12-13 Resistance Charts and Information .............. 26 Adjustable Glideboard Resistance Charts in Pounds Folding ....................14-15 Resistance in Pounds .................... -
Page 4: Assembly And Set-Up Instructions
ELEVATE ® ENCOMPASS OWNER’S GUIDE ASSEMBLY AND SET-UP INSTRUCTIONS BOX CONTENTS HARDWARE & INFORMATION BOX CONTENTS • Tower, Rail and Glideboard Assembly • Telescoping Squat Stand • Spanner wrench (1) • Quick links (2) • LAT Bars and Arm Pulley Cable •... - Page 5 ELEVATE ® ENCOMPASS OWNER’S GUIDE UNFOLDING ADJUSTING THE INCLINE OF THE RAILS 5. Unlatch the rails from the tower. 8. Stand next to the tower. Latch 9. Grasp the upper rail near the tower. Slightly lift the rails, then depress the release handle on the top of the tower and raise the rails to a level between 10 and 14.
- Page 6 ELEVATE ® ENCOMPASS OWNER’S GUIDE LAT BAR ASSEMBLY 12. Install the left LAT bar completely, then install the right LAT bar to keep the Encompass stable and safe. After you remove your Encompass from the box and unfold it, it is ready for 13.
- Page 7 ELEVATE ® ENCOMPASS OWNER’S GUIDE 15. NOTE: LAT bars are specific to each side of the tower. When installed the 17. Thread the LAT disc nut on the LAT bar while holding LAT bar handle still pull pin should face toward the back of the tower as shown. until it is too tight to turn by hand.
- Page 8 ELEVATE ® ENCOMPASS OWNER’S GUIDE 21. CABLE AND PULLEY USE POSITION: Raise the LAT bars to use the 25. FOLDING FOOT HOLDER USE pulleys and cable. Rotate each LAT bar up and parallel with the tower, POSITION: Pull up on the upper bar to ensuring the pull pin engages in the hole of the tower cross arm on both engage the folding foot holder for use.
- Page 9 ELEVATE ® ENCOMPASS OWNER’S GUIDE TELESCOPING SQUAT STAND ATTACHMENT 27. When the fixed pin is inserted into the hole gently move the folding platform to the right. Then lower the right side of the folding platform 29. Lift the release lever on the back of down to align the right pull-pin into the plate on the right lower rail as the telescoping squat stand.
-
Page 10: Safety Precautions
• Inspect your ELEVATE Encompass before each use to ensure proper operation. people. Ensure that your clients are able to participate in an exercise Check all parts for wear before each use. Do not use your ELEVATE Encompass program on this equipment without injury. -
Page 11: Specifications And Limitations
ELEVATE ® ENCOMPASS OWNER’S GUIDE SPECIFICATIONS AND LIMITATIONS SPECIFICATIONS • In Use: 107” x 38” x 69” (2.4 m x 1.0 m x 1.8 m) [L/W/H] • Folded: 20” x 38” x 56” (.5 m x 1.0 m x 1.4 m) [L/W/H] 37.6 •... -
Page 12: Parts Identifiers
ELEVATE ® ENCOMPASS OWNER’S GUIDE PARTS IDENTIFIER - FRONT Tower Cap Tower Tower Crosspin Dynamic Arm Pulley Locator Pulley System Clamp LAT Bar Folding Foot Holder Incline Scale Upper Rail Dip Bar Squat Stand Cable Handles Adjustable Handle Glideboard Telescoping Squat Stand Dip Bar Squat Adjust Lever... -
Page 13: Parts Identifiers
ELEVATE ® ENCOMPASS OWNER’S GUIDE PARTS IDENTIFIER - BACK Rail Incline Folding Foot Release Handle Holder Removal Rail Lock Pull Pins Pulley Storage Ring Folding Foot Holder Dip Bar Lowering Lever Transport Handle Tower Cross Arm Dip Bar Detent Pin Index Pin Plate Squat Fold Pull Pin Glideboard “D”... -
Page 14: Folding
4. Remove the folding foot holder and hook it on the back of the squat stand. lean back. 1. If LAT Bars are installed on your ELEVATE Encompass, move the pulleys to the upper outside position as shown. 5. Lower the rails to lowest position “F.”... -
Page 15: Folding
ELEVATE ® ENCOMPASS OWNER’S GUIDE 6. Stow the handles so they are not damaged when storing or moving your unit. WARNING Loop the handle straps around the opposite LAT Bar pull pin as shown below. Lift only where indicated on the upper rail. Lifting elsewhere may cause the rails to move up the tower during the folding process. -
Page 16: Unfolding
ELEVATE ® ENCOMPASS OWNER’S GUIDE UNFOLDING 1. Unlatch the rails from the tower. WARNING The tower is designed to open automatically by pulling away from the upper rails as the rails begin to unfold. Do not force or push the tower away from the rails, as this will cause the tower to fall backward. - Page 17 ELEVATE ® ENCOMPASS OWNER’S GUIDE 4. Grasp the upper rails near the tower and raise them to a level between 10 6. Rotate the squat stand up by pulling the squat fold pull pin on the left lower and 14. rail (while facing tower).
-
Page 18: Telescoping Squat Stand And Folding Platform
ELEVATE ® ENCOMPASS OWNER’S GUIDE TELESCOPING SQUAT STAND AND FOLDING PLATFORM ADJUSTING THE TELESCOPING SQUAT STAND REMOVING THE FOLDING PLATFORM 1. Lift the release lever on the back of the telescoping squat stand. Adjust 1. Remove the squat stand from the folding platform posts and set it aside. the squat stand to the desired level by aligning it over one of the sets of holes 2. -
Page 19: Pulley Locator Clamps
Keep all items clear of the mechanism and 1. UNLOCK: With one or two hands, do not use the ELEVATE Encompass if it is not working properly. squeeze the back of the clamp toward the pulley. -
Page 20: Adjusting The Rail Incline
ELEVATE ® ENCOMPASS OWNER’S GUIDE ADJUSTING THE RAIL INCLINE RAISING THE INCLINE OF THE RAILS LOWERING THE INCLINE OF THE RAILS 1. Stand next to the top rails. 1. Stand next to the top rails. 2. Grasp the rail between the tower and the folding foot holder and lift it slightly. 2. -
Page 21: Connecting Pulleys To Tower Crosspins In Center Channel
WARNING Never connect the center pulley above the arm pulleys on the ELEVATE Encompass as the force may cause the rails to be pulled up out of engagement from the tower. If you connect the center pulley to the center channel at a level beneath the rails, use caution to prevent cables from rubbing against the rails. -
Page 22: Changing The Angle Of The Adjustable Glideboard
WHEEL REMOVAL AND ASSEMBLY The adjustable glideboard is designed to remain parallel to the ground when the 1. Fold the ELEVATE Encompass and stand it up vertically. rails are at an incline. This helps to facilitate proper alignment of the spine in 2. -
Page 23: Using The Dip Bars
REPOSITIONING USING THE DIP BARS The ELEVATE Encompass can be moved short distances by lifting it from the rail Retractable dip bars provide specificity to dip exercises targeting the triceps and base or squat stand and/or by the tower cross arm from the back. -
Page 24: Getting Started
OWNER’S GUIDE GETTING STARTED When using your ELEVATE Encompass, wear athletic shoes and comfortable SEATED 2A. If you are performing a sitting exercise, sit at the top of the glideboard. lightweight clothing. Tie long hair back to avoid contact with the center pulley. - Page 25 Always control the glideboard while mounting or dismounting STEP 2. When kneeling on the glideboard, place knees one at a time just behind ELEVATE Encompass. The unit is rated at a maximum user weight your fists as you face the glideboard.
-
Page 26: Resistance Charts And Information
3 for unilateral movements or pulley handles, while there is no when using only one handle with The ELEVATE Encompass uses a variable angle incline plane to create exercise connection to the glideboard. the center pulley connected to the resistance by modifying the effect of the user’s bodyweight—a steeper angle... -
Page 27: Resistance In Pounds
ELEVATE ® ENCOMPASS OWNER’S GUIDE RESISTANCE CHARTS ADJUSTABLE GLIDEBOARD - POUNDS (LBS) Weight of Adjustable Glideboard: 37 lbs RESISTANCE IN POUNDS (LBS) RESISTANCE AS % OF BODYWEIGHT (LBS) Your Bodyweight + Weights Added (lbs) Your Bodyweight + Weights Added (lbs) Degree Degree Incline... -
Page 28: Resistance In Kilograms
ELEVATE ® ENCOMPASS OWNER’S GUIDE RESISTANCE CHARTS ADJUSTABLE GLIDEBOARD - KILOGRAMS (KGS) Weight of Adjustable Glideboard: 16.8 kgs RESISTANCE IN KILOGRAMS (KGS) RESISTANCE AS % OF BODYWEIGHT (KGS) Your Bodyweight + Weights Added (kgs) Your Bodyweight + Weights Added (kgs) Degree Degree Incline... -
Page 29: Optional Accessories
ELEVATE ® ENCOMPASS OWNER’S GUIDE OPTIONAL ACCESSORIES Purchased Separately: Observe the instructions provided with each accessory. 3GRIP PULL-UP BAR LEG PULLEY SYSTEM PRESS BAR SCRUNCH ® STANDING PLATFORM TOE BAR WEIGHT BAR... -
Page 30: Maintenance And Care
ENCOMPASS OWNER’S GUIDE MAINTENANCE AND CARE MAINTENANCE SCHEDULE Your ELEVATE Encompass model will offer you or your facility and your clientele years of easy operation if you follow these simple DAILY tips for maintenance and care. With periodic cleaning, moving parts and rolling surfaces will maintain their smooth function. -
Page 31: Warranty Information
Take photographs of damaged boxes or contents before LIMITED WARRANTY opening. USE OF NON-TOTAL GYM ACCESSORIES: Defects or damage that result from the use of third party or homemade accessories are excluded from coverage. PURCHASE RECORD. RETAIN THIS COPY FOR YOUR RECORDS. - Page 32 5225 Avenida Encinas Suite C, Carlsbad CA 92008 ©2017 Total Gym Global Corp. All rights reserved. Total Gym is a registered trademark of Total Gym Global Corp. Unauthorized duplication of this booklet is punishable by law. Designed in the United States of America. Manufactured in Taiwan. Covered by one or more of U.S. Pat. Nos. 5,967,955; 6,921,355; 7,270,628; 7,766,801; D493,853; Australia Des.
Need help?
Do you have a question about the ELEVATE ENCOMPASS and is the answer not in the manual?
Questions and answers