
Related Manuals for JVC UX-DM9DB


Summary of Contents for JVC UX-DM9DB
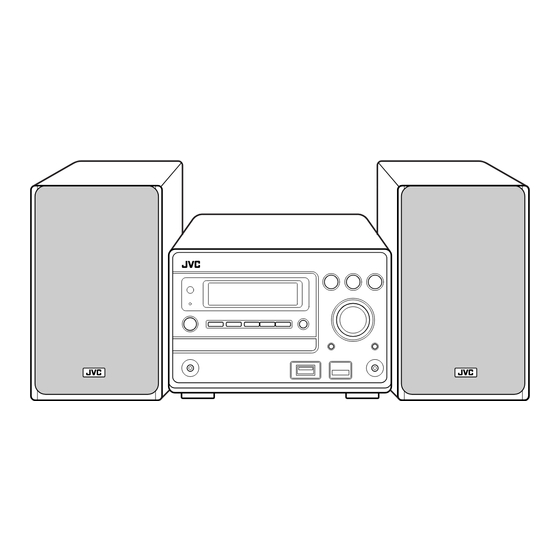
- Page 1 MICRO COMPONENT SYSTEM UX-DM9DB Consists of CA-UXDM9DB and SP-UXDM8 INSTRUCTIONS GVT0225-001A...
-
Page 2: Safety Instructions
SAFETY INSTRUCTIONS “SOME DOS AND DON’TS ON THE SAFE USE OF EQUIPMENT” This equipment has been designed and manufactured to meet international safety standards but, like any electrical equipment, care must be taken if you are to obtain the best results and safety is to be assured. ✮✮✮✮✮✮✮✮✮✮✮✮✮✮✮✮✮✮✮✮✮✮✮✮✮✮✮✮✮✮✮✮✮✮✮✮✮✮✮✮✮✮✮✮✮✮✮... - Page 3 European representative of Victor Company of Japan, Limited CAUTION To reduce the risk of electrical shocks, fire, etc.: JVC Technology Centre Europe GmbH 1. Do not remove screws, covers or cabinet. Postfach 10 05 52 2. Do not expose this appliance to rain or moisture.
- Page 4 This symbol is only valid (Business users) in the European Union. If you wish to dispose of this product, please visit our web page www.jvc-europe.com to obtain information about the take-back of the product. [Other Countries outside the European Union] If you wish to dispose of this product, please do so in accordance with applicable national legislation or other rules in your country for the treatment of old electrical and electronic equipment.
- Page 5 Introduction Thank you for purchasing a JVC product. Please read all instructions carefully before operation, to ensure your complete understanding and to obtain the best possible performance from the unit. Precautions How to Read This Manual • Button and control operations are explained in the table Installation below.
- Page 6 Contents Getting Started............3 Recording Operations ........... 26 Connections................. 3 Before You Start Recording..........26 Preparing the Remote Control..........5 Recording from a Disc ............27 About Display Indicators ............ 6 Recording from the Radio/iPod/External Equipment ..29 Moving Tracks between the Daily Operations—Playback ........
-
Page 7: Getting Started
Getting Started Connections Do not connect the power cord until all other connections have been made. Supplied accessories Check to be sure that you have all the following items. • DAB antenna (x1) • Docking station for iPod (x1) • FM antenna (x1) •... -
Page 8: Dab Antenna
Ÿ Speakers DAB antenna • When connecting the speaker cords, match the polarity of the speaker terminals: transparent to (+) and transparent with black stripe to (–). Insert DAB antenna (supplied) Extend the wire so that you can receive your desired ensembles. Release Press and hold For better DAB reception... -
Page 9: Preparing The Remote Control
AM/FM antenna To connect the power cord To assemble the AM loop antenna To a wall outlet Power cord (supplied) • Disconnect the power cord before cleaning or moving the System. How to attach the core filter To connect AM/FM antenna Attach the provided core filter to the power cord to reduce interference. -
Page 10: About Display Indicators
About Display Indicators The indications on the display tell you a lot of things while you are operating the System. Before operating the System, be familiar with when and how the indicators illuminate on the display. 1 Source status indicators p DAB band indicators: See page 18. -
Page 11: Turn On The Power
Daily Operations —Playback In this manual, operations using the remote control are Turn on the power. mainly explained; however, you can use the buttons The STANDBY lamp on the main unit turns off. and controls on the main unit if they have the same (or •... -
Page 12: Listening To The Fm/Am Radio
Listening to the FM/AM Radio INFO Remote To preset the stations ONLY • For DAB operations, see page 18. You can preset 30 FM and 15 AM stations. To select the band (FM or AM) Tune in to a station you want to preset. •... -
Page 13: Playing Back A Disc/Track
To connect a USB device Playing Back a Disc/Track INFO • Always set the volume to minimum level when connecting You can play back tracks from 3 types of sources on this or disconnecting external equipment. System: disc, built-in memory (MEMORY) and USB device On the front USB memory (USB). - Page 14 Remote Remote To change the USB connection mode ONLY To select a group ONLY You can change the USB connection mode according to the While playing a disc/track... type of USB device. Display the current USB connection mode. sec. • You can select a group directly by pressing a number button after pressing GROUP SELECT.
-
Page 15: Playing Back An Ipod
• Be sure to reduce the volume on the System to the Playing Back an iPod minimum level before connecting an iPod. Adjust the volume after starting playback. Compatible iPod types • DO NOT connect or disconnect the iPod when the System is iPod nano 1GB/2GB/4GB turned on. -
Page 16: Playing Back External Equipment
To locate a particular portion Playing Back External Equipment INFO While playing an iPod... By using QP Link (Quick Portable Link), you can easily start • Release the button when you reach playing back the external equipment connected to the AUX the desired position. -
Page 17: Adjusting The Volume
Daily Operations —Sound & Other Adjustments Remote Adjusting the Sound INFO ONLY Remote control To reinforce the bass sound While Active Hyper Bass Pro (AHB PRO) is turned on, the richness and fullness of the bass sound is clearly maintained regardless of how you set the volume. -
Page 18: Changing The Display Brightness
Remote Remote Changing the Display Brightness Adjusting the Audio Input Level ONLY ONLY You can dim the display window and illumination lamps. If the sound from the component connected to the AUX jack is too loud or is too small when changing from While the System is turned on... -
Page 19: Setting The Clock
Remote Remote Setting the Clock Turning Off the Power Automatically INFO ONLY ONLY Without setting the built-in clock, you cannot use Recording Auto Standby or Playback Timer (see pages 40 and 42). This function is available only for CD, built-in memory, •... -
Page 20: Radio Data System Operations
Radio Data System Operations Searching for a Program by PTY Codes Remote control Remote DISP/CHARA ONLY You can locate a particular kind of program from the preset stations (see page 8) by specifying the PTY codes. • For details about PTY codes, see page 17. PTY SEARCH To search for a program using the PTY codes While listening to an FM station... -
Page 21: Switching Temporarily To A Program Of Your Choice Automatically
Description of the PTY codes Switching Temporarily to a Program of News: News. Your Choice Automatically Remote Affairs: Topical program expanding or enlarging ONLY upon the news—debate, or analysis. The Enhanced Other Networks function allows the System Info: Programs the purpose of which is to impart to temporarily switch to a preset FM station broadcasting a advice in the widest sense. -
Page 22: Dab Operations
DAB Operations Caution: Remote control Electrostatic discharge from your body may cause noise from the speakers and you cannot hear the broadcast. Number DISP/ buttons If this happens, turn off the System (on standby), then turn CHARA it on again. Listening to a Service SEARCH 4,¢... -
Page 23: Presetting Services
Remote To scan for ensembles ONLY Presetting Services Remote INFO ONLY The System scans the DAB bands to pick out available You can preset 30 services. ensembles under your receiving conditions. • When you change the source to DAB for the first time after Tune in to an ensemble, then select a service you want plugging in the power cord, the System automatically to preset. -
Page 24: Changing The Display Mode
The System searches all the available ensembles, and Changing the Display Mode Remote INFO ONLY switches to a program of the selected PTY code when found. While listening to a DAB service... • If no program is found, “NOT FOUND” appears on the Service label display. -
Page 25: Advanced Playback Operations
Advanced Playback Operations Activate Program Play. Remote control PROGRAM RANDOM Canceled Number buttons CANCEL GROUP SKIP ENTER 4,¢ Select tracks you want for Program Play. TITLE SEARCH MEMORY 6 • For MP3/WMA/WAV: USB 6 1 Select a group number. REPEAT CD 6 2 Select a track number. - Page 26 Start playback. To program the playing order of tracks on the Playback starts in the order built-in memory and USB device Built-in you have programmed. You can arrange the playing order of the tracks in the memory device built-in memory and USB device (up to 999) before you start playback.
-
Page 27: Playing At Random—Random Play
Playing at Random—Random Play Playing a Selected Group Remote Remote —Group Play INFO INFO ONLY ONLY You can play all tracks on the disc, built-in memory or USB You can play a selected group on the built-in memory or device at random. USB device. -
Page 28: Playing At Random In A Selected Group Group Random Play
Playing at Random in a Selected Group Playing Repeatedly—Repeat Play Remote —Group Random Play Remote INFO INFO ONLY ONLY You can play all tracks of the selected group on the built-in You can repeat playback. memory or USB device at random. While playing or before playback... -
Page 29: Search For A Track Or Group By Title—Title Search
Search for a Track or Group by Title Prohibiting Disc Ejection—Child Lock Main Unit ONLY —Title Search Remote INFO ONLY You can lock the disc tray so that no one can eject the loaded You can search for a track or group in a built-in memory or disc. -
Page 30: Recording Operations
Recording Operations Before You Start Recording Remote control IMPORTANT: It should be noted that it may be unlawful to re-record pre-recorded tapes, records, or discs without the consent of the owner of copyright in the sound or video recording, broadcast or cable program and in any literary, dramatic, musical, or artistic work embodied DISP/ therein. -
Page 31: Recording From A Disc
About SCMS (Serial Copy Management System) Recording from a Disc The System uses the Serial Copy Management System which allows only first-generation digital copies to be made You can record tracks in digital recording from a CD onto of premastered software such as regular CDs. the built-in memory or USB device. - Page 32 Select the Recording Speed. Select the group to record tracks into. • When you make a new group for the tracks: REC SPEED 1 Select “FORM GR ?” mode. NORMAL REC SPEED HIGH Record at same speed as of usual 2 Make a new group.
-
Page 33: Recording From The Radio/Ipod/External Equipment
Select a Recording Mode. To stop recording manually • See page 27 for the details of each mode. SP REC HQ REC EP REC To record the playing track Select a Marking Mode. While playing back... Select a recording device. MANUAL To record onto built-in To record onto USB... - Page 34 Select a group to record tracks into. • When you want to record into the root group (G1 • When you make a new group: MUSIC): 1 Select “FORM GR ?” mode. To record onto built-in To record onto USB memory: device: 2 Make a new group.
-
Page 35: Moving Tracks Between The Built-In Memory And Usb Device
Confirm the selection. Moving Tracks between the When moving the track When moving the track Built-in Memory and USB Device onto built-in memory: onto USB device: You can move tracks between the built-in memory and a USB device. • You cannot copy tracks to the built-in memory or USB device. - Page 36 • When you select an existing group: To move a group 1 Select a desired group. • After moving a group onto the target device, the original group is deleted from the original device and the following groups in the original device are re-numbered automatically.
- Page 37 3 Start moving the tracks. To move the tracks in the programmed order • Even if a track is programmed twice or more, the track is transferred only once. • After moving the tracks onto the target device, the original tracks are deleted from the original device, and the •...
-
Page 38: Editing Operations
Editing Operations INFO • When you want to edit a group title: 1 Enter the group title editing mode. Remote control Number DISP/ 2 Select a group. CHARA buttons CANCEL TITLE/EDIT ENTER GROUP TITLE/EDIT 4,¢ • You cannot edit the title for the root group (G1 GROUP SKIP MUSIC). -
Page 39: Entering Titles
To enter a space Entering Titles Remote ONLY Select the space from “Symbols.” (See “Available Example: To enter “C” Characters” below.) • You can also enter a space at the end of a title by pressing Select the character type [A]. Track number or group number To quit title entry Character entry... -
Page 40: Forming A Group (Form Gr)
Enter a title of the new group. Forming a Group (FORM GR) Remote ONLY • See “Entering Titles” on page 35. You can make groups in the built-in memory. Store the title. • You can create an empty group using this function. An empty group can be used for recording or editing. -
Page 41: Erasing The Tracks (Erase)
Select track. Erasing the Tracks (ERASE) Remote ONLY You can erase tracks on the built-in memory or USB device. • Once tracks are erased, you cannot restore them. Example: Erasing the track “B.” Select a destination group. Group title Select the new track number in the destination group for the target track. -
Page 42: Erasing A Group (Erase Gr)
Start erasing. Select “ERASE GR.” TITLE FORM GR ERASE GR Canceled FORMAT “EDITING” appears on the display. The message goes off when erasing is finished. Confirm your selection. To go back to To quit editing: previous step: Select the group you want to erase. Remote Erasing a Group (ERASE GR) INFO... -
Page 43: Erasing All Tracks And Groups (Format)
Confirm the erasing. Erasing All Tracks and Groups (FORMAT) Remote ONLY You can erase all tracks and groups in the built-in memory or USB device. Start erasing. • When you erase all tracks in the USB device, files other than music are also erased. •... -
Page 44: Timer Operations
Timer Operations INFO Remote Setting Recording Timer INFO ONLY Remote control You can use Recording Timer to record radio broadcasts or sounds from external equipment onto the built-in memory. • You can store three timer settings in total for Recording Timer and Playback Timer (see page 42). - Page 45 Set the start time and end time of the selected timer. Select a source to record. • Adjust the start hour, the start minute, the end hour, then the end minute. • When you want to record the radio broadcast: Select the preset number of the desired station or service.
-
Page 46: Setting Playback Timer
Select the source to play. Setting Playback Timer Remote INFO ONLY You can use Playback Timer for all sources. • You can store three timer settings in total for Recording Timer (see page 40) and Playback Timer. • To exit from the timer setting, press CLOCK/TIMER as required. -
Page 47: Additional Information
System and the device. – While recording using Recording Timer. – JVC bears no responsibility for any loss of data in the USB device while using this System. – While the System is turned off and display brightness is –... - Page 48 Playing at Random—Random Play: Daily Operations—Sound & Other Adjustments • You cannot play tracks of different sources at random. (see pages 13 to 15) • When you turn off the System, or disconnect the USB Adjusting the Sound: device, Random Play is canceled. •...
-
Page 49: Maintenance
Editing Operations (see pages 34 to 39) Maintenance • Do not vibrate the System while recording/editing tracks. To get the best performance of the System, keep your discs Take care especially while “WRITING” is shown on the and mechanism clean. display. -
Page 50: Display Messages For Recording/Editing Operations
Display Messages for Recording/Editing Operations Display messages Possible cause and Solutions • Change the USB connection mode to “MSC” (see page 10). CANNOT EDIT CHANGE MSC • You cannot edit the connected USB device. CANNOT EDIT MTP DEVICE • You cannot erase a track. (The data may be corrupted.) Turn the System off, then on again. CANNOT ERASE •... -
Page 51: Troubleshooting
Display messages Possible cause and Solutions • Playback of this track is not allowed. (For example, the license is invalid, the playable times DRM ERROR exceed the limit, etc.) • You cannot play back a track with DRM while the USB connection mode is “MSC” (see DRM FILE page 10). - Page 52 DAB Operations: Recording Operations: Cannot receive an ensemble. Unable to record into the built-in memory or USB device. sYour area is not covered by the ensemble. sThe capacity of the built-in memory or USB device is sThe DAB antenna is not properly extended or full.
-
Page 53: Specifications
iPod section Specifications iPod output power: 5 V/500 mA Amplifier section—CA-UXDM9DB General Output power: Power requirement: AC 230 V , 50 Hz (20 W + 20 W) at 4 Ω (10% THD) 40 W Power consumption: 30 W (at operation) Audio input AUX: 500 mV/47 kΩ... -
Page 54: Parts Index
Parts Index Remote control Button Page Remote control Number buttons 1 8, 10, 19, 21, 35 g 10, 21 – 24, 27, 29 – 32, 34, 36 f 8, 10 – 12, 15, 18, 21 – 25, 31, 34, 37, 41, 42 6 8, 10 –...
Need help?
Do you have a question about the UX-DM9DB and is the answer not in the manual?
Questions and answers
How can i turn off the introductory messages.
To turn off the introductory messages (display demonstration and dolphin screen) on the JVC UX-DM9DB, select the "OFF" option in the display settings. This cancels both the display demonstration and the dolphin screen.
This answer is automatically generated