
Related Manuals for Comprehensive CHE-HDBTWP230K


Summary of Contents for Comprehensive CHE-HDBTWP230K
- Page 1 CHE-HDBTWP230K HDBaseT™ Wall Plate Extender TX/RX Kit (up to 230ft) with HDMI, VGA and Audio User's Manual...
- Page 2 Table of Contents ---------------------- Introduction ....................1 Overview ............................ 1 Product Features ........................2 Package Content ........................3 Product Description ....................... 4 Installation..........................7 Device Connection ......................7 Connection Pattern ..................... 7 LED Indications ....................... 8 Push Button Control.......................9 Operation ........................... 9 Specifications .........................
-
Page 3: Introduction
---------------------- Introduction Overview 4K Multi-Format HDBaseT Transmitter could extend full uncompressed 4K video and HD audio over CATx cable of up to 70/100 meters. It does not only support resolution up to Full HD 1080p and 4K, but supports Deep Color and HD Audio formats as well. The advanced and inexpensive all-in-one connectivity technology by using low-cost and handy CATx cables, 4K Multi-Format HDBaseT Transmitter is perfect for situations like hospitality (hotels,... -
Page 4: Product Features
Product Features Transmit HDMI / VGA with analog audio signal up to 70 / 100 meters Uses HDBaseT technology Auto EQ (Sharpness) adjustment for optimal signal clarity Screen Shift Mode provides user to adjust image's shifting ... -
Page 5: Package Content
Package Content Content Quantity ● Video Transmitter Unit ● US Dual-gang Decora plate (Plastic) ● Screws for wall-plate installation ● DC 12V Adapter ● DC Jack to Terminal Block adapter ● Quick Start Guide ● User’s Manual Optional RJ12 Cable + RJ12 to RS232 adapter* *NOTE: If users want to use RJ12 to RS-232 adapter, please follow the diagram below to properly connect the pin:... -
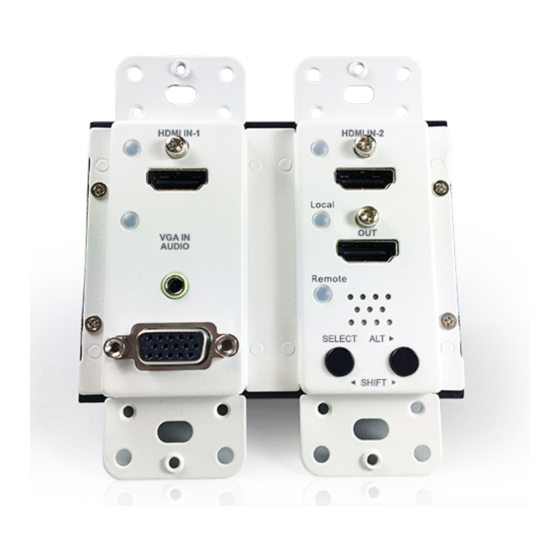
Page 6: Product Description
Product Description... - Page 8 EGO Slide Switch Mode Description Press Seletc to select Source-n; all monitors display Source-n NOTE: When switching from other modes to Switch mode, all monitors Manual display Source-1. But if there’s no source detected in Source-1, it’s required to manually press the button for other source selection. System will automatically select the latest video source for display NOTE: When switching from other modes to Auto mode, all monitors display Auto...
-
Page 9: Installation
Installation WARNING! ● Prior to installation, ensure to power off all devices that will be connected to this system. ● Ensure that all devices you will connect are properly grounded. ● Place cables away from fluorescent lights, air conditioners and machines that are likely to generate electrical noise. -
Page 10: Led Indications
LED Indications HDMI/DP Input Source LED Video OK Source Selected Note (B/R) Emit Blue and go off 3 times w/o HDCP Flash Blue once Emit Purple and go off 3 times w/ HDCP Flash Purple once Emit Blue and flash Red once VGA Input Source LED Video OK Source Selected... -
Page 11: Push Button Control
Push Button Control A/V Source Selection ◆ Press Select : select the source in sequence (S1→S2→S3→S1…) Stand‐by mode: ◆ Press and hold both of Select button for 5 sec. and release right after Remote LED flash Green. Then when the Remote LED flashes Blue once per 3 seconds, the system is in the stand-by mode. - Page 12 EDID Auto-Mixing Step 1. Apply power to the unit. Step 2. Press and hold the buttons “EDID COPY” around 9 sec. and release the button RIGHT AFTER the Local & Remote LED flash BLUE. If the Local & Remote LED return to normal status, indicating that the Factory Default Result.
-
Page 13: Specifications
Specifications Transmitter Model CHE-HDBTWP230RX HDMI x 2 Input VGA + Analog Stereo x 1 Output HDMI x 1 Connection RJ-45 x 1 LED Indicator Source x 3 (Power / Status) Remote x 1, Local x 1 SELECT x 1, ALT x 1 Push Button EDID Copy x 1 (under the cover) Serial Configuration... -
Page 14: Serial Configuration
------------------------ Serial Configuration built-in serial interface allows users to control the unit 4K Multi-Format HDBaseT Transmitter’s via serial control. Please follow the installation and operation steps as shown below. If there’s no serial connector on your computer, you may use USB-to-serial adapter for connection. The configuration of controller’s serial port is shown as below. -
Page 15: Ii. Gui Over Serial
II. GUI over Serial A. Installing Application The serial console (PC) running Windows 98/2000/XP/Vista/7 is required to install the appropriate software. Please follow the step-by-step instructions as listed below. All prompt screens and dialog boxes shown in this section are for Windows 98 and above. Some dialog boxes and folders may slightly different in other versions of Windows. - Page 16 Step 2. A dialog box will pop out indicating device(s) detected. Step 3. Double-click “Digital Switch-Splitter” on the left block. (There are other ways to detect the device. Please refer to Toolbar Guidance / Action.) 2. GUI Toolbar Guidance You can see the toolbar on the upper-left corner. Both top toolbars are identical in functions. For further information, please refer to the following guidance.
- Page 17 2.5 Help: Show the software version and copyright information. 3. GUI Function Description The following will describe the overall functions. And four sections will be included: Info, Setting, Upgrade, EDID and Tools. 3.1 Info: Show information and features. 3.2 Setting: In this section, users can set up port connection, enable or disable audio/video separately, set scan time rate, etc.
- Page 18 display 1 Local Output Port display 2 Remote OUT 1 display 3 Remote OUT 2 display 4 Remote OUT 3 display 5 Remote OUT 4 Advanced Operation 3.3 EDID: Users can not only select the desired ports to copy EDID via multiple methods, but also use built-in EDID for all connected monitors.
- Page 19 Method Operation Steps Step 1. Check the desired input port(s) or check All input ports to select Copy selected input port EDID as all. factory default Step 2. Click Make EDID. Step 1. Check the desired input port. Copy selected input port EDID from selected monitor (audio &...
- Page 20 ◆ Changing Source/Display Icon: Double-click the source/display icon and there will be a pop-up window. Users may change the icon and name the selected source or display. 1. Name the display/source: click the corresponding icon and insert any name you want. 2.
Need help?
Do you have a question about the CHE-HDBTWP230K and is the answer not in the manual?
Questions and answers