Table of Contents
Advertisement
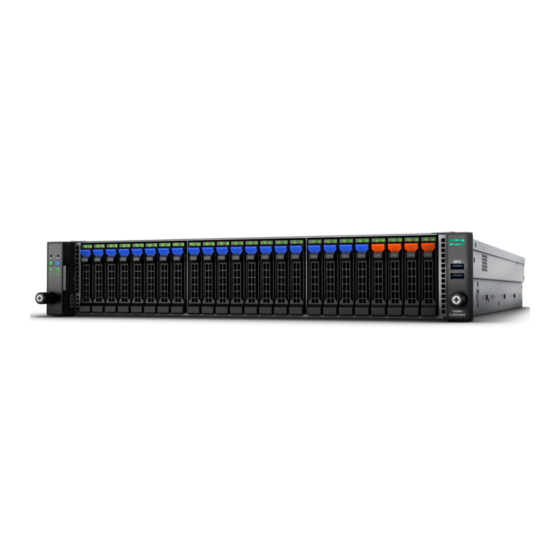
HPE Cloudline CL2200 Gen10 Server
User and Maintenance Guide
Abstract
This document is for the person who installs, administers, services, and troubleshoots servers. This guide describes identification and
maintenance procedures, and specifications and requirements for hardware components and software. Hewlett Packard Enterprise
assumes you are qualified in the servicing of computer equipment, trained in recognizing hazards in pr oducts, and are familiar with weight
and stability precautions.
Part Number: P04907-001
December 2017
Edition: 1
Advertisement
Table of Contents

Subscribe to Our Youtube Channel
Related Manuals for HPE Cloudline CL2200 Gen10


Summary of Contents for HPE Cloudline CL2200 Gen10
- Page 1 HPE Cloudline CL2200 Gen10 Server User and Maintenance Guide Abstract This document is for the person who installs, administers, services, and troubleshoots servers. This guide describes identification and maintenance procedures, and specifications and requirements for hardware components and software. Hewlett Packard Enterprise assumes you are qualified in the servicing of computer equipment, trained in recognizing hazards in pr oducts, and are familiar with weight and stability precautions.
- Page 2 © Copyright 2017 Hewlett Packard Enterprise Development LP The information contained herein is subject to change without notice. The only warranties for Hewlett Packard Enterprise products and services are set forth in the express warranty statements accompanying such products and services. Nothing herein should be construed as constituting an additional warranty.
- Page 3 Installing the operating system ..........................23 Driver resources ............................23 Software and configuration utilities....................... 24 Product QuickSpecs ............................... 24 Server mode ................................24 HPE BMC ................................24 Using BMC ..............................24 BMC RESTful API support ............................. 25 Firmware Information........................... 25 Firmware update............................27...
- Page 4 Troubleshooting ........................... 30 Troubleshooting resources ............................. 30 System utilities ............................. 31 BIOS setup ................................31 Accessing the BIOS setup menu screen ..................... 31 Navigating the BIOS setup menu screen ....................32 Remote Flash BIOS............................. 32 BIOS setup menu screen ............................33 Main menu ..............................
- Page 5 System battery ............................... 82 System board ................................. 83 Rear backplane ..............................85 Front drive cage backplane (SFF) .......................... 87 Front drive cage backplane (LFF) .......................... 91 Front panel and USB (SFF) ............................ 94 Front panel and USB (LFF) ............................ 97 Fan cage (SFF) ..............................
- Page 6 Front Panel Board ............................. 136 Front USB 3.0 ............................137 System Cabling (SFF only) ..........................138 4x U.2 NVMe Kit (Optional) ........................138 RAID Controller Super Capacitor CVPM05 (Optional) ................139 RAID Controller Super Capacitor CVPM05 x 2 (Optional) ................ 140 Warranty and regulatory information ....................
-
Page 7: Component Identification
Component identification Front panel identification Item Description Power button with LED Reset button NMI button UID button USB 3.0 ports (2) Hard drives 16 / 17 / 18 / 19 / 20 / 21 / 22 / 23 Hard drives 8 / 9 / 10 / 11 / 12 / 13 / 14 / 15 Hard drives 0 / 1 / 2 / 3 / 4 / 5 / 6 / 7 System LEDs NOTE: *See “Front panel LED indicators”... - Page 8 Item Description Power button with LED Reset button NMI button UID button USB 3.0 ports (2) Hard drives 9 / 10 / 11 Hard drives 6 / 7 / 8 Hard drives 3 / 4 / 5 Hard drives 0 / 1 / 2 System LEDs NOTE: *See “Front panel LED indicators”...
-
Page 9: Rear Panel Identification
Rear panel identification Item Description Rear hard drive 0 / 1 PCIe add-on card slot 8 (Processor 1) PCIe add-on card slot 7 (Processor 1) PCIe add-on card slot 6 (Processor 1) PCIe add-on card slot 5 (Processor 1) PCIe add-on card slot 4 (Processor 0) PCIe add-on card slot 3 (Processor 0) PCIe add-on card slot 2 (Processor 0) PCIe add-on card slot 1 (Processor 0) -
Page 10: Server Components
PCIe Slot 4 (Processor 0) PCIe slot 2 (Processor 0) PCIe Slot 5 (Processor 1) PCIe slot 4C (Processor 1) PCIe Slot 6 (Processor 1) PCIe slot 4 (Processor 1) PCIe Slot 7 (Processor 1) PCIe slot 5 (Processor 1) PCIe Slot 8 (Processor 1) PCIe slot 5C (Processor 1) OCP Mezzanine Card Slot (Processor 0) -
Page 11: System Board Components
Item Description Processor 0 DIMM slots (12) System board PCIE add-on cards (8) Rear hard drive slots Redundant Power Supply Units (2) Processor 1 DIMM slots (12) Heatsink / Processor 1 socket System board components Item Description HDD back plane board connector Processor 0 DIMM slots (6) Component identification 11... - Page 12 Item Description Processor 0 socket Slimline SAS connector #0 (SATA0) Front panel connector Slimline sSAS connector #0 (SSATA0) Front panel USB 3.0 connector BMC firmware readiness LED TPM module connector OCP mezzanine connector #1 System battery Riser slot connector #2 sSATA connector #5 (for rear HDD) NCSI switch* Riser slot connector #3...
-
Page 13: Dimm Slot Locations
DIMM slot locations DIMM slots are numbered sequentially for each processor. Use the population order below for spare replacement. Memory Module Population Rules All DIMMs must be DDR4 DIMMs. DIMMs must be installed in the Processor 0 memory slots first. ... - Page 14 Mixing of LRDIMMs and RDIMMs is not allowed in the same channel. Mixing of non-3DS and 3DS LRDIMMs is not allowed in the same channel. Speed (MT/s); Voltage (V); Slots per Channel (SPC) & DIMMs per Channel (DPC) DIMM Capacity (GB) Rank Per 2 Slots per Channel...
-
Page 15: Fan Locations
Fan locations Component identification 15... -
Page 16: Status Led Indicators
Status LED indicators The status LED indicators aid in problem diagnosis by indicating the status of system components and operations of the server. Front panel LED indicators Item Function Status Status Description System is not powered on or in ACPI S5 (powered off) or S4 state (hibernate) Power System is in ACPI S1 state (Sleep) - Page 17 Item Function Status Status Description No HDD access or no HDD fault Blinking Green & HDD is rebuilding Amber HDD Status HDD fault Solid Amber HDD accessed Blinking Green HDD located Solid Green Item Function Status Status Description System is not powered on or in ACPI S5 (powered off) or S4 state (hibernate) Power System is in ACPI S1 state (Sleep)
- Page 18 Item Function Status Status Description Blinking Green & HDD is rebuilding Amber HDD fault Solid Amber HDD accessed Blinking Green HDD located Solid Green Hard drive LED1 behavior Present LED1 Locate HDD Fault Rebuilding RAID SKU Access Access) Green On (*1) Green Disk LED No RAID...
-
Page 19: Rear Panel Led Indicators
Rear panel LED indicators Item Function Status Status Description 10 Mbps data rate 1, 3, 100 Mbps data rate NIC Link (left) Green and 6 1 Gbps data rate Yellow No data transmission is occurring Data transmission is occurring Blinking Green 2, 4, NIC Link (right) and 5... -
Page 20: Power Down The Server
Operations Power down the server Before powering down the server for any upgrade or maintenance procedures, perform a backup of critical server data and programs. IMPORTANT: When the server is in standby mode, auxiliary power is still being provided to the system. -
Page 21: Remove The Access Panel
Remove the access panel To remove the component: Power down the server (on page 20). Disconnect all peripheral cables from the server. Remove the access panel: Loosen the thumbscrew at the rear of the system securing the access panel to the chassis. Remove the single screw at the front of the system securing the access panel to the chassis. -
Page 22: Install The Access Panel
Install the access panel WARNING: To reduce the risk of personal injury from hot surfaces, allow the internal system components to cool before touching them. CAUTION: To prevent damage to electrical components, properly ground the server before beginning any installation procedure. Improper grounding can cause ESD. CAUTION: Do not operate the server with the access panel open or removed. -
Page 23: Powering Up The Server
Powering on and selecting boot options in BIOS setup Press the Power On/Standby button. During the initial boot, press the Delete key in the HPE POST screen to enter the BIOS menu screen. By default, the menus are in the English language. -
Page 24: Software And Configuration Utilities
BMC RESTful API support HPE BMC BMC is a remote server management processor embedded on the system boards of HPE CL2200 Gen10 servers. BMC enables the monitoring and controlling of servers from remote locations. HPE BMC management is a powerful tool that provides multiple ways to configure, update, monitor, and repair servers remotely. -
Page 25: Bmc Restful Api Support
Password: Refer to the label on the server for password information BMC RESTful API support HPE BMC includes the RESTful API. The RESTful API is a management interface that server management tools can use to perform configuration, inventory, and monitoring of the CL2200 Gen10 server via BMC. - Page 26 Software and configuration utilities 26...
-
Page 27: Firmware Update
Firmware update To update the current firmware installed in your server, from the BMC menu bar, click Maintenance > Firmware Update. This wizard takes you through the process of updating the firmware. A reset of the box will automatically follow if the upgrade is completed or cancelled. An option to Preserve All Configuration is available. Enable it, if you wish to preserve configured settings through the upgrade. - Page 28 Click Preserve all Configuration to preserve all configuration. You can also customize which configuration is retained by clicking the Edit Preserve Configuration option. Software and configuration utilities 28...
- Page 29 Click Choose File to select firmware image, then click Upload. The following actions will be automatically executed: Closing all active client requests Preparing Device for Firmware Upgrade Uploading Firmware Image Note: A file upload pop-up will be displayed for http/https but in the case of tftp files, the file is automatically uploaded displaying the status of upload.
-
Page 30: Troubleshooting
Troubleshooting resources Troubleshooting provides procedures for resolving common problems and comprehensive courses of action for fault isolation and identification, issue resolution, and software maintenance on servers and server blades. To view the guide, select a language: English (http://www.hpe.com/support/CL2100-2200Gen10-TSG-en) Troubleshooting 30... -
Page 31: System Utilities
System utilities BIOS setup Accessing the BIOS setup menu screen To access the BIOS setup menu screen, turn on the server. If the server is already turned on, save your data and close all open applications, then restart the server. During POST, press Delete. -
Page 32: Navigating The Bios Setup Menu Screen
Navigating the BIOS setup menu screen Use the keys listed on the bottom right of the Setup screen to work your way through the various BIOS menu and submenu screens. The table below lists these keys and their respective functions. Function Move the cursor to the menu screen you want. -
Page 33: Main Menu
BIOS setup menu screen NOTE: The screenshots used in this section are for illustration only. The values displayed may not be the same as those in your server. In the descriptive tables following each of the menu screen illustrations, settings in boldface are the default and suggested settings. - Page 34 Parameter Description System Language Sets the system language. Sets the system date. System Date Sets the system time. System Time System utilities 34...
-
Page 35: Advanced Menu
Advanced menu Parameter Description Configure the iSCSI parameters. iSCSI Configuration Manage Intel® Virtual RAID on the CPU Intel® Virtual RAID on CPU LAN Port 1 Configuration. Intel® I350 Gigabit Network Connection VLAN Configuration VLAN Configuration LAN Port 2 Configuration. Intel® I350 Gigabit Network Connection LSI MegaRAID Configuration Utility RAID Configuration Trusted Computing Setting. -
Page 36: Iscsi Configuration Menu
iSCSI Configuration menu Parameter Description The worldwide unique name of iSCSI Initiator. Only IQN format is iSCSI Initiator Name accepted. Range is from 4 to 223. System utilities 36... - Page 37 Intel® Virtual RAID on CPU (Optional) Parameter Description Select to see more information about the Intel VMD controllers. All Intel VMD Controllers System utilities 37...
- Page 38 Intel® I350 Gigabit Network Connection Parameter Description Network Interface Controller configuration. NIC Configuration Identifies the physical network port by blinking the associated LED. Blink LEDs Press the numeric keys to adjust desired values. System utilities 38...
-
Page 39: Vlan Configuration
VLAN Configuration Parameter Description VLAN Configuration Enter Configuration Menu System utilities 39... - Page 40 LSI MegaRAID Configuration Utility Parameter Description Displays configuration options. Configuration Management Controller configuration. Controller Management Virtual drive configuration. Virtual Drive Management Drive configuration. Drive Management Basic hardware status and configuration. Hardware Components System utilities 40...
-
Page 41: Trusted Computing
Trusted Computing Parameter Description Value Enable/Disable Security Device. NOTE: Your computer will Enable Security Device Support reboot during restart in order to change State of the Device Disable System utilities 41... - Page 42 Serial Port Console Redirection menu Parameter Description Value Enable/Disable Console redirection function Enabled Console Redirection Disabled This setting specifies the host computer and the remote computer (which the Console Redirection Settings user is using) will exchange data. Both computers should have the same or Legacy Console Redirection compatible settings.
- Page 43 SIO Configuration menu Parameter Description View and set basic properties of the SIO logical device. Like IO Base, IRQ Serial Port 1/2 Range, DMA Channel, and Device Mode. System utilities 43...
- Page 44 PCI Subsystem Settings menu Parameter Description Value PCI Express Slot #1/2/3/4/5/5C/6/7 Enable/Disable PCI-Express slot I/O ROM Enabled Disabled Enable/Disable the onboard LAN1 devices Enabled Onboard LAN1 Controller Disabled Enable/Disable the onboard LAN2 devices Enabled Onboard LAN2 Controller Disabled Enable/Disable the onboard LAN1 devices, and initializes Enabled Onboard LAN1 I/O ROM device expansion ROM.
- Page 45 Network Stack Configuration menu Parameter Description Value Enable/Disable UEFI Network Stack function. Enabled Network Stack Disabled Enable Ipv4 PXE Boot Support. If disabled IPV4 PXE boot Enabled Ipv4 PXE Support option will not be created. Disabled Enable/Disable Ipv4 HTTP feature. Enabled Ipv4 HTTP Support Disabled...
- Page 46 Post Report Configuration menu Parameter Description Value Enable/Disable POST error message support. Enabled Post Error Message Disabled System utilities 46...
- Page 47 NVMe Configuration menu Parameter Description Shows information on NVMe devices installed NVMe configuration System utilities 47...
-
Page 48: Usb Configuration
USB Configuration Parameter Description Value Shows information on USB devices installed USB Configuration Enable/Disable XHCI Hand-off support. Enabled XHCI Hand-off This is a workaround for OS without XHCI hand-off support. Disabled The XHCI ownership change should be claimed by the XHCI driver. -
Page 49: Chipset Configuration
Chipset Configuration Parameter Description Value Defines the power state to resume to after a system Last State Restore on AC Power Loss shutdown that is due to an interruption in AC power. Stay Off Options: Power On LAST STATE - The system will return to the active power state prior to shutdown. -
Page 50: Chipset Menu
Chipset menu Parameter Description Configure the processor. Processor Configuration Configure the Common RefCode. Common RefCode Configuration Configure the UPI. UPI Configuration Configure the memory. Memory Configuration Configure the IIO IIO Configuration Configure the Advanced Power Management settings. Advanced Power Management Configuration Configure the PCH. -
Page 51: Server Management Menu
Server Management menu Parameter Description Value Enable/Disable FRB-2 timer (POST timer). Enabled FRB-2 Timer Disabled Configure the FRB-2 timer 3 minutes FRB-2 Timer timeout 4 minutes 5 minutes 6 minutes Configure the FRB-2 timer policy Do Nothing FRB-2 Timer Policy Reset Power Down Enable/Disable OS watchdog timer. -
Page 52: Security Menu
Security menu Parameter Description Set the administrator’s password. Administrator Password Set the user’s password. User Password Secure Boot Select to configure the secure boot function. System utilities 52... -
Page 53: Boot Menu
Boot menu Parameter Description Value Boot Configuration Set the number of seconds to wait for setup activation key. 1 ~ 65535 Setup Prompt Timeout Select to enable or disable the Num-Lock key during boot. Bootup NumLock State When enabled, BIOS will show a full screen logo when Enabled Quiet Boot booting;... -
Page 54: Save & Exit Menu
Save & Exit menu Parameter Description Save Options Save Changes and Exit Save changes made and exit system setup. Keyboard shortcut: F4. Discard Changes and Exit Discard changes made and exit system setup. Keyboard shortcut: Esc. Save Changes and Reset Save changes made and restart the system. -
Page 55: Spare Parts Catalog
For more information about the Hewlett Packard Enterprise CSR program, contact your local service provider. For the North American program, go to the Hewlett Packard Enterprise CSR website (http://www.hpe.com/support/selfrepair). Parts only warranty service Your Hewlett Packard Enterprise Limited Warranty may include a parts only warranty service. Under the terms of parts only warranty service, Hewlett Packard Enterprise will provide replacement parts free of charge. -
Page 56: System Components
System components Hewlett Packard Enterprise continually improves and changes product parts. For complete and current supported parts information, see the Hewlett Packard Enterprise PartSurfer website (http://www.hpe.com/info/partssurfer). Item Description Spare part Customer self repair number Front Panel and USB P02118-001 Mandatory... - Page 57 Item Description Spare part Customer self repair number Rail Kit * P02128-001 Mandatory (on page 102) SAS 9400-8i HBA Card* P02145-001 Mandatory (on page 72) SAS 9400-16i HBA Card* P02146-001 Mandatory (on page 72) 9460-8i RAID Controller* P02181-001 Mandatory (on page 72) 9460-16i RAID Controller* P02182-001 Mandatory...
- Page 58 Item Description Spare part Customer self repair number Mandatory (on page126) Slimline SAS 800mm, CL2200 Gen10 LFF Mandatory (on page 126) Slimline SAS 800mm, CL2200 Gen10 SFF Mandatory (on page126) Slimline SAS 600mm, CL2xxx Gen10 Miscellaneous Parts* a) Hard Drive Trays P02134-001 ...
-
Page 59: Hood Label Information
Remotely: Command: ipmitool –I lanplus -H 10.32.x.x –U admin –P admin fru print 0 Hood Label Information CL2200 Gen10 SFF Vendor P/N SPS P/N CFP2001 (Original) / 5CFP2001NR-HP-10A (New) 25CR5-700604-Y4R P01540-001 P02118-001 25CFB-103K00-L5R 6N0ASP031PR-HP-100 P01837-001 P02123-001 6N0ASP030PR-HP-100 P01247-001 P02121-001 5CRS2132NR-00-10B (Original) / 5CRS2132NR-HP-10A (New) P01461-001 P02129-001 5CRS2131NR-00-10B (Original) / 5CRS2131NR-HP-10A (New) - Page 60 25EP0-212002-F3S 25EP0-212003-D0S P01502-001 P02127-001 25EP0-212001-D0S 25EK3-R18N01-I0R P01210-001 P02134-001 25EK3-H23001-I0R P01209-001 P02134-001 25CRI-550301-Y4R P02208-001 P02180-001 25CRI-370320-Y4R P01199-001 P02132-001 25CRI-370320-B1R 25CRI-300309-Y4R P02204-001 P02178-001 25CRI-220302-Y4R P01468-001 P02132-001 25CRI-220302-B1R 25CR5-550700-Y4R P01467-001 P02132-001 25CR5-250800-Y4R P01198-001 P02132-001 25CFM-850820-A4R P02202-001 P02178-001 25CFM-800821-A4R P02423-001 P02133-001 25CFM-750820-A4R P02203-001 P02178-001 25CFM-400820-A4R P01201-001 P02180-001...
- Page 61 25EP0-212002-F3S 25EP0-212003-D0S P01502-001 P02127-001 25EP0-212001-D0S 25EK3-R18005-I0R P01249-001 P02134-001 25EK3-H23001-I0R P01209-001 P02134-001 25CRI-550301-Y4R P02208-001 P02180-001 25CRI-370320-Y4R P01199-001 P02132-001 25CRI-370320-B1R 25CRI-300309-Y4R P02204-001 P02178-001 25CRI-220302-Y4R P01468-001 P02132-001 25CRI-220302-B1R 25CR5-550700-Y4R P01467-001 P02132-001 25CR5-250800-Y4R P01198-001 P02132-001 25CFM-850820-A4R P02202-001 P02178-001 25CFM-800820-A4R P01245-001 P02133-001 25CFM-750820-A4R P02203-001 P02178-001 25CFM-700820-A4R P01244-001 P02133-001...
-
Page 62: Removal And Replacement Procedures
Removal and replacement procedures Required tools You need the following items for some procedures: T-30 Torx screwdriver 1/4" Flat-bladed screwdriver PH-2 Phillips-head screwdriver Safety considerations Before performing service procedures, review all the safety information. Preventing electrostatic discharge To prevent damaging the system, be aware of the precautions you must follow when setting up the system or handling parts. -
Page 63: Warnings And Cautions
This symbol indicates that to avoid the risk of personal injury, be careful when accessing the inside of the system. Warnings and cautions Before installing a server, be sure that you understand the following warnings and cautions. WARNING: To reduce the risk of electric shock or damage to the equipment: ... -
Page 64: Storage (Sff)
Storage (SFF) WARNING: To reduce the risk of personal injury from hot surfaces, allow the drives and the internal system components to cool before touching them. To install the component: Remove the hard drive carrier from the chassis: Press the hard drive carrier handle release button to release the handle. Pull the carrier handle to remove the hard drive carrier. - Page 65 Place the hard drive into the hard drive carrier and secure it with four screws. To replace the component, reverse the removal procedure. Removal and replacement procedures 65...
-
Page 66: Storage (Lff)
Storage (LFF) WARNING: To reduce the risk of personal injury from hot surfaces, allow the drives and the internal system components to cool before touching them. To install the component: Remove the hard drive carrier from the chassis: Press the hard drive carrier handle release button to release the handle. Pull the carrier handle to remove the hard drive carrier. - Page 67 Place the hard drive into the hard drive carrier and secure it with four screws. To replace the component, reverse the removal procedure. Removal and replacement procedures 67...
-
Page 68: Power Supply
Power supply WARNING: To reduce the risk of personal injury from hot surfaces, allow the drives and the internal system components to cool before touching them. To remove the component: Power down the server (on page 20). Disconnect all peripheral cables from the server. Remove the power supply. -
Page 69: Fan Duct
Fan duct WARNING: To reduce the risk of personal injury from hot surfaces, allow the drives and the internal system components to cool before touching them. To remove the component: Power down the server (on page 20). Disconnect all peripheral cables from the server. Remove the access panel (on page 21). -
Page 70: Riser Cage
Riser cage WARNING: To reduce the risk of personal injury from hot surfaces, allow the drives and the internal system components to cool before touching them. To remove the component: Power down the server (on page 20). Disconnect all peripheral cables from the server. Remove the access panel (on page 21). - Page 71 Remove the single screw at the rear of the system. To replace the component, reverse the removal procedure. Removal and replacement procedures 71...
-
Page 72: Pcie Add-On Card
PCIe add-on card WARNING: To reduce the risk of personal injury from hot surfaces, allow the drives and the internal system components to cool before touching them. To install the component: Power down the server (on page 20). Disconnect all peripheral cables from the server. Remove the access panel (on page 21). - Page 73 Install the PCIe add-on card. To remove the component, reverse the installation procedure. Removal and replacement procedures 73...
-
Page 74: Memory Options
Memory options The memory controller is integrated in the processor: Supports DDR4 2666/2400/2133 MT/s RDIMM (up to 32GB) and LRDIMM (up to 64GB) memory modules. Support single-rank (SR), dual-rank (DR) and quad-rank (QR) DIMM modules. Per processor: [For RDIMM]: 384 GB maximum memory (12 x 32GB RDIMM) [For LRDIMM]: 768 GB maximum memory (12 x 64GB LRDIMM) ... -
Page 75: Dimm Identification
SPD Revision For more information about product features, specifications, options, configurations, and compatibility, see the product QuickSpecs on the Hewlett Packard Enterprise website (http://www.hpe.com/info/qs). For DIMM spare replacement, install the DIMMs per slot number as instructed by the system software. -
Page 76: Replacing The Dimm
Replacing the DIMM WARNING: To reduce the risk of personal injury from hot surfaces, allow the drives and the internal system components to cool before touching them. CAUTION: To avoid ESD damage, when removing electrostatic-sensitive components from the failed system board, place the components on a static-dissipating work surface or inside separate antistatic bags. -
Page 77: Heatsink And Processor
Heatsink and processor WARNING: To reduce the risk of personal injury from hot surfaces, allow the heatsink to cool before touching it. CAUTION: To avoid damage to the heatsink, do not touch the edge where the heatsink aligns with the water wall. CAUTION: To avoid damage to the processor or system board, only authorized personnel should attempt to replace or install the processor in this server. - Page 78 Release the thermal grease adhesion between the processor assembly and heatsink: Locate the TIM (thermal interface media) breaker slot between the processor assembly and heatsink. The slot is across from the Pin 1 indicator, near the corner. Insert a 1/4" flathead screwdriver into the slot. Be sure that the screwdriver is between the processor assembly and the heatsink.
- Page 79 Using an alcohol wipe, remove the existing thermal grease from the processor and heatsink. Allow the alcohol to evaporate before continuing. If reusing the heatsink, please follow the Processor Spare Kit Installation Instructions to apply thermal grease to the processor. Use the full contents of the thermal grease syringe. If installing a new heatsink, the thermal grease is pre-applied.
- Page 80 Place the heatsink (with processor) onto the processor slot, making sure the pegs on the processor slot fit into the openings in the heatsink. Secure the four screws on the heatsink in sequence (1 > 2 > 3 > 4). Removal and replacement procedures 80...
-
Page 81: Fan Module
Fan module WARNING: To reduce the risk of personal injury from hot surfaces, allow the drives and the internal system components to cool before touching them. To remove the component: Power down the server (on page 20). Disconnect all peripheral cables from the server. Remove the access panel (on page 21). -
Page 82: System Battery
System battery WARNING: To reduce the risk of personal injury from hot surfaces, allow the drives and the internal system components to cool before touching them. WARNING: The computer contains an internal lithium manganese dioxide, a vanadium pentoxide, or an alkaline battery pack. A risk of fire and burns exists if the battery pack is not properly handled. -
Page 83: System Board
System board WARNING: To reduce the risk of personal injury from hot surfaces, allow the drives and the internal system components to cool before touching them. CAUTION: To avoid damage to the processor and system board, only authorized personnel should attempt to replace or install the processor in this server. CAUTION: To avoid ESD damage, when removing electrostatic-sensitive components from the failed system board, place the components on a static-dissipating work surface or inside separate antistatic bags. - Page 84 Remove the system board. Remove the four screws securing the system board to the system. Carefully slide the system board towards the front of the system. Lift the system board out the system. To replace the component, reverse the removal procedure. Removal and replacement procedures 84...
-
Page 85: Rear Backplane
Rear backplane WARNING: To reduce the risk of personal injury from hot surfaces, allow the drives and the internal system components to cool before touching them. Power down the server (on page 20). Disconnect all peripheral cables from the server. Remove the access panel (on page 21). - Page 86 Remove the rear backplane from the system. To replace the component, reverse the removal procedure. Removal and replacement procedures 86...
-
Page 87: Front Drive Cage Backplane (Sff)
Front drive cage backplane (SFF) WARNING: To reduce the risk of personal injury from hot surfaces, allow the drives and the internal system components to cool before touching them. Power down the server (on page 20). Disconnect all peripheral cables from the server. Remove the access panel (on page 21). - Page 88 Remove the LED and USB covers. Remove the 4 screws securing the LED and USB covers to the system. Pull and remove the LED and USB covers. Removal and replacement procedures 88...
- Page 89 Remove the hard drive cage Remove the 12 screws securing the hard drive cage. Slide the hard drive cage forward then lift and remove the hard drive cage. Removal and replacement procedures 89...
- Page 90 Remove the front drive cage backplane. Remove the 4 screws securing the front drive cage backplane to the hard drive cage. Remove the front drive cage backplane from the hard drive cage. To replace the component, reverse the removal procedure. Removal and replacement procedures 90...
-
Page 91: Front Drive Cage Backplane (Lff)
Front drive cage backplane (LFF) WARNING: To reduce the risk of personal injury from hot surfaces, allow the drives and the internal system components to cool before touching them. Power down the server (on page 20). Disconnect all peripheral cables from the server. Remove the access panel (on page 21). - Page 92 Remove the front drive cage backplane assembly from the system. Remove 3 screws securing the front drive cage backplane to the system (see image below for screw location). Lift the front drive cage backplane assembly from the system. Removal and replacement procedures 92...
- Page 93 Remove 2 screws securing the front drive cage backplane board to the frame and then remove the front drive cage backplane board. NOTE: If you are removing the front drive cage backplane from the system in order to access other parts you do not need to complete this step.
-
Page 94: Front Panel And Usb (Sff)
Front panel and USB (SFF) WARNING: To reduce the risk of personal injury from hot surfaces, allow the drives and the internal system components to cool before touching them. Power down the server (on page 20). Disconnect all peripheral cables from the server. Remove the access panel (on page 21). - Page 95 Remove the front access panel. Remove 5 screws on securing the front access panel to the system. Slide the front access panel backward then lift and remove the front access panel. Remove the LED and USB covers. Remove the 4 screws securing the LED and USB covers to the system. Pull and remove the LED and USB covers.
- Page 96 Remove the hard drive cage Remove the 12 screws securing the hard drive cage. Slide the hard drive cage forward then lift and remove the hard drive cage. Remove the LED and USB boards. Remove the 4 screws securing the LED and USB boards to the system. Pull and remove the LED and USB boards.
-
Page 97: Front Panel And Usb (Lff)
Front panel and USB (LFF) WARNING: To reduce the risk of personal injury from hot surfaces, allow the drives and the internal system components to cool before touching them. Power down the server (on page 20). Disconnect all peripheral cables from the server. Remove the access panel (on page 21). - Page 98 Remove the LED and USB covers. Remove the 4 screws securing the LED and USB covers to the system. Pull and remove the LED and USB covers. Remove the LED and USB boards. Remove the 4 screws securing the LED and USB boards to the system. Pull and remove the LED and USB boards.
-
Page 99: Fan Cage (Sff)
Fan cage (SFF) WARNING: To reduce the risk of personal injury from hot surfaces, allow the drives and the internal system components to cool before touching them. Power down the server (on page 20). Disconnect all peripheral cables from the server. Remove the access panel (on page 21). - Page 100 Remove all fans from the system (on page 81). Remove the fan cage from the system. Remove the 6 screws securing the fan cage to the system. Lift and remove the fan cage. To replace the component, reverse the removal procedure. Removal and replacement procedures 100...
-
Page 101: Fan Cage (Lff)
Fan cage (LFF) WARNING: To reduce the risk of personal injury from hot surfaces, allow the drives and the internal system components to cool before touching them. Power down the server (on page 20). Disconnect all peripheral cables from the server. Remove the access panel (on page 21). -
Page 102: Rail Kit
Rail kit WARNING: To reduce the risk of personal injury from hot surfaces, allow the drives and the internal system components to cool before touching them. NOTE: The images below are for reference only; the actual product may vary. To install the component: Power down the server (on page 20). - Page 103 Remove the inner rail from the outer rail/bracket assembly. Extend the inner rail until you hear a click. WARNING: When extending the inner rail, ensure that the ball bearings lock in place. If the they are not locked in placed you will be able to properly insert the chassis. Pull the release tab forward then remove the inner rail.
- Page 104 Secure the inner rail onto the chassis with 4 screws. Affix the outer rail/bracket assembly to the frame. Removal and replacement procedures 104...
- Page 105 Insert the chassis into the outer rail. Ensure the ball bearing retainer is located at the front of the rail. Insert the chassis into the outer rails. Removal and replacement procedures 105...
- Page 106 WARNING: When inserting the chassis into the outer rails of the rack, hold the chassis securely and push the chassis in for at least 20 cm (200mm) before loosening to ensure proper installation, as seen in the image below. Continue pushing the chassis into the outer rail until you hit a stop, then pull/push the release tab on the inner rails.
- Page 107 Secure the chassis using the thumbnail screws on the front, and the supplied screws in the rear. To remove the component, reverse the installation procedure. Removal and replacement procedures 107...
-
Page 108: Ocp Mezzanine Card (Optional)
Bracket OCP Card Part Number Name 25HB1-R18106-I0R PA-01 INTEL ; HPE CL Eth 1x25Gb XXV71 OCP FIO Adptr ; XXV710DA1OCPG 25HB1-R18107-I0R PA-02 Mellanox : HPE CL Eth 1x50Gb MLX4Lx OCP FIO Adptr ; MCX4431A-GCAN 25HB1-R18109-I0R PA-03 INTEL : HPE CL Eth 2x25Gb XXV71 OCP FIO Adptr ; XXV710DA2OCPG1 Qlogic : HPE CL Eth 2x10Gb Q41132 OCP Adptr ;... - Page 109 Check the inside of the bracket for the bracket’s name to match the correct bracket. Install the OCP mezzanine card bracket. Install the OCP mezzanine card into the system: Insert the OCP mezzanine card into the slot at the rear of the system. CAUTION: When inserting the MCX4421 and MCX4431 OCP mezzanine cards, users will need to press and squeeze the foam at the rear of the card to fit the card into the slots along the rear wall of the chassis.
- Page 110 Secure the OCP mezzanine card to the chassis with three screws. To replace the component, reverse the removal procedure. Removal and replacement procedures 110...
-
Page 111: Tpm Module (Optional)
TPM module (optional) WARNING: To reduce the risk of personal injury from hot surfaces, allow the drives and the internal system components to cool before touching them. To install the component: Power down the server (on page 20). Disconnect all peripheral cables from the server. Remove the access panel (on page 21). -
Page 112: Vroc Upgrade Module (Optional)
VROC upgrade module (optional) WARNING: To reduce the risk of personal injury from hot surfaces, allow the drives and the internal system components to cool before touching them. Power down the server (on page 20). Disconnect all peripheral cables from the server. Remove the access panel (on page 21). -
Page 113: Sas Expansion Enablement Fio Kit (Optional)
SAS expansion enablement FIO kit (optional) WARNING: To reduce the risk of personal injury from hot surfaces, allow the drives and the internal system components to cool before touching them. To install the component: Power down the server (on page 20). Disconnect all peripheral cables from the server. - Page 114 Install the expander PCB tray. Turn the expander PCB tray arm to a 45-degree angle towards the front of the system. Removal and replacement procedures 114...
- Page 115 Install the SAS card into the bottom slot (PCIe add-on card slot 1) on the riser cage. Install the riser cage with SAS card into the system. Secure the riser cage to the system using the thumbnail screws described in the Riser cage section on page 70.
- Page 116 To remove the component, reverse the installation procedure. Removal and replacement procedures 116...
-
Page 117: M.2 Enablement Kit (Optional)
M.2 enablement kit (optional) WARNING: To reduce the risk of personal injury from hot surfaces, allow the drives and the internal system components to cool before touching them. To install the component: Power down the server (on page 20). Disconnect all peripheral cables from the server. Remove the access panel (on page 21). - Page 118 Secure the M.2 SSD to the M.2 card using a single screw. Install the M.2 card into the bottom slot (PCIe add-on card slot 3) on the riser cage. Removal and replacement procedures 118...
- Page 119 Install the riser cage with M.2 card into the system. Secure the riser cage to the system using the thumbnail screws described in the Riser cage section on page 70. To remove the component, reverse the installation procedure. Removal and replacement procedures 119...
-
Page 120: Nvme Enablement Fio Kit (Optional)
NVMe enablement FIO kit (optional) WARNING: To reduce the risk of personal injury from hot surfaces, allow the drives and the internal system components to cool before touching them. To install the component: Power down the server (on page 20). Disconnect all peripheral cables from the server. - Page 121 Install the expander PCB tray. Turn the expander PCB tray arm to a 45-degree angle towards the front of the system. Install the OCP Card (on page 102). Connect and route the NVMe cables (on page 138). To remove the component, reverse the installation procedure. Removal and replacement procedures 121...
-
Page 122: Raid Controller Super Capacitator (Optional)
RAID controller super capacitator (optional) WARNING: To reduce the risk of personal injury from hot surfaces, allow the drives and the internal system components to cool before touching them. To install the component: Power down the server (on page 20). Disconnect all peripheral cables from the server. - Page 123 Install the riser cage with the RAID controller super capacitator card into the system. Secure the riser cage to the system using the thumbnail screws described in the Riser cage section on page 70. Connect and route the RAID controller super capacitator card (on page 139). To remove the component, reverse the installation procedure.
-
Page 124: Cabling Overview
Cabling Cabling overview This section provides guidelines to help make informed decisions about cabling the server and hardware options to optimize performance. For information on cabling peripheral components, see the white paper on high-density deployment at the Hewlett Packard Enterprise website. CAUTION: When routing cables, always be sure that the cables are not in a position where they can be pinched or crimped. -
Page 125: Front Hdd Back Plane Board Signal
Front HDD Back Plane Board Signal Description Spare part number M/B Location BPB Location P02132-001 BP_1 BP_1 Power and Signal Cable Kit Rear HDD Back Plane Board Power Description Spare part number M/B Location BPB Location P02132-001 ATX2 BPB_PWR Power and Signal Cable Kit Cabling 125... -
Page 126: Rear Hdd Back Plane Board Signal
Rear HDD Back Plane Board Signal Description Spare part number Front BPB Rear BPB Location Location P02132-001 SERIES SERIES Power and Signal Cable Kit On-Board SATA to Rear HDD Back Plane Board Cabling 126... -
Page 127: Slimline Sas Hd To Slimline 8I Raid Card
Description Spare part number M/B Location BPB Location P02132-001 SSATA 4 SATA0 Power and Signal Cable Kit SSATA 5 Slimline SAS HD to Slimline 8i RAID Card Description Spare part number Card Location BPB Location SATA0 P02133-001 Slimline Cable Kit (Green) SATA1 P02133-001 Slimline Cable Kit (Turqouise) -
Page 128: Slimline Sas Hd To Slimline 8I + 8I Raid Card
Slimline SAS HD to Slimline 8i + 8i RAID Card Description Spare part number Card Location BPB Location Riser Card 1: C0 SATA0 P02133-001 Slimline Cable Kit (Green) Riser Card 1: C1 SATA1 P02133-001 Slimline Cable Kit (Turqouise) Riser Card 2: C0 SATA2 P02133-001 Slimline Cable Kit (Purple) Riser Card 2: C1 SATA3... -
Page 129: Slimline Sas Hd To Slimline 16I Raid Card
Slimline SAS HD to Slimline 16i RAID Card Description Spare part number Card Location BPB Location Riser Card 1: C0 SATA0 P02133-001 Slimline Cable Kit (Green) Riser Card 1: C1 SATA1 P02133-001 Slimline Cable Kit (Turqouise) Riser Card 1: C2 SATA2 P02133-001 Slimline Cable Kit (Purple) Riser Card 1: C3 SATA3... -
Page 130: Slimline Sas Hd To Slimline 8I + 16I Raid Card
Slimline SAS HD to Slimline 8i + 16i RAID Card Description Spare part number Card Location BPB Location Riser Card 1: C0 SATA0 P02133-001 Slimline Cable Kit (Green) Riser Card 1: C1 SATA1 P02133-001 Slimline Cable Kit (Turqouise) Riser Card 2: C0 SATA2 P02133-001 Slimline Cable Kit (Purple) Riser Card 2: C1 SATA3... -
Page 131: X Sas Kit (Optional)
24x SAS Kit (Optional) Description Spare part number Board BPB Location Location Power / Slimline SAS Cables SATA0 P02180-001 SAS_0 (Green) Power / Slimline SAS Cables SATA1 P02180-001 SAS_1 (Turqouise) Power / Slimline SAS Cables SATA2 P02180-001 SAS_2 (Purple) Power / Slimline SAS Cables SATA3 P02180-001 SAS_3... -
Page 132: Storage Cabling (Lff Only)
Storage Cabling (LFF only) Front HDD Back Plane Board Power Description Spare part number M/B Location BPB Location P02132-001 ATX1 ATX1 Power and Signal Cable Kit Front HDD Back Plane Board Signal Cabling 132... -
Page 133: On-Board Sata To Front Hdd Back Plane Board
Description Spare part number M/B Location BPB Location P02132-001 BP_1 BP_1 Power and Signal Cable Kit On-Board SATA to Front HDD Back Plane Board Description Spare part number M/B Location BPB Location SATA0 P02133-001 SATA0 Slimline Cable Kit (Green) SATA1 P02133-001 SATA1 Slimline Cable Kit (Turquiose) -
Page 134: Rear Hdd Back Plane Board Power
Rear HDD Back Plane Board Power Description Spare part number M/B Location BPB Location P02132-001 ATX2 BPB_PWR Power and Signal Cable Kit Rear HDD Back Plane Board Signal Description Spare part number Front BPB Rear BPB Location Location P02132-001 SERIES SERIES Power and Signal Cable Kit Cabling 134... -
Page 135: System Fans
On-Board SATA to Rear HDD Back Plane Board Description Spare part number M/B Location BPB Location P02132-001 SSATA 4 SATA0 Power and Signal Cable Kit SSATA 5 System Cabling (SFF and LFF) System Fans Cabling 135... -
Page 136: Front Panel Board
Description Spare part number M/B Location BPB Location FAN1_A/FAN1_B FAN2_A/FAN2_B P02123-001 Fan Cage FAN3_A/FAN3_B FAN4_A/FAN4_B Front Panel Board Description Spare part number M/B Location FP Location FP_1 P02118-001 FP_1 Front Panel and USB Cabling 136... -
Page 137: Front Usb 3.0
Front USB 3.0 Description Spare part number M/B Location FP Location P02118-001 F_USB1 Front Panel and USB Cabling 137... -
Page 138: System Cabling (Sff Only)
System Cabling (SFF only) 4x U.2 NVMe Kit (Optional) Description Spare part number Card Location BPB Location U.2H Power / Slimline NVMe cables P02178-001 U.2A (Green) U.2G Power / Slimline NVMe cables P02178-001 U.2B (Turqouise) U.2F Power / Slimline NVMe cables P02178-001 U.2C (Purple) -
Page 139: Raid Controller Super Capacitor Cvpm05 (Optional)
RAID Controller Super Capacitor CVPM05 (Optional) NOTE: For detailed installation instructions, please refer to the Broadcom website. Description Spare part number Module Board Location Location BBU PW P03112-001 RAID Controller Super Capacitor Connector Cabling 139... -
Page 140: Raid Controller Super Capacitor Cvpm05 X 2 (Optional)
RAID Controller Super Capacitor CVPM05 x 2 (Optional) NOTE: For detailed installation instructions, please refer to the Broadcom website. Description Spare part number Module Board Location Location BBU PW RAID Controller Super Capacitor P03112-001 Connector (Green) BBU PW RAID Controller Super Capacitor P03112-001 Connector (Turquoise) -
Page 141: Warranty Information
Warranty and regulatory information Warranty information HPE Cloudline Servers (http://www.hpe.com/support/cloudline_warranty_en) Regulatory information Safety and regulatory compliance For important safety, environmental, and regulatory information, see Safety and Compliance Information for Server, Storage, Power, Networking, and Rack Products, available at the Hewlett Packard Enterprise website (http://www.hpe.com/support/Safety-Compliance-EnterpriseProducts). -
Page 142: Turkey Rohs Material Content Declaration
Belarus: Kazakhstan: Manufacturing date: The manufacturing date is defined by the serial number. CCSYWWZZZZ (serial number format for this product) Valid date formats include: YWW, where Y indicates the year counting from within each new decade, with 2000 as the starting point;... -
Page 143: Electrostatic Discharge
Electrostatic discharge Preventing electrostatic discharge To prevent damaging the system, be aware of the precautions you must follow when setting up the system or handling parts. A discharge of static electricity from a finger or other conductor may damage system boards or other static-sensitive devices. This type of damage may reduce the life expectancy of the device. -
Page 144: Specifications
Specifications Environmental specifications Specification Value Temperature range* 10C to 35C (50F to 95F) Operating -30C to 60C (-22F to 140F) Non-Operating Relative humidity (non-condensing)** 8% to 90% Operating 5% to 95% Non-operating * All temperature ratings shown are for sea level. An altitude derating of 1°C per 305 m (1.8°F per 1,000 ft) to 3,050 m (10,000 ft) is applicable. -
Page 145: Support And Other Resources
Hewlett Packard Enterprise Support Center. You must have an HP Passport set up with relevant entitlements. Websites Hewlett Packard Enterprise Information Library (http://www.hpe.com/info/enterprise/docs) Hewlett Packard Enterprise Support Center (http://www.hpe.com/support/hpesc) Contact Hewlett Packard Enterprise Worldwide (http://www.hpe.com/assistance) -
Page 146: Customer Self Repair
Single Point of Connectivity Knowledge (SPOCK) Storage compatibility matrix (http://www.hpe.com/storage/spock) Storage white papers and analyst reports (http://www.hpe.com/storage/whitepapers) Customer Self Repair Hewlett Packard Enterprise products are designed with many Customer Self Repair (CSR) parts to minimize repair time and allow for greater flexibility in performing defective parts replacement. If during... - Page 147 Pour plus d'informations sur le programme CSR de Hewlett Packard Enterprise, contactez votre Mainteneur Agrée local. Pour plus d'informations sur ce programme en Amérique du Nord, consultez le site Web Hewlett Packard Enterprise (http://www.hpe.com/support/selfrepair). Riparazione da parte del cliente Per abbreviare i tempi di riparazione e garantire una maggiore flessibilità nella sostituzione di parti difettose, i prodotti Hewlett Packard Enterprise sono realizzati con numerosi componenti che possono essere riparati direttamente dal cliente (CSR, Customer Self Repair).
- Page 148 Weitere Informationen über das Hewlett Packard Enterprise Customer Self Repair Programm erhalten Sie von Ihrem Servicepartner vor Ort. Informationen über das CSR-Programm in Nordamerika finden Sie auf der Hewlett Packard Enterprise Website unter (http://www.hpe.com/support/selfrepair). Reparaciones del propio cliente Los productos de Hewlett Packard Enterprise incluyen muchos componentes que el propio usuario puede reemplazar (Customer Self Repair, CSR) para minimizar el tiempo de reparación y ofrecer una mayor...
- Page 149 Packard Enterprise, póngase en contacto con su proveedor de servicios local. Si está interesado en el programa para Norteamérica, visite la página web de Hewlett Packard Enterprise CSR (http://www.hpe.com/support/selfrepair). Customer Self Repair Veel onderdelen in Hewlett Packard Enterprise producten zijn door de klant zelf te repareren, waardoor de reparatieduur tot een minimum beperkt kan blijven en de flexibiliteit in het vervangen van defecte onderdelen groter is.
- Page 150 Para obter mais informações sobre o programa de reparo feito pelo cliente da Hewlett Packard Enterprise, entre em contato com o fornecedor de serviços local. Para o programa norte-americano, visite o site da Hewlett Packard Enterprise (http://www.hpe.com/support/selfrepair). Support and other resources 150...
- Page 151 Support and other resources 151...
- Page 152 Support and other resources 152...
-
Page 153: Remote Support
Remote support and Proactive Care information HPE Get Connected (http://www.hpe.com/services/getconnected) HPE Proactive Care services (http://www.hpe.com/services/proactivecare) HPE Proactive Care service: Supported products list (http://www.hpe.com/services/proactivecaresupportedproducts) HPE Proactive Care advanced service: Supported products list (http://www.hpe.com/services/proactivecareadvancedsupportedproducts) Proactive Care customer information Proactive Care central (http://www.hpe.com/services/proactivecarecentral) Proactive Care service activation (http://www.hpe.com/services/proactivecarecentralgetstarted) -
Page 154: Acronyms And Abbreviations
Acronyms and abbreviations Customer Self Repair electrostatic discharge identification POST Power-On Self-Test redundant power supply SATA serial ATA UEFI Unified Extensible Firmware Interface unit identification Acronyms and abbreviations 154... -
Page 155: Documentation Feedback
Hewlett Packard Enterprise is committed to providing documentation that meets your needs. To help us improve the documentation, send any errors, suggestions, or comments to Documentation Feedback (mailto:docsfeedback@hpe.com). When submitting your feedback, include the document title, part number, edition, and publication date located on the front cover of the document. For online help content, include the product name, product version, help edition, and publication date located on the legal notices page. -
Page 156: Index
141 Hewlett Packard Enterprise website 145 components 7, 10, 11, 56 Hewlett Packard Enterprise, contacting 145 components, identification 7, 10, 11, 16 HPE BMC 24 configuration of system 24 configuration settings 23 Installing an operating system 23 contact information 145... - Page 157 power supply 68 Virtual Power button 20 powering down 20 powering up procedure 23 warnings 63 preparation procedures 20, 62 warranty 55, 141 warranty information 141 QuickSpecs 24, 75 website, Hewlett Packard Enterprise 145 regulatory compliance information 141 regulatory compliance notices 141 regulatory information 141 removal and replacement procedures 62 required tools 62...
Need help?
Do you have a question about the Cloudline CL2200 Gen10 and is the answer not in the manual?
Questions and answers