
Related Manuals for Kathrein UFSconnect 906


Summary of Contents for Kathrein UFSconnect 906
- Page 1 Operating Instructions Part 1 UFSconnect 906 Connection and set-up Englisch You will fi nd an english version of this document at: Vous trouverez la version française du document sur : IMPORTANT READ CAREFULLY BEFORE USE...
- Page 2 7.5.3.2 DiSEqC™1.3 ..........................28 7.5.4 LNB only ........................31 7.5.5 OneCable system ......................33 7.5.5.1 EXR .../EXU ... (Kathrein OneCable matrices) ................34 7.5.5.2 UAS 481 (Kathrein OneCable LNB) ....................37 7.5.5.3 User-defi ned ..........................38 Step 4: Channel Search .....................41 Step 5: Time setting ....................44 Step 6: Changes to the ASTRA channel list ............45...
- Page 3 Software update .................... 46 Network/Internet connection ............... 47 DHCP "On" ......................... 48 DHCP "Off" ........................ 48 Common Interface (CI) ................. 49 10.1 Inserting the Smartcard and the CI+/CI module ............. 49 UFSconnect ....................50 Accessories (not included in the product package) ......... 52 Troubleshooting, service ................
-
Page 4: Safety Instructions - Important Notes
Safety Instructions - Important Notes These two pages contain important information about the operation, installation location and connection of the unit. Read these instructions carefully before setting up the unit. Explanation of the symbols and notes The signal indicates a hazard with a medium degree Warning! of risk which, if it is not avoided, can result in death or severe injury. - Page 5 Cleaning Disconnect the mains plug before cleaning the unit. Use a dry cloth for cleaning. Only clean the surface. Never open the casing of the unit. Touching the parts inside the unit carries a risk of death due to electric shock! Warning! Moisture, direct sunlight, heat, naked fl...
- Page 6 Safety Instructions - Important Notes Earthing The antenna system must be earthed as specifi ed or equipotentially bonded. EN 60728/11 and any national regulations must be complied with. Risk of voltage surges due to lightning strikes! Caution! Batteries If your unit was supplied with batteries (e.g. for the remote control), take care that the batteries are not exposed to excessively high temperatures, direct sunshine or fi...
- Page 7 (e.g. changes to the menus and/or functions), if we believe it necessary we will make available new operating instructions for download at "www.kathrein.de". Make a note of the receiver's basic settings (these are set during fi rst installation), so you can restore them if necessary.
-
Page 8: Product Package
Product Package ► UFSconnect 906 ► 2 batteries AAA 1.5 V ► Remote control RC 678 ► Operating Instructions (Parts 1, 2 and 3) ► HDMI cable ► Safety instructions (multi-lingual) ► Power supply unit 230 V/12 V Graphic: Product Package... -
Page 9: Inserting Batteries In The Remote Control
Inserting batteries in the remote control Remove the cover on the rear of the remote control. Insert the two batteries supplied into the remote control. Ensure that the polarity of the batteries is correct. This is marked on the bottom of the battery compartment. -
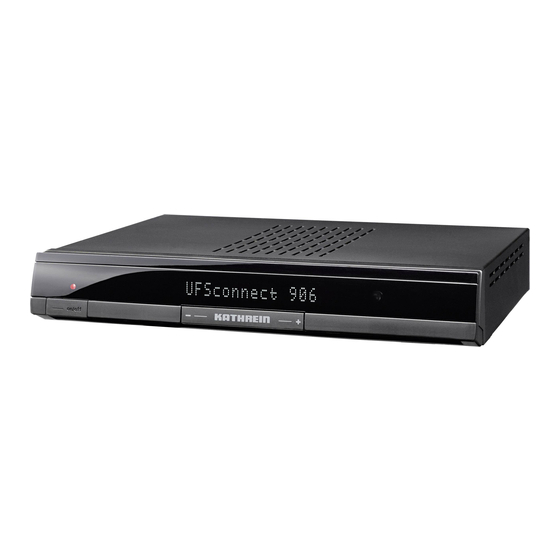
Page 10: Views Of The Receiver
Views of the receiver Graphic: Front view Graphic: Rear view 10 from 64... - Page 11 11 from 64...
-
Page 12: Connecting The Receiver
Connecting the receiver Connect the Sat IF input on the receiver to the satellite reception system. Use a coaxial cable with an F connector (see the illustration on the right). Graphic: F connector Cinch HDMI Graphic: Connection example Connection of the unit to the TV set Connect the HDMI socket of the satellite receiver to the HDMI socket of the TV set. -
Page 13: Audio Connection
Audio connection 6.2.1 Digital There are two ways you can access the digital audio. HDMI The stereo audio is transmitted to your TV set via the HDMI interface. If your TV set also supports Dolby Digital, you can also receive the Dolby Digital audio via the HDMI interface (providing it is broadcast by the channel provider). -
Page 14: First Installation
First Installation Read sections 1-6 of this manual before you put the UFSconnect 906 into operation. Do not connect the unit to the mains until all installation work has been properly carried out. In the explanation of the item "First Installation" we assume that the receiver has been connected correctly with due regard for the above section. -
Page 15: Step 2: Tv, Video, And Audio
Select with the desired menu language for your UFSconnect 906. Confi rm your selection with the button. The selected language is indicated with a check mark (see Fig. "Language Selection"). The following languages are available: German, English, French, Italian, Spanish, Czech, Dutch, Polish Turkish and Russian. - Page 16 First Installation ► 720p (resolution 1280 x 720, full-screen images) ► 576p (resolution 720 x 576, full-screen images) or ► Automatic Force 576i (this must be supported by the TV set otherwise you will not see a TV picture) You can only and need only make this setting if you have selected the setting "Automatic" for "HDMI/YPbPr Resolution".
-
Page 17: Step 3: Tuner Confi Guration
Step 3: Tuner confi guration The following on-screen display appears: Fig: Tuner Confi guration You should perform the antenna confi guration / make changes yourself only if you are fully familiar with the particulars of your reception system. Tip! If you are not familiar with the details of your reception system, note the following: If your receiver is connected up as in the connection example (see the illustration in "Connecting the receiver"... - Page 18 First Installation You can set up the tuner confi guration for the following types of reception systems: ► DiSEqC™1.0 ► DiSEqC™1.1 ► Motorized antenna (DiSEqC™1.2/DiSEqC™1.3 (USALS)) ► Single LNB or ► OneCable system Continue as described in the fi rst installation for the type of reception you have selected. Item Tuner confi...
-
Page 19: Diseqc™1.0
7.5.1 DiSEqC™1.0 Select with "DiSEqC™1.0". Press the (green) button. Fig: Tuner confi guration, DiSEqC™1.0 Number of Satellites Select the number of satellites present in the signal at the tuner (four max.). Go to the "Satellite 1: .." and press The following on-screen display appears: Fig: Tuner confi... - Page 20 First Installation LNB Type: If your reception system does not have a universal LNB, use the buttons to select the LNB types that are used in your reception system. You can choose from the following LNB types: ► Universal Refer to the documentation for ►...
-
Page 21: Diseqc™1.1
7.5.2 DiSEqC™1.1 Select with "DiSEqC™1.1". Press the (green) button. Fig: Tuner confi guration, DiSEqC™1.1 The following on-screen display appears: Fig: Tuner confi guration, DiSEqC™1.1, number of satellites Tuner Confi guration - Tuner 1 On the "Satellite" line, select the fi rst satellite location. You can use/assign up to 64 satellite locations. - Page 22 First Installation The following on-screen display appears: Fig: Tuner confi guration, DiSEqC™1.1, satellite confi g. Satellite and Position: Select the desired satellite using the buttons. Alternatively you can press the button to view a list of all stored satellites and then select the required satellites from this list. LNB Type: ...
- Page 23 Position: Select the fi eld "Position". Set the "Position" here to match the confi guration of your reception system. You can select "Off" or a value from "1" to "4" in single unit increments DiSEqC™ Repeat: The setting for how often the DiSEqC™ command must be repeated depends on the confi...
-
Page 24: Motorized Antenna: Diseqc™1.2/Diseqc™1.3 (Usals)
First Installation 7.5.3 Motorized antenna: DiSEqC™1.2/DiSEqC™1.3 (USALS) Select with "Motorized Antenna". Press the (green) button. Fig: Tuner confi guration, motorized antenna The following on-screen display appears: Fig: Tuner confi guration, motorized antenna, motor control Select the type of motor control suitable for your reception system. Refer to the documentation for your reception system or seek assistance from a specialist engineer. -
Page 25: Diseqc™1.2
7.5.3.1 DiSEqC™1.2 Fig: Tuner confi guration, motorized antenna, DiSEqC™1.2 Go to Null Position: Select the "Go to Null Position" selection fi eld. Press the button to instruct the turntable to move to its null position. Set Borders: Select the "Set Borders" selection fi eld. In this menu you can set the borders for your turntable. This is particularly necessary if the turntable has only a restricted range in which it may turn before striking an obstruction (such as a wall or tree). - Page 26 First Installation Start slow rotation to the East Once you have reached the desired "East"/"West" border, switch to the respective fi eld "Set current position for "****" border" and press the button to confi rm. If you subsequently wish to delete the set borders, switch to the selection fi...
- Page 27 LNB Frequencies (MHz): Enter the LNB frequencies (Low/High/Limit) using the number pad. Now use the button to save the new values. Test transponder: Select the "Test-Transponder" fi eld. Here you can select a transponder to check the signal strength bar and signal quality bar to see whether your settings are correct. Stop on Signal: Select the "Stop on Signal"...
-
Page 28: Diseqc™1.3
First Installation 7.5.3.2 DiSEqC™1.3 Fig: Tuner confi guration, motorized antenna, DiSEqC™1.3 My Longitude: Select the "My Longitude" selection fi eld. Input your current longitude here with the aid of the numeric keypad. My Latitude: Select the "My Latitude" selection fi eld. Input your current latitude here with the aid of the numeric keys. - Page 29 Here you can control the movements of the motorized antenna, using the following buttons: Start slow rotation to West Rotate to the West step by step Stop the current movement Rotate to the East step by step ...
- Page 30 First Installation LNB Type: If your reception system does not have a universal LNB, use the buttons to select the LNB types that are used in your reception system. You can choose from the following LNB types: ► Universal Refer to the documentation for ►...
-
Page 31: Lnb Only
7.5.4 LNB only Select with "Single LNB". Press (green). Fig: Tuner confi guration, single LNB The following on-screen display appears: Fig: Tuner confi guration, single LNB, confi guration Satellite and Position: Select the desired satellite using the buttons. - Page 32 First Installation LNB Type: If your reception system does not have a universal LNB, use the buttons to select the LNB types that are used in your reception system. You can choose from the following LNB types: ► Universal Refer to the documentation for ►...
-
Page 33: Onecable System
In the reception system fi eld select the OneCable system in use: ► EXR .../EXU ...: For all Kathrein OneCable matrices ► UAS 481: For the Kathrein OneCable LNB UAS 481 ► User-defi ned: For all OneCable systems not covered by either of the above specifi cations Refer to the documentation for your reception system or seek assistance from a specialist engineer. -
Page 34: Exr .../Exu ... (Kathrein Onecable Matrices)
OneCable components. Please note also that multiple receivers cannot share the same frequencies/channels - the receivers would interfere with each other. 7.5.5.1 EXR .../EXU ... (Kathrein OneCable matrices) Select with "EXR .../EXU". - Page 35 Saving channel with PIN code: If your OneCable system allows the transmission frequency to be protected by entering a PIN, this can be done in this menu. No other receiver can then use this transmission frequency unless the PIN is input. Select "Yes". You can now enter a PIN code (0-255) on the next line "Tuner 1 PIN Code"...
- Page 36 First Installation Satellite and Position: Select the desired satellite using the buttons. Alternatively, you can press the button to view a list of all stored satellites and then select the required satellites from this list. LNB Type: If your reception system does not have a universal LNB, use the buttons to select the LNB types that are used in your reception system.
-
Page 37: Uas 481 (Kathrein Onecable Lnb)
7.5.5.2 UAS 481 (Kathrein OneCable LNB) Select with "UAS 481". Press the button. Fig: Tuner confi guration, OneCable, UAS 481 The following on-screen display appears: Fig: Tuner confi guration, OneCable, UAS 481, system ... Transmission channel for tuner 1: Select a free available transmission channel (SCR 0 - SCR 3). -
Page 38: User-Defi Ned
First Installation Satellite and Position: Select the desired satellite using the buttons. Alternatively you can press the button to view a list of all stored satellites and then select the required satellites from this list. Test transponder: Select the "Test-Transponder" fi eld. Here you can select a transponder to check the signal strength bar and signal quality bar to see whether your settings are correct. - Page 39 Saving channel with PIN code: If your OneCable system allows the transmission frequency to be protected by entering a PIN, this can be done in this menu. No other receiver can then use this transmission frequency unless the PIN is input. Select "Yes". You can now enter a PIN code (0-255) on the next line "Tuner 1 PIN Code"...
- Page 40 First Installation Satellite and Position: Select the desired satellite using the buttons. Alternatively you can press the button to view a list of all stored satellites and then select the required satellites from this list. LNB Type: If your reception system does not have a universal LNB, use the buttons to select the LNB types that are used in your reception system.
-
Page 41: Step 4: Channel Search
Step 4: Channel Search The following on-screen display appears: Tip! The receiver already has a preinstalled list of channels for Astra 19.2° East and Eutelsat 13° East. A channel search is not absolutely necessary. Fig: Channel Search If you do not want to perform a channel search then press the (green).button. - Page 42 First Installation Channel Search Mode: Use the buttons to select the type of channels you want to search for. You have three options: ► "free and scrambled" All channels are searched for ► "only free" Only free-to-air channels are searched for ►...
- Page 43 The channel search starts in conjunction. During the search you will see the following on-screen display (example): Radio channels found channels found Fig: Channel search, search started Note: The search takes a certain amount of time. If it is taking too long for you, then you can stop it ...
-
Page 44: Step 5: Time Setting
First Installation Step 5: Time setting The following on-screen display appears: Fig: Time setting Local time zone offset (difference from UTC) Here you can select the local time offset from UTC (formerly GMT) (e.g. for Germany: + 1 hour). You can set the deviation in 30-minute steps. The maximum deviation is 11 hours and 30 minutes (+ and -). -
Page 45: Step 6: Changes To The Astra Channel List
Step 6: Changes to the ASTRA channel list If there have been changes to the ASTRA channel list, you will see the following on-screen display(s) (example): Fig: Changes to the ASTRA channel list If you do not want to edit the channel positions of the new channels, you can leave the ... -
Page 46: From
Software update On completion of a successful fi rst installation (TV picture can be seen) we recommend having the receiver search for any available software update. In order to do this, you must have selected (included in the selection) the satellite ASTRA 19.2° East in the fi rst installation. ... -
Page 47: Network/Internet Connection
Refer to our network function connection examples at the end of this manual and the instructions on this subject available on the Internet under "www.kathrein.de". To connect the receiver to the network via the PC/laptop, you must have unrestricted rights (administrator rights) for your PC/laptop and on your network. -
Page 48: Dhcp "On
Network/Internet connection DHCP setting "On" "Off" DHCP Server Deviation Unit Router Switch Direct connection to PC or laptop Individual items are selected using the buttons. Changes to the current settings can be made using the buttons or the numeric keypad. DHCP "On"... -
Page 49: Common Interface (Ci)
Common Interface (CI) Always follow the operating instructions from your Pay TV provider and the instructions supplied with the Smartcard and the CI+/CI module! Smartcards and CI modules are not included with this product. The cards and modules are issued by the relevant Pay TV providers. You are given the subscriber data and data on the corresponding paid programmes. -
Page 50: Ufsconnect
UFSconnect Smarter than your TV set. With the UFSconnect receivers from Kathrein you can break through the limits of TV individual solutions up to now: ► The Auto-Tuner-Share function automatically uses the receiver of an additional UFSconnect receiver in the network while a recording is being made. - Page 51 Multischalter Multi-switch e r z i m K i n d m e r n z i m W o h UFSconnect 906 UFSconnect 906 Hybrid receiver Hybrid-Receiver UFSconnect UFSconnect TWIN-Festplatten-Receiver TWIN hard disk receiver Switch...
-
Page 52: Accessories (Not Included In The Product Package)
Accessories (not included in the product package) The following accessories are also available for the UFSconnect 906: UFZ 112 Fig: USB hard disk UFZ 112 USB hard disk 500 GB Order number: 20410038 ► Hard Disk Capacity: 500 GByte for up to 300 hours standard TV or 100 hours. -
Page 53: Troubleshooting, Service
Troubleshooting, service 13.1 Troubleshooting In the event of a malfunction, fi rst check all the cable connections 1. Receiver and TV set power plugs are connected to wall socket 2. Antenna cables are connected to the receiver input 3. Receiver and TV set correctly connected by a HDMI or Scart cable 4. -
Page 54: Service
Troubleshooting, service DECT telephones operate The following channels on the same frequency cut out or "No or bad as these channels. signal!" appears: Interference may occur Consult your antenna specialist Sport 1, Tele due to inadequate output 5, HSE 24 and level or poor shielding of Sonnenklar TV cable... -
Page 55: Advanced Connection Example
Advanced connection example Graphic: Advanced connection example External hard disk Network PC/laptop Modem/router Modem/Router HiFi system Dolby Digital system 55 from 64... -
Page 56: Technical Specifi Cation
Technical Specifi cation Type UFSconnect 906si UFSconnect 906sw Order no./colour 20210220/silver 20210221/black RF section Sat IF band 950–2150 Input level range dBμV 44–83 Modulation, FEC, demultiplexer DVB-S/DVB-S2 standard CCIR 601 (720 x 576 rows), 576p, Video resolution 720p, 1080i, 1080p Video decryption MPEG-2, MPEG-4/H.264, Xvid Input data rate... -
Page 57: Connection Examples For Satellite Reception Systems
Connection examples for satellite reception systems 16.1 Individual system Graphic: Individual system Sat IF 16.2 Community antenna network systems Graphic: Community antenna network system (1 satellite) Sat IF KAZ 11/KAZ 12 overvoltage protection 57 from 64... -
Page 58: Onecable System
Connection examples for satellite reception systems Sat IF Graphic: Community antenna network system (2 satellites) 16.3 OneCable system Graphic: OneCable system Sat IF KAZ 11/KAZ 12 overvoltage protection 58 from 64... -
Page 59: Connection Examples For Network And Ufsconnect
Connection examples for network and UFSconnect 17.1 Direct connection receiver - PC/laptop IP-Adresse: IP address: 192.168.1.2 Gekreuztes Netzwerkkabel Cross-over network cable IP address: IP-Adresse: 192.168.1.4 PC/Laptop PC/laptop Graphic: Direct connection of the receiver with a PC/laptop 59 from 64... -
Page 60: Integrating The Receiver Into A Network
W o h m e r a f z i m S c h l UFSconnect UFSconnect TWIN hard disk receiver TWIN-Festplatten-Receiver UFSconnect 906 Switch UFSconnect 906 Switch Hybrid receiver Hybrid-Receiver Modem/router Modem/Router Internet 60 from 64... - Page 61 With the aid of the UFZ 130 WLAN/USB adapter you can set up your UFSconnect 906 in a home network without any cables. You can fi nd further information on the UFZ 130 Graphic: Network connection of the receiver in the section "12 Accessories (not included in the product package)"...
-
Page 62: For Your Notes
For your notes 62 from 64... -
Page 63: From
63 from 64... - Page 64 936.4487/-/VMWI/0414/EN - Technical data subject to change. Internet: www.kathrein.de KATHREIN-Werke KG • Anton-Kathrein-Straße 1 - 3 • P.O. Box 100 444 • 83004 Rosenheim • GERMANY • phone +49 8031 184-0 • Fax +49 8031 184-385...
Need help?
Do you have a question about the UFSconnect 906 and is the answer not in the manual?
Questions and answers