Table of Contents
Advertisement
Quick Links
Advertisement
Table of Contents

Related Manuals for Kathrein UFD 430


Summary of Contents for Kathrein UFD 430
- Page 1 Operating manual Kathrein Satellite Receiver UFD 430 Order No.: 260 442...
-
Page 2: Table Of Contents
Contents Controls, displays and connections... 3 View of front panel, rear panel and remote control handset... 3 Concise description - front panel, rear panel and remote control handset... 4 Safety instructions ... 5 Important notes regarding operation and place of installation... 5 Connecting up and putting into operation... -
Page 3: Controls, Displays And Connections
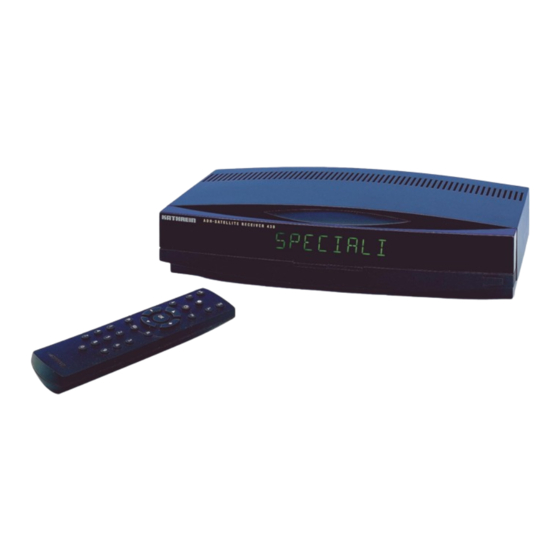
Controls, displays and connections Bedienelemente, Anzeigen und Anschlüsse This section contains a brief description of all the control elements, displays and connections. The key symbols presented here are also used when describing the operating sequences. View of front panel View of rear panel Remote control handset... -
Page 4: Rear Panel Controls And Connections
Controls, displays and connections Front panel controls and displays Mains switch (with mains isolation) LED display for TV (8-position, 7-segment display) Displays programme slot and programme name as well as menu settings. Keys for selecting programmes Step-by-step programme selection (upwards and down- wards). -
Page 5: Safety Instructions
Safety instructions Sicherheitshinweise The following section contains important information relating to operation, place of installation and connecting-up of the receiver. Read these notes carefully before putting the unit into operation. Important notes regarding operation Extended absence / Thunderstorms Always switch the unit off via its mains switch during periods of extended absence or at the onset of thunderstorms. -
Page 6: Important Notes For Siting And Installation
If the feeder system (LNB) is supplied with an external supply voltage and the LNB supply voltage is not used for polarity switchover (e.g. Kathrein single-cable feeder system UAS 330), the receiver‘s LNB supply must be set to “OFF“ (refer to section: “Initial settings, LNB supply voltage“). -
Page 7: Connecting Up And Putting Into Operation
Connecting up and putting into operation Anschluß und Inbetriebnahme The following section is intended specifically for the specialist dealer. If you are not carrying out the installation yourself, there is no need to pay any attention to this section. Sample configurations are to be found in section: “Connection examples“. Attention Do not connect the unit to the mains until after the installation work has been car- ried out properly. -
Page 8: Inserting Batteries Into Remote Control Handset, Uhf Tuning
Connecting up and putting into operation UHF connection If your TV set does not have a Scart socket, the connection to the TV set is made via a coaxial cable (possibly via the video recorder). In this case, pull out the coaxial cable from the antenna input of the video re- corder or TV set (if no video recorder is attached) and connect it to the satellite receiver‘s terrestrial antenna input (view of rear panel, 3). - Page 9 Connecting up and putting into operation Tuning UHF channel / Checking operation Switch on the satellite receiver via the on/off switch on the front of the unit. The LED display on the unit shows the last programme slot that was selected. Turn on your TV set.
-
Page 10: Receiver Operation
Receiver operation Bedienung des Receivers In this chapter, you learn how to select both TV and analogue and digital radio pro- grammes (ADR) using your receiver, how to adjust the volume and how to pro- gramme the timer functions. In describing the functions, it is assumed that the receiver has already been prop- erly connected up by the specialist. -
Page 11: Muting The Sound
Receiver operation Note The settings are not effective on the VCR Scart socket in order not to disturb any recordings. The on-screen display is removed again after approximately 3 seconds. Whilst the menu for volume adjustment is overlaid, the vate the following menu for balance adjustment, tone adjustment, stereo width and pseudo-stereo . -
Page 12: Setting Date And Time
Receiver operation The switching voltage on pin 8 of the TV Scart socket is turned off, and it is turned on again by pressing once more. In Sat mode, “Sat mode“ is displayed on the screen, the programme slot indicator in the LED display begins with “P...“. -
Page 13: Timer Setting
Receiver operation Timer setting The unit is assumed to be in normal mode. Press the The following screen display appears: In this menu, you can make timer settings in order to start the receiver at the same time as a video recorder (e.g. for recordings). The bottom menu line shows keys you can use to make the settings. -
Page 14: Daily And Weekly Repeated Switch-On
Receiver operation Note If the timer becomes active, “RECORD“ is indicated on the LED display for 3 sec- onds. During the recording period the programme selection keys are disabled. If you press a key the following message appears on the screen: Press the the unit switches off after 5 minutes. -
Page 15: Switching Between Tv And Radio Mode
Receiver operation Switching between TV and radio mode Your receiver allows you to receive TV programmes, analogue radio programmes and digital radio (ADR) programmes. After switching on, the receiver is in either the TV mode or the radio mode (de- pending on the mode at time of switch-off). -
Page 16: Programme Category Selection In Adr Mode
Receiver operation Programme category selection in ADR radio mode The digital radio programmes are divided up into different categories by the pro- gramme provider. The receiver provides the facility for calling up just those broad- casting stations in a certain chosen category. Press the The OSD menu appears as follows: Using the numeric keys... -
Page 17: Additional Functions In Adr Mode
Receiver operation Additional functions in ADR mode The UFD 430 receiver provides the facility for displaying the information that ac- companies the broadcast, not just in the on-screen menu, but also via the LED dis- play. Display of TTA data via the LED display is done sequentially, which means that the data is scrolled. -
Page 18: Switching Back To Last Programme
Receiver operation Switching back to last programme (swap) With key gramme and, by a further pressing, switch back again. If you changed programme using the keys the 10 seconds in order for it to switch back to this programme slot. Otherwise it switches back to the programme slot last selected with the programme keys. -
Page 19: Operation Without Remote Control
Receiver operation Operation without remote control If you happen to have mislaid the remote control handset, you can switch the re- ceiver on by simultaneously pressing both Using the same method you can switch between operating modes: “TV”, “Ana- logue radio” and “ADR radio”. Displaying programme overview The unit is assumed to be in normal mode (TV-, or radio mode) Press the... -
Page 20: Programming Tv Programmes
Programming TV programmes Programmieren von TV-Programmen The satellite receiver has already been factory pre-programmed for satellite re- ceiving systems with feed systems (receiving system) having 9.75 GHz oscillator frequency. All of the programmes set up are listed in the table that is enclosed. If your satellite receiving system uses a feed system with a different oscillator fre- quency, the receiver only needs to be matched to the feed system oscillator fre- quency during the installation. -
Page 21: The "Video" Menu
Programming TV programmes Call up the audio menu: press keys Switch between video and audio menus using Select the desired menu line using the keys: For direct numeric input use the keys: Alter the values step-by-step using the Press the Exit from the menu using the Note Frequent reference is made to saving the settings in subsequent descriptions. -
Page 22: Decoder Menu
Programming TV programmes Orbit position In the “Orbit Position“ menu entry, division of the satellites into orbit positions 1 to 4 is carried out. This dividing up is necessary for the signal selection with the 22 kHz, tone-burst or DiSEqC switching signal on reception from two (or more) satellites. The receiver is pre-programmed in accordance with the following table. -
Page 23: Programme Name
Programming TV programmes Programme name In the “Programme name“ line (in the video menu) you can enter a 5-character sta- tion identifier of your choice. Using the Using the With the Select the remaining characters in the same way. Exit from the menu line using key To save the entries press the Press the Move to the first line using the... -
Page 24: Volume Offset
Programming TV programmes Input of the audio carrier frequency via the numeric keys the range 5.00 to 8.80 MHz. In stereo mode, the frequency is to be entered for the left sound channel. The frequency for the right sound channel then automatically lies 180 kHz above the left sound frequency. -
Page 25: Programming Radio Programmes
Programming radio programmes Programmieren von Radio-Programmen Programme providers are continually bringing out new radio programmes that are broadcast via the satellites. The “Radio“ menu allows you to store these pro- grammes. The settings for radio programmes in “Radio“ mode are carried out in the same way as for the “TV“... -
Page 26: The "Adr" Radio Menu
Programming radio programmes The “ADR” radio menu It is generally not necessary to make settings in the ADR radio menu since new pro- grammes can be stored without difficulty using the automatic search run. Naturally, you can also store ADR radio programmes manually, in the same manner as for TV and analogue radio programmes. -
Page 27: Initial Settings
Initial settings Grundeinstellungen In the initial setup menu, matching of the satellite receiver to the satellite receiving system is carried out. The receiver has already been factory pre-programmed for standard satellite re- Important ceiving systems. Alterations to the initial setting are therefore necessary only if your receiving sys- tem deviates from this type of installation or if you happen to want different set- tings. -
Page 28: Osd Language
Here you can turn off the power supply for the feed system if this is catered for by an external power supply and signal selection likewise is not carried out through the LNB supply voltage (e.g. Kathrein single-cable feed system UAS 330). If there are switchover matrices in the receiving system the LNB supply voltage Note needs to be turned in all cases. -
Page 29: Led Brightness
Factory preset: Low Remote control handset The receiver contains command sets for Kathrein remote controls with both 24 and 26 keys. The remote control included with the receiver has 26 keys and this is the predefined command set on delivery. Hence leave this setting unchanged as “26 keys“... -
Page 30: Diseqc Menu
As a result, you can easily install the UFD 430 on other receiving systems without needing to reprogramme every single programme slot. You only need to set up the particular oscillator frequencies that your receiving system uses. -
Page 31: 22 Khz Signal
Initial settings DiSEqC 1.1 The required setting is dependent on the components of your receiving system. Settings in the DiSEqC menu Call the initial setup menu (see paragraph “Calling the initial setup menu“). Using the Activate the submenu “DiSEqC menu . . .“ using the The following menu appears (factory preset): The bottom line shows the keys you can use to make the settings. -
Page 32: Remote Frequency
Initial settings Tone burst In the “Tone burst“ menu entry the following settings of the 22 kHz signal are pos- sible: Switching states on setting: 22 kHz signal Tone burst High Pos. 1 Pos. 2 DiSEqC Up to 16 inputs can be switched with the “DiSEqC“ control signal. If the receiver is connected up to a “DiSEqC"... -
Page 33: Ufo Micro
Here control and communication between the receiver and the Kathrein “UFO mi- cro" system is effected via the return path of the coaxial cable. If the UFD 430 receiver is operated on a “UFO micro“ receiving system, an “ On " setting must be made in menu entry “UFO micro". -
Page 34: Switching Over Remote Control's Command Set
Note With remote control handsets that have 24 keys (remote controls of the 200-series receivers from Kathrein) code numbers 001, 002 and 003 are to be entered in place of codes 901, 902 and 903. Press the key and keep it pressed. -
Page 35: Features
Features The UFD 430 receiver is equipped with the following features: Reception of TV, digital (ADR) and analogue radio programmes 250 programme channel memory for TV- and analogue radio programmes 250 ADR radio channel memory Automatic station search with storing of ADR radio programmes in standby... -
Page 36: Specifications
Specifications Technische Daten UHF characteristics Sat-IF frequency range Input level range IF frequency IF bandwidth FM threshold Video Frequency range Output voltage De-emphasis Audio (digital) Standard Audio carrier frequency range: Tuning: Bandwidth: Frequency range: Distortion factor (1kHz): S/N (A-curve): Output voltage: Bit error rate (9 dB C/N): Audio (analogue) Subcarrier frequency range... -
Page 37: Temperature Range
Specifications Connectors Sat IF input Modulator - Input - Output TV connection VCR connection DECODER connection Audio-digital (SPDIF output) Audio Data interface General Unit dimensions (B/H/D) Weight Temperature range Ambient temperature Accessories Infrared remote control, mains cable, 2x 1.5 V batteries, Type: LR 03, size: AAA (micro) Scart connector pin designations Signal Right audio output... -
Page 38: Connection Example
Connection examples / Service note The best picture quality is obtained if you connect the satellite receiver, TV set and video recorder by means of Scart cables. A stereo TV set also allows you to receive the sound in stereo. The Sat receiver can be connected to a TV set and video recorder and also a de- coder for Pay-TV programmes (e.g. - Page 39 KATHREIN-Werke KG Telephone +49 80 31 18 40 Fax (0 80 31) 18 43 06 Anton-Kathrein-Straße 1-3 P.O.B. 10 04 44 D-83004 Rosenheim...
Need help?
Do you have a question about the UFD 430 and is the answer not in the manual?
Questions and answers