Kathrein MobiSet 2 CAP 210 Installation Manual
Kathrein satellite receiver installation manual
Hide thumbs
Also See for MobiSet 2 CAP 210:
- Notice de montage (37 pages) ,
- Brief operating instruction (17 pages)
Table of Contents
Advertisement
Quick Links
Advertisement
Table of Contents

Related Manuals for Kathrein MobiSet 2 CAP 210


Summary of Contents for Kathrein MobiSet 2 CAP 210
- Page 1 Installation Manual MobiSet 2 digital CAP 210 Mobi Set 3 digital CAP 310...
- Page 2 Information for Owners of MobiSet 2 digital CAP 210! The HTV 115 LCD/TFT television set is only included with the CAP 310! If you have purchased a CAP 210, all safety instructions, installation and operating steps and instructions outlined in this installation manual are applicable (except the instructions and information relating to the HTV 115 television set).
- Page 3 Lei puo avvere la versione italiana delle istruzioni di montaggio dalla nostra rapresentanza (http://www.kathrein.de/include/kontakte_groups_eng.cfm?kontinent=1&gruppe=SAT) piu vicina della sua citta´, oppure scaricarla dalla nostra hompage http://www.kathrein.de/en/sat/products/italienisch.htm) Para obtener la versión española de nuestro manual de instalación, contacte nuestros representantes en su país (http://www.kathrein.de/include/kontakte_groups_eng.cfm?kontinent=1&gruppe=SAT) o bajela de...
- Page 4 Components of MobiSet 3 digital CAP 310 HDP 171 1. Roof duct with mounting nut 2. Mounting plate 3. Turntable 4. Antenna boom 5. BAS 60 UFD 170 explanation connections, see the “Connection Examples” section and operating manual UFD 170. HTV 115 explanation connections, see the “Connection...
-
Page 5: Product Package
Product package Product package • Turntable with fi tted BAS 60 and ready for connection cables with a length of 3.5 m • Power supply cable (10 m) for connection to on-board network • Mounting plate • Roof duct with sealing gasket •... -
Page 6: Proper Use
(e.g. DVB-T). The turntable can only be used in conjunction with a Kathrein UFD 170 combi receiver or the Kathrein UFD 540 digital receiver and HDS 160 control unit. In conjunction with these two receivers, the turntable provides fully automatic alignment of the planar antenna to receive digital satellite signals. -
Page 7: Safety Instructions - Important Notes
Safety instructions - important notes Safety during installation work When carrying out installation work in locations with a risk of falling, take appropriate safety precautions, e.g. use of a working platform. Make sure that the vehicle roof is suffi ciently strong and stable to carry out the installation work (risk of damage or collapse of roof). - Page 8 Safety instructions - important notes Proper installation and safety Fundamental information A crucial safety factor is proper performance of installation and electrical connection work, and the specifi ed alignment of the turntable in the direction of travel (park position), see also installation and connection.
- Page 9 Safety instructions - important notes Power supply, fusing Checks before commencing a journey Operate the system from your vehicle‘s battery (12 V) or a suitable mains power pack. This mains power pack must guarantee a stable initial voltage of 12 V, 11 A continuous current and 15 A (300 ms) surge current.
-
Page 10: Safety Precautions During Installation
1. The turntable can only be used in conjunction with a Kathrein UFD 170 Caravan Digital Combi Receiver or a Kathrein UFD 540 Caravan Digital Receiver with HDS 160 control unit. - Page 11 Safety instructions - important notes If the fuse responds, the source of the fault must be eliminated. The defective fuse should only ever be replaced with a fuse of the same rated value. Never remove or bridge the fuse in the cable or in the receiver (UFD 170)! Cable fi...
-
Page 12: Installation And Connection
Installation and connection Required tools and equipment Unpacking and preparation Selecting the installation location • Circular cutter, Ø 38 mm • Flat-bladed screwdriver for M5 screws • Drilling machine • Galvanised tallow drop screws, depending on roof structure (Ø: 5 mm, sheet metal screws D 7981, depending on roof panel structure) or tallow drop screws D 7985 with shims and nuts •... - Page 13 Installation and connection Note: • To ensure secure adhesion, the height difference of the roof curve may not be more than 1 cm over a length of 2 m, as otherwise the gap between the roof and the mounting plate would be too big to be fi...
-
Page 14: Installation Steps
Figure: A Figure: B Note: If you have previously used a Kathrein HDM140/141 fl exible satellite mast or another mast with a diameter of 34 mm, you can continue using the existing duct hole in the roof (if space allows). - Page 15 Installation and connection Figure: C *) (not included) • For very thin roof panel materials and insuffi cient support in the insulating material, through holes (Ø: 5.5 mm) into the interior of the vehicle are necessary and galvanised M5 tallow drop screws of suffi...
- Page 16 Installation and connection Figure: D Note: • Note before starting glueing work that the optimal processing temperature of materials to be glued and the sealing glue is between +15 °C und +25 °C. Prepare all necessary fastening elements and tools. •...
-
Page 17: Installation Of Turntable
Installation and connection Installation of turntable Version with cable duct below turntable (Fig. E) Figure: E • Check that the O ring is correctly positioned in the groove of the cable duct (Fig. A). An incorrectly positioned or missing O ring will allow water to penetrate. - Page 18 Installation and connection Version with external cable duct (Fig. F) Figure: F *) (not included) • Arrange the cables in the cable duct when placing the turntable onto the mounting plate. Make sure that the cables are not crossed over and that they are tightened so that they cannot be kinked. Do not try to pull the cable out of the unit.
- Page 19 Installation and connection Brief instructions for installing the HDP 171 other detailed instructions in this operating manual must also followed! For ease of illustration, we have dismantled the BAS 60 on these photographs. As supplied, the BAS 60 pre-mounted HDP 171. Unscrew screws (x6, SW 10) in mounting plate and remove mounting plate.
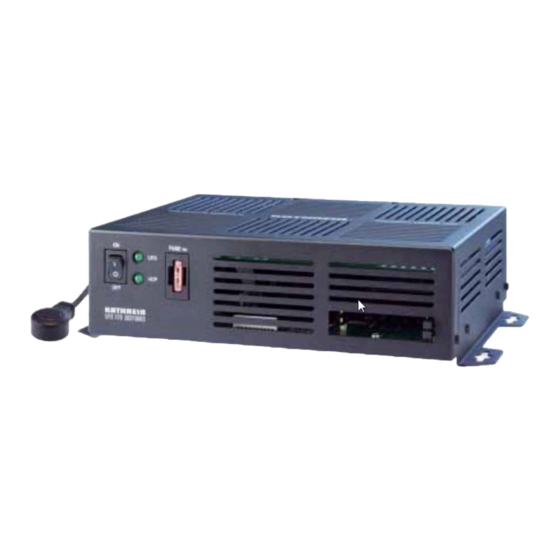
- Page 20 Installation and connection Installation of UFD 170 Note: Set up electrical connections. Connect UFD 170/UFD 540 receiver. Connect connecting/control unit to battery. The antenna must always be lowered into horizontal position (park position) while driving! Maximum driving speed of the vehicle: 130 km/h The turntable is actuated exclusively by the UFD 170 combi satellite receiver.
- Page 21 UFD 170. Connect the 6-pole Western connector on the rear to the socket marked “IR REMOTE IN”. Lay the AV cinch enclosed with the CAP 210 to the Scart cable. Here you must absolutely note the assignment of the connectors! The cinch connector must be assigned to the UFD 170 and the Scart connector to the TV set.
- Page 22 Installation and connection Only connection a motorhome, not in a caravan! Connecting the HTV 115 LCD TV Set Function information for connection to on-board network Important safety information for CAP 310 • The third, green connecting cable wire, marked “IGNITION” allows you a free choice of connection to a circuit in the vehicle that is activated when the ignition key is turned and then carries a constant 12 V voltage.
- Page 23 Installation and connection Connection example motorhome - 12 V battery connection (UFD 170) Fig: G Note: To prevent damage to the HTV 115 electronics, it must be ensured that the supply voltage is in the range 10.5 to 14.5 V. your charger does...
- Page 24 Installation and connection Connection example caravan - 230 V battery connection (UFD 170) Fig: H 6-pole External IR sensor HTV 115 TV set 8-pole Mains unit HTV 115 brown white green Note! Do not connect. Option not available. antenna must lowered before departure.
-
Page 25: Safety Notes
BAS 60 planar antenna Proper use BAS 60 with HDP 171 Important information for use Safety notes The BAS 60 fl at antenna is used to receive digital TV and radio signals in the frequency range from 10.70 to 12.75 GHz. It cannot receive terrestrial signals. -
Page 26: Reception Range/Footprint
BAS 60 planar antenna Reception range/footprint The inner line of the footprint here shows the area covered with digital signals by the ASTRA satellites. The outer dashed line of the footprint displayed here shows the area that is covered by individual Astra satellite. -
Page 27: Polarisation Setting
Polarisation setting Polarisation setting As supplied, the BAS 60 is mounted centrally on the turntable. In this position, you can also receive signals from satellites with deviations in the degree of longitude (of the typical reception range) of between 15° and 20° from the orbit position of the satellite. Deviations in the preferred reception range degree of longitude or more than 15-20°... -
Page 28: Installation Process
Polarisation setting Safety notes Installation process We strongly advise that users who are not familiar with the installation work should not reassemble the BAS 60 independently. They should contact a technician or engineer. They may fi nd a suitable person on the campsite. Make sure that: - The antenna and connected units are disconnected from the power... - Page 29 Polarisation setting In motorhome/caravan On the turntable To dismantle/install the planar antenna from the turntable, proceed as follows: (the key names refer to the remote control for the UFD 170 receiver) 1. Turn on the receiver with the main switch on the front of the unit. 2.
- Page 30 Installation and connection View after installation +15° View after installation View after installation -15° in the middle (standard)
-
Page 31: Dismantling For Servicing
Before replacing the UFD 170 receiver, the turntable should fi rst be moved to park position. Electronic Service Chiemgau GmbH Bahnhofstrasse 108 83224 Grassau, Germany Phone: +49 8641 9545-0 Fax: +49 8641 9545-35 and -36 Internet: http://www.esc-kathrein.de E-mail: service@esc-kathrein.de... -
Page 32: Technical Data
Technical data Dimensions (mm) Driving direction... -
Page 33: Electric Data
Technical data Electric data Supply voltage Ignition signal “Standby” current “ENGINE ON” current Transient start-up current Azimuth rotation range Elevation rotation range Search time for fi rst satellite Search time for additional satellites LSM start-up time 10.9…13.8 V 12…24 V 20 mA 5...8 A 12 A... - Page 34 ® Sikafl ex 291 data sheet...
-
Page 35: Sikafl Ex ® 291 Technical Data Sheet
® Sikafl ex 291 technical data sheet... -
Page 36: Declaration Of Conformity
Declaration of conformity Internet: www.kathrein.de KATHREIN-Werke KG • Anton-Kathrein-Strasse 1 - 3 P.O. Box 100 444 • 83004 Rosenheim GERMANY...
Need help?
Do you have a question about the MobiSet 2 CAP 210 and is the answer not in the manual?
Questions and answers