Table of Contents

Related Manuals for Kathrein UFSconnect 906


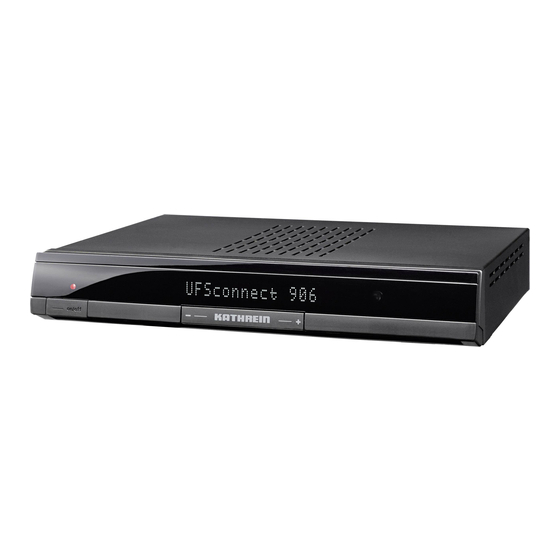
Summary of Contents for Kathrein UFSconnect 906
- Page 1 Operating Instructions Part 2 UFSconnect 906 Basic functions and operation Englisch You will fi nd an english version of this document at: Vous trouverez la version française du document sur : IMPORTANT READ CAREFULLY BEFORE USE...
-
Page 2: Preface
This unit makes use of legally protected technologies, which are protected by patents in the USA and also by other intellectual property rights in other countries. KATHREIN-Werke KG has obtained licences from Audio MPEG Inc. and Societa‘ Italiana per lo sviluppo dell‘elettronica, S.I.SV.EL, S.P.A to use these technologies. These licences carry certain restrictions which also apply to you as the customer. - Page 3 Software changes/use of applications Any modifi cations to the receiver software, or the use of applications not provided by Kathrein will invalidate the warranty! You will have to bear the costs yourself for dispatching and repairing any receiver that requires attention due to modifi cations to the software and use of applications...
-
Page 4: Table Of Contents
Contents Preface ......................2 Legal information ....................2 Contents ......................4 Safety Instructions - Important Notes ............10 Basic functions ....................14 Remote control in live mode (TV/radio) ..............15 I want to watch TV .....................16 I want to listen to the radio ..................17 I want to access teletext ... - Page 5 "Current" View ......................42 "Preview" view (programme magazine) ..............43 Categories view ......................44 Timer list view ......................45 Timer recording ......................46 6.8.1 Editing the recording settings ..................47 6.8.1.1 Specifying a target (recording location) ..................47 6.8.1.2 Specifying the recording type (daily, weekly, etc.) ..............48 Reminder function ....................
- Page 6 Deleting chapters ......................79 HbbTV ......................80 Red Bull TV Portal & ServusTV Portal ............81 UFSconnect ....................82 Kathrein portal (Media centre) ..............84 Calling up the main menu and introduction ..........85 12.1 Overview of the main menu sub-menus ..............86 Main Menu - Edit TV-Channel list ..............87 13.1...
- Page 7 13.6.3 Lock ..........................96 13.6.4 Start Blockselection ..................... 96 13.6.5 Rename favourites list ....................97 Mainmenu - Channel Search ............... 98 14.1 Calling up the menu ....................98 14.2 Automatic channel search ..................99 14.3 Manual channel search ................... 101 14.4 Channel Search with Service ID ................
- Page 8 Contents 16.4.3 Programme Guide (EPG Setup) ................122 16.4.4 Recording Menu (settings) ..................124 16.4.5 Mediacenter Setup .....................125 16.4.6 Autom. channel name update ..................125 16.5 Antenna & Satellite ....................126 16.5.1 Sat Finder ........................126 16.5.2 Tuner confi guration ....................127 16.5.3 Edit Satellites ......................128 16.5.4 Edit Transponders ......................130 Mainmenu - Interface Setup ................132...
- Page 9 Third Party Copyrights and License Terms ..........152 Third Party Copyright Notices / Acknowledgements ........... 152 General ........................152 Software-Components and associated Licenses ..........153 2.2.1 Application ......................... 153 2.2.2 ST-Linux / ......................... 153 2.2.3 Webkit ........................153 2.2.4 Binaries / Executables ....................154 License Texts ......................
-
Page 10: Safety Instructions - Important Notes
Safety Instructions - Important Notes The following pages contain important safety and other information about the operation, installation location and connection of the unit. Read these instructions carefully before setting up the unit. Explanation of the symbols and notes The signal word indicates a hazard with a medium level of Warning! risk that, if it is not avoided, can lead to death or severe injuries. - Page 11 cable network and PC. If the mains voltage is too high, there is a risk of fi re. Cleaning Disconnect the mains plug before cleaning the unit. Use a dry cloth for cleaning. Only clean the surface. Never open the casing of the unit. Touching the parts inside the unit carries a risk of death due to electric shock! Warning! Moisture, direct sunlight, heat, naked fl...
- Page 12 Safety Instructions - Important Notes Earthing The antenna system must be earthed as specifi ed or equipotentially bonded. EN 60728/11 and any national regulations must be complied with. Risk of voltage surges due to lightning strikes! Caution! Batteries If your unit was supplied with batteries (e.g. for the remote control), take care that the batteries are not exposed to excessively high temperatures, direct sunshine or fi...
- Page 13 (administrator rights) for your PC/laptop and on your network. Regarding the Ethernet settings, see the operating instructions part 1, "Network/ Internet connection" or the separate instructions "Kathrein Portal (Media Centre)" which can be downloaded from "www.kathrein.de". Channel assignment The channels available on the satellites and transponders are subject to continual change.
-
Page 14: Basic Functions
(as detailed in the operating instructions part 1 "Connection and set-up"). Certain functions of the UFSconnect 906 such as, for example, recording broadcasts, TV at a different time (timeshift), etc. can only be used if an external USB storage medium has been connected at the back of the unit. -
Page 15: Remote Control In Live Mode (Tv/Radio)
Basic functions Remote control in live mode (TV/radio) Graphics: Remote control Switch between TV/radio mode Operation (on)/standby (off) Numeric keypad Call up teletext Call up Mainmenu Channel selection Volume "-" (softer) Volume "+" (louder) Mute Call up channel information (info banner and detailed information) The coloured buttons are reserved for certain... -
Page 16: I Want To Watch Tv
Basic functions I want to watch TV ... ► Use to increase or decrease the volume ► Use to switch channels ► Use to display and hide again additional channel information ► Press to mute sound ... -
Page 17: I Want To Listen To The Radio
I want to listen to the radio ... ► Press to change to radio mode ► Use to increase or decrease the volume ► Use to switch channels ► Use to display and hide again additional channel information ... -
Page 18: I Want To Access Teletext
Basic functions I want to access teletext ... ► Use to call up teletext ► Use to enter the required page directly ► Use to page forward/back ► Use to return to TV 18 from 176... -
Page 19: I Want To Watch Time-Shift Tv
I want to watch time-shift TV ... ► Press to start time-shift Fig.: Timeshift started Made a ► Press to cancel time-shift mistake? ► Press to start playback ► Press during playback to fast forward and rewind ... -
Page 20: I Want To Record A Programme Immediately
Basic functions I want to record a programme immediately ... ► Press to open the recording window ► Press to start recording the programme Fig.: Direct recording ► Press to change the duration before recording Made a ... -
Page 21: I Want To Record A Programme That Is Scheduled For Later (Timer List)
I want to record a programme that is scheduled for later (timer list) ► Press to open the programme guide ► Press to select the desired channel Fig.: EPG, view: Currently showing ► Press the (yellow) button to call up the programme preview ... -
Page 22: I Want To Play Back A Recording
Basic functions I want to play back a recording ... ► Press ) to open the "My Recordings" recording archive Fig.: Recording archive ► Press to select a recording ► Press to start playback and exit the recording archive ... -
Page 23: I Want To Delete A Recording
I want to delete a recording ... ► Press ) to open the "My Recordings" recording archive ► Press to select a recording ► Press the button to open the "Edit" menu Fig.: Recording archive, Edit recording ... -
Page 24: Editing And Selection Options In The Menus
Basic functions 5.10 Editing and selection options in the menus In some menus/on-screen displays this box is shown with a particular colour gradation. Each colour gradation represents a specifi c view/ selection. The table below shows which colours are assigned to which buttons. -
Page 25: Alphanumeric Entries
5.11 Alphanumeric entries For entries such as the names of favourites or search expressions, use the keyboard displayed on the screen (see screenshot example). Fig.: TV channel list The letters assigned to the numeric keypad also apply to your remote control. They are used in a similar way to those on a mobile phone. - Page 26 Basic functions Switch between letters and digits/ special characters Fig.: Entry of alphanumeric characters Switch to the QWERTZ keyboard (control using the arrow buttons and the OK button) - see the screenshot at top right Switch between upper case and lower case letters ...
-
Page 27: Switching Between Tv And Radio Operation
5.12 Switching between TV and radio operation Press the button to switch between TV and radio operation. 5.13 Adjusting the volume Adjust the volume using the buttons. 5.14 Channel selection 5.14.1 Direct channel selection button allows the channel to be selected from the sorted version of the currently selected channel list/favourites list. - Page 28 Basic functions 28 from 176...
- Page 29 Now use the relevant coloured button to select the category from which you want to open a channel list: (red): Call up "Favorites lists" contains the following channel lists: ► Favourites lists 1-8 Fig.: TV channel list, selection favourites list ...
-
Page 30: Channel Banners (Information)
Basic functions The following display appears (example favourites lists): Fig.: TV channel list, selection favourites list, overview Select the desired channel list with and call it up with . After selecting the desired channel list the channels are selected with and called up with . - Page 31 Fig.: Channel banners (information) 31 from 176...
- Page 32 Basic functions The following icons (symbols) may appear in the channel information: Broadcast transmitted in Teletext is available HDTV standard 1080i Broadcast transmitted in Receiver registers the HDTV standard 720p programme as a live broadcast Portal channel Receiver registers the (channel options available) programme as a fi...
-
Page 33: Calling Up The Options Channel
5.16 Calling up the options channel If the channel banner contains the following icon this indicates that it is a portal channel. Open the selection window with . Select "Change audio, picture, subtitles" with Confi rm with –... -
Page 34: Audio Selection
Basic functions 5.17 Audio selection If the channel banner displays, for example, "1/3" in front of the symbol for the selected audio track, this tells you that you have currently selected the fi rst of the three available audio tracks. ... -
Page 35: Teletext
5.19 Teletext This symbol in the channel banner indicates whether teletext is available for the selected channel. When you press the button, the receiver processes the videotext/teletext service data for your TV set to display, even when the signal is encrypted. During the search, the page which is being searched for is displayed in the top left-hand corner with the time and date displayed at the top right. -
Page 36: Automatic Timeshift
"On". See also "16.4.4 Recording menu (settings}" on page 124. The UFSconnect 906 offers you a special function in this context. As soon as you switch to a channel, the receiver automatically starts recording the programme you are viewing to the connected USB storage device in the background. - Page 37 The selection of the line to be changed and the changes is made with Recording: The following selection options are available: ► "From start": Recording takes place from the time since the current channel has been watched without interruption (option available only if automatic time-shift is activated) ►...
-
Page 38: Electronic Programme Guide (Epg)
ASTRA satellite (see "14 Main menu - Channel Search" on page 98). Could something other than the receiver be preventing the EPG from working? In case of receivers not produced by Kathrein, it may happen that EPG data cannot be transmitted. With such systems, the necessary transponder (12,603.75 MHz, symbol rate 22 MSymb, horizontal) is not transmitted. -
Page 39: Calling Up The Epg
Information on current or subsequent programmes is only visible in the EPG if this data has been made available/broadcast by tvtv or by the channel provider. If no EPG data are available the receiver, instead of showing information on the current program, shows the message "No data available". - Page 40 Electronic Programme Guide (EPG) The following on-screen display appears (example): Fig.: EPG - View now running 40 from 176...
-
Page 41: Navigation (Remote Control Buttons In The Epg)
Navigation (remote control buttons in the EPG) Button Function Call up "Current" view (displays all channels in the order of the overall list) (green) Calling up the recording list (displays all pre-programmed recordings/reminders) (red) Navigation in the individual views (e.g. skip forward 15 minutes in the "Current"... -
Page 42: Current" View
Electronic Programme Guide (EPG) "Current" View Press the (green) button at any time to call up the "Current" view in the EPG. In the "Current" view you can see all channels displayed in the order of the complete channel list. Provided that the EPG data has been supplied by tvtv or by the channel provider, the receiver shows the current programme running on each channel, with the starting time, fi... -
Page 43: Preview" View (Programme Magazine)
"Preview" view (programme magazine) The "Preview" view can be called up at any time in the EPG by pressing the (yellow) button. In the "Preview" view you will see all programmes to be shown for the channel previously selected in the "Current" view. Provided that EPG data has been supplied/transmitted by tvtv or by the channel provider, the receiver displays programme lists for up to two weeks in advance. -
Page 44: Categories View
Electronic Programme Guide (EPG) Categories view The categories overview can be called up at any time in the EPG by pressing the (blue) button. In the "Categories" view you can see all programmes sorted by category and starting time. The following main categories are available for selection: Pick of the day, My picks (see the "Extras menu"), Movies, Entertainment, Sport, News, Children's TV, Music, Special interests, Parental control and HD transmissions. -
Page 45: Timer List View
Timer list view The timer list view can be called up at any time in the EPG by pressing the (red) button. The timer list view shows you all the recordings and reminders that are scheduled (reminders are marked green). A detailed description of the timer list view can be found at the end of the item "6.8 Timer list"... -
Page 46: Timer Recording
Electronic Programme Guide (EPG) Timer recording button allows you to set a programme for recording at any time. The programme to be recorded can be selected in any of the EPG views, provided the button appears at the bottom of the on-screen display. Fig.: EPG - "Preview"... -
Page 47: Editing The Recording Settings
Tip! Recordings can also be made, for example, on an NAS system. You will fi nd more information in the "Kathrein portal (Media centre)" guide which you can download from the Internet at "www.kathrein.de". The following on-screen display appears (example): Fig.: EPG - Recording settings/recording location... -
Page 48: Specifying The Recording Type (Daily, Weekly, Etc.)
Electronic Programme Guide (EPG) 6.8.1.2 Specifying the recording type (daily, weekly, etc.) You can use the buttons to select the desired recording mode: once: The recording will only be made once. Fig.: EPG - Recording settings/Recording type/once daily: The recording will be made daily at the time specifi... - Page 49 Tip! Remember that the day of the week for the desired programme is loaded in the timer recording schedule and you can make no further manual corrections to it! Therefore, before pressing the button, select the programme on the day of the week that you will want to make the weekly recording in future.
- Page 50 Electronic Programme Guide (EPG) Series recording: The selected programme will be set for recording by the EPG each time it is broadcast. Fig.: EPG - Recording settings/Recording type/Series_1 This function requires, however, that the EPG data are updated daily. The updating time of the EPG can be set in the menu "Settings", "User-defi...
- Page 51 Series recording (further options): In "Further options..." the receiver also allows you to further limit the data for a series recording. Select the "Further options..." line and confi rm using the button. The following on-screen display appears (see example screenshot on the right): Fig.: EPG - Recording settings/Recording type/Series_1 Avoid repeat episodes:...
- Page 52 Electronic Programme Guide (EPG) Reminder function: See "6.9 Reminder function" on page 53 in this chapter. Fig.: EPG - Reminder function Information on direct decryption using timers (recordings on encrypted channels): The "Decryption" fi eld only appears when recording encrypted channels. If you wish ...
-
Page 53: Reminder Function
Reminder function Reminder function: If you want to be reminded that a programme is about to start, you can activate the reminder function for the desired programme. The reminder function is set up in exactly the same way as programming a recording. -
Page 54: Editing A Planned Recording/Reminder
Electronic Programme Guide (EPG) 6.10 Editing a planned recording/reminder When editing a recording, you can change all parameters apart from the recording mode. First call up the timer recording view in the EPG with (red). Select the recording or reminder ... -
Page 55: Timer Overlap
Editing options with other recording modes: ► Delete scheduled recording ► Edit the scheduled recording Fig.: EPG - Edit recording (apart from series recording) Editing options with the reminder function: ► Delete reminder ► Edit reminder Fig.: EPG - Edit reminder 6.11 Timer overlap If your programmed recording overlaps with another scheduled recording, the scheduled... -
Page 56: Search Function
"Further programme times" and "Key word search in detail information". An Internet connection is required for the "YouTube" function. Please refer to the separate instructions "Kathrein portal (Media Centre)" which can be downloaded from "www.kathrein.de". 56 from 176... -
Page 57: More Episodes
6.12.1 More episodes The following on-screen display appears (example): Fig.: EPG - Search function, More episodes The selection is made using the buttons. 6.12.2 Presenter – Actor Select between the available persons with . Pressing will show you further broadcasts, if there are any, with this person. -
Page 58: Key Word Search In The Detailed Information
Electronic Programme Guide (EPG) 6.12.3 Key word search in the detailed information The following on-screen display appears (example): Fig.: EPG - Search function, Key word search_1 Use the cursor buttons to select the fi rst letter of the word by which you want to search the ... -
Page 59: Full Text Search
6.12.4 Full text search After calling up the search function, you must press the button once again to gain access to the full text search. The following on-screen display appears (example): Fig.: EPG - Search function, Key word search_1 ... -
Page 60: Extras Menu
Electronic Programme Guide (EPG) 6.13 Extras menu The "Extras" menu is opened in the EPG by pressing the button. The following on-screen display appears (example): Fig.: EPG - Extras menu The following search options are available: ► My hints ►... -
Page 61: Actors List
Fig.: EPG - Extras menu, My hints_2 To search the available programmes for one of your hints/categories, you merely need to select the desired hint/category in the Categories view (called up using the (blue) button) or in the "My hints"... - Page 62 Electronic Programme Guide (EPG) that for persons whose name includes the characters you input. Fig.: EPG - Extras menu, Actors list_2 Press in connection with the selection. All the available data on the broadcasts is searched for this person. If there are programmes available where the name of this person appears in the information data, a list of the relevant programmes will be displayed by the receiver.
-
Page 63: Recording Archive (Play Back/Edit Recordings)
Recording archive (play back/edit recordings) Calling up the recording archive (My recordings) The recording archive is called up with . Each time the EPG is opened, you will automatically see the view you had selected the last time you exited the archive. -
Page 64: Navigation (Remote Control Buttons In The Recording Archive)
Recording Archive (Playing Back/Editing Recordings) Navigation (remote control buttons in the recording archive) Button Function ► 1 x Calling up sort orders for recordings (sorted by date, sorted by title and sorted by duration) (green) ► 2 x Overview of sort options ►... -
Page 65: Recording Archive Views (Sorting The Recordings)
Recording archive views (sorting the recordings) (green) You can use the buttons to select either Date, Title or Duration (recording length) as the sorting criterion. Fig.: Recording archive - sorted by date (yellow) Sorted by channel (you can choose between the available channels using ... -
Page 66: Playing Back A Recording
Recording Archive (Playing Back/Editing Recordings) Playing back a recording Use the buttons to select the desired recording. Press the button to start the playback. Pressing the button again exits the recording archive and allows the desired recording to be viewed in full-screen mode. Playback starts from the last playback position. ... - Page 67 Each time the cursor button (right arrow) is pressed, the playback Cursor button point in the recording skips 30 seconds forwards. (right/left Each time the cursor button (left arrow) is pressed, the playback arrows) point in the recording skips back 30 seconds Red button Calling up chapter view/close chapter view Calling up option selection (audio selection, subtitles,...
-
Page 68: Edit Recordings
Recording archive (playing back/editing recordings) Edit recordings Select with the recording or reminder to be changed. Fig.: Recording archive - Editing recordings Tip! To select several recordings to be edited at the same time, if they are not listed ... -
Page 69: Delete
7.5.1 Delete Deleted recordings are irrevocably deleted and can only be restored by re-recording the programme! Select with "Audio selection" and confi rm with The selected recording(s) will be deleted. 7.5.2 Lock Select with "Audio selection" and confi rm with . -
Page 70: Rename
Recording archive (playing back/editing recordings) 7.5.3 Rename Select with "Rename" and confi rm with Fig.: Recording archive - Editing recordings, Lock You can now rename your selected recording. Alphanumeric characters are entered as described in "Basic functions", "5.11 Alphanumeric entries" on page 25. ... - Page 71 The following on-screen display appears: Fig.: Recording archive - Editing recordings, Change category, My categories Press the button to create a new category. The following on-screen display appears: Fig.: Recording archive - Editing recordings, Change category, New category Alphanumeric characters are entered as described in "Basic functions", "5.11 Alphanumeric entries"...
-
Page 72: Create New Folder
Recording archive (playing back/editing recordings) 7.5.5 Create new folder ... Select with any desired recording and then press Fig.: Recording archive - Create folder_1 Use the buttons to select the "Create new folder" option and confi rm by pressing ... -
Page 73: Move To Folder
7.5.6 Move to folder ... You can use this function to move the recording selected before calling up the edit menu to a folder you have created. Use the buttons to select "Move to folder ...". Fig.: Recording archive - Move to folder_1 ... -
Page 74: Decryption In Standby
Recording archive (playing back/editing recordings) 7.5.7 Decryption in standby The "Decryption" option is only displayed if a recording was made from an encrypted channel with the "Decryption: No" setting. Fig.: Recording archive - Edit, decrypt recoding To decrypt the recording, press the button. -
Page 75: Copy To External Data Carrier (Such As Nas)
Fig.: Progress of the copying operation to the external data medium Tip! To fi nd out how to set up an NAS and to use it with the UFSconnect 906, look in the separate instructions "Kathrein portal (Media Centre)" which can be downloaded from "www.kathrein.de". -
Page 76: Start Blockselection
Recording archive (playing back/editing recordings) 7.5.9 Start Blockselection Fig.: Recording archive - Editing recordings, Blockselection Use the buttons to select "Start Blockselection". Confi rm your selection with the button. You can now use the buttons to start block selection in the previously selected recording. -
Page 77: Folders In The Recording Archive
Folders in the recording archive The receiver offers you the option of creating folders in the recording archive. You can give these folders the names of your choice and add recordings to them. Use the buttons to select the folder to be edited and then press the button. -
Page 78: Chapter View
Recording archive (playing back/editing recordings) Chapter view 7.7.1 Creating chapters To create a chapter during playback of a recording, press the button. The receiver will automatically assign a chapter marker to the current position. Fig.: Recording archive - Chapter view, Create chapter 7.7.2 Opening a chapter ... -
Page 79: Deleting Chapters
7.7.3 Deleting chapters Use the buttons in the chapter overview to select the chapter to be deleted, and press button. Select with "Delete" and confi rm with . The selected chapter is deleted. The section of the recording assigned to that chapter is assigned to the preceding chapter that has not been deleted. -
Page 80: Hbbtv
The HbbTV content is provided by each respective programme provider/ broadcaster and not by Kathrein. Kathrein also does not accept any liability for any inaccurate, incomplete or out-of-date content that may be provided. The use of HbbTV is the responsibility of the user, and at his or her own risk. -
Page 81: Red Bull Tv Portal & Servustv Portal
Internet connection" for confi guration of the network settings. The content of the applications in the Red Bull TV Portal & ServusTV Portal is provided by Red Bull and ServusTV, and not by Kathrein. Kathrein also does not accept any liability for any inaccurate, incomplete or out-of-date content that may be provided. -
Page 82: Ufsconnect
UFSconnect Smarter than your TV set. With the UFSconnect receivers from Kathrein you can break through the limits of previous TV island solutions: ► The Auto-Tuner-Share function automatically uses the receiver of another UFSconnect receiver in the network while a recording is being made. This allows an undisturbed live TV experience, even when the built-in receiver is blocked by a recording. - Page 83 Multi-switch Multischalter e r z i m K i n d m e r n z i m W o h UFSconnect 906 UFSconnect 906 Hybrid receiver Hybrid-Receiver UFSconnect UFSconnect TWIN hard disk receiver TWIN-Festplatten-Receiver Switch...
-
Page 84: Kathrein Portal (Media Centre)
Kathrein portal (Media centre) For all applications of the Kathrein portal please refer to the separate guide "Kathrein portal (Media centre)" which you can download from "www.kathrein.de". Anleitung Deutsch UFSconnect 906 84 from 176... -
Page 85: Calling Up The Main Menu And Introduction
Calling up the main menu and introduction The main menu is opened by pressing the button. The following on-screen display appears: Fig.: Main Menu The picture for the programme on the currently selected channel appears in the top right-hand corner of the main menu. -
Page 86: Overview Of The Main Menu Sub-Menus
Calling up the main menu and introduction 12.1 Overview of the main menu sub-menus 86 from 176... -
Page 87: Main Menu - Edit Tv-Channel List
Main Menu - Edit TV-Channel list All changes to the channel lists and favourites lists which you can perform as described in the following chapter are not saved by the receiver unless when you exit the menu by pressing the button you answer "Yes"... - Page 88 Main Menu - Edit TV Channel list Fig.: Main Menu - Edit TV Channel list, Overview 88 from 176...
-
Page 89: Navigation (Remote Control Buttons In "Edit Tv-Channel List" Menu)
13.2 Navigation (remote control buttons in "Edit TV-Channel list" menu) Button Function 1 x Call up the overall list 2 x Overview of available sort orders for the overall list (green) (list view) 1 x Call up alphabetical sort order (yellow) 2 x Overview of the sort options (list view) Switch between TV and radio channel lists... -
Page 90: Views (Sort Orders)
Main Menu - Edit TV Channel list 13.3 Views (sort orders) (green) Complete list view. Using the buttons you can choose between the available sorting criteria: ► Complete list ► Sorted by satellite (e.g. ASTRA 19.2°) ► tvtv channels Fig.: Mainmenu - Edit channel list, Sorting all ... -
Page 91: Selection Of The Channel/S To Be Edited
13.4 Selection of the channel/s to be edited Select a channel in the selected channel list/favourites list using the cursor buttons. The channel is shown with a coloured background. Fig.: Mainmenu - Edit channel list, Selected channel Tip! To select several channels to be edited at the same time, if they are not listed directly ... -
Page 92: Move
Main Menu - Edit TV Channel list 13.5.1 Move Use the buttons to select "Move". Confi rm with Fig.: Mainmenu - Edit channel list, Move Use the cursor buttons or the numeric keypad to select the new channel memory ... -
Page 93: Skip
13.5.3 Skip Use the buttons to select "Skip". Confi rm with Fig.: Mainmenu - Edit channel list, Skip The channel that is to be skipped in future is shown in grey in the channel list. If you wish to select it in future, you can do this only by direct selection from the channel list. -
Page 94: To Favourites List
Main Menu - Edit TV Channel list 13.5.5 To Favourites list Use the buttons to select "To fav. list: ***". Fig.: Mainmenu - Edit channel list, to favourites list Now use the buttons to select the desired favourites list (see the example screenshot ... -
Page 95: Start Blockselection
You can tell for which channels tvtv data support is activated (on) by the support on blue and red tvtv logo. Channels for which support is not activated tvtv data are recognisable by the logo being support off greyed out. If several channels use the same tvtv data, the following warning message is displayed when you deactivate the function: "The tvtv data is used for several channels". -
Page 96: Editing Favourites Lists
Main Menu - Edit TV Channel list You can fi nd an explanation of the individual editing options in this chapter. 13.6 Editing favourites lists First select any desired programme from the favourites list that you wish to edit. After selecting ... -
Page 97: Rename Favourites List
13.6.5 Rename favourites list Select with "Rename favourites list" and confi rm with You can now rename the favourites list you had just selected. Fig.: Mainmenu - Edit channel list, Rename favourites Alphanumeric characters are entered as described in "5.11 Basic functions", "Alphanumeric entries"... -
Page 98: Mainmenu - Channel Search
Mainmenu - Channel Search 14.1 Calling up the menu Press on the TV screen. Then select with the item "Channel Search". Confi rm with Fig.: Mainmenu - Channel Search Search type Description Channel search via a satellite or via all satellites Automatic Channel Search that are set Channel search via a certain frequency of a... -
Page 99: Automatic Channel Search
14.2 Automatic channel search After calling up the menu you will see the following on-screen display: Fig.: Mainmenu - Channel Search, Autom. Search. buttons allow you to select different sets of parameters for the search. Satellite and Position Use the buttons to choose between the individual satellites you have set up, or select the setting "All". - Page 100 Mainmenu - Channel Search Once you have defi ned all the settings, use the buttons to switch to the "Start Search" selection fi eld and confi rm the start of the search using the button. TV channels Radio channels found found Fig.: Mainmenu - Channel Search, Aut.
-
Page 101: Manual Channel Search
14.3 Manual channel search After calling up the menu you will see the following on-screen display: Fig.: Mainmenu - Channel Search, manual search buttons allow you to select different sets of parameters for the search. Satellite and Position Press to select the satellite on which the transponder to be searched for is located. - Page 102 Mainmenu - Channel Search Symbol Rate Use the numeric keypad to enter the corresponding symbol rate. Channel Search Mode Use the buttons to select the type of channels you want to search for. You have three options: ► "free and scrambled" All channels are searched for ►...
-
Page 103: Channel Search With Service Id
14.4 Channel Search with Service ID After calling up the menu you will see the following on-screen display: Fig.: Mainmenu - Channels, Channel Search with Service ID buttons allow you to select different sets of parameters for the search. Satellite and Position ... -
Page 104: Channel Search With Service Id
Mainmenu - Channel Search Symbol Rate Use the numeric keypad to enter the corresponding symbol rate. Service ID Use the numeric keypad to enter the service ID of the channel to be searched for. Once you have defi ned all the settings, use the buttons to switch to the "Start Search"... -
Page 105: Update Astra Channel List
14.5.2 Update ASTRA channel list Press . The ASTRA channel list is updated. If your channel list is already fully up to If there are new channels available, the date, the following on-screen display following on-screen display appears appears: (example): Fig.: Mainmenu - Channels, LCN (ASTRA channel Fig.: Mainmenu - Channels, LCN (ASTRA channel... -
Page 106: Mainmenu - Service Menu
Mainmenu - Service Menu 15.1 Calling up the menu Press on the TV screen. Then select with the item "Service Menu". Confi rm with Operating software currently in use on the receiver with change date Fig.: Mainmenu - Service Menu ... -
Page 107: Automatic Software Update
UFS 906 (the original on-screen displays may vary from these example screenshots): ! New software available Information UFS 906 date xx.xx.xxxx Dear customer, New software V x.xx is available. Further information can be found under www.kathrein.de Cancel Update Software ... -
Page 108: Software) Update By Satellite
Mainmenu - Service Menu 15.3 (Software) Update by Satellite After calling up the menu, you will see the following on-screen display: Fig.: Mainmenu - Service Menu, Software Update by Satellite All available modules/components for your receiver will be loaded and then displayed. The loading process may take up to 60 minutes. - Page 109 Tip! You can also download the updates from the Internet. The address is: www.kathrein.de The updating of the software via the USB interfaces of the receiver is a rapid alternative to updating via satellite (see "15.4 Software Update by USB" on page 110 in this chapter).
-
Page 110: Software Update By Usb
∟ ufs906 Subfolder: You can also download the updates from the Internet. The address is: www.kathrein.de → Service 15.4.1 Loading the operating software First connect your USB stick (containing the new operating software) to the receiver, using a free USB port on the receiver. Now select the "Update Firmware" fi eld and confi rm the start of ... -
Page 111: Update Channel List
The channel list "channel.xml" is copied to the USB storage medium using the following folder structure: Main folder: kathrein ∟ ufs906 Subfolder: You can also download the channel list from the Internet in the same way as for the operating software. The address is: www.kathrein.de → Service 111 from 176... -
Page 112: Factory Reset
Mainmenu - Service Menu 15.5 Factory Reset After calling up the menu, you will see the following on-screen display: Fig.: Mainmenu - Service menu, Factory Reset Here you can restore the channel list and the installation settings to the factory settings. ... -
Page 113: Mainmenu - Settings
Mainmenu - Settings 16.1 Calling up the menu Press on the TV screen. Then select the item "Service Menu" with . Confi rm with Fig.: Mainmenu - Settings You can choose between the following menus: Menu Submenus First Installation Video Settings Audio Settings... -
Page 114: First Installation
Mainmenu - Settings 16.2 First Installation See Operating Instructions Part 1 "Connection and set-up". 16.3 Basic Settings After calling up the menu you will see the following on-screen display: Fig.: Mainmenu - Settings, Basic Settings Select the desired menu with . - Page 115 Video Output via The rear panel outputs video via the HDMI socket on the unit's rear panel. HDMI/YPbPr Resolution Here you can select the video resolution that will be output at the TV set. Either ► 1080p (resolution 1920 x 1080, full-screen images), ►...
-
Page 116: Audio Settings
Mainmenu - Settings 16.3.2 Audio Settings Fig.: Mainmenu - Settings, Basic Settings, Audio Settings Individual items are selected using the buttons. The changes to the current settings can be performed using the buttons. Preferred Audio Language Here select your preferred audio language. You can choose between the following languages: German, English, French, Italian, Spanish, Czech, Dutch, Polish, Turkish or Russian. -
Page 117: Time Setting
16.3.3 Time Setting Fig.: Mainmenu - Settings, Basic Settings, Time Setting Individual items are selected using the buttons. The changes to the current settings can be performed using the buttons. Set Local Time Here you can select the time zone deviation to UTC (formerly GMT) (e.g. for Germany +1 hour). You can set the deviation in 30-minute steps. - Page 118 ► for remote control code 4 If you have another Kathrein receiver in use that was supplied with the RC 660 remote control, you can use the UFS 906 remote control to operate that other receiver also. On the UFS 906 remote control, the codes for remotely controlling the RC 660 begin with "5":...
-
Page 119: User Defi Ned Settings
16.4 User Defi ned Settings After calling up the menu you will see the following on-screen display: Fig.: Mainmenu - Settings, User Defi ned Select the desired menu with . Confi rm with 16.4.1 Parental Lock In order to access this menu, you must enter the four-digit PIN code (factory setting: "0000"). - Page 120 Mainmenu - Settings Fig.: Mainmenu - Settings, User Defi ned, Parental Lock_2 Lock Mainmenu Select here whether the main menu should be locked. If the main menu is locked, the four- digit PIN code will be requested when it is called up. Without the four-digit PIN code (factory setting: "0000"), the main menu cannot be viewed and no changes can be made to the device settings.
-
Page 121: Customize Screen Menu
Keep your four-digit PIN code in a safe place, so that you always have access to your channels should you ever forget it. If you have forgotten your password, you must contact your dealer, who will be able to unlock your receiver for you. 16.4.2 Customize Screen Menu Fig.: Mainmenu - Settings, User Defi... -
Page 122: Programme Guide (Epg Setup)
Mainmenu - Settings Playback Banner Duration (playback information) Select here how long the playback information should be displayed after the start of playback. The options available are 1, 2, 3, 4, 5 or 6 seconds. Display Volume Bar Select here whether, on changing the volume using the receiver remote control, the volume bar should be displayed on the TV screen (select: "On") or not (select: "Off"). - Page 123 EPG Grabbing Select here whether the EPG data are to be automatically updated at the time selected in "EPG Grabbing Time" (selection: DVB-SI) or automatic EPG updating is not required (selection: Off). EPG Grabbing Time Select here the time at which the receiver's EPG data is to be updated. Since updating can take up to 45 minutes it is recommended that the grabbing time is during the night when the receiver is not being used.
-
Page 124: Recording Menu (Settings)
Mainmenu - Settings 16.4.4 Recording Menu (settings) Fig.: Mainmenu - Settings, User Defi ned, Recording Menu Individual items are selected using the buttons. The changes to the current settings can be performed using the buttons. Automatic time-shift function Select here whether automatic timeshifting is enabled or disabled. -
Page 125: Mediacenter Setup
16.4.5 Mediacenter Setup Fig.: Mainmenu - Settings, User Defi ned, Mediacenter Individual items are selected using the buttons. The changes to the current settings can be performed using the buttons. Simple MP3 Mode Here you can select "Simple MP3 Mode" (On/Off). You need to defi ne this setting if the receiver, in conjunction with the UPnP server, encounters problems with playing MP3 fi... -
Page 126: Antenna & Satellite
Mainmenu - Settings 16.5 Antenna & Satellite You should only make changes to the "Tuner Confi guration", "Edit Satellites" and "Edit Transponder" menus if you are very familiar with the confi guration of your satellite reception system! If you do not know the confi... -
Page 127: Tuner Confi Guration
Individual items are selected using the buttons. Changes to the current settings can be made using the buttons or the numeric keypad. Satellite and Position Select the satellite on which the transponder to be tested is located. Make sure your reception system is aligned to this/these satellite(s). -
Page 128: Edit Satellites
Mainmenu - Settings 16.5.3 Edit Satellites Fig.: Mainmenu - Settings, Antenna & Satellite, Edit Satellites Individual items are selected using the buttons. If required, the sub-menus are called up with . Make the changes to the current settings by using or the numeric keypad. - Page 129 New Satellite Pressing the button calls up the input screen for you to store a new satellite. Satellite Name: Use the numeric keypad to enter a name for the new satellite. Alphanumeric characters are entered as described in "5.11 Basic functions", "Alphanumeric entries" on page 25. Confi rm ...
-
Page 130: Edit Transponders
Mainmenu - Settings 16.5.4 Edit Transponders Fig.: Mainmenu - Settings, Antenna & Satellites, Edit Transponder_1 Individual items are selected using the buttons. If required, the sub-menus are called up with . Make the changes to the current settings by using or the numeric keypad. - Page 131 New Transponder Pressing the button calls up the input screen for you to store a new transponder. Frequency: Use the numeric keypad to enter the transmission frequency for the new transponder. Polarisation: Select here the applicable polarisation for the selected transponder. Either "Horizontal" or "Vertical".
-
Page 132: Mainmenu - Interface Setup
HDD Management Format media archive Please refer to the separate instructions Ethernet Settings "Kathrein portal (Media Centre)" which can be downloaded from "www.kathrein.de". Wake on LAN allows other devices within the same network to "wake up" the receiver from standby mode. -
Page 133: Common Interface (Ci)
17.2 Common Interface (CI) Fig.: Mainmenu - Interfaces - CI+ encryption system For details on fi tting the CI module and Smartcard in the receiver’s CI slot, see Operating Instructions Part 1, "Connection and set-up", "Common interface (CI)" section. ... -
Page 134: Multidecryption
Mainmenu - Interface Setup 17.2.1 Multidecryption If your CI module is capable of decrypting multiple channels, you can press the buttons to select whether the module should always decrypt only one channel (Off) or multiple channels simultaneously (On). This function is optimised for "AlphaCrypt" modules and may lead to malfunctions with other modules. -
Page 135: Format A Recording/Media Archive
17.3.2 Make dedicated HDD To make recordings using the UFSconnect 906 and to utilise the timeshifting and recording archive functions, you must connect an external hard disk to the rear of the receiver (USB) and set it up. - Page 136 Mainmenu - Interface Setup Now remove all hard disks or USB sticks from the receiver and then confi rm by pressing button, or else press the button to abort this procedure. If you have aborted this procedure the following on-screen display appears (see screenshot on the ...
-
Page 137: Ethernet Settings
Anleitung Deutsch Regarding the Ethernet settings, see the UFSconnect 906 operating instructions part 1, "Network/ Internet connection" or the separate instructions "Kathrein Portal (Media Centre)" which can be downloaded from "www.kathrein.de". 17.5 Wake On LAN (Start via the network) You can fi nd more detailed information on the topic of "Wake On LAN"... -
Page 138: Main Menu - Applications
Main menu - Applications 18.1 Calling up the menu Press on the TV screen. Then select with the item "Applications". Confi rm with Fig.: Main menu - Applications Use the buttons to select the setting to be changed and make the changes using ... -
Page 139: Main Menu - Language
Main Menu - Language 19.1 Calling up the menu Press on the TV screen. Then select with the item "Language". Confi rm with Fig.: Main Menu - Language 139 from 176... -
Page 140: Operation From The Front Panel (Without Remote Control)
Operation from the front panel (without remote control) If you have misplaced your remote control, or if the batteries are empty, you can still operate your receiver from the front panel. 20.1 Backup operation There are three buttons on the front of the receiver: On/Off button The on/off button allows the receiver to be switched On (operation) and Off again (stand-by mode). -
Page 141: Software Update Over Usb
It is essential that the operating software to be loaded is stored on the USB stick under the following directory structure: Main folder: kathrein ∟ ufs906 Subfolder: You can also download the updates from the Internet. The address is: www.kathrein.de... -
Page 142: Accessories (Not Included)
Accessories (not included) The following accessories can be ordered in addition for the UFSconnect 906: UFZ 112 Fig.: USB hard disk UFZ 112 USB hard disk 500 GB Order number: 20410038 ► Hard Disk Capacity: 500 GByte for up to... -
Page 143: Troubleshooting, Service
Troubleshooting, service 22.1 Troubleshooting In the event of a malfunction, fi rst check all the cable connections and operating states 1. Receiver and TV set power plugs are connected to wall socket 2. Antenna cables are connected to the receiver input 3. -
Page 144: Service
Troubleshooting, service DECT telephones operate The following channels on the same frequency cut out or "No or bad as these channels. signal!" appears: Interference may occur Consult your antenna specialist Sport 1, Tele due to an inadequate 5, HSE 24 and output level or poor Sonnenklar TV shielding of the cable... -
Page 145: Advanced Connection Example
Advanced connection example Graphics: Advanced connection example External hard disk Network PC/laptop Modem/router Modem/Router HiFi system Dolby Digital system 145 from 176... -
Page 146: Brief Technical Glossary
TV set and vice versa. It is a single master/multi-slave system, With Kathrein receivers the TV set can be i.e. there is only ever one master in the switched on and off by the receiver. satellite system. All activities start from the Channel package master. - Page 147 A DiSEqC™ switching matrix will work with analogue switching criteria until the FEC is the abbreviation for Forward Error DiSEqC™ command from the master is Correction. A technique for reducing the received. All analogue switching criteria are error rate of data transmission. Additional then ignored.
- Page 148 Brief technical glossary HDMI – High Defi nition Multimedia Low band Interface Satellite frequency range between 10.7 GHz A digital interface for digital video and audio and 11.7 GHz. data transmission between TV and receiver (preferred for HDTV). File format for compressed audio fi les. HDTV –...
- Page 149 Polarisation Analogue TV standard The individual transponders on satellites transmit on two different (polarisation) Pan & Scan format planes (horizontal and vertical). The capacity of the transponder is increased as a result. With the Pan & Scan format it is possible to adapt 4:3 format content on 16:9 format QPSK –...
- Page 150 Timeshift function matrix. Time-shifted playback The Kathrein one cable system satisfi es Transponder the single-cable standard in accordance with EN 50494, i.e. all the components of a A transponder is a frequency converter...
- Page 151 Connection for an external recorder (such as a video or DVD recorder). VFD display Vacuum Fluorescent Display. This is a type of display that is used in some Kathrein receivers. Viterbi rate The Viterbi rate (code rate, error rate) characterises the error protection used by the channel provider.
-
Page 152: Third Party Copyrights And License Terms
You are authorised to use the open source software in accordance with the license provisions printed below. You can fi nd the sources of supply of the source code together with the respective copyright notes on the Kathrein Werke KG Homepage at “Source-Informationen” http://www.ttgoerler.de/3060/-_Sources.html... -
Page 153: Software-Components And Associated Licenses
The website will be available for a maximum of three years after the sale of our fi nal product. Please note: The open source software used in our products is distributed WITHOUT ANY WARRANTY; without even the implied warranty of MERCHANTABILITY or FITNESS FOR A PARTICULAR PURPOSE. -
Page 154: Binaries / Executables
Third Party Copyrights and License Terms 2.2.4 Binaries / Executables - iptables, iptables-multi GPLv2 http://www.netfi lter.org/ - iwpriv, iwconfi g, iwlist GPLv2 http://www.hpl.hp.com/personal/Jean_Tourrilhes/Linux/Tools.html - busybox GPLv2 http://www.busybox.net/ - mount.cifs GPLv2 - lircd GPLv2 http://www.lirc.org/ - mkdosfs GPLv2 License Texts 2.3.1 GPLv2 Related Software or Software parts: - mount.cifs... - Page 155 want it, that you can change the software or use pieces of it in new free programs; and that you know you can do these things. To protect your rights, we need to make restrictions that forbid anyone to deny you these rights or to ask you to surrender the rights.
- Page 156 Third Party Copyrights and License Terms exchange for a fee. 2. You may modify your copy or copies of the Program or any portion of it, thus forming a work based on the Program, and copy and distribute such modifi cations or work under the terms of Section 1 above, provided that you also meet all of these conditions: a) You must cause the modifi...
- Page 157 c) Accompany it with the information you received as to the offer to distribute corre- sponding source code. (This alternative is allowed only for noncommercial distribu- tion and only if you received the program in object code or executable form with such an offer, in accord with Subsection b above.) The source code for a work means the preferred form of the work for making modifi...
- Page 158 Third Party Copyrights and License Terms royalty-free redistribution of the Program by all those who receive copies directly or indi- rectly through you, then the only way you could satisfy both it and this License would be to refrain entirely from distribution of the Program. If any portion of this section is held invalid or unenforceable under any particular circumstance, the balance of the section is intended to apply and the section as a whole is intended to apply in other circumstances.
- Page 159 WARRANTIES OF MERCHANTABILITY AND FITNESS FOR A PARTICULAR PURPOSE. THE ENTIRE RISK AS TO THE QUALITY AND PERFORMANCE OF THE PROGRAM IS WITH YOU. SHOULD THE PROGRAM PROVE DEFECTIVE, YOU ASSUME THE COST OF ALL NECESSARY SERVICING, REPAIR OR CORRECTION. 12.
-
Page 160: Lgpl Licensed Software
Third Party Copyrights and License Terms or your school, if any, to sign a „copyright disclaimer” for the program, if necessary. Here is a sample; alter the names: Yoyodyne, Inc., hereby disclaims all copyright interest in the program `Gnomovision‘ (which makes passes at compilers) written by James Hacker. signature of Ty Coon, 1 April 1989 Ty Coon, President of Vice This General Public License does not permit incorporating your program into... - Page 161 This license, the Lesser General Public License, applies to some specially designated software packages--typically libraries--of the Free Software Foundation and other authors who decide to use it. You can use it too, but we suggest you fi rst think carefully about whether this license or the ordinary General Public License is the better strategy to use in any particular case, based on the explanations below.
- Page 162 Third Party Copyrights and License Terms When a program is linked with a library, whether statically or using a shared library, the com- bination of the two is legally speaking a combined work, a derivative of the original library. The ordinary General Public License therefore permits such linking only if the entire combination fi...
- Page 163 The „Library”, below, refers to any such software library or work which has been distributed under these terms. A „work based on the Library” means either the Library or any derivative work under copyright law: that is to say, a work containing the Library or a portion of it, either verbatim or with modifi...
- Page 164 Third Party Copyrights and License Terms tions as part of a whole which is a work based on the Library, the distribution of the whole must be on the terms of this License, whose permissions for other licensees extend to the entire whole, and thus to each and every part regardless of who wrote it.
- Page 165 work under the terms of Section 6. Any executables containing that work also fall under Section 6, whether or not they are linked directly with the Library itself. 7. As an exception to the Sections above, you may also combine or link a „work that uses the Library”...
- Page 166 Third Party Copyrights and License Terms and of the other library facilities is otherwise permitted, and provided that you do these two things: a) Accompany the combined library with a copy of the same work based on the Library, uncombined with any other library facilities. This must be distributed under the terms of the Sections above.
- Page 167 software distributed through that system in reliance on consistent application of that system; it is up to the author/donor to decide if he or she is willing to distribute software through any other system and a licensee cannot impose that choice. This section is intended to make thoroughly clear what is believed to be a consequence of the rest of this License.
-
Page 168: Stlinux Licenses
Third Party Copyrights and License Terms CONSEQUENTIAL DAMAGES ARISING OUT OF THE USE OR INABILITY TO USE THE LIBRARY (INCLUDING BUT NOT LIMITED TO LOSS OF DATA OR DATA BEING RENDERED INACCURATE OR LOSSES SUSTAINED BY YOU OR THIRD PARTIES OR A FAILURE OF THE LIBRARY TO OPERATE WITH ANY OTHER SOFTWARE), EVEN IF SUCH HOLDER OR OTHER PARTY HAS BEEN ADVISED OF THE POSSIBILITY OF SUCH DAMAGES. -
Page 169: Gpl With Exeption
The standard STLinux Distribution comprises a number of packages each with an associated license, mainly GPL and LPGL. GPL and LGPL are printed in this document. License Text: A detailed list of the licenses can be found at http://www.stlinux.com/licensing 2.3.4 GPL with exeption Related Software or Software parts: libstdc++ GNU General Public License (GPL) with exception ( Refer to FAQ 2.4. -
Page 170: Portable Sdk For Upnp Devices
Third Party Copyrights and License Terms with the option of using any subsequent versions published by the FSF. „GPL-compatible Software” is software whose conditions of propagation, modifi cation and use would permit combination with GCC in accord with the license of GCC. „Target Code”... -
Page 171: Expat Xml Parser
- libupnp.so BSD license ( 3-clause ) http://pupnp.sourceforge.net/ License Text: http://pupnp.sourceforge.net/LICENSE Copyright (c) 2000-2003 Intel Corporation All rights reserved. Redistribution and use in source and binary forms, with or without modifi cation, are permitted provided that the following conditions are met: Redistributions of source code must retain the above copyright notice, this list of conditions and the following disclaimer. -
Page 172: Fontconfi G
Third Party Copyrights and License Terms Permission is hereby granted, free of charge, to any person obtaining a copy of this software and associated documentation fi les (the „Software”), to deal in the Software without restriction, including without limitation the rights to use, copy, modify, merge, publish, distribute, sublicense, and/or sell copies of the Software, and to permit persons to whom the Software is furnished to do so, subject to the following conditions: The above copyright notice and this permission notice shall be included... -
Page 173: Open Ssl
2.3.8 Open SSL License Text: Details of software - Open SSL Toolkit The OpenSSL toolkit stays under a dual license, i.e. both the conditions of the OpenSSL License and the original SSLeay license apply to the toolkit. See below for the actual license texts. Actually both licenses are BSD-style Open Source licenses. - Page 174 Third Party Copyrights and License Terms This product includes cryptographic software written by Eric Young * (eay@cryptsoft.com). This product includes software written by Tim * Hudson (tjh@cryptsoft.com). * */ Original SSLeay License Copyright (C) 1995-1998 Eric Young (eay@cryptsoft.com) All rights reserved. This package is an SSL implementation written by Eric Young (eay@cryptsoft.com).
- Page 175 PATENTS Various companies hold various patents for various algorithms in various locations around the world. _YOU_ are responsible for ensuring that your use of any algorithms is legal by check- ing if there are any patents in your country. The fi le contains some of the patents that we know about or are rumoured to exist.
- Page 176 936.4488/-/VMWI/0414/EN - Technical data subject to change. Internet: www.kathrein.de KATHREIN-Werke KG • Anton-Kathrein-Straße 1 - 3 • P.O. Box 100 444 • 83004 Rosenheim • GERMANY • phone +49 8031 184-0 • Fax +49 8031 184-385...
Need help?
Do you have a question about the UFSconnect 906 and is the answer not in the manual?
Questions and answers