
Subscribe to Our Youtube Channel
Related Manuals for Inficon SQC-310


Summary of Contents for Inficon SQC-310
- Page 1 Cover Page SQC-310 Deposition Controller PN 074-550-P1D...
- Page 3 Title Page SQC-310 Deposition Controller PN 074-550-P1D ® www.inficon.com re achus@inficon.com ©2015 INFICON...
- Page 4 All other brand and product names are trademarks or registered trademarks of their respective companies. Disclaimer The information contained in this manual is believed to be accurate and reliable. However, INFICON assumes no responsibility for its use and shall not be liable for any special, incidental, or consequential damages related to the use of this product.
- Page 7 Seller product was not designed nor against any defects due to plans or instructions supplied to Seller by or for Buyer. This manual is intended for private use by INFICON® Inc. and its customers. Contact INFICON before reproducing its contents.
- Page 9 1.3.1 Returning SQC-310 to INFICON ....... . . 1-5 SQC-310 Specifications ........1-6 1.4.1...
- Page 10 SQC-310 Menu Overview ........
- Page 11 SQC-310 Commands ........
- Page 12 SQC-310 Operating Manual 4.3.5.1 Get/Set Layer Parameter Examples......4-19 4.3.6 Get/Set Material Parameters ........4-19 4.3.6.1...
- Page 13 SQC-310 Operating Manual Chapter 5 SQC-310 Comm Software Introduction..........5-1 Installation .
- Page 14 SQC-310 Operating Manual Chapter 8 Measurement Theory Basics............8-1 8.1.1...
-
Page 15: Introduction
USB with Ethernet communications. NOTE: SQC-310 and SQC-310C are both referred to as SQC-310 in this manual. If there is a reason to distinguish between the two models, the SQC-310 or SQC-310C model number will be called out. -
Page 16: Related Operating Manuals
PN 153800 ....RSH-600 Sensor Sensor operating manuals are available on the Thin Film Instruments and Sensors Manuals CD included with the SQC-310 ship kit. Other related documentation can be downloaded from www.inficon.com. -
Page 17: General Safety Information
1.2.3 Earth Ground SQC-310 is connected to earth ground through a sealed three-core (three-conductor) power cable, which must be plugged into a socket outlet with a protective earth terminal. Extension cables must always have three conductors including a protective earth terminal. - Page 18 This symbol indicates where the protective earth ground is connected inside SQC-310. Never unscrew or loosen this connection. Disconnecting the protective earth terminal or interrupting the protective earth circuit, whether inside or outside of SQC-310, may render SQC-310 dangerous. 1 - 4...
-
Page 19: How To Contact Inficon
The exact wording of any error messages received. 1.3.1 Returning SQC-310 to INFICON Do not return any component of SQC-310 to INFICON without first speaking with a Customer Support Representative and obtaining a Return Material Authorization (RMA) number. Packages delivered to INFICON without an RMA number will be held until the customer is contacted. -
Page 20: Sqc-310 Specifications
SQC-310 Operating Manual 1.4 SQC-310 Specifications 1.4.1 Measurement Crystal Frequency Range..6.5 to 1.0 MHz (adjustable) Frequency Resolution ... .±0.012 Hz over 0.25 s measurement interval Frequency Accuracy . -
Page 21: Power
Weight ..... . . 1.8 kg (4 lb.) 1.4.8 Cleaning Mild, nonabrasive cleaner or detergent. Prevent cleaner from entering SQC-310 or contacting connectors. -
Page 22: Display
SQC-310 Operating Manual 1.4.9 Display Type ......LCD/Color/TFT/14.5 cm (5.7 in.) Diagonal Format ..... . . QVGA Resolution . -
Page 23: Film Parameters
SQC-310 Operating Manual Rate Dev. Alarm ....0.0 to 99.9% Rate Ramp Start ....0.0 to 999.990 kÅ... -
Page 24: Unpacking And Inspection
SQC-310 Operating Manual 1.5 Unpacking and Inspection If SQC-310 has not been removed from its packaging, do so now. NOTE: Do not discard the packing materials until an inventory has been taken and the installation has been performed successfully. To install... -
Page 25: Accessories
SQC-310 Operating Manual SQC-310 configuration includes: Thin Film Instrument and Sensor Manuals CD containing SQC-310 software, SQC-310 Operating Manual, and sensor operating manuals. 25-pin female high-density solder cup D-sub connector (PN 051-1846) and connector housing (PN 051-1794). One of each included for a 2 channel standard configuration. -
Page 26: Handheld Remote Controller
Crystal 12 ....... . . PN XL12-1XXXXX NOTE: Shuttered sensors require a solenoid valve (PN 750-420-G1). NOTE: CrystalSix and Crystal12 crystal position detection feature cannot be used with the SQC-310. NOTE: CrystalTwo switch is not compatible with SQC-310. 1 - 12... -
Page 27: Initial Power-On Verification
Confirm that the proper AC line mains voltage is supplied to SQC-310. Confirm that the rear panel (main) AC switch is in the ON Position. After the initial boot-up screen, SQC-310 will display a screen similar to the screen displayed in Figure 1-3. - Page 28 SQC-310 Operating Manual This page is intentionally blank. 1 - 14...
-
Page 29: Introduction
CAUTION Care should be exercised to route SQC-310 cables as far as is practical from other cables that carry high voltages or generate noise. This includes other line voltage cables, wires to heaters that are SCR-controlled, and cables to source power supplies that may conduct high transient currents during arc down conditions. - Page 30 Rack mounting hardware is not included. Optional 3U rack adapter Installation and 3U rack extender kits are available to mount either one or two SQC-310 controllers in a standard 48.3 cm (19 in.) rack (see section 2.7 on page 2-8).
-
Page 31: Front Panel
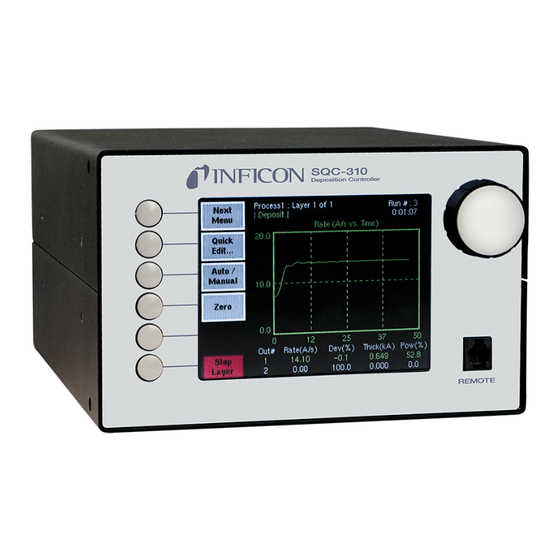
SQC-310 Operating Manual 2.2 Front Panel Figure 2-1 Front panel controls Buttons Control Knob Remote Jack Table 2-2 Front panel controls Buttons Provide access to operation and setup menus. The functions of the buttons change to adapt to different operations and are displayed on the left of the screen. -
Page 32: Rear Panel
Connection to a computer for programming and data acquisition. USB or Ethernet RS-232 and USB are standard. Ethernet option replaces USB. Sensor 3 and 4 These Sensor, Output, and I/O Ports are optional with SQC-310 and standard with SQC-310C. Output 3 and 4 I/O 9-16 Ground terminal for common system and cable grounding. -
Page 33: System Connections
Connects the SQC-310 output to the source power supply control BNC Cable voltage input. Ground Wire/Strap A wire or strap that connects the vacuum system to the SQC-310 ground terminal. The wire or strap is important for noise rejection (see section 2.5). -
Page 34: Ground Requirements
SQC-310 Operating Manual 2.5 Ground Requirements Low impedance wires or straps must be used to connect the chassis of all control components to a common ground point connected to earth ground (see section 2.5.1 for the earth ground requirement). Solid copper straps at least 12.7 mm (0.5 in.) wide and approximately 0.56 mm (0.022 in.) thick (as short as possible) are recommended where RF is present. -
Page 35: Establishing Earth Ground
Figure 2-5 Handheld Remote Controller To install the Handheld Remote Controller, attach the cable from the Handheld Remote Controller to the Remote Jack on the SQC-310 front panel. The front panel control knob or the Handheld Remote Controller can be used to increase (↑) or decrease (↓) output power. -
Page 36: Rack Mount
2.7 Rack Mount The procedure below provides instructions for installing the SQC-310 rack mount kit. SQC-310 is designed to mount in a standard 48.3 cm (19 in.) rack, using optional rack mount kits, or can be used on a benchtop. -
Page 37: Installation
Small flat head screws Install hex shoulder screws. From inside the extender, thread two hex shoulder screws on one side, closest to the front of SQC-310. Continue to thread the screws until the threads are completely exposed (see Figure 2-7 Figure 2-8). -
Page 38: Rack Adapter
SQC-310 Operating Manual Figure 2-8 Installing hex should screw - overall view Attach the extender. Align the extender with SQC-310 to fit the rack. The hex shoulder screws installed in step 2 should align with the two large threaded holes in SQC-310. Tighten the hex shoulder screws to secure the extender to SQC-310. -
Page 39: Installation
NOTE: These screws are no longer needed and may be discarded. Install the rear mount couplers. Using the 4 pan head screws and washers provided, install one side of the rear mount coupler to each SQC-310. Do not fully tighten the screws until all screws are installed. -
Page 40: Interfacing Sqc-310 To Ci-100 Crucible Indexer
2.9.1 BCD I/O Setup BCD wiring is suggested over Individual I/O wiring because it uses fewer relays. The wiring below interfaces the SQC-310 I/O connector to the CI-100 BCD I/O connector for controlling an 8 pocket source. SQC-310 CI-100 BCD I/O Pin 14------------->-------------- Pin 1... -
Page 41: Individual (Binary - As Defined By Ci-100) I/O Setup
Feedback Type: In Position Indexer Delay: 5 seconds 2.9.2 Individual (Binary - as defined by CI-100) I/O Setup To use Individual wiring between CI-100 and SQC-310 for a four pocket crucible: SQC-310 CI-100 Binary I/O Pin 1,3,5,14,24 ---------------- Pin 1, 2 Common Pin 16 ------------<-------------- Pin 3... -
Page 42: Interfacing Sqc-310 To Ebs-530 E-Beam Sweep Controller
If the first logic statement is not true and the second logic statement is true, sweep will be off and an Alarm message will be displayed by SQC-310 to indicate that EBS-530 is either not in I/O mode or an EBS-530 error has occurred. - Page 43 SQC-310 Operating Manual Table 2-6 SQC-310 to EBS-530 wiring chart SQC-310 EBS-530 Function SQC-310 I/O Connector EBS-530 Function Digital I/O (Refer to section 2.8 on Connector page 2-11 for pinout) Input: Pattern Select Bit 0 Either pin of relay named...
- Page 44 SQC-310 Operating Manual This page is intentionally blank. 2 - 16...
-
Page 45: Thin Film Deposition Overview
Codeposition of multiple films occurs when more than one output is active during a layer. SQC-310 stores up to 1000 layers. Process: A process is a sequence of layers to be deposited. SQC-310 stores up to 100 processes. Phase: A phase is a step or stage in the deposition cycle. Preconditioning phases include Ramp 1, Soak 1, Ramp 2, and Soak 2. -
Page 46: Thin Film Deposition Phases
SQC-310 Operating Manual 3.1.2 Thin Film Deposition Phases Figure 3-1 Typical thin film deposition cycle The cycle can be broken into three distinct phases: Preconditioning (ramp/soak) Deposition Postconditioning (feed/idle) During preconditioning, power is supplied in steps to prepare the evaporation source for deposition. -
Page 47: Sqc-310 Menu Overview
SQC-310 Operating Manual 3.2 SQC-310 Menu Overview When powered on, SQC-310 briefly displays the model number (SQC-310 or SQC-310C) and firmware version information, then the Main screen is displayed (see Figure 3-2). Three menus on the Main Screen control SQC-310 operation. The buttons... - Page 48 SQC-310 Operating Manual The functions of the buttons change to adapt to different operations and are displayed on the left of the screen. Press Next Menu to display alternate Main screen menus (see Figure 3-3). Figure 3-3 Alternate Main screen menus...
-
Page 49: Main Screen, Menu 1
Auto / Toggles between Auto and Manual power control. When Manual Auto/Manual is displayed, output power is set by SQC-310 to achieve the programmed deposition rate. When Manual/Auto is displayed, the control knob or optional Handheld Remote Controller sets the output power. -
Page 50: Main Screen, Menu 2
SQC-310 Operating Manual 3.4 Main Screen, Menu 2 Table 3-2 describes the function of each button on Main screen, Menu 2. Table 3-2 Main screen, Menu 2 buttons Next Sequences through each of the three Main screen menus. Menu Next Sequences through the graph options for the Main screen. -
Page 51: Main Screen, Menu 3
Settings on the Film menu include pre/postconditioning, deposition error controls, and the physical chamber setup for that material. System System parameters control the overall operation of SQC-310. Menu Tooling, crystal frequency, and operating modes are found on the System Parameters menu. -
Page 52: Quick Edit Menu
SQC-310 Operating Manual 3.6 Quick Edit Menu The Quick Edit menu is found on the Main Screen under Main Menu 1. It provides access to the most commonly adjusted parameters for the current process and layer (see Figure 3-4). Figure 3-4 Quick Edit menu Table 3-4 Quick Edit menu buttons Returns to the Main screen Menu 1. - Page 53 SQC-310 Operating Manual Quick Edit parameters are described below: Initial Rate: The beginning rate of deposition for this layer. This is the target rate that the control loop tries to maintain throughout the deposition (assuming no rate ramps are used).
-
Page 54: Process Menus
SQC-310 Operating Manual Ramp 1: During the deposition of a layer, it may be desirable to change the deposition rate. For example, a process may require the deposition to occur at a slow rate first and then increase the rate once an initial thickness is reached. - Page 55 SQC-310 Operating Manual Table 3-5 Process Select menu buttons (continued) Delete Deletes the selected process and all of its layers. A prompt will follow if delete is selected to safeguard against accidental process deletion. Copy/Paste Copies the selected process and all of its layers. Scroll to an Empty process and press Paste to paste the copied process and corresponding film name.
-
Page 56: Process Menu - Edit Layer
SQC-310 Operating Manual Table 3-6 Layer Select menu buttons (continued) Insert New . . . Displays the list of 50 films. Select a film, then press Insert Normal or Insert CoDep to insert the film as a new layer. Copy.../Paste... - Page 57 If multiple sensors are assigned to a film, and one fails, it is excluded from measurements. Sensors 3 and 4 will not be displayed unless the optional sensor board is installed in SQC-310 or SQC-310C is used. Source: Selects the source output that is active for the selected layer.
- Page 58 SQC-310 Operating Manual Min. Power: The minimum output power desired for the selected output. An alarm occurs if power remains below this value for Power Alarm Delay seconds. Power Alarm Delay: The time that source power must remain outside the Min/Max Power settings to trigger an alarm.
-
Page 59: Layer Copy, Insert, And Delete Menus
SQC-310 Operating Manual 3.9 Layer Copy, Insert, and Delete Menus From the process menu, the Copy, Delete, and Insert buttons are used to build and edit a sequence of process layers. The Layer Select menu, displays a process consisting of four layers (see Figure 3-8). - Page 60 SQC-310 Operating Manual Once a film is selected, press Paste Normal or Paste CoDep. The Paste CoDep button only appears when a valid layer has been selected for inserting using SQC-310C. After the paste, the screen returns to the Layer Select menu (see Figure 3-10).
-
Page 61: Film Menus
SQC-310 Operating Manual Insert Normal or Insert CoDep inserts layers above the selected layer. That is, the inserted layer will have the same number as the selected layer, and the selected layer will move down one layer. HINT: When building a process it is easiest to add a test layer and insert new layers above that layer. -
Page 62: Film Edit Menu
SQC-310 Operating Manual Table 3-8 Film Select menu buttons (continued) Delete Deletes the selected film. NOTE: Films cannot be deleted if they are used in any process. Copy/Paste Copies the selected film. Scroll to a film labeled as <Empty> and press the Paste button to paste the copied film. - Page 63 SQC-310 Operating Manual Table 3-9 Film Edit menu buttons To Main Returns to the Main menu. Prev Menu Returns to the Film Select menu. Edit Opens the selected parameter for edit. Button functions change Next: Store parameter and move to next for editing.
- Page 64 SQC-310 Operating Manual Crystal Quality, Counts: A counter is incremented each time Crystal Quality, Rate Deviation is exceeded, then decremented each time a reading is within the rate deviation. If the counter reaches Crystal Quality, Counts during a layer, the process is aborted.
-
Page 65: Film Conditioning Menu
SQC-310 Operating Manual 3.11.1 Film Conditioning Menu The Film Conditioning menu contains the power settings used for preconditioning and postconditioning. Figure 3-14 Film Conditioning menu Ramp1 Power: Sets the power level (% of full scale) desired at the end of Ramp 1. -
Page 66: Film Deposit Controls Menu
Deposit state. This helps to eliminate overcompensation by the control loop due to rate spikes when the sensor or source shutter opens. The Control Delay setting is the amount of time SQC-310 will wait before the control loop takes over. - Page 67 SQC-310 Operating Manual Control Error: If the control loop cannot maintain the desired deposition rate due to loss of source material, excess rate ramps, equipment malfunction, or a control error occurs, the Control Error will respond accordingly with the programmed response.
-
Page 68: Film Configure Sensor Menu
SQC-310 Operating Manual 3.11.3 Film Configure Sensor Menu The Configure Sensors menu contains the settings used to control crystal fail modes during error conditions (see Figure 3-16). Figure 3-16 Configure Sensors menu Crystal Fail Mode: The action that is executed if the sensor crystal fails. -
Page 69: System Menu
SQC-310 Operating Manual 3.12 System Menu The System menu contains settings that affect the basic operation of SQC-310 (see Figure 3-17). System parameters generally pertain to the physical setup of the vacuum system equipment. Figure 3-17 System Parameter menu Table 3-10 System menu buttons To Main Returns to the Main menu. - Page 70 7-2). Min/Max Frequency: The frequency values for the quartz crystal sensors used as inputs to SQC-310. The maximum frequency should be set to the frequency of a new crystal, typically 6 MHz. Sensor readings outside the minimum and maximum frequency values cause a crystal failure.
-
Page 71: Input And Relay Menus
3-18 for an illustration of the password number designations). Figure 3-18 Password number designations NOTE: Holding down buttons 1 and 6 while powering up SQC-310 sets the password to 1111. CAUTION Holding down 1, 6, and 7 (control knob) will default memory for the entire system to the factory settings. - Page 72 CAUTION If changes have been made to the Input or Relay menu, be sure to exit to the System menu or Main Screen before powering SQC-310 down. Otherwise, the changes may not be saved. Figure 3-19 Relay menu Figure 3-20 Input menu To edit an Input or Relay, select it and press Select.
- Page 73 Set to Default button. Type: Normally Open (NO) contacts or Normally Closed (NC) contacts. SQC-310 uses software to implement the NO/NC function. All relays are normally open and will open when SQC-310 is not powered. Pulses: Number of pulses required for activation. Setting Pulses to One Pulse will cause the relay to turn on for the Pulse Width amount of time, then turn off.
-
Page 74: Logic Menu
SQC-310 Operating Manual 3.12.2 Logic Menu Logic statements allow the programming of SQC-310 to respond to inputs and activate relays, using a variety of process conditions. To create logic statements select System Menu, then Logic Menu. The Logic menu also displays the current state of each logic statement. Statements in green are currently true. -
Page 75: Creating A Logic Statement
SQC-310 Operating Manual Table 3-12 Edit Logic screen buttons Go to Then Moves the cursor to the THEN (action) part of the logic statement (see section 3.12.2.1 for details on creating a logic statement). This button becomes the Go to Name button after it is pressed. -
Page 76: Logic Statement Conditions (If)
If the specified input becomes active, the logic statement will become true (choose input 1 to 16.) Relays: Choose the logic state (active state) of one of the SQC-310 relays as a condition. If the specified relay becomes active, the logic statement will become true (choose relay 1 to 16). - Page 77 SQC-310 Operating Manual Sensors: Allows the operator to choose between various sensor conditions. Available sensor conditions include: Sensor Enabled (choose sensor 1 to 4) Sensor Shutter (choose sensor 1 to 4) Sensor Fail (choose sensor 1 to 4) All Crystals Fail...
- Page 78 SQC-310 Operating Manual Crystal Fail Stop Layer Sensor Feedback Timeout Source Feedback Timeout Sensor Feedback Error Source Feedback Error Invalid Crystal Position Invalid Pocket Position Internal Events: Allows the operator to select an internal event as a condition. Available events include:...
-
Page 79: Logic Statement Actions (Then)
Move Snsr to Next Position (choose sensor 1 to 4) Move Src to Next Pocket (choose source 1 to 4) Relays: Activate one of the SQC-310 relays (choose relay 1 to 16). SoftNodes: Sets a SoftNode to true (choose SoftNode 1 to 8). -
Page 80: Sensors And Sources Menu
SQC-310 Operating Manual 3.12.3 Sensors and Sources Menu The Sensors and Sources menu allows the types of sensors and sources in the system to be configured, particularly multi-crystal sensors and multi-pocket sources (see Figure 3-22). Figure 3-22 Sensor 1 Edit 3.12.3.1 Sensor Setup... - Page 81 Down works identically, except the relay output is labeled Sensor Drive Down. Select Fast to create both up and down outputs. SQC-310 will then determine the fastest direction to the target crystal position by activating the appropriate output.
- Page 82 If there is position feedback, SQC-310 will wait this time for the pocket to reach the target position. If it does not receive the feedback signal, a Pocket Wait Timeout error is issued.
-
Page 83: Source Setup
10 V, 5 V, -10 V, or -5 V. CAUTION If changes have been made to the Logic menu, be sure to exit to the System menu or Main Screen before powering SQC-310 down. Otherwise, the changes may not be saved. 3 - 39... - Page 84 SQC-310 Operating Manual This page is intentionally blank. 3 - 40...
-
Page 85: Introduction
2-4). A mating male connector is required to attach a host interface. The host and SQC-310 can be separated by up to 15.2 m (50 ft.) using a multiconductor shielded data cable. For successful communications, the baud rate of the host computer and SQC-310 must match. -
Page 86: Usb Port
Internet until the setting is reversed. SQC-310 ships with a pre-assigned address of 192.168.1.200. To communicate directly with SQC-310 from a computer, the computer must also be assigned a 192.168.1.xxx address, but cannot be set to 192.168.1.200. The examples in section 4.1.3.1.1... -
Page 87: Accessing Network Settings In Windows Xp
SQC-310 Operating Manual 4.1.3.1.1 Accessing Network Settings in Windows XP Select Network Connections from either the Windows Start menu or from the Control Panel (see Figure 4-1). Figure 4-1 Accessing network connections Select the Local Area Connection to be changed, right click and select... - Page 88 SQC-310 Operating Manual On the General tab, select Internet Protocol (TCP/IP) and click the Properties button (see Figure 4-3). Figure 4-3 Internet Protocol (TCP/IP) Properties 4 - 4...
- Page 89 Figure 4-4 Entering the IP address and Subnet mask Click OK in all open dialog boxes to close the Internet Protocol setup for the Local Area Connection. Open the SQC-310 software and confirm communications (see section 5.7, Communications Setup Menu, on page 5-20).
-
Page 90: Accessing Network Settings In Windows 7 And Windows 8
SQC-310 Operating Manual 4.1.3.1.2 Accessing Network Settings in Windows 7 and Windows 8 Open the Control Panel (Start >> Control Panel) and Select Network and Sharing Center. Click Change adapter settings on the left side pane (see Figure 4-5). This will open the Network Connections window. - Page 91 SQC-310 Operating Manual In the Local Area Connection Properties, select Internet Protocol Version 4 (TCP/IPv4), and click Properties (see Figure 4-7). Figure 4-7 Local Area Connection properties 4 - 7...
-
Page 92: How To Change The Sqc-310 Ip Address
Figure 4-8, and click OK. With this selection, the computer is assigned an IP address to use when communicating with SQC-310. Figure 4-8 Entering the IP address and Subnet mask Click OK in all open dialog boxes to close the Internet Protocol setup for the Local Area Connection. -
Page 93: Sqc-310 Communications Protocol
SQC-310 communicates with a host computer using an ASCII based protocol. SQC-310 defaults to 19200 bps baud rate, 8 data bits, and no parity. The baud rate can be changed in the SQC-310 System menu, but is always 8 data bits with no parity. -
Page 94: Command Packet (Host To Sqc-310 Message)
NOTE: If CRC checking in the application is not necessary, send two Null characters (CHR$0) for the CRC. SQC-310 will ignore the CRC. SQC-310 will still return a CRC in its response, but it can be ignored. 4 - 10... -
Page 95: Response Packet (Sqc-310 To Host Message)
SQC-310 in wrong mode for this command NOTE: If CRC checking in the application is not necessary, send two Null characters (CHR$0) for the CRC. SQC-310 will ignore the CRC. SQC-310 will still return a CRC in its response, but it can be ignored. -
Page 96: Calculating The Crc
SQC-310 Operating Manual 4.2.3 Calculating the CRC The following algorithm is used to computer the Cyclic Redundancy Check (CRC): NOTE: The Sync character and CRC are not included in the CRC calculation. All other characters should be included. The CRC is initialized to hexadecimal(0x) 3FFF. -
Page 97: Sqc-310 Commands
Response: !8ASQC310C 2 MB Ver 6.58 9A (154)(131) 4.3.2 Get/Set Film Parameters Numeric film parameter values sent and received by SQC-310 are integers. To convert between the integer value and the actual value, multiply or divide by the number of decimal digits in the displayed parameter. - Page 98 SQC-310 Operating Manual Table 4-3 Get/Set film parameters Cmd ID Description Parameters Film Name Sets/Gets the film name. P Term Sets/Gets the main film edit I Term screen parameters. D Term Material # Pocket Tooling Crystal Quality, Rate Dev %...
-
Page 99: Get/Set Film Parameter Examples
However, the I Term is displayed with one decimal digit (e.g., 0.5). A Get response of 5 actually represents a parameter value of 0.5. Similarly, a Set value of 5 for the I Term sets its value in SQC-310 to 0.50. 4.3.3 Get/Set System Parameters Get Command Message = <CommandID><?><Space>... -
Page 100: Get/Set System Parameter Examples
SQC-310 Operating Manual 4.3.3.1 Get/Set System Parameter Examples Get the Period and System Tooling: Command: !(B? 1 2(65)(117) Response: !/A1,25 2,100 (81)(73) Set the Period and System Tooling: Command: !.B 1,25 2,100(84)(133) Response: !$A(53)(151) Set the Display Rate vs. Time Graph: Command: !&BA 1(81)(35) -
Page 101: Get/Set Process Parameter Examples
SQC-310 Operating Manual The First Layer is the layer number of the first layer in the process. Subsequent layers are found by reading the Next Layer parameter (see section 4.3.5). Table 4-5 Get/Set process parameters Cmd ID Description Parameters Gets/sets the process parameters. 1... -
Page 102: Get/Set Layer Parameters
SQC-310 Operating Manual 4.3.5 Get/Set Layer Parameters Get Command = <CommandID><Layer Number><?><Space><Parameter> Get Response = <A><Parameter><Comma><String|Value> Set Command = <CommandID><Layer Number><Space><Parameter> <Comma><String|Value> Set Response = <A> Table 4-6 Get/Set layer parameters Cmd ID Description Parameters Init Rate Gets/Sets the layer parameters for Final Thickness any layer in the active process. -
Page 103: Get/Set Layer Parameter Examples
[Parameter] Current layer - CoDep Positions None Deletes all 1000 layers. Most often used to clear SQC-310 in preparation for downloading a new list. 4.3.5.1 Get/Set Layer Parameter Examples Get Process 1, Layer 1, Source 1 initial rate and final thickness: Command: !.DA1 1 1? 1 2(90)(89) -
Page 104: Get/Set Material Parameter Examples
SQC-310 Operating Manual 4.3.6.1 Get/Set Material Parameter Examples Get Material 1 name: Command: !'F1? 1(135)(105) Response: !,AAluminum9 (57)(152) Set Material 1 name: Command: !/F1 1,Aluminum(99)(39) Response: !$A5 (53)(151) 4.3.7 Get/Set Input and Relay Parameters Get Command = <CommandID><Input#|Relay#><?><Space> <Parameter> Get Response = <A><Parameter><Comma> <String|Value>... - Page 105 Once a relay state has been set remotely, that relay is Unlock Relay (Releases the relay back to locked and SQC-310 will not allow it SQC-310 control) to be controlled via a Logic Statement Action, Sensor, or Source.
-
Page 106: Get/Set Input And Relay Parameter Examples
SQC-310 Operating Manual 4.3.7.1 Get/Set Input and Relay Parameter Examples Get input 1 and input 2 functions: Command: !(G? 1 2(131)(40) Response: !*A1,3 2,4(156)(152) Set input 1 and input 2 functions to Start Layer and Stop Layer: Command: !,G1 1,2 3,4 (56)(34) -
Page 107: Get/Set Sensor And Source Parameters
SQC-310 Operating Manual 4.3.8 Get/Set Sensor and Source Parameters Get Command = <CommandID><Sensor|Source><?><Space><Parameter> Get Response = <A><String|Value> Set Command = <CommandID><Sensor|Source><Space><Parameter> <Comma><String|Value> Set Response = <A> Table 4-9 Get/Set sensor and source parameters Cmd ID Description Parameters Crystal Tooling Gets/Sets the parameters of each Number of Positions of the 2 or 4 sensors. -
Page 108: Get/Set Sensor And Source Parameter Examples
SQC-310 Operating Manual 4.3.8.1 Get/Set Sensor and Source Parameter Examples Get sensor 1 number of positions, control type, and current crystal position: Command: !,HA1? 2 5 9(153)(140) Response: !0A2,1 5,1 9,1 (67)(113) Get source 1 number of positions, control type, and current pocket position:... -
Page 109: Get/Set Logic Statement Parameters
SQC-310 Operating Manual 4.3.9 Get/Set Logic Statement Parameters Get Command = <CommandID><Logic Statement#><?><Space> <Parameter> Get Response = <A><String|Value> Set Command = <CommandID><Logic Statement#><Space><Parameter> <Comma><String|Value> Set Response = <A> Table 4-10 Get/Set logic statement parameters Cmd ID Description Parameters Name (16 characters) -
Page 110: Get Num Channels
Output Readings Same as K but will respond with an Sensor Readings error if there are no new sensor readings since the last time the command was sent. Used primarily for the testing SQC-310. 4 - 26... -
Page 111: Get Readings Examples
SQC-310 Operating Manual 4.3.11.1 Get Readings Examples To Get Output readings: Command: !$K1(93)(49) Response: !cA0.00 0.00 100.00 0.000 0.00 -1 -1 -1 -1 -1 -1 -1 -1 -1 -1 -1 -1(44)(90) The return string is of the form: Time, Rate 1, Deviation 1, Thickness 1, Power 1, Rate 2, Deviation 2, Thickness 2, etc. -
Page 112: Get Output Rate Example
SQC-310 Operating Manual 4.3.13.1 Get Output Rate Example To get the output 1 rate: Command: !$M1(92)(113) Response: !)A 0.00(87)(100) 4.3.14 Get Sensor Thickness Get Command Message = <CommandID><Sensor Number> Get Response Message = <A><String|Value> Table 4-15 Get sensor thickness parameters... -
Page 113: Get Sensor Frequency/Crystal Life
SQC-310 Operating Manual 4.3.16 Get Sensor Frequency/Crystal Life Get Command Message = <CommandID><Sensor Number> Get Response Message = <A><String|Value> Table 4-17 Get sensor frequency/crystal life parameters Cmd ID Description Parameters Sensor Number (1 to 4) Returns the frequency of the requested sensor. -
Page 114: Get/Set Output Power
SQC-310 Operating Manual 4.3.18 Get/Set Output Power Get Command Message = <CommandID><?><Space><Output Number> Get Response Message = <A><String|Value> Set Command Message = <CommandID><Output Number><Space> <String|Value> Set Response Message = <A> Table 4-19 Get/Set output power parameters Cmd ID Description Parameters Output Number (1 to 4) Gets/Sets the output power. -
Page 115: Set Active Process Example
Set Command Message = <CommandID><Parameter> Set Response Message = <A> Table 4-21 Set run state parameters Cmd ID Description Parameters Start Process Sets SQC-310 operating state Stop Process Start Layer Stop Layer Next Layer Force Final Thickness Zero Thickness Zero Time... -
Page 116: Get Run State
Cmd ID Description Parameters Stopped Returns the Phase #, Process Crystal Verify Elapsed Time (displayed on SQC-310 main screen), Process #, Initialize Layer Active Layer of the active process, Manual Start Layer and Manual/Automatic control Crystal Rotate (0/1). Pocket Rotate... -
Page 117: Get Run State Examples
SQC-310 Operating Manual Table 4-22 Get run state parameters (continued) Cmd ID Description Parameters Alarm: Min. Rate and Max. Power Gets the on/off status of each Alarm: Max. Rate and Min. Power possible alarm. Alarm: Shutter Delay Error Alarm: Crystal Failure... -
Page 118: Start/Stop Download/Upload Session
Table 4-23 Start/Stop download/upload session parameters Cmd ID Description Parameters None XSTART Starts a upload/download session and places in SQC-310 in remote mode. SQC-310 must be Stopped in order to start an upload/download session. None XSTOP Stops an upload/download session and exits remote mode. - Page 119 SQC-310 Operating Manual ® 4.4.1 Visual Basic Public Sub CalcChkSumByte(ByRef ByData() As Byte, ByRef byCRC() As Byte) Dim CRC As Integer Dim TmpCRC As Integer Dim LastIndex As Long Dim i As Integer Dim j As Integer LastIndex = UBound(ByData()) ' Avoid on length messages If ByData(1) >...
- Page 120 SQC-310 Operating Manual ' Source : Total VB SourceBook 6 On Error GoTo PROC_ERR LoByte = intNumber And &HFF& PROC_EXIT: Exit Function PROC_ERR: MsgBox "Error: " & Err.Number & ". " & Err.Description, , _ "LoByte" Resume PROC_EXIT End Function...
-
Page 121: Java ®
SQC-310 Operating Manual ® 4.4.2 Java private short calcCRC(byte[] str) { short crc = 0; short tmpCRC; int length = 1 + str[1] - 34; if (length > 0) { crc = (short) 0x3fff; for (int jx = 1; jx <= length; jx++) { crc = (short) (crc ^ (short) str[jx]);... - Page 122 SQC-310 Operating Manual 4.4.3 C++ class CRC14 public: CRC14(void) { crc = 0x0;}; public: short crc; public: short calcCRC( unsigned char * str) int length = (str != NULL) ? 1 + str[1] - 34 : 0; if (length > 0) { crc = (short) 0x3fff;...
-
Page 123: Introduction
Operate the process remotely. Display SQC-310 readings in both numerical and graphical format. Data log and store SQC-310 readings to a text file on a drive. Create and store an unlimited number of processes, layers, and films. ... -
Page 124: Main Window
SQC-310 communications are not established. The Main window control functions are listed below. Run Process ....Selects the active process on SQC-310. Defaults on SQC-310 Comm software startup to the first SQC-310 process. - Page 125 Graph ......Displays readings from SQC-310. A graph of the average rate, rate deviation, or output power can be selected on the Main screen View menu.
-
Page 126: Data Log Menu
SQC-310 Operating Manual Thickness ....The current film thickness, based on the average of all sensors assigned to the output (kÅ). - Page 127 Once communications have been established, follow these steps to start data acquisition: Select the desired process/layer from the list of SQC-310 processes/layers. Press Zero to zero the thickness reading (optional). With the log file option set to append or overwrite, Press Start Process or Start Layer to start data acquisition.
-
Page 128: Instrument Window
5.5 Instrument Window The Instrument window is used to edit processes, films, materials, and other SQC-310 setup data. In the Main window toolbar, click Edit >> Instrument... to display the Instrument window. When Edit >> Instrument is selected in the Main... - Page 129 OK ......Closes the SQC-310 Instrument window. If data is still in memory, but it has not been...
-
Page 130: Process Tree
Processes can be renamed but they cannot be deleted. Process names can be 16 characters long. SQC-310 always holds a list of 100 processes, even if some are empty. After naming the process, the buttons on the Instrument window can be used to add layers to the process. -
Page 131: Film Menu
SQC-310 Operating Manual 5.5.2 Film Menu In the Instrument window toolbar, click Edit >> Films... to display the Film Edit window to assign materials stored in the database to films (50 films maximum) which are used to define process layers (see Figure 5-6). -
Page 132: Materials Menu
SQC-310 data will be overwritten. <-Upload ..... Click to upload materials from SQC-310 to the SQC-310 Comm software. The existing SQC-310 Comm software data will be overwritten. -
Page 133: Sensor Setup Menu
SQC-310 data will be overwritten. <-Upload ..... Click to upload sensor data from SQC-310 to the SQC-310 Comm software. The existing SQC-310 Comm software data will be overwritten. -
Page 134: Source Setup Menu
5-9). NOTE: Source setup is closely linked to Digital I/O definitions. Changing a source may cause SQC-310 to alter its internal I/O definitions. For this reason, the software must be connected to SQC-310. Click Download to verify and modify SQC-310 configuration before selecting OK to close the Source Setup menu and save the data to memory. -
Page 135: Digital I/O Setup Menu
SQC-310 Operating Manual <-Upload ..... Click to upload source data from SQC-310 to the SQC-310 Comm software. The existing SQC-310 Comm software data will be overwritten. - Page 136 SQC-310 data will be overwritten. <-Upload ..... Click to upload sensor data from SQC-310 to the SQC-310 Comm software. The existing SQC-310 Comm software data will be overwritten.
- Page 137 Name ......A descriptive name for the input. For inputs that have been assigned in SQC-310, this will overwrite the SQC-310 assigned default name.
-
Page 138: Logic Statements Menu
When either the Show Relays or Show Inputs button is clicked, the View Status may be selected. View Status monitors the state of the SQC-310 inputs and relays. Similar to the SQC-310 display, relays and inputs whose state is currently true are displayed in green. - Page 139 DnLoad->..... Click to download the displayed logic statement from the SQC-310 Comm software to SQC-310. The existing SQC-310 data will be overwritten. Ideal for testing the statements.
-
Page 140: Creating Logic Statements
IF statement, add an operator such as AND, OR, or NOT and select another condition. If a mistake is made, click Back to delete the last entry in the IF statement. If SQC-310 is connected, click Check to verify the logic statement is correct. -
Page 141: Graph Menu
Download-> ....Click to download the current System settings from the SQC-310 Comm software to SQC-310. The existing SQC-310 data will be overwritten. -
Page 142: Communications Setup Menu
5.7 Communications Setup Menu On the Main window toolbar, click Edit >> Communications... to display the communications setup menu. This menu allows for setup and troubleshooting of the SQC-310 communications (see Figure 5-15). Figure 5-15 Comm Setup menu... - Page 143 USB ......Select for USB communications. SQC-310 units currently connected to a computer via USB will be recognized and added to the displayed on the list.
-
Page 144: View Menu
Protocol, on page 4-9 for details). Response ....The response from SQC-310 is displayed in this dialog box. Responses will be displayed in ASCII format (refer to section 4.2,... -
Page 145: Help Menu
On the Main window toolbar, click Help to display a Help option and an About option. The Help option contains the information presented in this chapter. NOTE: The Help option is not available on Windows 7/8 operating systems. The About window displays the SQC-310 Comm software revision and technical support information (see Figure 5-17). - Page 146 SQC-310 Operating Manual This page is intentionally blank. 5 - 24...
-
Page 147: Troubleshooting Guide
Chapter 6 Troubleshooting and Maintenance 6.1 Troubleshooting Guide If SQC-310 does not function as expected, or appears to have diminished performance, the following Symptom/Cause/Remedy chart may be helpful (see Table 6-1). Additional troubleshooting information can be found in the operating manuals for sensors, located on the Thin Film Instrument and Sensor Manuals CD. - Page 148 Ground wires or straps must connect to an appropriate earth ground (refer to section 1.2.3 on page 1-3). SQC-310 is malfunctioning. Contact INFICON service department (refer to section 1.3 on page 1-5). Stored parameter values SQC-310 is malfunctioning. Contact INFICON service...
- Page 149 SQC-310 Operating Manual Table 6-1 Symptom/Cause/Remedy Chart (continued) SYMPTOM CAUSE REMEDY Frequency reading in Temperature of the crystal is Control the vacuum chamber Sensor Information screen unstable (an AT-cut crystal temperature. is unstable or drifting (not may drift as much as a normal frequency 10 Hz/°C).
- Page 150 Bad in-vacuum cable or bad Use an ohmmeter to check oscillator cables. electrical continuity and isolation of cables. SQC-310 or oscillator is Test the SQC-310 and malfunctioning. oscillator using the oscillator test mode (see section 6.6 on page 6-17).
- Page 151 SQC-310 Operating Manual Table 6-1 Symptom/Cause/Remedy Chart (continued) SYMPTOM CAUSE REMEDY Frequency reading in SQC-310 or oscillator is Test the SQC-310 and Sensor Information screen malfunctioning. oscillator using the oscillator is an incorrect value. test mode (see section 6.6 on page 6-17).
- Page 152 Use an ohmmeter to check bad in-vacuum cable, or bad electrical continuity and BNC cable. isolation of sensor head, feedthrough, in-vacuum SQC-310 or oscillator is cable, and both BNC cables. malfunctioning. Refer to the sensor operating manual for detailed troubleshooting information.
- Page 153 SQC-310 Operating Manual Table 6-1 Symptom/Cause/Remedy Chart (continued) SYMPTOM CAUSE REMEDY Crystal Fail is displayed Crystal is being hit by small Use a shutter to shield the during deposition before droplets of molten material sensor during source “normal” life of crystal is from the evaporation source.
- Page 154 SQC-310 Operating Manual Table 6-1 Symptom/Cause/Remedy Chart (continued) SYMPTOM CAUSE REMEDY Crystal Fail is displayed Crystal oscillation is weak In-vacuum cable length during deposition before due to excessive cable should not exceed 78.1 cm “normal” life of crystal is length between oscillator and (30.75 in.).
- Page 155 SQC-310 Operating Manual Table 6-1 Symptom/Cause/Remedy Chart (continued) SYMPTOM CAUSE REMEDY Rate, Thickness, and Excessive cable length In-vacuum cable length Frequency readings are between oscillator and should not exceed 78.1 cm noisy. crystal. (30.75 in.). Use the 15.2 cm (6 in.) cable between oscillator and feedthrough.
- Page 156 SQC-310 Operating Manual Table 6-1 Symptom/Cause/Remedy Chart (continued) SYMPTOM CAUSE REMEDY Thickness reading has Mode hopping due to Replace the crystal. large excursions during damaged crystal. deposition. Crystal is near the end of its Replace the crystal. life. Scratches or foreign particles...
- Page 157 SQC-310 Operating Manual Table 6-1 Symptom/Cause/Remedy Chart (continued) SYMPTOM CAUSE REMEDY Thickness reading has Excessive heat input to the If heat is due to radiation large excursions during crystal. from the evaporation source, source warm-up or when move sensor farther away (at source shutter is opened least 25.4 cm (10 in.)) from...
- Page 158 SQC-310 Operating Manual Table 6-1 Symptom/Cause/Remedy Chart (continued) SYMPTOM CAUSE REMEDY Thickness reproducibility Erratic evaporation flux Move sensor to a different is poor. characteristics. location. Check the evaporation source for proper operating conditions. Ensure relatively constant pool height and avoid tunneling into the melt.
- Page 159 Check source output cable incorrect. wiring (refer to section 2.4 on page 2-5). SQC-310 is malfunctioning. Substitute a known good SQC-310 (or other QCM). SQC-310 Comm software Host computer has Check that operating system does not install correctly incompatible operating...
-
Page 160: Cleaning
(displayed at power up as Ver x.xx) and hardware version (displayed at power up as Hw x) available when contacting INFICON for upgrades. 6.4 Clearing the Memory SQC-310 has two ways to clear system memory. Both involve pressing and holding a combination of buttons and the control knob. Figure 6-1 displays the number designations given to each button and the control knob. - Page 161 Loading System ... . . Failed! Loading Processes ... Failed! Once SQC-310 boots up, turn the power off and back on again. SQC-310 loads normally and displays: Loading Materials .
-
Page 162: Spare Parts
SQC-310 Operating Manual 6.5 Spare Parts Oscillator ..... PN 783-500-013 BNC Cable (15.2 cm (6 in.)) ..PN 782-902-011 BNC Cable (3.0 m (10 ft.)) . -
Page 163: Persistent Crystal Fail Indication
This connects the internal test crystal to the circuit instead of the normal Sensor connector. If SQC-310 and the oscillator are functioning correctly, the Sensor Information will display a Frequency of approximately 5.5 MHz while this button is depressed. - Page 164 SQC-310 Operating Manual This page is intentionally blank. 6 - 18...
-
Page 165: Importance Of Density, Tooling And Z-Ratio
SQC-310 Operating Manual Chapter 7 Calibration Procedures 7.1 Importance of Density, Tooling and Z-Ratio The quartz crystal microbalance is capable of precisely measuring the mass added to the face of the oscillating quartz crystal sensor. The density of this added material allows conversion of the mass information into thickness. -
Page 166: Determining Tooling
SQC-310 with the new density value and observing that the displayed thickness is equal to the measured thickness, provided that the thickness displayed on SQC-310 has not been zeroed between the test deposition and entering the calculated density. NOTE: Slight adjustment of density may be necessary in order to achieve T 7.3 Determining Tooling... -
Page 167: Laboratory Determination Of Z-Ratio
Install a new crystal and record its starting frequency, F . The starting frequency will be displayed on the SQC-310 Main screen. Make a deposition on a test substrate such that the percent crystal life display will read approximately 50%, or near the end of crystal life for the particular material, whichever is smaller. - Page 168 SQC-310 Operating Manual Using the density value from step 1 and the recorded values for F and F adjust the Z-Ratio value in thickness equation [5] to bring the calculated thickness value into agreement with the actual thickness. If the calculated value of thickness is greater than the actual thickness, increase the Z-Ratio value.
-
Page 169: Control Loop
SQC-310 Operating Manual 7.5 Control Loop The function of the control loop parameters is to match the SQC-310 reaction to an error (between the measured deposition rate and the desired rate) to the time related characteristics of the deposition source and its power supply. There are three adjustable parameters;... - Page 170 SQC-310 Operating Manual The integral time constant (I-Term) parameter is defined as the time difference between the actual start of a change in rate and the time at which approximately 66% of the rate step is achieved. It can be estimated as twice the time for the rate...
-
Page 171: Identifying A Fast Or Slow Source
SQC-310 Operating Manual 7.5.1 Identifying a Fast or Slow Source Classifying a source as being fast or slow is based on the time it takes for the rate to change from a change in power (delay). It is straight forward to measure the delay. -
Page 172: Control Loop Tuning Procedure
SQC-310 Operating Manual 7.6 Control Loop Tuning Procedure This section will help in adjusting SQC-310 PID control loop settings to achieve a stable deposition process. Control loop tuning is a trial and error process and there is no "best" procedure to accomplish this task. It may take several adjustments to achieve the desired tune. - Page 173 Verify that the power supply output agrees with the SQC-310 Power (%) reading. If the readings are not the same, check the wiring and verify the source setup in the System menu. Confirm the Voltage Scale agrees with the input specifications of the power supply.
- Page 174 SQC-310 Operating Manual NOTE: TIME is typically 0.2 to 1 seconds for e-beam evaporation, 5 to 20 seconds for thermal evaporation. When finished, slowly decrease power until there is no rate. Determine the Dead Time Å Slowly increase the power (%) until the desired Rate ( /s) is achieved.
- Page 175 SQC-310 Operating Manual Figure 7-5 Over/Under damped control curve (from a positive/negative step) Continue to adjust P and I Terms alternating between 0% power in Manual mode and Auto mode until the steady-state response is well controlled. Ringing does not need to be completely removed during this step if the steady-state response is smooth;...
- Page 176 SQC-310 Operating Manual This page is intentionally blank. 7 - 12...
-
Page 177: Basics
IQM-233 Operating Manual Chapter 8 Measurement Theory 8.1 Basics The quartz crystal deposition monitor, or QCM, utilizes the piezoelectric sensitivity of a quartz monitor crystal to added mass. The QCM uses this mass sensitivity to control the deposition rate and final thickness of a vacuum deposition. When a voltage is applied across the faces of a properly shaped piezoelectric crystal, the crystal is distorted and changes shape in proportion to the applied voltage. -
Page 178: Monitor Crystals
XTC/3 Operating Manual when 1 angstrom of Aluminum (density of 2.77 g/cm ) is added to its surface. In this manner the thickness of a rigid adlayer is inferred from the precise measurement of the crystal frequency shift. The quantitative knowledge of this effect provides a means of determining how much material is being deposited on a substrate in a vacuum system, a measurement that was not convenient or practical prior to this understanding. - Page 179 IQM-233 Operating Manual Contouring dissipates the energy of the traveling acoustic wave before it reaches the edge of the crystal. Energy is not reflected back to the center where it can interfere with other newly launched waves, essentially making a small crystal appear to behave as though it is infinite in extent.
-
Page 180: Period Measurement Technique
XTC/3 Operating Manual Figure 8-3 Thickness shear displacement Displacement node 8.1.2 Period Measurement Technique Although instruments using equation [2] were very useful, it was soon noted they had a very limited range of accuracy, typically holding accuracy for F less than 0.02 F . -
Page 181: Z-Match Technique
IQM-233 Operating Manual Since the frequency of the reference is stable and known, the time to accumulate the m counts is known to an accuracy equal to ± 2/F where F is the reference (n/F oscillator frequency. The monitor crystal period is where is the number of counts in the second accumulator. - Page 182 XTC/3 Operating Manual This page is intentionally blank. 8 - 6...
-
Page 183: A.1 Introduction
SQC-310 Operating Manual Appendix A Material Table A.1 Introduction The following Table A-1 represents the density and Z-Ratio for various materials. The list is alphabetical by chemical formula. CAUTION Some of these materials are toxic. Please consult the material safety data sheet and safety instructions before use. - Page 184 SQC-310 Operating Manual Table A-1 Material Table (continued) Formula Density Z-Ratio Material Name 3.244 1.261 barium nitrate 5.720 *1.000 barium oxide BaTiO 5.999 0.464 barium titanate (tetr) BaTiO 6.035 0.412 barium titanate (cubic) 1.850 0.543 beryllium 1.990 *1.000 beryllium fluoride 3.010...
- Page 185 SQC-310 Operating Manual Table A-1 Material Table (continued) Formula Density Z-Ratio Material Name 6.440 0.412 cobalt oxide 7.200 0.305 chromium 5.210 *1.000 chromium (iii) oxide 6.680 *1.000 chromium carbide 6.170 *1.000 chromium boride 1.870 *1.000 cesium 4.243 1.212 cesium sulfate CsBr 4.456...
- Page 186 SQC-310 Operating Manual Table A-1 Material Table (continued) Formula Density Z-Ratio Material Name 5.350 0.516 germanium 5.200 *1.000 germanium nitride 6.240 *1.000 germanium oxide GeTe 6.200 *1.000 germanium telluride 13.090 0.360 hafnium 10.500 *1.000 hafnium boride 12.200 *1.000 hafnium carbide 13.800...
- Page 187 SQC-310 Operating Manual Table A-1 Material Table (continued) Formula Density Z-Ratio Material Name LiNbO 4.700 0.463 lithium niobate 9.840 *1.000 lutetium 1.740 1.610 magnesium MgAl 3.600 *1.000 magnesium aluminate MgAl 8.000 *1.000 spinel 3.180 0.637 magnesium fluoride 3.580 0.411 magnesium oxide 7.200...
- Page 188 SQC-310 Operating Manual Table A-1 Material Table (continued) Formula Density Z-Ratio Material Name NiCr 8.500 *1.000 nichrome NiCrFe 8.500 *1.000 Inconel NiFe 8.700 *1.000 permalloy NiFeMo 8.900 *1.000 supermalloy 7.450 *1.000 nickel oxide 2.510 *1.000 phosphorus nitride 11.300 1.130 lead PbCl 5.850...
- Page 189 SQC-310 Operating Manual Table A-1 Material Table (continued) Formula Density Z-Ratio Material Name 4.810 0.864 selenium 2.320 0.712 silicon 3.440 *1.000 silicon nitride 3.220 *1.000 silicon carbide 2.130 0.870 silicon (ii) oxide 2.648 1.000 silicon dioxide 7.540 0.890 samarium 7.430 *1.000...
- Page 190 SQC-310 Operating Manual Table A-1 Material Table (continued) Formula Density Z-Ratio Material Name 5.430 *1.000 titanium nitride 4.900 *1.000 titanium oxide 4.260 0.400 titanium (iv) oxide 11.850 1.550 thallium TIBr 7.560 *1.000 thallium bromide TICI 7.000 *1.000 thallium chloride 7.090 *1.000...
- Page 191 SQC-310 Operating Manual Table A-1 Material Table (continued) Formula Density Z-Ratio Material Name ZnTe 6.340 0.770 zinc telluride 6.490 0.600 zirconium 6.080 *1.000 zirconium boride 6.730 0.264 zirconium carbide 7.090 *1.000 zirconium nitride 5.600 *1.000 zirconium oxide A - 9...
- Page 192 SQC-310 Operating Manual This page is intentionally blank. A - 10...
Need help?
Do you have a question about the SQC-310 and is the answer not in the manual?
Questions and answers
Source feedback timeout error is on my SQC-310 controller. How do I correct this? Thank You