
Subscribe to Our Youtube Channel
Related Manuals for Lumens 3D101


Summary of Contents for Lumens 3D101
-
Page 1: Document Camera
3D101 Document Camera User Manual [Important] To download the latest version of Quick Start Guide, multilingual user manual, software, or driver, etc., please visit Lumens http://www.Mylumens.com/goto.htm English - 0... - Page 2 Table of contents Copyright Information ..................2 Chapter 1 Safety Instructions ................ 3 Precautions ....................4 FCC Warning ....................4 EN55022 (CE Radiation) Warning ............... 4 Revisions......................5 Chapter 2 Package Contents ................. 6 Chapter 3 Product Overview ................. 7 Relative Operation Position ..............
-
Page 3: Copyright Information
Inc. Copying, reproducing or transmitting this file is not allowed if a license is not provided by Lumens Digital Optics Inc. unless copying this file is for the purpose of backup after purchasing this product. In order to keep improving the product, Lumens Digital Optics Inc. hereby reserves the right to make changes to product specifications without prior notice. -
Page 4: Chapter 1 Safety Instructions
Chapter 1 Safety Instructions Always follow these safety instructions when setting up and using the Document Camera: 1. Do not place Document Camera in tilted position. 2. Do not place the Document Camera on an unstable trolley, stand or table. 3. -
Page 5: Precautions
Precautions Warning: To reduce the risk of fire or electric shock, do not expose this appliance to rain or moisture. Caution Risk of Electric Shock DO NOT OPEN Caution: To reduce the risk of electric shock, do not remove cover (or back). No user-serviceable parts inside. -
Page 6: Revisions
Revisions English - 5... -
Page 7: Chapter 2 Package Contents
Chapter 2 Package Contents 3D101 Quick Start Guide 4-Steps Card (For download of other language versions, please visit Lumens website) USB Cable English - 6... -
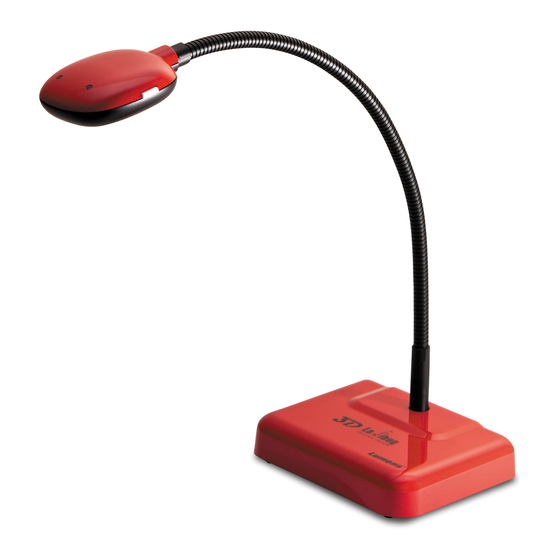
Page 8: Chapter 3 Product Overview
Chapter 3 Product Overview 3. Gooseneck 1. LED indicator 2. AF button 4. Lens English - 7... -
Page 9: Relative Operation Position
3.1 Relative Operation Position 3.2 Correct use English - 8... -
Page 10: Chapter 4 Installation And Connections
Chapter 4 Installation and Connections 4.1 Connecting to 3D display Cable Cable 3D display or TV VGA cable, DVI cable or HDMI cable Computer 4.2 Connecting to an Interactive Whiteboard (IWB) 3D projector Cable Cable Cable Cable Computer English - 9... -
Page 11: Mounting At Desk
(H1) M4 screw (P = 0.7) 4.4 Installing application software After installing Lumens image software, you can use the following functions: Control the 3D101. Capture and record images. Annotate the image, highlight important details and save it. -
Page 12: System Requirements
Min Hard Drive Space: 100 MB Windows XP SP2 or above 4.4.2 Install software Please download Ladibug™ software at Lumens website. Extract the file downloaded and then click [Setup] to install. Select language. The installation wizard will guide you through the process. Please follow the on-screen instructions and press [Next] for the next step. - Page 13 Press [Yes] to create Ladibug™ shortcut on your desktop. Press [Finish] and restart the computer. English - 12...
-
Page 14: Chapter 5 Start Using
Chapter 5 Start Using <Note> Ensure that the USB cable is connected and Ladibug™ software is installed at first. Refer to Chapter 4 Installation and Connections in this user manual. FOCUS USB Cable icon to open Ladibug™ Software. 1. Double click on 2. -
Page 15: Description Of Led Indicator
5. Press button to optimize the image. You are ready to teach or present. 6. Adjust the gooseneck as needed and press [FOCUS] button. * Each time the camera head is moved, press the [FOCUS] button to refocus the lens. 5.1 Description of LED indicator LED indicator 1. -
Page 16: Chapter 6 Troubleshooting
USB port at the front end of the computer. Please change the connection to other USB port. Cannot identify 3D101 Outdated or incomplete OS versions might not be able to identify USB devices like 3D101. Please use Windows XP SP2 or newer versions that are compatible.
Need help?
Do you have a question about the 3D101 and is the answer not in the manual?
Questions and answers