Winmate W07IB3S-EHT1 Quick Start Manual
E-series hmi
intel celeron bay trail-m n2930 1.83 ghz
Hide thumbs
Also See for W07IB3S-EHT1:
- User manual (64 pages) ,
- User manual (64 pages) ,
- Quick start manual (20 pages)
Table of Contents
Advertisement
Quick Links
Download this manual
See also:
User Manual
E-Series HMI
Intel® Celeron® Bay Trail-M N2930 1.83 GHz
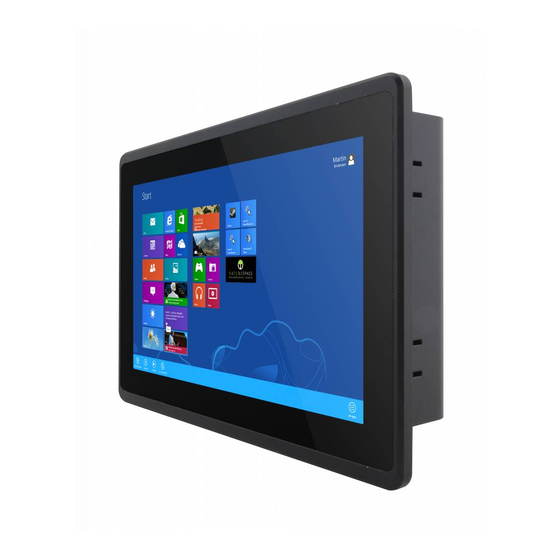
W07IB3S-EHT1
W10IB3S-EHH2
W15IB3S-EHA2
Quick Start Guide
V1.1
For more information on this and
other Winmate products, please
visit our website at:
www.winmate.com
Document Part Number: 9152101I1003
Please read these instructions carefully before using this product, and save this manual for future use.
Advertisement
Table of Contents

Related Manuals for Winmate W07IB3S-EHT1


Summary of Contents for Winmate W07IB3S-EHT1
- Page 1 W15IB3S-EHA2 Quick Start Guide V1.1 For more information on this and other Winmate products, please visit our website at: www.winmate.com Document Part Number: 9152101I1003 Please read these instructions carefully before using this product, and save this manual for future use.
-
Page 2: Table Of Contents
3.2.2 VESA Mounting - 22 - 5 SPECIFICATIONS - 23 - 5.1 Hardware Specifications - 23 - APPENDIX - 25 - Appendix A: Cleaning the Monitor - 25 - Appendix B: Winmate Software Development Kit - 26 - - 2 -... - Page 3 FCC Statement This device complies with part 15 FCC rules. Operation is subject to the following two conditions: This device may not cause harmful interference. This device must accept any interference received including interference that may cause undesired operation. This equipment has been tested and found to comply with the limits for a class "B"...
- Page 4 European Union Electromagnetic Compatibility Directive (2014/30/EU) EN55024: 2010/ A1: 2015 o IEC61000-4-2: 2009 o IEC61000-4-3: 2006+A1: 2007+A2: 2010 o IEC61000-4-4: 2012 o IEC61000-4-5: 2014 o IEC61000-4-6: 2014 o IEC61000-4-8: 2010 o IEC61000-4-11: 2004 EN55032: 2012/AC:2013 EN61000-3-2:2014 EN61000-3-3:2013 Low Voltage Directive (2014/35/EU) ...
- Page 5 Brand and product names are trademarks or registered trademarks of their respective owners. Disclaimer Winmate Inc. reserve the right to make changes, without notice, to any product, including circuits and/or software described or contained in this manual in order to improve design and/or performance. We...
- Page 6 Customer Service We provide a service guide for any problem by the following steps: First, visit the website of our distributor to find the update information about the product. Second, contact with your distributor, sales representative, or our customer service center for technical support if you need additional assistance.
- Page 7 Safety Information WARNING! / AVERTISSEMENT! Always completely disconnect the power cord from your chassis whenever you work with the hardware. Do not make connections while the power is on. Sensitive electronic components can be damaged by sudden power surges. Only experienced electronics personnel should open the PC chassis.
-
Page 8: Introduction
1 INTRODUCTION Congratulations on purchasing Winmate® E-Series HMI. Winmate® continues developing new generation of Human Machine Interfaces for Industry 4.0 and Internet of Things (IoT). You can choose the most suitable operating system for you application. Thereby wide customization possibilities are available to satisfy the needs of industrial automation. -
Page 9: Package Contents
1.2 Package Contents Carefully remove the box and unpack your device. Please check if all the items listed below are inside your package. If any of these items are missing or damaged contact us immediately. Standard factory shipment list: Quick Start Guide Driver CD &... -
Page 10: Product Overview
1.3 Product Overview 1.3.1 E-Series HMI 7” Unit: mm № Description № Description ① 12V DC Power Jack ④ HDMI 1.4a ② RS-232/422/485 ⑤ RJ-45 Gbe LAN x 2 ③ USB 3.0 x 1, USB 2.0 x 1 - 10 -... -
Page 11: E-Series Hmi 10.1
1.3.2 E-Series HMI 10.1” Unit: mm № Description № Description ① 12V DC Power Jack ④ HDMI 1.4a ② RS-232/422/485 ⑤ RJ-45 Gbe LAN x 2 ③ USB 3.0 x 1, USB 2.0 x 1 - 11 -... -
Page 12: E-Series Hmi 15.6
1.3.3 E-Series HMI 15.6” Unit: mm № Description № Description ① 12V DC Power Jack ④ HDMI 1.4a ② RS-232/422/485 ⑤ RJ-45 Gbe LAN x 2 ③ USB 3.0 x 1, USB 2.0 x 1 - 12 -... -
Page 13: Getting Started
2 GETTING STARTED 2.1 Turning on Your Device Follow the following steps to turn on your HMI device: 1. Connect the AC adapter to the DC-in jack connector on the back side of the HMI device. 2. Connect the power cord to AC adapter. 3. -
Page 14: Connecting To Other Devices
2.2 Connecting to Other Devices 2.2.1 Power Connector DC power source input is a power jack connector. Power input is 12V Pin № Pin № Signal Name Signal Name DC_IN Minimum Voltage 11.4V Maximum Voltage 12.6V Voltage Maximum Current 4.2A 2.2.2 Serial Port Connector Use serial port connector to connect your HMI to external devices such as mouse, modem or printer. -
Page 15: Ethernet Connector
2.2.3 Ethernet Connector The E-Series HMI has one RJ-45 (LAN) connector that supports10/100/1000 Mbps Ethernet interface for connecting to the internet. Pin № Signal Name Pin № Signal Name TX1+ TX1- TX2+ TX2- TX3+ TX3- TX4+ TX4- 2.2.4 USB Connector E-Series HMI has USB 2.0 and USB 3.0 connectors. -
Page 16: Hdmi Connector
2.2.5 HDMI Connector E-Series HMI uses HDMI1.4a connector to connect to the external display. Signal Signal № № Name Name TMDS_DATA2+ TMDS_DATA2- TMDS_DATA1+ TMDS_DATA1- TMDS_DATA0+ TMDS_DATA0- TMDS_CLOCK+ TMDS_CLOCK- DDC_CLOCK DDC_DATA Hot Plug Detect - 16 -... -
Page 17: Changing Serial Port Settings
2.3 Changing Serial Port Settings Serial port COM1 can be configured for RS-232, RS-422 or RS- 485. Jumpers are located on the motherboard. You need to open the housing in order to access the jumpers. CAUTION/ ATTENTION It is recommended to use factory jumper settings. Opening the housing when it is sealed may damage the device and its parts. -
Page 18: How To Enable Watchdog
To enable Watchdog, you need to download Winmate Watchdog utility. Find more information on Watchdog in “Watchdog Guide” that you can download from Winmate Download Center or File Share. To enable watchdog in Watchdog AP follow the instructions below: 1. On the right bottom side of the desktop screen, click triangle button to show hidden icons. -
Page 19: Turning Off Your Device
3. In Watchdog utility window set countdown time and periodically feed time, or disable watchdog. Example: Every 10 min watchdog will monitor the system, in case any error occurs the system will restart automatically when the countdown time reaches 0. Every 9 min watchdog timer will be reset to 10 min. -
Page 20: Installation
3 INSTALLATION 3.1 Wiring Requirements The following common safety precautions should be observed before installing any electronic device: Strive to use separate, non-intersecting paths to route power and networking wires. If power wiring and device wiring paths must cross make sure the wires are perpendicular at the intersection point. -
Page 21: Mounting Solution
3.2 Mounting Solution 3.2.1 Panel Mounting In addition to elegant design, panel mount solution is making the HMI unit easy to clean and maintain. The HMI device is secured to the fixture from the rear by using the mounting brackets included in the package. -
Page 22: Vesa Mounting
VESA Mount is a widely used mounting solution suitable for all kinds of applications. Notice that VESA mounting solution applies only to 7” E-Series HMI. Notice that VESA mounting kit is not supplied by Winmate. Dimensions Screw Hole Diameter 75 x 75 mm... -
Page 23: Specifications
5 SPECIFICATIONS 5.1 Hardware Specifications Model Name W07IB3S-EHT1 W10IB3S-EHH2 W15IB3S-EHA2 Display 7” TFT 10.1” TFT 15.6” TFT Size/ Type Resolution 1024 x 600 1280 x 800 1366 x 768 Brightness, 320 (typ.) 350 (typ.) 400 (typ.) Contrast Ratio 500 : 1 (typ.) 800:1 (typ.) - Page 24 Operating System Windows 10 IoT Windows Embedded 8.1 Industry Windows Embedded 8 Standard Windows Embedded Standard 7 Input / Output USB Port 1 x USB 2.0 , 1 x USB 3.0 COM Port 1 x RS232/422/485 Ethernet 2 x RJ45, 10/100/1000 HDMI 1 x HDMI 1.4a Environment Considerations...
-
Page 25: Appendix
APPENDIX Appendix A: Cleaning the Monitor Before cleaning: Make sure the device is turned off. Disconnect the power cable from any AC outlet. When cleaning: Never spray or pour any liquid directly on the screen or case. ... -
Page 26: Appendix B: Winmate Software Development Kit
Appendix B: Winmate Software Development Kit Winmate® provides Software Development Kit (SDK). The table below lists SDK provided by Winmate for E-Series HMI with Intel® Celeron® Bay Trail-M N2930 processor: Item File Type Description Watchdog SDK Utility Watchdog Utility To find the Drivers and SDK, please refer to the Driver CD that comes in the package or contact us. - Page 27 NOTES _______________________________________________________ _______________________________________________________ _______________________________________________________ _______________________________________________________ _______________________________________________________ _______________________________________________________ _______________________________________________________ _______________________________________________________ _______________________________________________________ _______________________________________________________ _______________________________________________________ _______________________________________________________ _______________________________________________________ _______________________________________________________ _______________________________________________________ _______________________________________________________...
- Page 28 Winmate Inc. 9F, No.111-6, Shing-De Rd., San-Chung District, New Taipei City 24158, Taiwan, R.O.C Tel: 886-2-8511-0288 Fax: 886-2-8511-0211 Email: sales@winmate.com.tw Official website: www.winmate.com...
Need help?
Do you have a question about the W07IB3S-EHT1 and is the answer not in the manual?
Questions and answers