
Related Manuals for SciCan Quantim 16


Summary of Contents for SciCan Quantim 16
- Page 1 • Operator’s Manual Copyright 2004 SciCan. All rights reserved. Rev 4.0 www.scican.com...
-
Page 2: Table Of Contents
12. Pressure Vessel Certificate of Compliance .....23 All rights reserved. QUANTIM 16 and SysTM are trademarks of SciCan. For all service and repair inquiries:... -
Page 3: Introduction
Operator’s Manual before operating the unit. By following these simple step-by-step instructions you can ensure your instruments are correctly sterilized every time. The Quantim 16 is suitable only for the applications listed in this user manual; use for other purposes may be unsafe. -
Page 4: Important Information
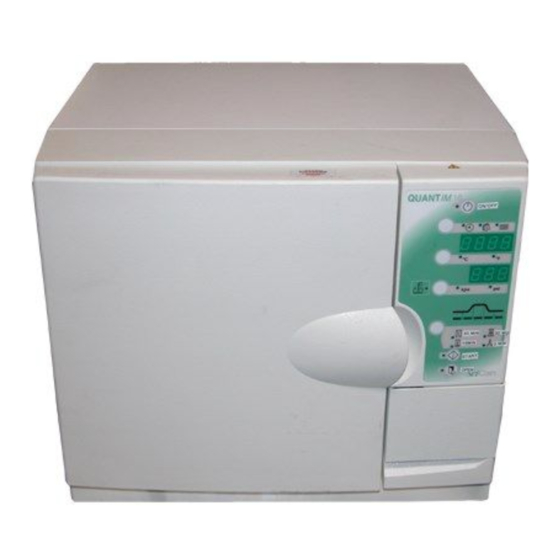
2.1 Warnings Do not permit any person other than authorized personnel to supply parts for, service, or maintain your Quantim 16. SciCan shall not be liable for incidental, special or consequential damages caused by any maintenance or services performed on the... - Page 5 ■ cycle select button door gasket seal ■ ■ status indicator air filter ■ main autoclave door The Quantim 16 autoclave is approx. 42 kg or 92 lbs. At least two people will be needed to lift it. Page 4...
-
Page 6: Installation
3. Installation 3.1 Installing the Unit To install the unit, follow these steps: 1. Ensure the unit is placed on a flat, level surface prior to running a sterilization cycle. To verify if the unit is level, pour half a cup of de-ionized / distilled water into the chamber. - Page 7 3. Installation 3.3 Setting the Date and Time To set the calendar and clock, follow these steps: 1. Ensure the autoclave is in the ready mode by pressing the Standby / Ready button ■ ■ . The LED next to button will be out.
-
Page 8: Indicators And Controls
4. Indicators and Controls ■ Standby / Ready ■ time / date / cycle counter time / temp / date / ■ counter LED ■ Celsius / Fahrenheit ■ pressure LED ■ water fill indicator ■ pressure reading button (kpa / psi) cycle status indicator ■... -
Page 9: Running A Cycle
5. Running a Cycle 5.1 Cycle Description Chart Unwrapped Wrapped Cycle Symbol Packs instruments instruments 132˚C/ 270˚F /3 min 132˚C/ 270˚F /15 min 121˚C/ 250˚F /30 min Temp./ exposure time Instruments • For unwrapped • Solid and hinged • Wrapped solid surgical packs instruments;... - Page 10 ■ Press button to open the door. At the completion of each sterilization cycle the Quantim 16 automatically begins a vacuum drying cycle. When the autoclave is drying the load the door may be opened at anytime by pressing ■...
- Page 11 5. Running a Cycle Always use the lifter handle, part #279007 when removing standard open trays from the autoclave as the instruments may be hot. When using other trays or cassettes, use heat protective gloves. ■ If the Drying Phase is interrupted UM 15 will displayed in the pressure display ■...
- Page 12 5. Running a Cycle • If during this ten-second period the standby button is pressed again the display reverts to either Ready Mode (Temperature < 95˚C) or recovery (for example does not allow entry into the unit until the display shows 95˚C). The display will be as shown in Figure 3.
-
Page 13: Printer Installation
6. Printer Installation View 1 – Front View 4 – Side ■ ■ fixing cam and screw power ON light ■ ■ printer mechanism swung open printer mechanism open tab ■ paper feed button View 5 Side – (Printer mechanism ■... - Page 14 6. Printer Installation 6.1 Printer Installation Install the printer by following these instructions and by referring to the illustrations. A large flat blade screwdriver will be required. Disconnect the autoclave from the power supply and wait at least 1 minute before fitting or removing the printer.
- Page 15 6. Printer Installation 6.2 Installing Paper into the Printer Install the paper roll by following these steps and by referring to the illustrations. ■ 1. Open the printer door. Open the printer and swing the printer mechanism down. ■ 2. Note the position the printer paper feeds into the printer mechanism 3.
-
Page 16: Accessories
7. Accessories Product - Part number Printer – 289083 Printer Ribbon – 279221 Paper Roll - 279001 Stainless Steel Pouch Rack (282 mm / 11") – 279009 6 tray chamber rack – 279229 Printer – 289083 Stainless Steel Tray (282 mm / 11") – 279006 Stainless Steel Lifter Handle –... -
Page 17: Maintenance
Refill the reservoir with clean distilled water. 8.3 Routine maintenance Routine annual maintenance including such tasks as filter replacements are required for this unit. Contact your authorized dealer or your SciCan technician to book your service appointment. Page 16... - Page 18 8. Maintenance 8.4 Waste bottle The waste bottle has to be regularly checked and be emptied when the water reaches the “Max” level. One easy way to remember is to empty the waste bottle every time you fill up the water reservoir. After emptying the waste bottle fill it up to “Min” level with tap water.
-
Page 19: Troubleshooting
9. Troubleshooting If the software detects any unusual condition, a visual and audible indication will be given. The nature of the condition can be determined by reference to the fault guide. The recovery sequence allows access to any instruments within the autoclave. Condition indicated Cause Remedy... - Page 20 9. Troubleshooting Recovery Sequence (allows instruments to be removed from the unit) ■ • Recovery Sequence ‘i’: Press –‘Stabilize’ (no ‘flashing’, no ‘beeping’) ■ Press – ‘Recover’ ■ • Recovery Sequence ‘ii’ Press –‘Stabilize’ (no ‘flashing’, no ‘beeping’) Cannot proceed (door not enabled). Contact your local dealer or service technician. ■...
-
Page 21: Warranty
10. Warranty Limited Warranty For a period of one year*, SciCan guarantees that the QUANTIM 16, when supplied by SciCan in new and unused condition, will not fail during normal service due to defects in material and workmanship that are not due to apparent abuse, misuse, or accident. -
Page 22: Specifications
11. Specifications Chamber Capacities: 16 L / 4.23 ga Overall product width: 480 mm / 18.9" Overall product height: 410 mm / 16.14" Overall product length: 440 mm / 17.3" Unpacked weight: 41kg (max) / 90.4lbs Chamber diameter: 250 mm / 9.9" Chamber lengths: 330 mm / 13"... - Page 23 11. Specifications Rating: All products are rated for intermittent use, continuously Heater: Cast into boiler Temperature cutout: Bimetallic type with manual only reset. This operates at 170˚C / 338˚F Pressure release valve: Operates at 2.76 bar or 40psi. Manufactured to ASME code and UV stamped. Accumulation is ≤ 10% Over-voltage category: Group II Pollution degree:...
-
Page 24: Compliance
Hydrostatic Pressure Test: Location: Assembly Area Test Pressure: 4.6 Bar Test Medium & temp: water – 20˚C T ypical SciCan, A Division of Lux & Zwingenberger, 1440 Don Mills Rd., Toronto, ON, M3B3P9 Tel: (416) 446-2706, Fax: (416) 445-2727. Page 23...
Need help?
Do you have a question about the Quantim 16 and is the answer not in the manual?
Questions and answers