Table of Contents
Advertisement
Quick Links
Advertisement
Table of Contents

Related Manuals for SciCan Bravo


Summary of Contents for SciCan Bravo
- Page 1 BRAVO AUTOCLAVES • Operator’s Manual...
-
Page 3: Table Of Contents
1. INTRODUCTION ..........................1 SYMBOLS USED IN THE MANUAL ........................1 DISCLAIMERS ..............................1 GENERAL WARNINGS ............................2 2. RECEIVING YOUR BRAVO ......................3 SHIPPING WEIGHT ............................3 DESCRIPTION OF PACKAGE CONTENTS ...................... 3 HANDLING THE UNIT ............................4 3. PRODUCT OVERVIEW ........................5 GENERAL CHARACTERISTICS ......................... - Page 4 TABLE OF CONTENTS 7. PREPARING MATERIAL FOR STERILIZATION ................34 TREATING TEXTILE MATERIAL BEFORE STERILIZATION ................. 34 ARRANGING THE LOAD ..........................34 8. PROGRAM SELECTION ......................36 INTRODUCTION .............................. 36 PROCEDURE ..............................36 9. RUNNING THE CYCLE ........................ 38 STARTING THE CYCLE ..........................38 PROGRAM EXECUTION ..........................
- Page 5 TABLE OF CONTENTS APPENDIX D – TROUBLESHOOTING ..................... 69 APPENDIX E – ALARMS ........................72 ALARMS ................................72 ALARM INTERVENTION ..........................72 Alarm during a cycle ..........................72 Alarm outside the cycle ........................... 73 RESETTING THE SYSTEM ..........................74 ALARM CODES ..............................75 ANALYSIS AND RESOLUTION OF PROBLEMS .....................
-
Page 7: Introduction
Bravo. SciCan shall not be liable for incidental, special or consequential damages caused by any maintenance or services performed on the Bravo by a third party, or for the use of equipment or parts manufactured by a third party, including lost profits, any commercial loss, economic loss, or loss arising from personal injury. -
Page 8: General Warnings
1. INTRODUCTION GENERAL Please observe the following precautions in order to avoid injury or property damage: WARNINGS – Use ONLY high quality distilled water. WARNING THE USE OF WATER OF INADEQUATE QUALITY CAN SEVERELY DAMAGE THE UNIT. FOR MORE INFORMATION, SEE APPENDIX A, TECHNICAL CHARACTERISTICS. -
Page 9: Receiving Your Bravo
SELLER AND SHIPPER DESCRIPTION OF PACKAGE CONTENTS The package contains: – Bravo Steam sterilizer Stainless steel wire instrument tray (3 pc with Bravo , 5pc with Bravo , Bravo Stainless steel rack; Instruction/Operators manual and other documents; Tray extractor; Container with quick connect for adding distilled water (about 0.5 US gal / 2 L );... -
Page 10: Handling The Unit
2. RECEIVING YOUR BRAVO Where possible, the packaged product must be handled using suitable mechanical means and HANDLING THE following the instructions shown on the package. UNIT In the case of manual handling, the product must be lifted by two people using the handles cut in the side of the box. -
Page 11: Product Overview
U.S. by FDA for healthcare use. Bravo units also offer a number of interesting options for configuring the preheating mode (based on the sterilizer's frequency of use) and printing the cycle report (printer optional on Bravo17). -
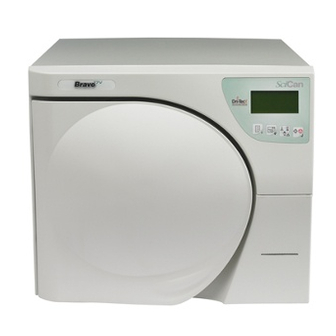
Page 12: Front
Bravo Sterilization chamber Door microswitch Motorized closing system Bacteriological filter RS232 serial port (Manufacture use only) Built-in printer (optional in Bravo Service compartment (shown open) Used water drain quick connect Distilled water fill quick connect Water drain filter Door... -
Page 13: Rear
3. PRODUCT OVERVIEW Signal input for future REAR Bravo Pure Start/Stop cable Distilled water tank vent hole Safety valve Ventilation Outlets (back and side of unit) Heat exchanger Distilled water tank draining point (maintenance) Jack socket for the external tank level... -
Page 14: Control Panel
3. PRODUCT OVERVIEW CONTROL PANEL LCD Display Command keys Command keys will perform different functions depending on the mode: NORMAL mode SETUP mode COMMAND KEYS Enter, confirmation of the value/option Cycle Start/Stop selected Value increment / Forward scroll of Sterilization cycle selection the menu options Value decrement / Backward scroll of Test cycle selection... -
Page 15: Sample Operating Cycle
3. PRODUCT OVERVIEW The Bravo’s sterilization program is a succession of phases, each with a specific purpose. SAMPLE OPERATING After loading the material in the chamber, closing the door, selecting the program and starting CYCLE the cycle (the door opening mechanism locks automatically), the standard program (for porous materials, 134 °C at 4 minutes, for example) uses the following sequence:... -
Page 16: Installation
4. INSTALLATION Correct and careful installation will ensure your Bravo functions properly, protects operators 4. INSTALLATION from physical injury and protects property from damage. DIMENSIONS AND – Height (all models) 16.5” / 420 mm WEIGHT – Width (all models) 19” / 480 mm –... -
Page 17: General Installation Precautions
– Install the device so that any external fill/drain tubing(s) is/are not sharply bent or kinked. These must run freely to the drain tank. The Bravo must be connected to an outlet that provides adequate capacity for the device's ELECTRICAL absorption and ground, and which conforms with current laws and/or standards. -
Page 18: Connecting An External Water Tank
With this option, the autoclave automatically activates a pump that fills the internal tank when it reaches the MIN level. Be sure to monitor the external tank as the Bravo unit can not monitor the water level in the external tank. -
Page 19: Direct Connection To Acentralized Draining Point
4. INSTALLATION Follow the instructions shown below for a correct direct connection to a centralized draining DIRECT point: CONNECTION TO A CENTRALIZED – Insert the silicone tube (provided) or other suitable plastic tube onto hose connection A; DRAINING POINT push the tube all the way on and lock with the plastic tie or other means; –... -
Page 20: Instructions For Use
Once the sterilizer has been correctly installed, it may be turned on and prepared for use. 5. INSTRUCTIONS FOR USE Turn on the Bravo using the main (luminous) switch located on the right side of the unit. NOTE TURNING ON THE... -
Page 21: Stand-By Mode
5. INSTRUCTIONS FOR USE After the initial test, the sterilizer goes into STAND-BY mode and the display shows: STAND-BY MODE C o u n t e r x x x x x / y y y y y S t a n d - b y H I G H 2 3 . -
Page 22: Filling Distilled Water
5. INSTRUCTIONS FOR USE The first time the sterilizer is used or when the MIN water level indicator comes on, you will FILLING DISTILLED have to fill, or top-off, the internal distilled water tank. WATER With reference to the figure (and with the door open), follow these steps: Manual filling 1. -
Page 23: Max Level In The Internal Drain Tank
5. INSTRUCTIONS FOR USE When the water level in the internal drain tank reaches the MAX level, the LCD display MAX LEVEL IN THE alternatively flashes the MAX and MIN icons. INTERNAL DRAIN TANK NOTE T THIS STAGE THE UNIT WILL GENERATE AN ALARM INDICATION PPENDIX LARMS SHOULD YOU ATTEMPT TO START A STERILIZATION CYCLE... -
Page 24: Configuration
6. CONFIGURATION Bravo users can configure the device to meet their specific needs. For example, the device's performance may be adapted on the basis of the type of activity, the type of material to be CONFIGURATION sterilized or its frequency of use. - Page 25 6. CONFIGURATION...
-
Page 26: Description Of The Menu Items
(exit the SPECIAL menu and return to the main menu) SERVICE Menu The Service menu can ONLY be accessed by a SciCan technician. DATA REVIEW Menu The Data Review displays a summary of the device's current settings, allowing users to verify their accuracy. - Page 27 6. CONFIGURATION B R A V O 1 7 D A T E E x x x x / B M y y y y y y d d / m m / y y y y L A N G U A G E T I M E E N G L I S H h h : m m : s s...
-
Page 28: Defaults Settings
6. CONFIGURATION The sterilizer leaves the factory with the following settings: DEFAULTS SETTINGS PROGRAMS: Preset 1: 134 POROUS/WRAPPED Preset 2: 134 HOLLOW/UNWRAP Preset 3: 134 SOLID/WRAPPED Preset 4: 134 SOLID/UNWRAP STAND-BY MODE: HIGH (preheating) PRINT OPTIONS: OFF or 1 copy FILLING OPTIONS: MANUAL DRAIN OPTIONS:... -
Page 29: Setting The Time
6. CONFIGURATION Setting the time To set the date, follow these steps: (TIME SETTING on the – When the day flashes: set the current date with the + and - keys. Confirm with ↵. BASIC menu) – When the month flashes: set the current month with the + and - keys. Confirm with ↵. –... -
Page 30: Setting The Sterilization Programs
6. CONFIGURATION NOTE DISABLE O CHANGE THE PASSWORD FIRST SELECT THE OPTION WHICH CANCELS ANY POWER-ON THE PREVIOUS PASSWORD AND THEN SELECT THE CYCLE START OPTION ENTERING THE NEW PASSWORD AS DESCRIBED ABOVE Setting the sterilization Setting and storing customized sterilization programs in the four pre-set positions can be programs completed by following these steps, starting in the advanced menu. - Page 31 6. CONFIGURATION As a function of the choices made, you will go to one of two alternative menus that allow you to choose the type of drying you want associated with the selected program. a) Programs with short drying (HOLLOW/UNWRAP., SOLID/UNWRAP., EMERGENCY): →...
- Page 32 6. CONFIGURATION To define the CUSTOM program. follow these steps: 1. From the PROGRAMS menu, select the number to which the program is to be associated (see the previous description) and then select CUSTOM in the next screen. The following menu will appear: →...
- Page 33 6. CONFIGURATION 5. Depending on the selection (LONG or SHORT) one of two different menus will open (these menus are the same for the standard cycles), i.e.: In SHORT mode the following is displayed: → S T A N D A R D D R Y I N G ↑...
-
Page 34: Setting The Stand-By Mode
6. CONFIGURATION Setting the STAND-BY Based on the equipment's frequency of use, or other considerations, users may want to select mode a high or low heating level during the STAND-BY (preheating) phase. They may also want to (STAND-BY OPTIONS on select a STAND-BY time-out mode that determines when the STAND-BY is deactivated. -
Page 35: Setting The Printing Mode
6. CONFIGURATION Setting the printing When the sterilizer is equipped with a printer (optional on the Bravo17, but standard on the mode Bravo17V and 21V) for recording sterilization program data, it is necessary to set the (PRINT OPTIONS on the parameters required for its proper operation. - Page 36 6. CONFIGURATION Item REPORT The following screen appears: → P R I N T O U T M O D E ↑ N R . C O P I E S ↓ P R I N T L A S T E X I T Select item PRINTOUT MODE to choose the mode in which the data is printed: The following options appear:...
-
Page 37: Setting The Tank Filling Mode
Setting the tank filling The internal tank can be filled either manually or automatically. Automatic filling would occur mode from an external device (container or demineralizer) connected to the Bravo - see Chapter 4 - (FILLING OPTIONS on Installation). the ADVANCED menu) Select FILL OPTIONS and the following menu appears: →... -
Page 38: Acquisition Of The Ambient Pressure
6. CONFIGURATION Selecting INTERNAL DRAIN enables the reading of the MAX level sensor in the internal tank. This is the setting that should be selected if connected directly to the drain. Selecting EXTERNAL DRAIN enables the MAX level sensor located in the external tank and in the internal tank. -
Page 39: Adjusting The Contrast Of The Liquid Crystal Display
6. CONFIGURATION Adjusting the The LCD contrast function adjusts the screens’ readability to compensate for the sterilizer contrast of the liquid location’s lighting. crystal display (LCD CONTRAST on the When LCD CONTRAST is activated, this screen appears: SPECIAL menu) A D J U S T M E N T T H E L C D C O N T R A S T... -
Page 40: Preparing Material For Sterilization
FOR STERILIZATION 7. PREPARING Clean and rinse all instruments before loading them into the sterilizer. Disinfectant residues and solid debris may inhibit sterilization and damage the instruments and the Bravo. MATERIAL FOR STERILIZATION Unwrapped instruments, once exposed to ambient or external conditions, cannot be maintained in a sterile state. - Page 41 In addition, MONITORING SciCan recommends the use of biological monitors such as the EZTEST-STEAM indicator or the 3M Attest system for routine monitoring of the sterilizer. It is important to select the correct...
-
Page 42: Program Selection
8. PROGRAM SELECTION Program selection is key to a successful sterilization process. 8. PROGRAM SELECTION Since objects for sterilization can vary in shape, consistency and properties, it is important to identify the most suitable program for it. This will not only preserve its physical characteristics INTRODUCTION (avoiding or, at any rate, limiting alterations) it will ensure the most effective sterilization. - Page 43 8. PROGRAM SELECTION NOTE F NO STERILIZATION PROGRAM IS SELECTED THE EQUIPMENT CANNOT START A STERILIZATION CYCLE AND THE FOLLOWING MESSAGE WILL APPEAR WITH A BEEP S E L E C T P R O G R A M P L E A S E . . . WARNING IF YOU USE A PROGRAM THAT IS INAPPROPRIATE FOR THE TYPE OF MATERIAL TO BE STERILIZED (SEE APPENDIX B) THE EFFECTIVENESS...
-
Page 44: Running The Cycle
9. RUNNING THE CYCLE A sterilization cycle consists of a predetermined number of phases. Based on the type of air 9. RUNNING extraction, sterilization process and drying method, the number and duration of these phases THE CYCLE can differ with each programs. The electronic control system monitors the various phases, while checking that the various parameters are respected. -
Page 45: Program Execution
9. RUNNING THE CYCLE If there is insufficient memory to store the new cycle data, the following message will be displayed: W A R N I N G C A R D F U L L M E M O R Y F U L L ↵... - Page 46 9. RUNNING THE CYCLE First vacuum phase When the optimum temperature is reached, the first vacuum phase (1st VACUUM PULSE) begins and the unit brings the chamber pressure down to the target value. The display shows: 1 3 4 P O R O U S / W R A P P E D V A C U U M P U L S E 8 4 .
- Page 47 9. RUNNING THE CYCLE Third rise in After the last vacuum phase, the pressure in the sterilization chamber must rise to the value pressure set for the sterilization process (3rd PRESSURE PULSE), always through the injection of steam. 1 3 4 P O R O U S / W R A P P E D P R E S S U R E P U L S E...
- Page 48 9. RUNNING THE CYCLE Drying After the steam under pressure is released, the vacuum pump turns on to begin the drying phase (DRYING). This creates a low pressure in the sterilization chamber to facilitate the evaporation and consequent elimination of the steam. Depending on the type of drying selected, one of the following screens will appear: 1 3 4 P O R O U S / W R A P P E D...
-
Page 49: Result Of The Cycle
9. RUNNING THE CYCLE NOTE T THE END OF THE CYCLE AND UP TO THE OPENING OF THE DOOR THE HEATING ELEMENTS ARE OFF TO ALLOW COOLING OF THE LOAD NLY AFTER THE LOAD HAS BEEN REMOVED WILL THE UNIT RETURN TO ANY STAND BY PREHEATING OPTIONS YOU HAVE SELECTED NOTE... -
Page 50: Checking The Cycle Data Report (For Units With Printers)
9. RUNNING THE CYCLE It is a good practice to check that the print report issued at the end of the sterilization program, CHECKING THE also specifies a positive outcome. CYCLE DATA At the end of the cycle, the relevant data for the thermodynamic parameters of the sterilization, REPORT (FOR i.e., temperature and pressure (°C and bar), and time (in minutes) of the sterilization cycle, UNITS WITH... -
Page 51: Resetting The System
9. RUNNING THE CYCLE Finally, when the door is opened, you will be asked to reset the device by the following message: M A N U A L S T O P R E S E T S Y S T E M 8 5 . -
Page 52: Storing Sterilized Materials
10. STORING STERILIZED MATERIALS The sterilized material must be adequately treated and stored to maintain its sterility over time, 10. STORING until its use. STERILIZED MATERIALS Inadequate storage can cause rapid recontamination. This leads to problems regardless of what you do since you will either be using INTRODUCTION recontaminated material (most of the time unconsciously), placing the user and patient at risk, or you will have to run the sterilization cycle again, with an inevitable waste of time and... -
Page 53: Test Programs
11. TEST PROGRAMS The Bravo product line offers two test programs to periodically check the unit’s effectiveness. 11. TEST The two programs are: PROGRAMS • BOWIE & DICK Test • INTRODUCTION Vacuum Test The BOWIE & DICK Test program executes a cycle at 134 °C for a duration of 3.5 min. This cycle has a fractionated vacuum phase similar to that used in the POROUS and HOLLOW programs. -
Page 54: Vacuum Test
11. TEST PROGRAMS To select the VACUUM TEST program, press the Test Selection key one or two times until the display reads: VACUUM TEST V A C U U M T E S T - 0 . 8 0 b a r The Vacuum Test program is run with the sterilization chamber empty, except for the trays and their supports. - Page 55 11. TEST PROGRAMS V A C U U M T E S T W A I T I N G P E R I O D 0 5 : 0 0 - 0 . 8 0 b a r 0 1 : 4 8 During this phase, a variation of not more than 10% of the maximum low pressure is allowed.
-
Page 56: Appendix A - Technical Characteristics
APPENDIX A – TECHNICAL CHARACTERISTICS APPENDIX A – TECHNICAL CHARACTERISTICS SUMMARY TABLE Autoclave Device Models Bravo , Bravo , Bravo SciCan Ltd. 1440 Don Mills Road Phone: (416) 445-1600 Manufacturer Toronto ON M3B 3P9 Fax: (416) 445-2727 CANADA Toll free: 1-800-667-7733... -
Page 57: Safety Devices
APPENDIX A – TECHNICAL CHARACTERISTICS SAFETY DEVICES The sterilizer is equipped with the following safety devices: – Mains fuses (see summary table data) Protects inside the device against a fault in the heating elements. Action: cuts the electricity. – Fuses protecting the electronic circuits (see summary table data) Protects against a fault in the primary transformer circuit and low voltage uses. -
Page 58: Water Supply Characteristics
APPENDIX A – TECHNICAL CHARACTERISTICS WATER SUPPLY CHARACTERISTICS DESCRIPTION WATER SUPPLY VALUES VALUES IN CONDENSATE DRY RESIDUE < 1 mg/l < 10 mg/l SILICON OXIDE SiO < 0.1 mg/l < 1 mg/l IRON < 0.1 mg/l < 0.2 mg/l CADMIUM <... -
Page 59: Appendix B - Programs
APPENDIX B – PROGRAMS APPENDIX B – PROGRAMS INTRODUCTION The steam sterilizer is appropriate for almost all materials and instruments, so long as they are able to tolerate, without damage, a minimum temperature of 121 °C. The following material can typically be sterilized with steam: –... -
Page 60: Program Summary Table
APPENDIX B – PROGRAMS PROGRAM SUMMARY TABLE NOMINAL BASIC PROGRAM STERILIZABLE MATERIAL VALUES PARAMETERS PROGRAM NOTES DESCRIPTION TYPE 220V 17V 21V 17/17V 17/17V 21V Unpackaged 1.00 1.25 0.30 0.40 0.30 porous material Porous material 0.75 1.00 0.25 0.30 0.25 in single package Porous material in double 0.60... - Page 61 APPENDIX B – PROGRAMS GENERAL NOTES FRACTIONATED = Pre-vacuum stage completed with a sequence of 3 vacuum pulses + 3 pressure pulses. “Fractionated vacuum” programs are dedicated to the sterilization of porous materials or handpieces. SINGLE = Pre-vacuum stage completed by 1 vacuum + 1 pressure pulse. “Single vacuum”...
-
Page 62: Sterilization Program Diagram
APPENDIX B – PROGRAMS STERILIZATION PROGRAM DIAGRAM... - Page 63 APPENDIX B – PROGRAMS...
- Page 64 APPENDIX B – PROGRAMS...
- Page 65 APPENDIX B – PROGRAMS...
- Page 66 APPENDIX B – PROGRAMS...
-
Page 67: Diagrams Of The Test Cycles
APPENDIX B – PROGRAMS DIAGRAMS OF THE TEST CYCLES... -
Page 68: Examples Of Printed Reports
APPENDIX B – PROGRAMS EXAMPLES OF PRINTED REPORTS Cycle Report (normal) Cycle Report (extended) Report following a Manual Stop at the operator's request Model Bravo17 Model Bravo17 Model Bravo17 03 BM 0001 03 BM 0001 03 BM 0001 Ver. SW Exxxx/BMyyyyyy Ver. - Page 69 APPENDIX B – PROGRAMS Report following an alarm Cycle Report Cycle Report BOWIE & DICK TEST VACUUM TEST Model Bravo17 Model Bravo17 Model Bravo17 03 BM 0001 03 BM 0001 03 BM 0001 Ver. SW Exxxx/BMyyyyyy Ver. SW Exxxx/BMyyyyyy Ver. SW Exxxx/BMyyyyyy Counter 0011/0019...
-
Page 70: Appendix C - Maintenance
APPENDIX C – MAINTENANCE APPENDIX C - MAINTENANCE Regular maintenance will guarantee safe, efficient operation of the Bravo over the device's entire life. For better quality maintenance, supplement ordinary checks with regular periodic examinations by a qualified technical service department (see Appendix Z). -
Page 71: Maintenance Description
APPENDIX C – MAINTENANCE DANGER BEFORE PERFORMING ORDINARY MAINTENANCE, MAKE SURE THAT THE POWER SUPPLY CORD IS REMOVED FROM THE MAINS SOCKET. WHEN IT IS NOT POSSIBLE, TURN OFF THE EXTERNAL BREAKER OF THE EQUIPMENT POWER SUPPLY LINE. IF THE EXTERNAL BREAKER IS FAR AWAY OR, AT ANY RATE, NOT VISIBLE TO THE MAINTAINANCE WORKER, PLACE A WORK IN PROGRESS SIGN ON THE EXTERNAL BREAKER AFTER TURNING IT OFF. -
Page 72: Clean Internal Distilled Water Tank
APPENDIX C – MAINTENANCE Clean internal distilled Arrange an empty container on the floor near the sterilizer and insert the free end of a water tank tube. Unscrew the plug (1) from the rear draining point and plug in the other end of the tube. Wait until the internal tank is completely drained and close the draining point with the plug. -
Page 73: Replace Bacteriological Filter
APPENDIX C – MAINTENANCE Replace bacteriological When it is due to be changed, or when you notice visible clogging of the filter (when the filter filter turns gray) unscrew the bacteriological filter from its support and replace it with a new one by screwing it all the way down on the connector on the front of the machine. -
Page 74: Replacing The Printer Paper On Units Equipped With Internal Printers
APPENDIX C – MAINTENANCE Replacing the printer To replace the printer paper: paper on units equipped with internal printers Printer type1: Open the door (1) of the service compartment to access the printer. Printer type 1 Push the tongues (2) to open the printer door and access the paper compartment. Remove the empty roll and place a new roll of thermal paper so that the paper unrolls from the top. -
Page 75: Appendix D - Troubleshooting
APPENDIX D – TROUBLESHOOTING APPENDIX D – TROUBLESHOOTING Analysis and resolution of problems If your sterilizer is not working correctly, please consult this list before calling the Technical Service Department: PROBLEM POSSIBLE CAUSE PROPOSED SOLUTION The power cord is not plugged-in. Plug it in. - Page 76 APPENDIX D – TROUBLESHOOTING PROBLEM POSSIBLE CAUSE PROPOSED SOLUTION Check the tightness of the connector; if necessary, reassemble, paying greater attention to sealing (see The water supply tube from the the Chapter 4 - “Installation”). external tank (optional) is not well Check that the tube coming from the external tank is connected.
- Page 77 APPENDIX D – TROUBLESHOOTING PROBLEM POSSIBLE CAUSE PROPOSED SOLUTION Lime residue on the wall of the Clean the device and its parts, as required. sterilization chamber and/or (See Appendix C “Maintenance”). accessories. Check the adequacy of the sterilization temperature of Blackening of the the selected program in relation to the material to be Wrong sterilization program...
-
Page 78: Appendix E - Alarms
APPENDIX E – ALARMS APPENDIX E – ALARMS ALARMS Every time an anomalous condition occurs during the operation of the sterilizer, an alarm is generated and a specific code (consisting of a letter followed by a 3-digit number) is displayed. Alarm codes are divided into three categories: •... -
Page 79: Alarm Outside The Cycle
APPENDIX E – ALARMS At the end of what has been described and having reached safe conditions, the machine activates a special procedure, that asks the user to manually unlock the door: ⇑ P R E S S U N L O C K T H E D O O R 1 0 1 . -
Page 80: Resetting The System
APPENDIX E – ALARMS which is automatically transformed to the message: ( A l a r m M e s s a g e ) R E S E T S Y S T E M 8 0 . 5 °... -
Page 81: Alarm Codes
APPENDIX E – ALARMS ALARM CODES The list of alarm codes the messages displayed on the LCD and relative RESET mode are as follows: CODE ALARM DESCRIPTION LCD INDICATION RESET MODE ERRORS (category E) E 000 Blackout BLACK-OUT E 010 Door open DOOR OPEN Exceeded timeout for activating door lock... - Page 82 APPENDIX E – ALARMS CODE ALARM DESCRIPTION LCD INDICATION RESET MODE A 250 1st vacuum pulse not reached within timeout PV1 TIMEOUT 1st rise to atmospheric pressure not reached A 251 ATM1 TIMEOUT within timeout A 252 1st pressure pulse not reached within timeout PP1 TIMEOUT Press key A 253...
-
Page 83: Analysis And Resolution Of Problems
APPENDIX E – ALARMS ANALYSIS AND RESOLUTION OF PROBLEMS Based on the type of alarm, below we provide instructions for identifying the possible causes and restoring correct operation: CODE POSSIBLE CAUSE PROPOSED SOLUTION ERRORS (category E) Wait for electricity to return and perform RESET following the Sudden power failure (blackout). - Page 84 Lack of water in the external tank or Bravo Pure turned off (automatic Fill the tank with a sufficient quantity of water, remembering to filling). periodically check the level, or turn on the Bravo Pure. Perform RESET following the instructions. Connection tube between the A 040...
- Page 85 APPENDIX E – ALARMS CODE POSSIBLE CAUSE PROPOSED SOLUTION Incorrect connection of the temperature sensor (sterilization chamber) to the connector. A 111 Temperature sensor short circuit (sterilization chamber). Incorrect connection of the temperature sensor (steam generator) to the connector. A 112 Temperature sensor short circuit (steam generator).
- Page 86 APPENDIX E – ALARMS CODE POSSIBLE CAUSE PROPOSED SOLUTION Perform RESET following the instructions. Carefully clean the gasket with a clean cotton cloth dampened with Steam leaking through the gasket. water. Start the program again. If the gasket still leaks, replace the gasket. Perform RESET following the instructions.
- Page 87 APPENDIX E – ALARMS CODE POSSIBLE CAUSE PROPOSED SOLUTION A 255 Perform RESET following the instructions. Check the quantity of material in the sterilization chamber and make sure Excessive load. it does not exceed the maximum quantity allowed. (See the Summary Table in Appendix A, Technical Characteristics). Contact the Technical Support Department Problem in the plumbing circuit.
- Page 88 APPENDIX E – ALARMS CODE POSSIBLE CAUSE PROPOSED SOLUTION Manually rearm the thermostat(s) located on the back of the device (see the Chapter 3 - Product Overview). A258 Unscrew the black plastic protection cap, press the white button until Intervention of the steam generator you hear a click and replace the cap.
-
Page 89: Appendix F - Diagrams
APPENDIX F – DIAGRAMS APPENDIX F – DIAGRAMS ELECTRICAL DIAGRAM... -
Page 90: Plumbing Diagram
APPENDIX F – DIAGRAMS PLUMBING DIAGRAM... -
Page 91: Appendix G - Notes
APPENDIX G – NOTES APPENDIX G - NOTES... -
Page 92: Appendix H - Spare Parts & Accessories
Chamber Drain Filter, Bravo 47200030000 Thermal Paper STXX0250000 Data Logger (G), Bravo 01-111729 Data Logger (T), Bravo 01-111730 Water In-Take Pull Kit, Bravo 01-111774S Direct-to-Drain Kit, Bravo 01-111775S Rack Chamber, Bravo 17(V) C1BP583000Y Rack Chamber, Bravo 21V C1BG534000Y Tray 17/17V, Bravo... -
Page 93: Appendix I - Technical Support
APPENDIX I – TECHNICAL SUPPORT APPENDIX I – TECHNICAL SUPPORT For all service and repair inquiries: Canada 1-800-870-7777 United States: 1-800-572-1211 International: +1 (416) 446-4500 Email: techservice.ca@scican.com (Canada) techservice.us@scican.com (USA) techservice.int@scican.com (International) -
Page 94: Appendix J - Limited Warranty
SciCan’s option and without charge, of any defective non-consumable part(s) (except gasket), provided SciCan is notified in writing within thirty (30) days of the date of such a failure and further provided that the defective part(s) are returned to SciCan, prepaid.
Need help?
Do you have a question about the Bravo and is the answer not in the manual?
Questions and answers