
Related Manuals for Thermo Scientific RMI300S-9-A


Summary of Contents for Thermo Scientific RMI300S-9-A
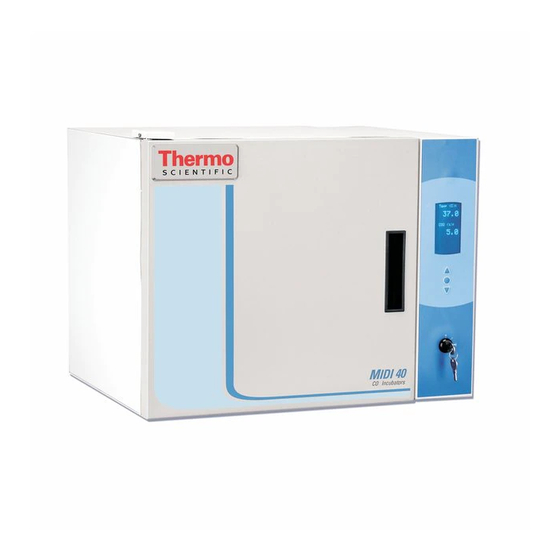
- Page 1 Midi 40 Series Incubator Operating and Maintenance Manual 7003403 Rev. 9 Visit us online to register your warranty www.thermoscientific.com/labwarranty...
- Page 2 Preface Models covered by this manual: Catalog Manufacturer Capacity Sensor Voltage Number Model Number (cu ft) RMI300S-9-A 3403 115V/60Hz 208/230V RMI300S-9-V 3404 50/60Hz MANUAL NUMBER 7003403 41116/IN-4785 11/30/16 Replaced Sample Port and CO2 Inlet labels on pg 3-4 40639 3/22/16...
- Page 3 Thermo Fisher Scientific makes no representations or warranties with respect to this manual. In no event shall Thermo be held liable for any damages, direct or incidental, arising out of or related to the use of this manual. ©2009 Thermo Fisher Scientific. All rights reserved. Midi 40 CO2 Incubator Thermo Scientific...
- Page 4 Always use the proper protective equipment (clothing, gloves, goggles, etc.) 4 Always dissipate extreme cold or heat and wear protective clothing. 4 Always follow good hygiene practices. 4 Each individual is responsible for his or her own safety. Thermo Scientific Midi 40 CO2 Incubator...
- Page 5 We can also provide you with a quotation on our Extended Warranty for your Thermo Scientific products. Whatever Thermo Scientific products you need or use, we will be happy to discuss your applications. If you are experiencing technical problems, working together, we will help you locate the problem and, chances are, correct it yourself...over the telephone without a service...
-
Page 6: Table Of Contents
Control System ........6-2 Recovery (after door opening) ......6-2 Thermo Scientific Midi 40 CO2 Incubator... - Page 7 Warranty Information .........9-1 Section 9 Midi 40 CO2 Incubator Thermo Scientific...
-
Page 8: Introduction
On or Alarm position. This battery system will not power the heaters, fan motor or gas control system. Only qualified service technicians should replace this battery. Replacement instructions and batteries are available from Thermo Scientific. Requirements • A high quality two-stage, low pressure 15 psig (1.056 kg/cm2) pressure regulator is required for proper operation of the CO gas supply. -
Page 9: Specifications
95% @ 37°C Source humidity pan, removable Electrical Rated voltage 115V, 60Hz 208/230V, 50/60Hz Amps/breaker 3A/15 2A/15 Weight 60 lbs. (27kg) Shipping 70 lbs. (32kg) Warranty 1 year All specifications are subject to change without notice. Midi 40 CO2 Incubator Thermo Scientific... -
Page 10: Operating Standards
These units are designed to operate under the following environmental conditions: • Indoor use only • Altitude up to 2000m • Maximum relative humidity 80% for temperatures up to 31°C • Main supply voltage fluctuations not to exceed 10% of the nominal voltage. Thermo Scientific Midi 40 CO2 Incubator... -
Page 12: Pre-Installation
1/4 in. (6.35 mm) ID clear tubing for the gas connection • Cordset • 5” round humidity pan • Additional CO sensor gasket • disposable filter 99.97 Filter Additional gasket Operating manual Humidity Cordset Tubing Figure 3-1. Included Components (shelves and brackets not shown) Thermo Scientific Midi 40 CO2 Incubator... -
Page 13: Set-Up
Electrical codes require fuse or circuit breaker protection for branch circuit conductors. Use time delay fuses for #12 AWG circuits. Midi 40 CO2 Incubator Thermo Scientific... -
Page 14: Co Gas Connections
5. Use the remaining 1/4 in. ID tubing to connect the input gas to the gas filter. Keep the tubing length as short as possible to minimize the pressure drop. Caution DO NOT turn on the gas supply at this time. Thermo Scientific Midi 40 CO2 Incubator... -
Page 15: Component Locations
Section 3 Pre-Installation Component Locations dataplate on left side Inside Chamber sensor humidity pan Upper back of unit Lower back of unit Sample Port CO2 inlet Power inlet Midi 40 CO2 Incubator Thermo Scientific... -
Page 16: Initial Start-Up Procedures
If a displayed parameter is not adjusted and 60 seconds elapse, the software registers the existing default value and moves to the next parameter. If no changes are needed to the factory-set defaults, press Mode repeatedly until the end of the prompts. Thermo Scientific Midi 40 CO2 Incubator... -
Page 17: Section 4 Initial Start-Up Procedures
1%) When parameter adjustments are complete, the screen returns to the normal display (Figure 4-1). An additional message indicates that the stabilization period has begun. During this initial stabilization period, leave the door closed. Midi 40 CO2 Incubator Thermo Scientific... - Page 18 DOWN ARROW (DECREASE) normal operation, an alarm or error condition is indicated. Note that alarm conditions are displayed only when the key switch is turned to the KEY SWITCH alarm position. Figure 5-1. Key Switch Thermo Scientific Midi 40 CO2 Incubator...
-
Page 19: Key Switch And Control Operation
Display shows current values, alarm or error field Mode Silence audible alarm Press Mode continues to flash. Return to default display after Press Excursion values are reset; display shows current values. Reset excursion or alarm condition simultaneously Display flashes twice Midi 40 CO2 Incubator Thermo Scientific... -
Page 20: Setpoint And Alarm Programming
When the incubator is first powered up, all factory-set program parameter defaults can be restored as follows: Table 5-4. Restore Defaults Function Sequence Notes Press simultaneously, Restore program defaults Restores original (factory-set) values of all program parameters. hold for five seconds Thermo Scientific Midi 40 CO2 Incubator... -
Page 21: Calibration (Optional)
Note If user does not push any keys after approximately thirty seconds, the display will revert back to the normal Run mode . If a value was changed, whatever value was last displayed will be stored as the new setting. Midi 40 CO2 Incubator Thermo Scientific... -
Page 22: Temperature Calibration
10. After the temperature is calibrated, it is recommended to remove the temp sensor from the inner chamber to ensure the humidity inside the chamber is not passing through the door seal. TC CO sensors require stable temp and RH environment to ensure accurate calibration! Thermo Scientific Midi 40 CO2 Incubator... -
Page 23: Co2 Calibration
FYRITE, lower the CO control set point in Program mode 1.0% below your current set point, e.g. from 5% to 4%. This step is necessary to prevent CO2 gas injection during the calibration of the unit. Midi 40 CO2 Incubator Thermo Scientific... - Page 24 Run mode; wait at least 2 to 3 minutes for the displayed value to auto-correct using the new offset value entered. The delay in the update is due to how the system microprocessor averages CO measurements, the displayed value will not update immediately! Thermo Scientific Midi 40 CO2 Incubator...
-
Page 26: Control Systems Theory
Control is now effectively switched to the overtemperature monitoring system. The overtemperature sensor is the chamber air sensor which also provides the signal for the digital display on the control panel. Thermo Scientific Midi 40 CO2 Incubator... -
Page 27: Door Heat System
TC gas concentration sensor. At this time the gas solenoid is open 100% of the time and remains open until the level has recovered to within 5% of the setpoint. The solenoid then reverts to cycling. Midi 40 CO2 Incubator Thermo Scientific... -
Page 28: Maintenance
To avoid marring the surface, always rub in the direction of the finish polish lines. Caution Do not use aromatic solvents to clean the cabinet interior: residues could cause contamination of the cabinet environment. Thermo Scientific Midi 40 CO2 Incubator... -
Page 29: Cleaning
(refer to Gas Supplies in Section 3 and Figure 2-1). 5. Turn the gas supply (or supplies) to ON. 6. Turn the main power switch to ON. Midi 40 CO2 Incubator Thermo Scientific... -
Page 30: Fuses
3. Slowly pull the paper strip from the outside. You should feel some resistance. 4. Repeat this test at 4 inch (10 cm) intervals around the door. If the door does not seal properly, call Technical Services; the gasket needs to be adjusted or replaced. Thermo Scientific Midi 40 CO2 Incubator... -
Page 32: Parts List
2 Black Rubber Suction Type Foot 505180 Disposable Filter 99.97 770001 MIDI Exterior Door Gasket 990044 MIDI Inner Glass Door SRO 1900435 MIDI Inner Door Latch SRO 1900436 Valve Assembly, CO2 Solenoid SRO 1900437 Stacking Hardware Kit 290225 Thermo Scientific Midi 40 CO2 Incubator... - Page 34 Thermo Scientific Midi 40 CO2 Incubator...
- Page 35 Midi 40 CO2 Incubator Thermo Scientific...
- Page 36 thermoscientific.com © 2014 Thermo Fisher Scientific Inc. All rights reserved. All trademarks are the property of Thermo Fisher Scientific and its subsidiaries. Specifications, terms and pricing are subject to change. Not all products are available in all countries. Please consult your local sales representative for details.
Need help?
Do you have a question about the RMI300S-9-A and is the answer not in the manual?
Questions and answers