Table of Contents
Advertisement
Quick Links
FCC Part 15 Transmitter Certification
Test Report
FCC ID: SK9C1A-2
FCC Rule Part: 15.247
ACS Report Number: 04-0396-15C
Manufacturer: Itron Electricity Metering, Inc.
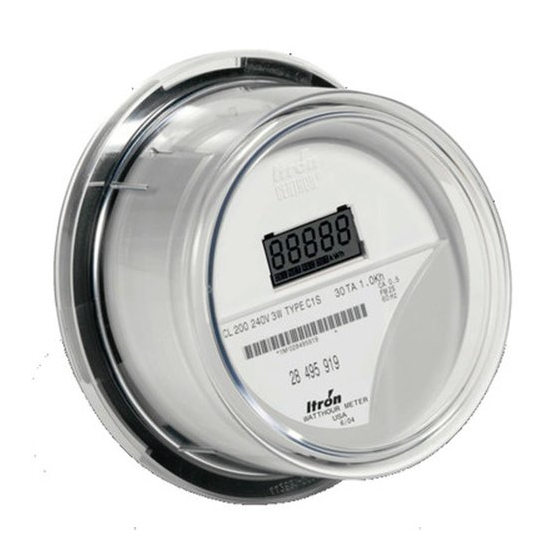
Equipment Type: Electricity Meter With Dual RF Transmitters
Trade Name: CENTRON ™ ICARe
Model: C1A-2
Manual
5015 B.U. Bowman Drive Buford, GA 30518 USA Voice: 770-831-8048 Fax: 770-831-8598
Advertisement
Table of Contents
Troubleshooting

Related Manuals for ITRON CENTRON C1SR


Summary of Contents for ITRON CENTRON C1SR
-
Page 1: Test Report
FCC Part 15 Transmitter Certification Test Report FCC ID: SK9C1A-2 FCC Rule Part: 15.247 ACS Report Number: 04-0396-15C Manufacturer: Itron Electricity Metering, Inc. Equipment Type: Electricity Meter With Dual RF Transmitters Trade Name: CENTRON ™ ICARe Model: C1A-2 Manual 5015 B.U. Bowman Drive Buford, GA 30518 USA Voice: 770-831-8048 Fax: 770-831-8598... - Page 2 CENTRON® Meter Technical Reference Guide Effective: January 2005...
- Page 3 This manual is an unpublished work and contains the trade secrets and confidential infor- mation of Itron, Inc., which are not to be divulged to third parties and may not be repro- duced or transmitted in whole or part, in any form or by any means, electronic or mechanical for any purpose, without the express written permission of Itron, Inc.
- Page 4 Connect the equipment and the affected receiver to power outlets on separate circuits. • Consult the dealer or an experienced radio/TV technician for help. Changes or modifications not expressly approved by Itron, Inc. could void the user’s author- ity to operate the equipment. RF Exposure Information This equipment complies with the FCC RF radiation requirements for uncontrolled environ- ments.
- Page 5 Repair of Meters Under Warranty If the meter is under warranty, then Itron, Inc. will repair the meter at no charge if the meter has failed due to components or workmanship. A return authorization number must be obtained before the equipment can be sent back to the factory.
-
Page 6: Table Of Contents
TABLE OF CONTENTS Chapter 1 General Information About This Manual ................1-1 General Description . - Page 7 Table of Contents Pre-June 2003 LCDs ............... . 4-4 Post-June 2003 LCDs .
- Page 8 Testing the CENTRON C1SR Tamper Counter ........
- Page 9 Table of Contents Recommended Energy Testing Procedures ............8-4 AEP Test Codes .
- Page 10 CENTRON C1SR Transmission Cycle........
- Page 11 List of Figures Figure Figure Titles Page LED Location ................8-1 Pulse Detector .
- Page 12 LIST OF TABLES Table Table Titles Page Outer Cover Configurations ............... . 1-5 LCD Display Items .
- Page 13 List of Tables Notes: CENTRON Meter Technical Reference Guide...
-
Page 14: About This Manual
General Information This technical reference guide explains the installation, operation, and maintenance of the Itron CENTRON® meter family. Itron urges you to read the entire manual before attempting installation, testing, operation, or maintenance of a meter. To operate the Itron PC-PRO+® Programming Software and the PRO-READ®... -
Page 15: General Description
General Information General Description The CENTRON meter family is a solid-state, singlephase and network meter used for measuring electrical energy consumption. The CENTRON incorporates a two- piece design combining a base metrology with a variety of personality modules that snap on the standard meter base. Utilizing the Hall Effect technology for accurate power measurement, the metrology portion of the meter contains all measurement circuitry and calibration information, while the personality modules contain the register functionality and communication mediums. -
Page 16: Physical Description
General Information Physical Description The CENTRON meter features a common meter base to which various personality modules are attached. The covers come in configurations of polycarbonate and glass. Meter Base The CENTRON meter base contains all of the measurement circuitry and calibration information on the metrology board. -
Page 17: Personality Modules
General Information Personality Modules All of the personality modules in the CENTRON meter family snap into the module holder located on the standard meter base (see Figure 1.5). From the base metrology, the energy data is transmitted to the personality modules, which contain the meter display, communication mediums, and register functionality. -
Page 18: Covers
General Information Covers The outer cover configurations available for CENTRON meter family are described in Table 1.1. Table 1.1 Outer Cover Configurations Meter Versions Cover Options Polycarbonate Glass C1S, C1SR, C1SC Standard Optional C1SD, C1ST, C1SL Including Demand Reset+ Optical Tower Not Available Outputs The C1SD, C1ST, and C1SL personality modules are available input/output-ready... -
Page 19: Characteristic Data
General Information Characteristic Data Starting Watts 2S CL200 1S, 2S CL320, 12S, 25S 3S CL20 1.2W 4S CL20 2.4W Temperature Rise Meets ANSI C12.1 Section 4.7.2.9 Burden Data Metrology Voltage Watt Loss 0.45 2S Class 200 0.45 2S Class 320 0.65 10.2 0.65... -
Page 20: Technical Data
General Information Technical Data Meets applicable standards: • ANSI C12.1-1995 • ANSI C12.10-1997 • ANSI C12.16 (Solid State Meters) • ANSI C12.18 (Optical Communications Protocol) • ANSI C12.20 (Class 0.5) - 1998 • IEC 61000-4-4 • IEC 61000-4-2 Dimensions The following dimensional measurements are shown in inches and (centimeters). Figure 1.6 Dimensions Polycarbonate 6.29 (16.00) -
Page 21: C1Sd/C1St/C1Sl Dimensions
General Information C1SD/C1ST/C1SL Dimensions The following dimensional measurements are shown in inches and (centimeters). Figure 1.7 C1SD/C1ST/C1SL Dimensions Polycarbonate 6.95 (17.70) 6.29 (16.00) 2.70 (6.90) 3.16 (8.00) 4.53(11.50) 4.98(12.70) 6.29(16.00) 6.95 (17.70) Shipping Weights The following weight measurements are shown in pounds and (kilograms). Polycarbonate Glass Meter... -
Page 22: Chapter 2 Installation
Chapter 2 Installation This chapter of the guide gives instructions for the proper handling and installation of the CENTRON meter. Inspection Perform the following inspections when you receive the meter: • Inspect for obvious damage to the cover, base, and meter assembly. •... -
Page 23: Unpacking
When using a Demand, TOU, or Load Profile meter where the line frequency is not stable, Itron recommends using either the C1ST or C1SL meter version with Crystal Time synchronization if a clock is needed (TOU or Load Profile). -
Page 24: Programming The C1Sd,T,L Meter
Installation The practice of knowingly installing Form 12S/25S meters into metering sockets with either missing or disconnected fifth terminal jaws in the meter socket is NOT recommended for CENTRON Form 12S/25S meters. The following guidance should be followed when using the Form 12S/25S CENTRON meter: •... -
Page 25: Removing The Board-To-Board Connector
Installation Board-to-Board Connector Figure 2.1 Removing the Board-to-Board Connector Remove the register module, one side at a time, by pulling gently outward on the meter frame snaps (see Figure 2.2) while lifting the module up. Meter Frame Snaps Figure 2.2 Removing the Register Module Snap the new module into the meter frame by aligning the notches at bottom of the circuit board with the lower two snaps (see Figure 2.3). -
Page 26: New Module Snap-In
Installation Figure 2.3 New Module Snap-in Replace the board-to-board connector by aligning the top of the connector with the notches in the circuit board (see Figure 2.4) and pressing gently at the bottom of connector to mate the connector to metrology board (see Figure 2.5). -
Page 27: Board-To-Board Connector, Bottom
Installation Be sure to use the meter base for leverage instead of the LCD holder (see Figure 2.5). Pressure on the LCD holder may damage the personality module. Figure 2.5 Board-to-Board Connector, Bottom Ensure the board-to-board connector is fully seated by pressing firmly in on the middle of the connector. - Page 28 Installation 10 Place the cover over the meter base until the flange on the cover is flush with the flange on the meter base. 11 Turn the cover clockwise until the locking tabs are fully engaged with the meter base. 12 If the cover has a Demand Reset or an Optical Connector, be sure these are properly aligned with their corresponding accessory on the register faceplate.
- Page 29 Installation Notes: CENTRON Meter Technical Reference Guide...
-
Page 30: Chapter 3 Operation: Base Metrology
K could be viewed as the Hall sensor intrinsic gain and is maximized by the appropriate choice of semiconductor materials that have been uniquely optimized by Itron for the CENTRON meter. For the metering application, the biasing current i applied to the sensor is generated from the line voltage (V) using a resistor (R). -
Page 31: Power Measurement Principle In 2S
Operation: Base Metrology The output voltage of the Hall Effect device is then: GPower hall ⁄ Where G G is the combined gain factor of the entire system (Voltage to biasing current, line Current to flux density, Hall sensor). Figure 3.1 Power Measurement Principle in 2S From the power information available at the output voltage of the sensor, the meter architecture is simplified over previous designs as the multiplication has already taken place (see Figure 3.2). -
Page 32: Centron 2S Cl320, 4S, 12/25S
This shift causes a small power factor error that is uniform across the dynamic range (load curve) of the meter. Itron compensates for this shift in the CENTRON by the use of a capacitor in the biasing current circuit. -
Page 33: Hall Cells And Adcs
Operation: Base Metrology For these metering applications, the biasing current Ibias (I and I ) applied to bias1 bias2 each sensor is generated from the line voltage (V and V ) using a resistor. The line1 line2 magnetic field is generated by the line current (I and I ) that flows through the line1... -
Page 34: Chapter 4 Operation: C1S Version
Chapter 4 Operation: C1S Version The kWh only version of the CENTRON meter is available with an LCD personality module to register energy accumulation: Figure 4.1 C1S LCD Personality Module The LCD module may be ordered with a 5x1 or 4x10 register for self-contained meters, and a 5xTR or 4xTR register for transformer-rated meters. -
Page 35: Registers
Operation: C1S Version Figure 4.2 Mounted LCD Register Registers Kilowatt Hours The modules display energy in increments of whole values of kWh. Standard operation for all modules is to add forward and reverse energy flow. Therefore, if the meter is inverted, the registers will accumulate in the forward direction, thus providing uni-directional operation. -
Page 36: Zro-C2A Resetter Connected To The Centron
Operation: C1S Version Figure 4.3 ZRO-C2A Resetter Connected to the CENTRON The ZRO-C2A Resetter works with both pre-June 2003 and Post-June 2003 LCDs. The ZRO-C2A is a pocket-sized handheld device for resetting the electronic meter readings in the CENTRON LCD kWh meter (C1S) and the R300 meter (C1SR). The ZRO-C2A also resets the tamper indicators in the C1SR. -
Page 37: Lcd Display Function
Operation: C1S Version All current production resetters and resetters produced after June of 2001 were built with the C2A upgrade and are labeled accordingly as shown in Figure 4.4 below. Although personality modules with the new EEPROM are only compatible with the C2A version of the CENTRON resetter (ZRO-C2A), the older revisions of the personality modules are also compatible with the ZRO-C2A. -
Page 38: Lcd Display Without Segment Check
Operation: C1S Version The non-segment check version displays only the kWh reading. A downward pointing arrow on the LCD pulses at a rate equal to the energy consumption. The arrow flashes on for 1 watthour and off for 1 watthour. This effectively produces an equivalent Kh of 2.0. -
Page 39: Post-June 2003 Lcds
Operation: C1S Version Post-June 2003 LCDs The post-June 2003 LCD module is shown in Figure 4.8. This display uses five 7-segment digits, four icons to indicate the type of displayed data, and three icons to represent a watt disk emulator. The display may be configured for either four or five digits and will roll over at 100,000 kWh. -
Page 40: Detented Register
Operation: C1S Version Detented Register The Detented Register addresses applications requiring the reading of delivered kWh only. Received energy is discarded. Figure 4.10 Delivered kWh with Detent Enabled Net Register The Net (kWh) Register addresses applications requiring residential net metering points. -
Page 41: Factory Programming Options
Operation: C1S Version Although the DEL and REC indicators are ON during segment check, they are not currently used. Factory Programming Options Display Timing The display will scroll between the billing register and the segment check mode based on the factory programming option. Option Description 7 second billing register display, 1 second blank, 7 second segment check display (7/7) -
Page 42: Chapter 5 Operation: C1Sd, C1St, And C1Sl Versions
C1SL—a load profile module with TOU and demand Figure 5.1 C1SL Meter with Cover These personality modules utilize the SCS protocol which allows the C1SD, C1ST, and C1SL meters to mimic the Itron 200 Register Series product line for use with existing systems. Features Features of these multifunction modules include: •... -
Page 43: Controls And Indicators
Operation: C1SD, C1ST, and C1SL Versions • Self-Read Capability—Billing data can be stored automatically at programmable times to be read later. • Load Profile—The C1SL module provides 32K RAM for load profile data. • Expansion Capability—An expansion port is available for future functions. •... -
Page 44: Modes Of Operations
Operation: C1SD, C1ST, and C1SL Versions Modes of Operations When the C1SD, C1ST, and C1SL modules are powered, they automatically enter the normal display mode, perform self-diagnostics and display any appropriate error codes. If no error codes are detected, an unprogrammed module will alternate between CNTRON and Segment Test. -
Page 45: Test Mode
Operation: C1SD, C1ST, and C1SL Versions mode program parameters are then retrieved from nonvolatile memory for use in the Test mode. In the C1SL version, a status bit is set to indicate the register was placed in Test mode. The Test mode can be activated while in either Normal or Alternate mode using the Test mode switch (see Figure 5.3) or a meter programming device. -
Page 46: Low Power Mode
Operation: C1SD, C1ST, and C1SL Versions Low Power Mode The demand, TOU, and load profile modules are shipped from the factory in low power mode unless factory programming is specified at time of order. This mode consists of a default program and minimizes drain on the battery. The user can place the meter in low power mode by performing a three button reset or by programming the meter with the programming software as a demand-only meter. -
Page 47: Programmable Functions
(or at the end of each subinterval when rolling demand is used). Programmable Functions The CENTRON can be programmed using Itron programming software: PC-PRO+ or PC-PRO+ 98. Table 5.1 describes each display item and indicates the display mode in which each is available. -
Page 48: Register Display Options
Operation: C1SD, C1ST, and C1SL Versions Table 5.1 LCD Display Items Display Mode Display Item Normal Alternate Test Number of Power Outages Number of Days Since Demand Reset Demand (Sub) interval Length Register Full Scale Value Kh Value Demand Threshold Value P/DR Value Register Multiplier Date (C1ST and C1SL version only) -
Page 49: Self Reading
Operation: C1SD, C1ST, and C1SL Versions Energy and demand registers can be programmed to be displayed in any of the specified formats (see Table 5.2). Table 5.2 Register Display Formats 3 Digits 4 Digits 5 Digits 6 Digits X.XXX XX.XXX XXX.XXX X.XX XX.XX... -
Page 50: Last Season Registers
Operation: C1SD, C1ST, and C1SL Versions Last Season Registers For a C1ST or C1SL meter, Last Season Registers are selectable in the programming software. For every Current Season Register there is a Last Season Register for the same quantity. Last Season registers are stored in memory when a season change occurs. -
Page 51: Informational Data
Operation: C1SD, C1ST, and C1SL Versions Table 5.3 Programmable Parameters Parameter Description A kW demand value that defines the maximum rated Register Full Scale demand for a particular meter installation. Valid entries range from 0 to 999999. The number of minutes the meter will remain in Test mode before exiting to Normal mode. - Page 52 Operation: C1SD, C1ST, and C1SL Versions Table 5.4 Information Data Items Item Description Two separate nine digit display items that can be used to identify the meter with an alpha character displayed as a Meter ID Numbers 1 and 2 dash, a space displayed as a blank, and a number displayed as the appropriate value.
-
Page 53: Test Mode Data
Operation: C1SD, C1ST, and C1SL Versions Table 5.4 Information Data Items Item Description A date that indicates when the register’s TOU schedule will TOU Expiration Date * no longer be valid. A kW demand value that represents the maximum rated Register Full Scale Value demand for a particular meter installation. -
Page 54: Programming The Meter With A 200 Series Program
Operation: C1SD, C1ST, and C1SL Versions Programming the Meter With a 200 Series Program A CENTRON meter can be programmed using an existing Series 200 program. This procedure is a two-step process. First, export the 200 Series program you want to use to a CENTRON file format and then import that file into PC-PRO+ as follows: Open the Program Editor. -
Page 55: Program File Export Type
Operation: C1SD, C1ST, and C1SL Versions Figure 5.6 Program File Export Type Select CENTRON export format as shown in Figure 5.6 above. Click OK. The file you selected in Figure 5.5 is converted to a CENTRON format. The program ID remains the same, but the file type becomes CENTRON. Select File | Import. -
Page 56: Demand Reset
Operation: C1SD, C1ST, and C1SL Versions Demand Reset A demand reset can occur in both Normal and Alternate modes. A demand reset can occur in two ways: • Through the optical port using a compatible programming device • With the standard push-button demand reset switch located on the face of the meter (see Figure 5.2) When a demand reset is initiated, the following events occur: •... -
Page 57: Rate Schedules
Operation: C1SD, C1ST, and C1SL Versions Rate Schedules Four independent rates are available for TOU registration-designated A, B, C, and D. Only one of these rates can be active at a time. The Total register is always active, regardless of the active rate period. The currently active rate is indicated by a flashing rate-specific annunciator. -
Page 58: Last Season Registers
Operation: C1SD, C1ST, and C1SL Versions Last Season Registers Last Season Registers are selected when two or more seasons are used during the year. For every Current Season Register there is a Last Season Register for the same quantity. Last Season Registers are designated LS in the programming software. -
Page 59: Interval Lengths
Operation: C1SD, C1ST, and C1SL Versions Interval Lengths The load profile records data on a block interval basis. The interval length is programmable: 1, 2, 3, 4, 5, 6, 10, 12, 15, 20, 30, or 60 minutes. This interval length is independent of the interval length chosen for displayed demand quantities. -
Page 60: Data Storage
Operation: C1SD, C1ST, and C1SL Versions The maximum number of pulses is 4095; therefore, the smallest pulse weight (PW) that can be used is: 12 000Wh 2.94Wh PW Min ---------------------------- - -------------------- - 4095P Pulse Data Storage The Load Profile register stores data in mass memory at the end of each interval. This data stored is the pulse data for that interval. -
Page 61: Optional Features
Operation: C1SD, C1ST, and C1SL Versions Table 5.6 Recording Duration for 32Kb Recording Duration Interval Length (min) (days) 12.75 25.50 63.75 127.50 191.25 382.50 765.00 Optional Features Electronic Detent Programming electronic detent prevents received energy from accumulating in the delivered energy register. When detent is enabled, the received energy is accumulated in a separate register. -
Page 62: Calculations
Operation: C1SD, C1ST, and C1SL Versions Calculations Energy Calculation of energy is continuously incremented by multiplying the energy pulse weight by the measured energy. The energy pulse weight is calculated by the following formula: ⎛ ⎞ × --------------- - kWh Pulse Weight Kh 1000 Register Multiplier ⎝... -
Page 63: Demand Calculations
Operation: C1SD, C1ST, and C1SL Versions Demand Calculations Block Interval Demand Block demand corresponds to the number of subintervals being equal to one. At the end of every interval, the microprocessor compares the last completed block interval demand value to the demand value in memory. If the new value is greater than the stored value, the new demand value is stored as Maximum Demand. -
Page 64: Power Procedures
Operation: C1SD, C1ST, and C1SL Versions Power Procedures Applying Power Personality Modules are powered directly from line voltage via the board-to-board connector. These modules are energized when AC power is present. During power outages, the permanently installed lithium battery runs the clock circuit on C1ST and C1SL versions. -
Page 65: Example 1
Operation: C1SD, C1ST, and C1SL Versions Figure 5.8 CENTRON C1ST/L Battery Life An explanation of Figure 5.8 is as follows: The Available Battery Capacity line is a function of time. Recent changes made to the design (optimized battery current consumption at the transition phase from AC power ON to AC power OFF), allowed the CENTRON to further improve the available battery budget over time. -
Page 66: Example 2
Operation: C1SD, C1ST, and C1SL Versions not cross the Battery Capacity line until beyond year 15. The battery is not considered depleted until the Current Draw line crosses the Available Battery Capacity line. Figure 5.9 Example 1 Example 2 For example 2 (see Figure 5.10), the meter is unpowered (with battery running the clock) for six years then installed in the field under AC power. -
Page 67: Example 3
Operation: C1SD, C1ST, and C1SL Versions Example 3 For example 3 (see Figure 5.11), the meter is unpowered (with battery running the clock) for an infinite amount of time. This shows that the Current Draw line will not cross the Battery Capacity line until past year 8. Figure 5.11 Example 3 Low Battery Error The TOU and LP module firmware counts minutes on battery (when the battery is... -
Page 68: Effectivity Date
Operation: C1SD, C1ST, and C1SL Versions Effectivity Date Meters shipped after October 1, 2003 have this revision of hardware with extended battery life capability. This revision of module can also be identified by the inspection of the module part number etched into the module itself. This revision has a part number of 442701-xxx. -
Page 69: Programming The R300Cd Meter
In the instance of a power outage, the option board will update the kW and kWh values from the self read register upon power restoration. The R300CD features the Itron patented method of tamper detection that senses both meter removal and inversion. The removal tamper (RTPR) increments a counter each time the meter is abruptly removed from a live meter socket. -
Page 70: Errors
Operation: C1SD, C1ST, and C1SL Versions The meter will transmit zeros for kWh and kW until it is programmed. For detailed programming instructions, see the PC-PRO+ documentation. Also refer to the CENTRON R300CD Quick Install Guide. Errors The table below shows how fatal and non-fatal errors affect R300CD RF transmission. - Page 71 Operation: C1SD, C1ST, and C1SL Versions Notes: 5-30 CENTRON Meter Technical Reference Guide...
-
Page 72: Chapter 6 Operation: C1Sr Version
Consumption Message to any of Itron’s radio-based data collection technologies, including handheld computers (OMR), a vehicle-based Mobile AMR unit such as the Mobile Collector, or a network data collection solution such as the Itron Fixed Network or MicroNetwork. In addition, the R300 IDM is also capable of delivering the Interval Data Message to the Itron Fixed Network AMR system to calculate ANSI standard demand, time-of-use, and load profiling information. -
Page 73: Physical Description
LCD, for resetting the energy register and tamper counters. This can be accomplished with the ZRO-C2A Resetter. The C1SR uses a unique module identification number, provided by Itron. This ID number is contained in each message transmission and is used by the handheld and billing system to determine meter identity and location. -
Page 74: Registers
Operation: C1SR Version Registers Display The C1SR personality module is only available with a liquid crystal display (LCD). The LCD is automatically adjusted for contrast over the operating temperature range. Figure 6.2 C1SR LCD This module can be configured to display either four or five digits of energy consumption and will rollover at 100,000 kWh for both self-contained (Form 1S, 2S, 12S, 25S) and transformer rated meters (3S, 4S). -
Page 75: Electronic Detent
This randomness provides a method for avoiding interference with transmissions from other devices. Figure 6.3 shows an example of the CENTRON C1SR transmission cycle containing one message burst. CENTRON Meter Technical Reference Guide... -
Page 76: Fcc Regulations
The C1SR communicates in the unlicensed, 910-920 MHz band governed by the US Code of Federal Regulations (CFR) Title 47, Part 15 Radio Frequency Devices, Sub Part C Paragraph 249 Intentional Radiator. Changes or modifications not expressly approved by Itron could void the users authority to operate the equipment. Tamper Detection The CENTRON C1SR features the Itron patented method of tamper detection that senses both meter removal and meter inversion. -
Page 77: Testing The Centron C1Sr Tamper Counter
Operation: C1SR Version Testing the CENTRON C1SR Tamper Counter SCM Testing In order to test the power removal counter, the meter must sense a shaken condition associated with a power outage. Place the meter in a socket. Apply power to the meter. -
Page 78: Retrofitting The C1Sr Personality Module
Operation: C1SR Version Table 6.1 ReadOne Pro Tamper Count Tamper Binary Inversion Removal Count 1110 1111 IDM Testing In order to test the power removal counter, the meter must sense a shaken condition associated with a power outage. Place the meter in a socket. Apply power to the meter. -
Page 79: C1Sr Fcc Label Location
Operation: C1SR Version Figure 6.4 C1SR FCC Label Location Changes or modifications not expressly approved by Itron could void the user’s authority to operate the equipment. To retrofit an existing meter with an R300 module, follow "Retrofitting with Personality Modules" on page 2-3. - Page 80 Operation: C1SR Version IDM Tamper Detection This will be implemented by observing a tilt event in Removal Tamper close proximity to a power outage. We will implement this by taking advantage of the tilt switch. On power-up we do a prolonged read of the tilt switch to see if it is inverted.
- Page 81 Operation: C1SR Version 6-10 CENTRON Meter Technical Reference Guide...
-
Page 82: Chapter 7 Operation: C1Sc Version
CellNet. The LAN address is a value that is assigned by Itron and programmed into every meter within the network. LAN addresses and utility billing IDs are unique to each meter. Itron activates the LAN ID upon receipt of the meter association file. -
Page 83: Physical Description
Operation: C1SC Version Physical Description The C1SC is constructed of a flame retardant, glass-filled printed circuit board material which supports the discrete, surface-mounted, and integrated circuitry components. A slot antenna etched on the circuit board serves as the RF antenna. The C1SC board snaps into the meter register mounting brackets to ease in the installation of the board. -
Page 84: Display Functions
Operation: C1SC Version LECTRICITY LECTRICITY NTERVAL NTERVAL ELEMETRY ELEMETRY (Pulses) (Pulses) Time Time 2.5 minutes 2.5 minutes (Interval (Interval 45 minutes 45 minutes Resolution) Resolution) Interval 0 Interval 0 0 1 2 3 4 5 6 7 8 9 0 1 2 3 4 5 6 7 8 9 Interval packets contain 18 intervals Interval packets contain 18 intervals Interval 1... -
Page 85: Resetting Values
Operation: C1SC Version Figure 7.3 C1SC LCD The display will scroll between the billing register and the segment check mode based on the factory programming option. Option Description 7 second billing register display, 1 second blank, 7 second segment check display (7/7) 7 second billing register display, 1 second blank, 1 second segment check display (7/1) Only the billing register is displayed (7/0) Resetting Values... -
Page 86: C1Sc/Cn1Sc Programming Port Location
Operation: C1SC Version Figure 7.4 C1SC/CN1SC Programming Port Location CENTRON Meter Technical Reference Guide... - Page 87 Operation: C1SC Version CENTRON Meter Technical Reference Guide...
-
Page 88: Chapter 8 Testing, Troubleshooting, And Maintenance
Chapter 8 Testing, Troubleshooting, and Maintenance This section provides information and instructions to help you test and maintain the CENTRON meter. Topics covered include: • Testing support features • Energy testing • Recommended testing procedures • TOU schedule testing • Field testing •... -
Page 89: Annunciators
Testing, Troubleshooting, and Maintenance pulse while the left LED will flash once for every 10Wh infrared pulses received. The left LED on the pulse detector is helpful when heavier loads are present on the system being examined. This can be used to verify that the metrology is measuring energy when installed and to conduct timing tests to determine the amount of load on meter. -
Page 90: Test Mode Annunciator
Testing, Troubleshooting, and Maintenance Figure 8.3 TOU Rate Annunciators Test Mode Annunciator The CENTRON meter is equipped with a Test Mode LCD annunciator located in the left portion of the display. This annunciator is enabled when Test Mode is activated. The word TEST appears on the display and flashes at a steady rate when test mode is activated. -
Page 91: Testing Using The Disk Emulation Annunciator
Testing, Troubleshooting, and Maintenance To determine the number of pulses per second, use the following equation: × × ------------ - Number of Pulses per sec Wapp 3600 Testing Using the Disk Emulation Annunciator The CENTRON meter is capable of visually being tested by using the Watt Disk Emulation Annunciator. -
Page 92: Troubleshooting
Testing, Troubleshooting, and Maintenance Troubleshooting Error Codes (R300) Non-Fatal Error Cause Effect Indication Stops RF transmission but The LCD will display the Checksum Error of the continues energy annunciator, a downward Energy Register accumulation and will be pointing arrow, in the lower cleared after a power cycle. -
Page 93: Non-Fatal Error Codes
Testing, Troubleshooting, and Maintenance Non-fatal errors can be programmed to scroll during the one second display off- time or lock on the register display. If multiple non-fatal errors occur, the meter will display a combined error message. For example, if a low battery error and a clock error exist, the error display will read ER 010001. -
Page 94: Fatal Error Codes
Testing, Troubleshooting, and Maintenance Table 8.3 Non-Fatal Error Codes Code Error Possible Causes Load Profile Error—Reprogram register and check for proper Er 030000 Load Profile Error operation; checked upon programming and once per second Discussion: A Load Profile error occurs when the Load Profile parameter is out of range or inactive. Programmed Full Scale Value exceeded—Check programmed Full Scale Overflow Er 100000... -
Page 95: Inspecting And Troubleshooting-General
Testing, Troubleshooting, and Maintenance Inspecting and Troubleshooting—General Due to the modular architecture of the CENTRON meter, modules of similar voltage (120V or 240V) may be interchanged. Therefore, the personality module of the CENTRON you are troubleshooting can be placed on a known working base to verify proper operation of the personality module. -
Page 96: Software Cannot Communicate With Module
Testing, Troubleshooting, and Maintenance Software Cannot Communicate with Module Cause Solution Check cable with known register that communicates. Check cable against known cable Optical Probe Cable Assembly Failure that is functioning. Also check batteries in cable assembly. Verify proper Com Port number has been selected Com Port in PC is Set Wrong in the programming software. -
Page 97: Test Mode Switch Does Not Place Module In Test Mode
Testing, Troubleshooting, and Maintenance Test Mode Switch Does Not Place Module in Test Mode Cause Solution Verify that the test mode pushbutton has been Switch Not Fully Depressed completely depressed. Switch or Electronic Failure Replace module. Re-program module with items to be displayed in Test Mode Items Not Selected Test mode. -
Page 98: Chapter 9 Specifications And Drawings
Chapter 9 Specifications and Drawings Specifications For a complete list of the latest CENTRON specification numbers, refer to the CENTRON Meter Specification Numbers Bulletin, Part Number 428601-220. Drawings LINE LOAD Figure 9.1 Form 1S Wiring Diagram CENTRON Meter Technical Reference Guide... -
Page 99: Form 2S Wiring Diagram
Specifications and Drawings LINE LOAD Figure 9.2 Form 2S Wiring Diagram Figure 9.3 Form 3S Wiring Diagram CENTRON Meter Technical Reference Guide... -
Page 100: Form 4S Wiring Diagram
Specifications and Drawings Figure 9.4 Form 4S Wiring Diagram Alternate positions of movable potential terminal Alternate positions of fifth terminal Figure 9.5 Form 12S Wiring Diagram CENTRON Meter Technical Reference Guide... -
Page 101: Form 25S Wiring Diagram
Specifications and Drawings Figure 9.6 Form 25S Wiring Diagram CENTRON Meter Technical Reference Guide... - Page 102 GLOSSARY Term Description annunciator A Liquid Crystal Display (LCD) label that is displayed to identify a particular quantity being displayed baud Unit of data transmission signalling speed, roughly analogous to bits per second (bps) display duration The programmed number of seconds that a quantity is displayed on the LCD before it is replaced with the next quantity in the display sequence Electrically Erasable Programmable Read Only Memory.
- Page 103 Glossary Notes: CENTRON Meter Technical Reference Guide...
- Page 104 Index Clock error 8-6 clock register 4-1 ADC 3-2 communication AEP barcode 7-2 optical port 5-1 AEP test codes 8-4 communication problem 8-9 alternate display mode 5-3 communications rate Alternate mode annunciator 5-5 default 2-3 Alternate Mode Magnetic Reed Switch 8-6 comparator 8-3 analog to digital converter (ADC) 3-2 connector...
- Page 105 Index energy calculation 5-21 IR light pipe 2-6 energy consumption 4-5 IR Test LED 8-1 energy register 5-8 ITPR 5-28 energy testing 8-1 EOI annunciator 5-6 kWh annunciator 5-6 EPROM G-1 KYZ outputs 5-20 error EEPROM 8-7 metrology 8-7 LAN address barcode 7-2 error checks 8-5 LAN Address ID 7-1 error code 8-5...
- Page 106 Index module rate schedule 5-16 demand 5-5 ReadOne Pro handheld reader 6-5 LCD 4-2 recycling information i-iv load profile 5-1 register R300 6-1 current season 5-16 – register 2-4 last season 5-17 5-23 TOU 5-5 Load Profile 5-18 – module holder 1-4 register module 2-1 5-23 MOV 1-3...
- Page 107 Index test mode 5-4 warranty i-iv watt disk emulator 5-5 tamper counter 5-28 watt loss 1-6 tamper detection 6-4 watthour 8-2 tamper indication 6-5 watthour annunciator 8-2 tertiary security code 5-20 watthour measurement 8-1 Test annunciator 5-4 test codes AEP 8-4 –...
Need help?
Do you have a question about the CENTRON C1SR and is the answer not in the manual?
Questions and answers
Measurements of the C2SOD Open Way meter: need to cut a surrounding cover board