Table of Contents
Advertisement
Advertisement
Table of Contents

Related Manuals for Growatt SPH3000


Summary of Contents for Growatt SPH3000
- Page 1 Installation Manual of SPH series Installation & Shenzhen Growatt New Energy Technology CO.,LTD No.28 Guangming Road, Shiyan Street, Bao’an District, Operation Manual Shenzhen, P.R.China +86 0755 2747 1942 service@ginverter.com www.ginverter.com GR - UM - 139 - A - 00...
- Page 2 1.4 Safety Instructions Safety 2.1 Purpose Use 2.2 Safety Measure 2.3 Symbols introduction on the SPH inverter Product Description 3.1 Growatt SPH series inverter 3.2 Label Explanation 3.3 Size and weight 3.4 The advantage of the unit of Growatt SPH Unpacking...
- Page 3 6.1 Commissioning of SPH 6.2 Operation modes 6.3 Country setting 6.4 Display and button Product specification 6.5 Communication 12.1 Growatt SPH series energy storage machine product Start-up and shut specification 7.1 Start-up the SPH system down SPH system 12.2 DC input terminal parameter 7.2 Disconnect the SPH system...
-
Page 4: Brief Introduction
Brief Introduction Overview: 1.1 Preface This manual will provide the users who use the Growatt SPH Series of GROWATT NEW ENERGY TECHNOLOGY CO.LTD.SHENZHEN(Short for Growatt New Energy as below) with the detailed product information and the installation instructions. Please read this manual carefully and put this manual on some place where is convenient to installation, operation, obtain. -
Page 5: Safety Instructions
PD2, meanwhile the temperature should be control in the 0-40 of indoor ventilation and the humidity should be 5%-85%. If the chosen PV modules needs to positive or negative ground connection, please contact with Growatt for technical support before installation. - Page 6 2.3 Symbols introduction on the SPH inverter 2.2 Safety Measure Symbol Description Caution: Risk of electrical shock! Risk of high voltage! ·Relevant operation for professional personnel. ·Please notice children, disabled, laypeople do not close Caution : hot surface ·Supervise and make sure children don’t play near the installation position of energy storage machine Caution: risk of danger Danger to life due to high voltage in SPH...
-
Page 7: Label Explanation
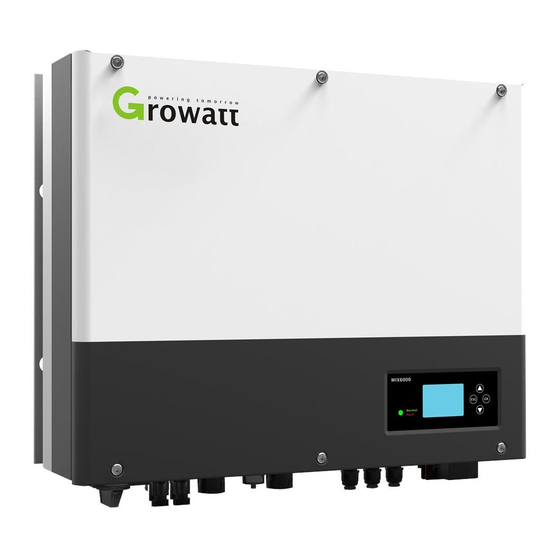
Product Description 3.1 Growatt SPH series inverter 3.2 Label Explanation Marks of SPH Label contains the following information: for example SPH6000 shows as below: Mark Description Explanation Push-button Operation of display screen and set system Green light on SPH run normally... -
Page 8: Size And Weight
3000W Rated output voltage 230V,50/60Hz Battery data 42-59Vdc 3.4 The advantage of the unit of Growatt SPH Battery voltage range Max charge and discharge current of Features below: battery ·All in one design. Can improve self consumption, back up and also pinch the valley. -
Page 9: Basic Installation Requirements
5.1 Basic installation requirements A. The installation location must be suitable for SPH's weight for a long period time Growatt SPH series and accessories as follows: B. The installation location must conforms with dimension of SPH C. Do not install the unit on structures constructed of flammable or thermo labile materials D. - Page 10 H. Installation position shall not prevent access to the disconnection means. I. In order to ensure machine can run normally and easy to operate, please pay Description attention to provide adequate space for SPH, Please refer to below: Press the RJ45 terminal Press battery terminal connector Disconnect PV terminal Unscrew nut...
-
Page 11: Installation Instructions
1.Project the machine's probably size on the wall; the thickness of wall for SPH must be not less than 60mm. There're three types of sensors for use with Growatt SPH. one is wired current sensor, one is meter sensor, or SP-CT, if you choose wired sensor or meter . Before installing... - Page 12 5.4 SPH System Connection Mode 5.4.1 Connection of PV terminal Chart 5.9 Similar to the traditional inverter connecting, the input of PV panel energy can be realized by using MC4 PV terminal, the detail steps are as follows: 1.Turn off PV switch. 2.Insert PV panel positive and negative cables into MC4 terminal,...
- Page 13 Growatt Growatt Growatt Growatt Growatt Growatt section SPH3000 SPH5000 SPH6000 SPH3600 SPH4000 SPH4600 5.2mm 10AWG Chart 5.13 6.6mm 9AWG : Step 3:Push threaded sleeve on to connection terminal until both are locked tightly AC output terminal connection steps as follow Chart 5.11...
- Page 14 Chart 5.15 3.Thread cables into connection terminal, then press the terminal by relevant tools and make sure battery cables are firmly (Growatt lithium battery contains a battery cable in the original packing). 4.Connect positive pole (+) of battery cable to battery positive terminal (+) of the inverter, connect negative pole (-) of battery cable to battery negative terminal (-).
- Page 15 Chart 5.19 Chart 5.18 : Note we suggest the distance between battery and SPH no longer than 1.5m, and The power line area must be larger than 5 AWG. 5.4.4 Connection of communication terminal for lithium battery , When using lithium batteries which need to connect BMS system of the battery Chart 5.20 connect lithium battery terminal (RJ45) steps as follows: 1.Unscrew the swivel nut from the cable gland for the “RS485”...
- Page 16 6. Insert the RJ45 plug of the network cable into the “CT/METER” pin connector : , Note If you are using a lithium battery you do not need to install this on the inverter until it snaps into place. temperature probe, the probe of the temperature cable should be attached to the surrounding environment of the lead-acid battery, and the length of this cable is 1.5m, so pay attention to the distance of battery and SPH.
- Page 17 Chart 5.25 During the actual operation, please pay attention to the installation of current transformer as the diagram shows below: Chart 5.27 5.4.8 Connection of DRMs terminal When SPH is applied to Australia, the DRMs terminals need to be connected, the connection way appears as follows: 1.
-
Page 18: Grounding Connection
DRM5 Do not generate power DRM6 Do no generate at more than 50% of rated power DRM7 Do not generate at more than 75% of rated power and sink reactive power if capable DRM8 Increase power generation(subject to constraints from other active DRMs) 5.4.9 Grounding connection Chart 5.29 grounding... - Page 19 Commissioning 6.1 Commissioning of SPH Transformer 1) electrify SPH after all installation of Part5 be finished,here are the steps : connect AC. · connect PV. · PV array Inverter Grid turn on battery. · if PV、Grid and battery are available,system would work on the “normal”mode.when the SPH the normal mode ,the screen showing “normal ”,LED is green,if SPH not enter normal m successful.
-
Page 20: Shut Down Mode
3000W 6.3 Country setting Notice: Growatt can provide various regulations of the machine, after customers receive the , machine, according to their country, by dialing DIP switch to set the corresponding 1. user only can set one period for battery first and Grid first on the LCD, if user regulations. - Page 21 The DIP switch is composed of five-digit binary number PINS. The different combination of the five PINS can represent different inverter's model, which is corresponding to the local grid standard. Each small white PIN has two statuses, Danmark-EN50438-1 GT4XXXXXXB when set upward to “ON”, its value turns to “1”, when set downward, its value turns to “0”.
- Page 22 6.4 Display and button 6.4.2 LED and button instruction 6.4.1 LCD display area Chart 6.3 location description Status Chart 6.2 ESC- button(cancel control) location Description Down-button information Enter-button state UP-button PV input (if you connect two tracks, it will show two. Otherwise show one) Notice:LED showing status of SPH, it has two color, one is green and another is red.
-
Page 23: Work Mode Set Up
Note: The A line's concluding information as follow: 1.“down” control command (if pushing “up” button, command will go back) 1.Standby state: SPH is in standby state. No error in this state, but for other reasons, make it in a 2.Workmode depend on the situation. If SPH is normal state, it will show wait state. - Page 24 4.Under the MODE Change ,you can see the setup options below after pressing In the basic Parameter,you can set language (English,Italian ,German ) system time , lead-acid cell charging voltage (default is 58V),discharge low voltage (default is : Enter 48V)and lead-acid constant current(default is 60A). Press “enter”...
- Page 25 SPH. machine and PC, using the shinebus software developed by Growatt. NOTE: this kind of monitoring, Can only be used by the monitor of Growatt's Shine About ShineBus software, when you needed, please download from official website server software provided by the company.
- Page 26 Heat dissipation performance is very important when SPH inverter work under the environment of high temperature, better heat dissipation can reduce the possibility of 1.Connect to PV SPH inverter stops working. Growatt SPH series inverter without fan so belongs to 2.Connect to Grid 3.Connect to Battery...
-
Page 27: Fault Removal
Please refer to the local grid specification or not. standard for more details for 2.Restart inverter. the grid voltage. Please contac t Growatt service center if restart can’t solve the problem. PairingTimeOut Communication fault Check the distance of SP CT and inverter is in the range of specification or not. - Page 28 Error : 105 2.Check the temperature of Bus sample fault 1.Restart inverter. lead-acid battery is connected well 2. Please contact Growatt service center or not. if restart can’t solve the problem. Battery Open Battery terminal open 1.Check the battery connection is Error :...
-
Page 29: Manufacturer Warranty
Growatt-SPH5000. Liability Growatt-SPH6000. The liability of Growatt in respect of any defects in its machines shall be limited to compliance with the obligations as stated in these terms and conditions of warranty. Limited Product Warranty Maximum liability shall be limited to the sale price of the product. Growatt shall... -
Page 30: Product Specification
Decommissioning Product Specification 12.1 Growatt SPH series energy storage machine product 11.1 Dismantling the energy storage specification 1. Disconnect the storage machine such as mentioned in section 7. Model 2. Disconnect the upper cable of SPH inverter. Growatt Growatt Growatt... - Page 31 Model Model Growatt Growatt Growatt Growatt Growatt Growatt Growatt Growatt Growatt Growatt Growatt Growatt SPH3000 SPH3000 SPH3600 SPH4000 SPH4600 SPH5000 SPH6000 SPH3600 SPH4000 SPH4600 SPH5000 SPH6000 Specifications Specifications BAT reverse <3% <3% <3% <3% <3% <3% THDI protection Single Single...
- Page 32 E0126-1-1 E0126-1-1 Certificates and ,G59,AS4 ,G59,AS4 ,G59,AS4 ,G59,AS4 ,G59,AS4 ,G59,AS4 need please contact the Growatt New Energy Technology Co., Ltd or dealer orders. approvals 777, AS/N 777, AS/N 777, AS/N 777, AS/N 777, AS/N 777, AS/N ZS 3100, ZS 3100,...
- Page 33 Certificate Growatt SPH series inverter apply within the scope of the world, So the inverter have to satisfy different countries and regions of different safety standards. Model Certificate CE,IEC62109,G83 VDE0126-1-1,G59,AS4777, Growatt-SPH series AS/NZS 3100, CEI 0-21 VDE-AR-N4105 Contact If you have technical problems about our products, contact the Growatt Service line or dealer.
Need help?
Do you have a question about the SPH3000 and is the answer not in the manual?
Questions and answers